Mastering the art of cropping can significantly enhance the impact of your photos. Whether it’s to remove distracting elements, adjust the composition, or simply to fit a specific format, knowing how to effectively crop images is an essential skill for any digital artist or photographer.
This step-by-step guide will walk you through the process of cropping photos in Adobe Photoshop. It will introduce you to various tools that Photoshop offers for cropping, and teach you how to use them to get the desired results. From choosing the right cropping tool to refining the final crop, this article covers it all.
So, let’s dive in and learn how to make the most out of your photos by cropping them effectively in Photoshop.


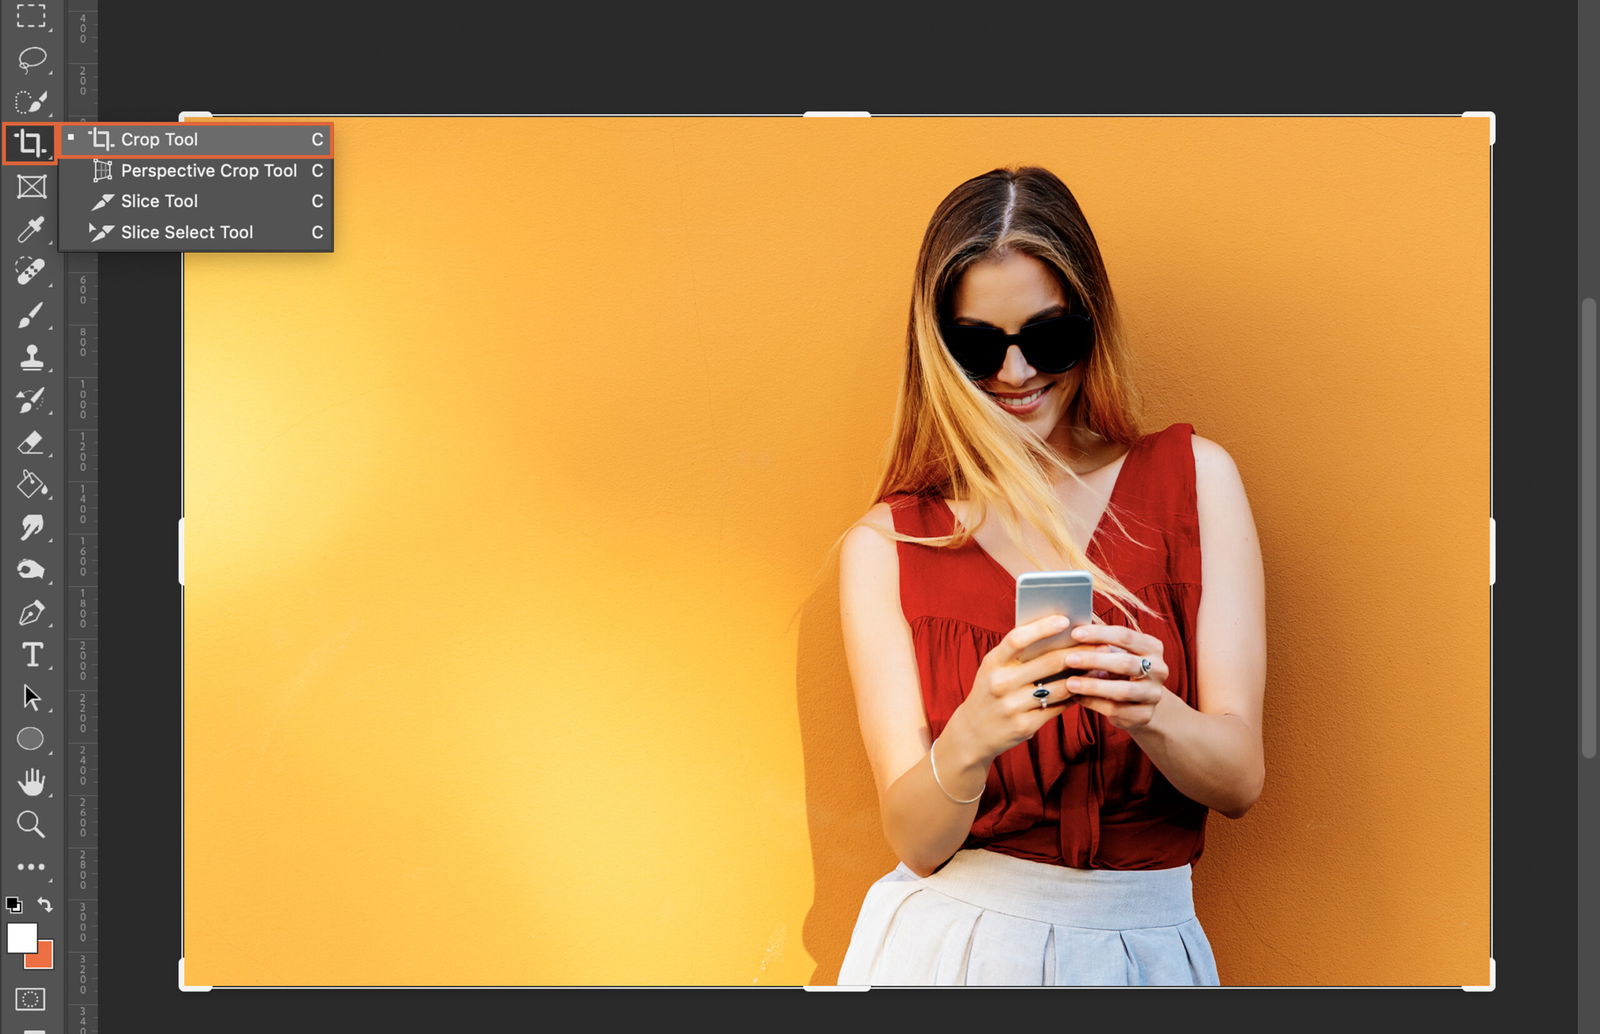
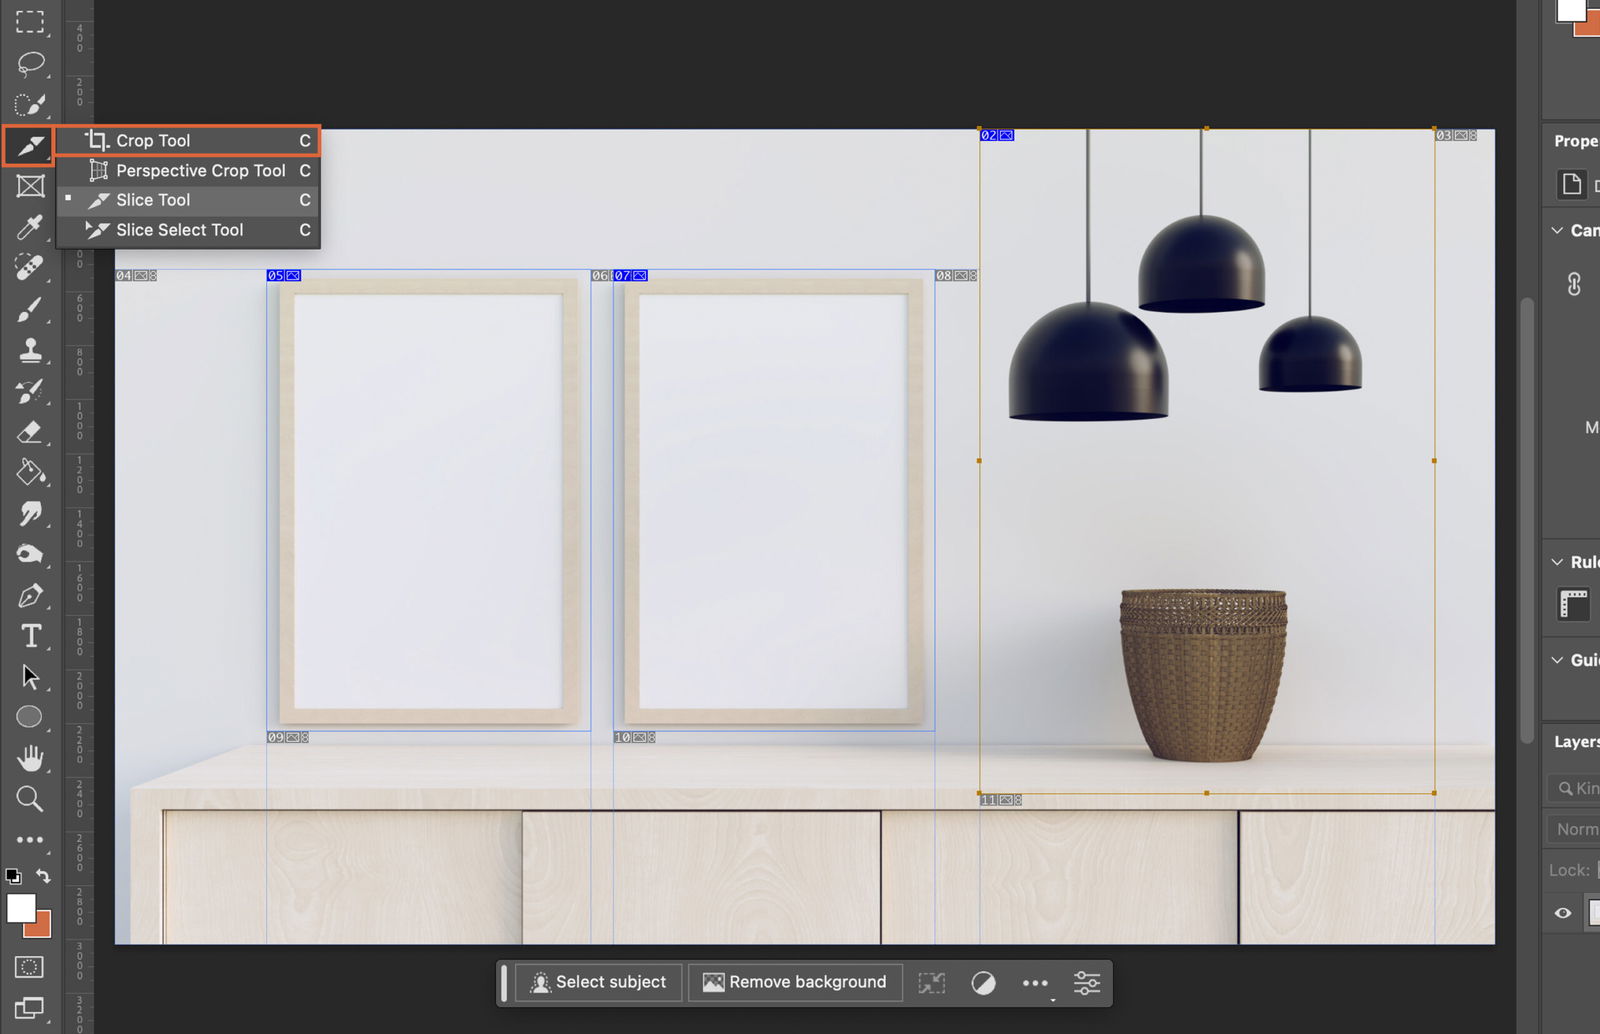
The Crop Tool is the simplest way to crop your photo. It’s found in the Photoshop toolbox, represented by a square icon with two intersecting lines. Select it, and you’re ready to start cropping.
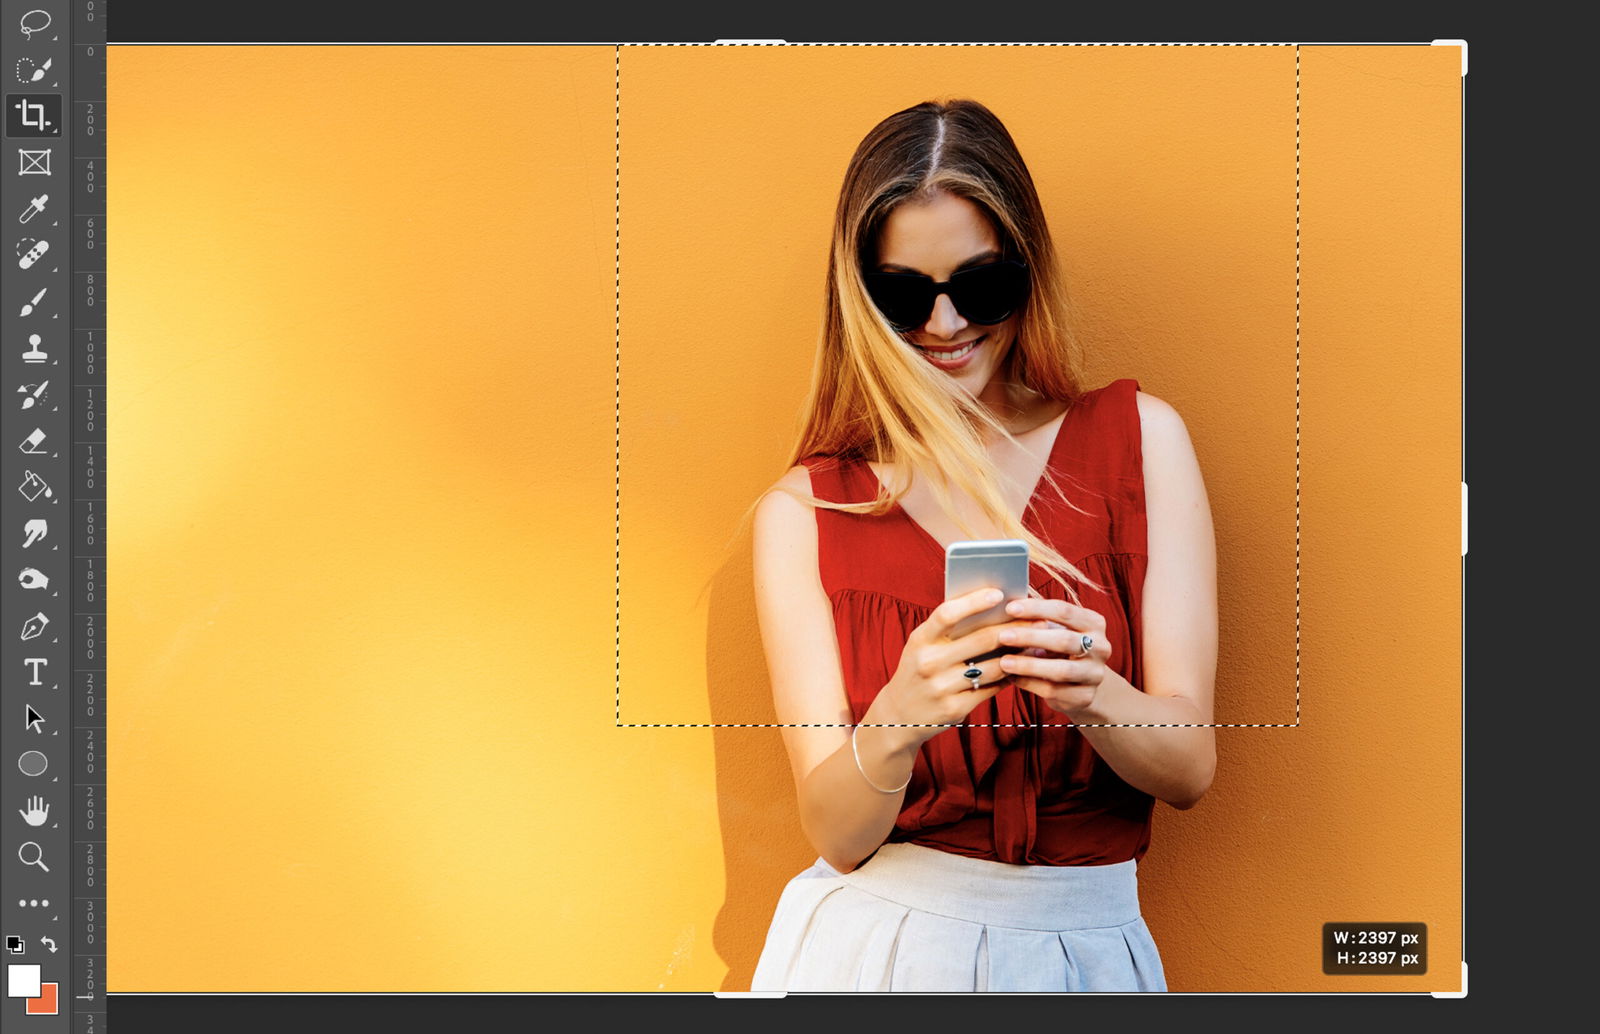
Once you’ve chosen your tool, it’s time to decide what part of your photo you want to keep.
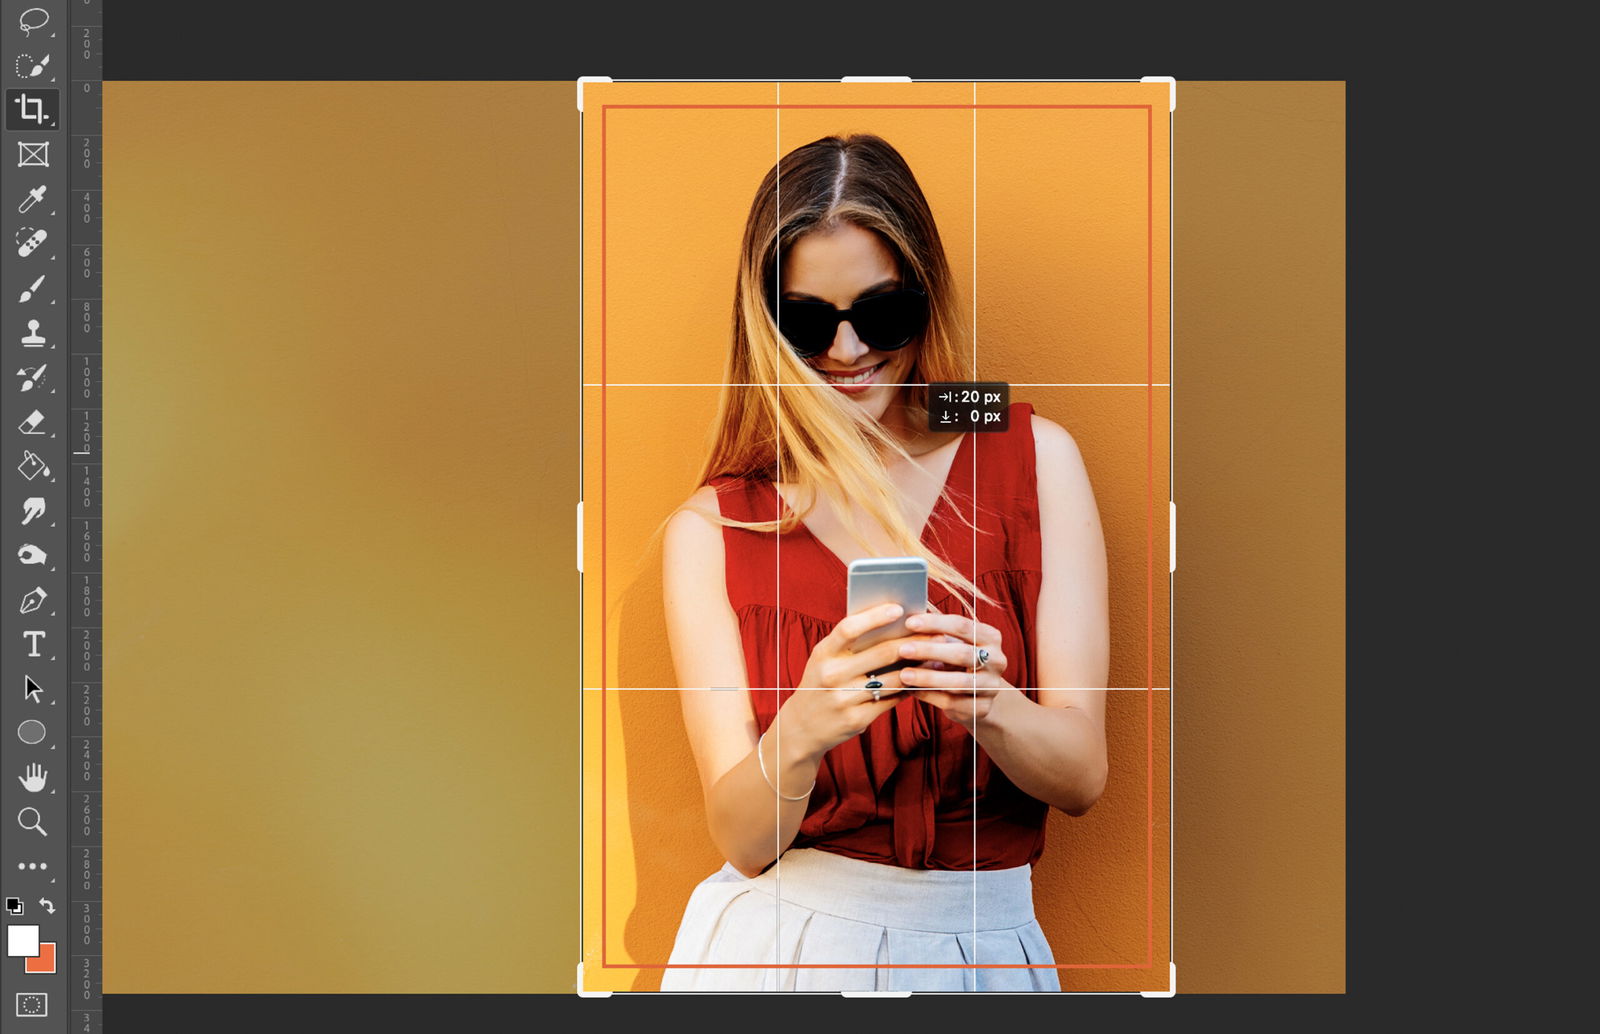
With the Crop Tool selected, click and drag across your image to create a bounding box. This box represents the area of your photo that you’ll keep after cropping.
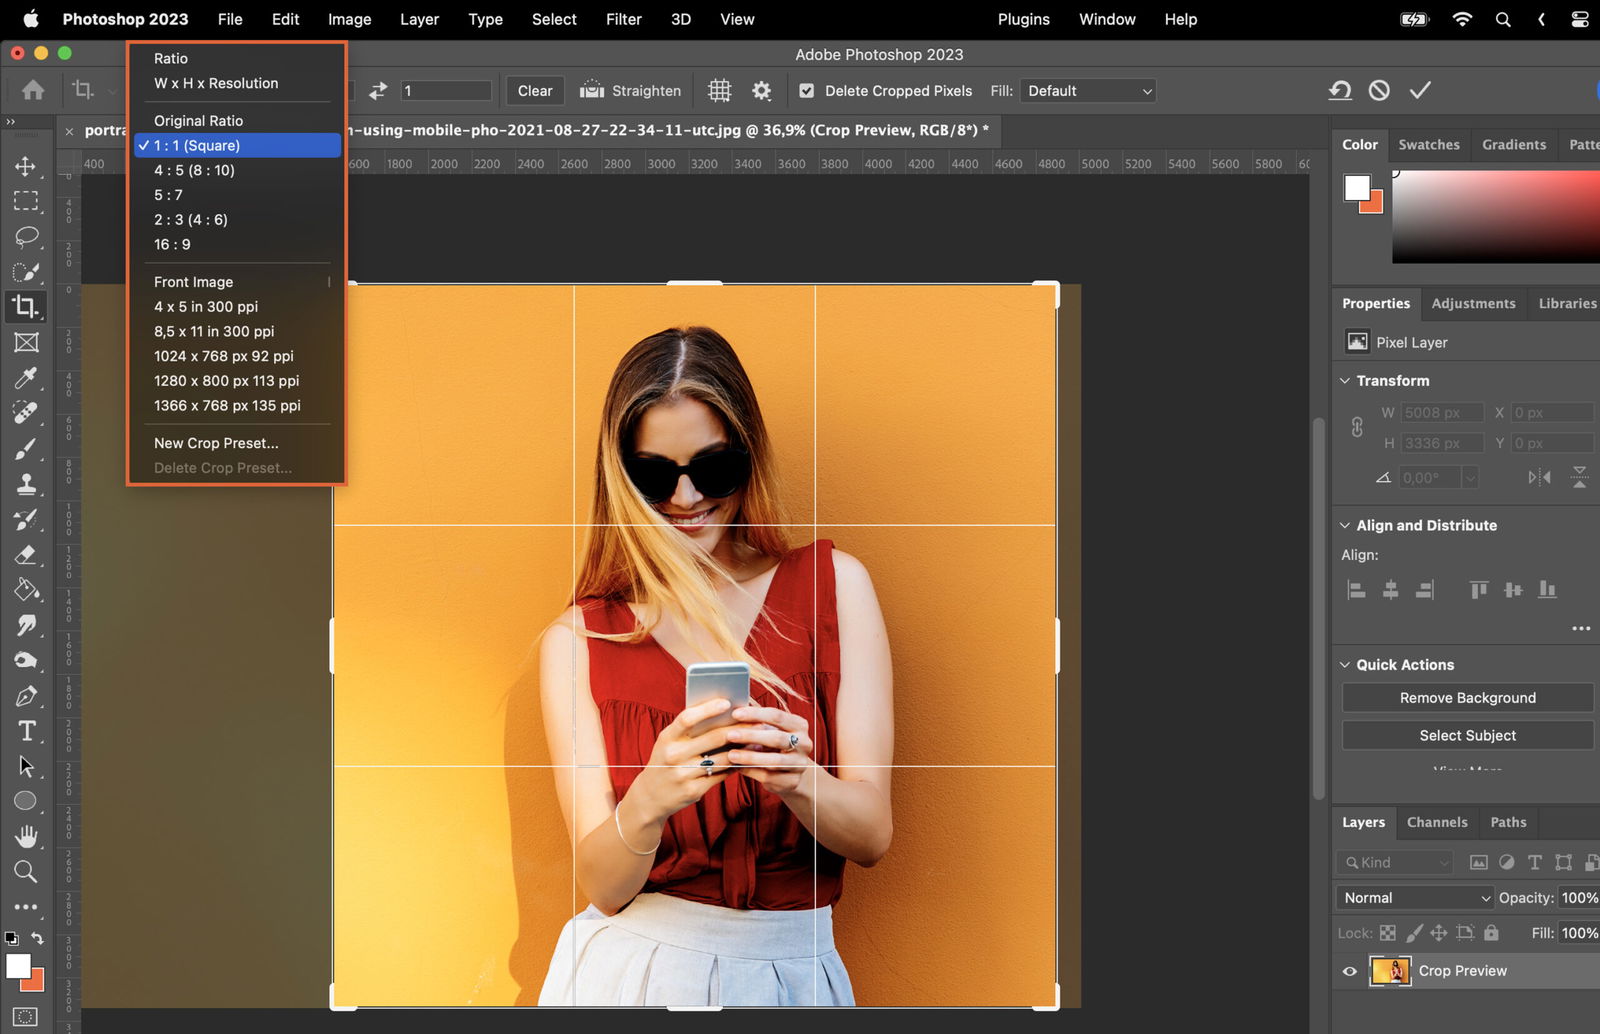
If you need your photo to fit a specific size or ratio, use the Preset Ratio Method. In the Crop Tool options bar, you can select a preset ratio or enter your own.
After defining your crop area, you can fine-tune it to make sure it’s perfect.
To resize your crop area, click and drag the handles on the corners and edges of the bounding box.
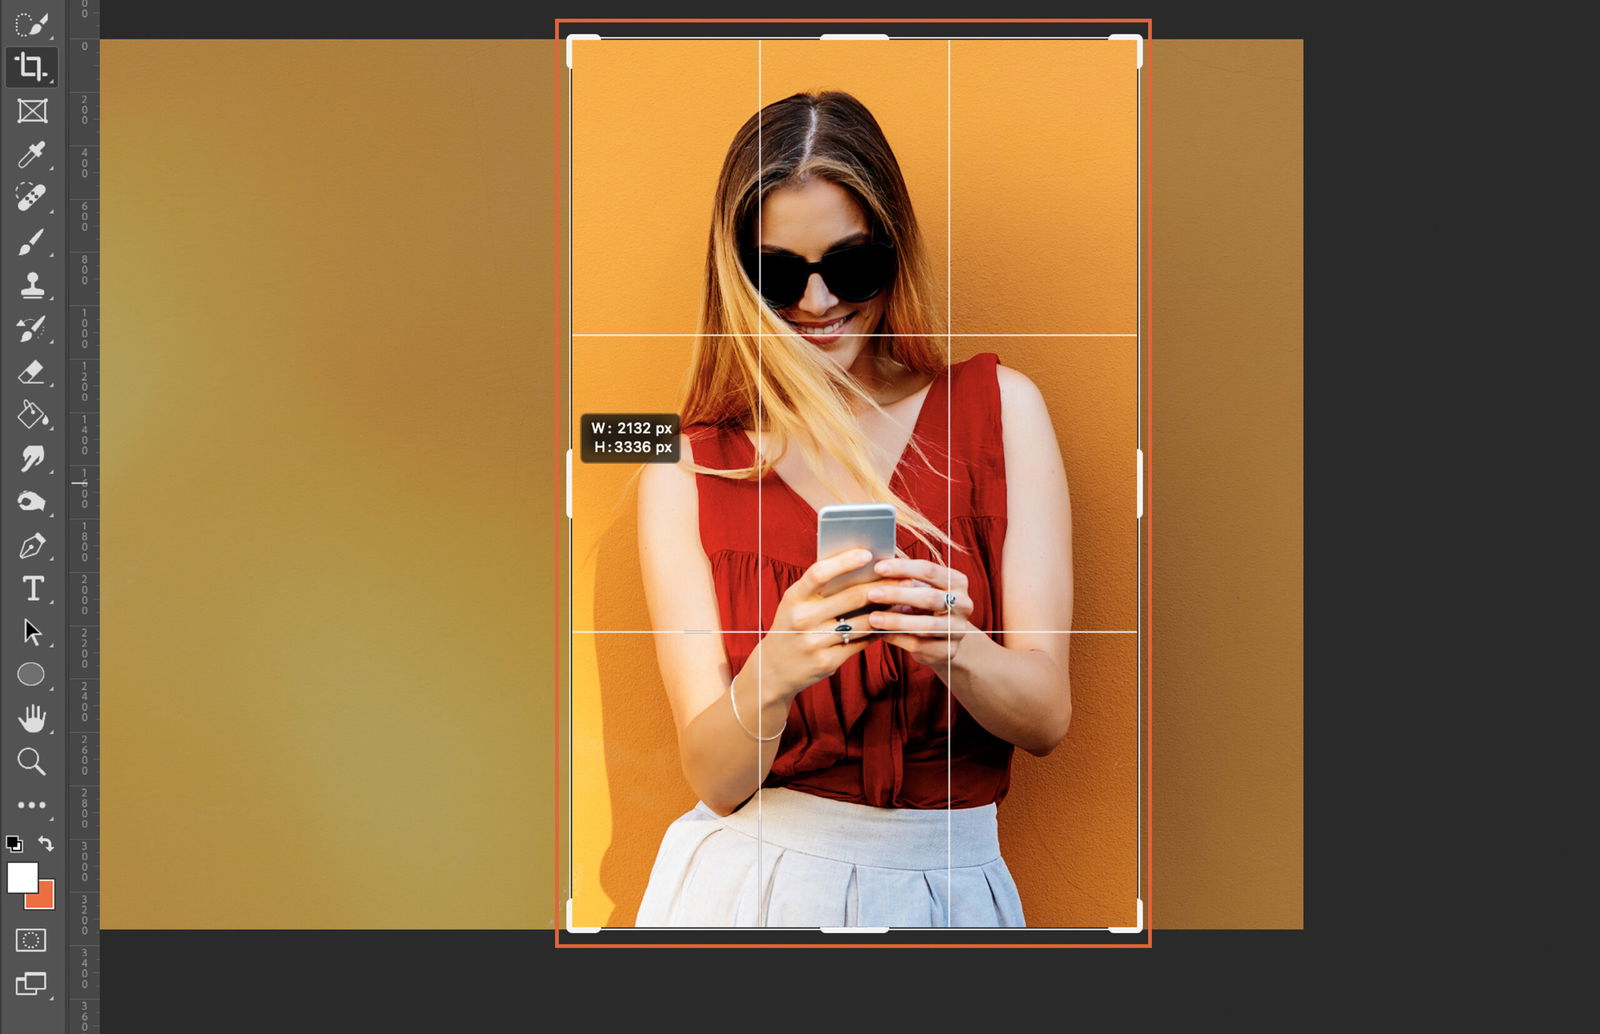
To move your crop area, click inside the bounding box and drag it to where you want it.
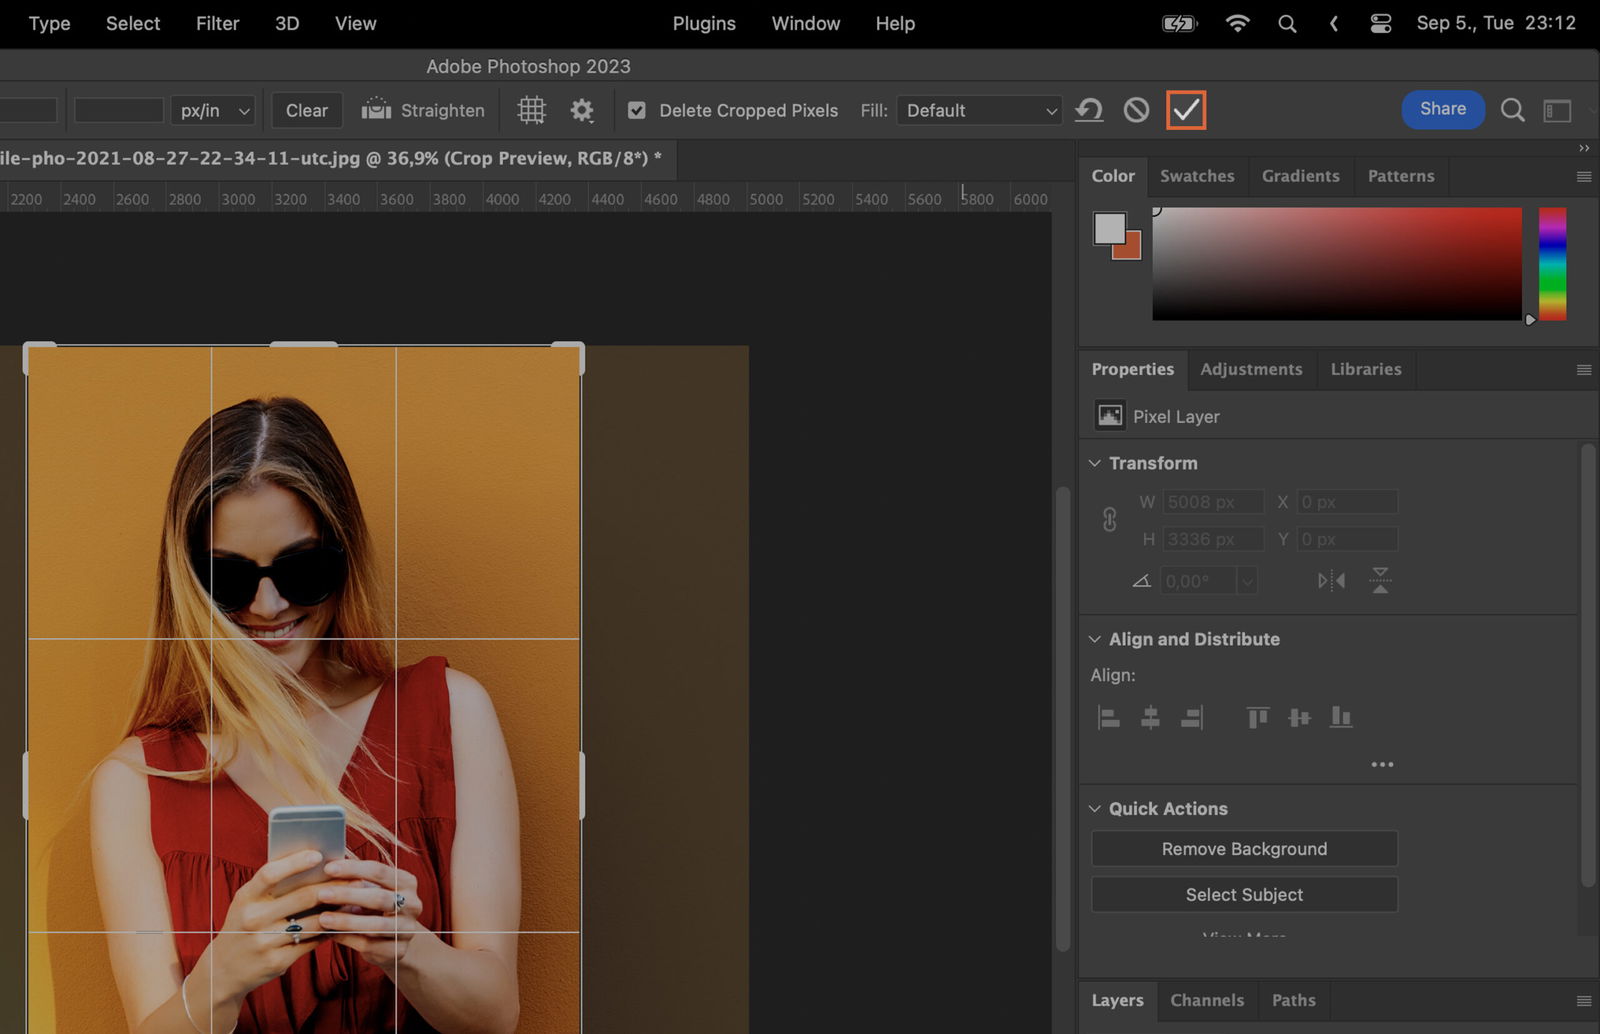
Happy with your crop area? Press Enter or Return to apply the crop. Or, click the checkmark in the options bar.
If you’re not quite satisfied with your crop, don’t worry. You can always tweak it.
Made a mistake? Use the Undo function (Ctrl+Z or Command+Z) to go back one step.
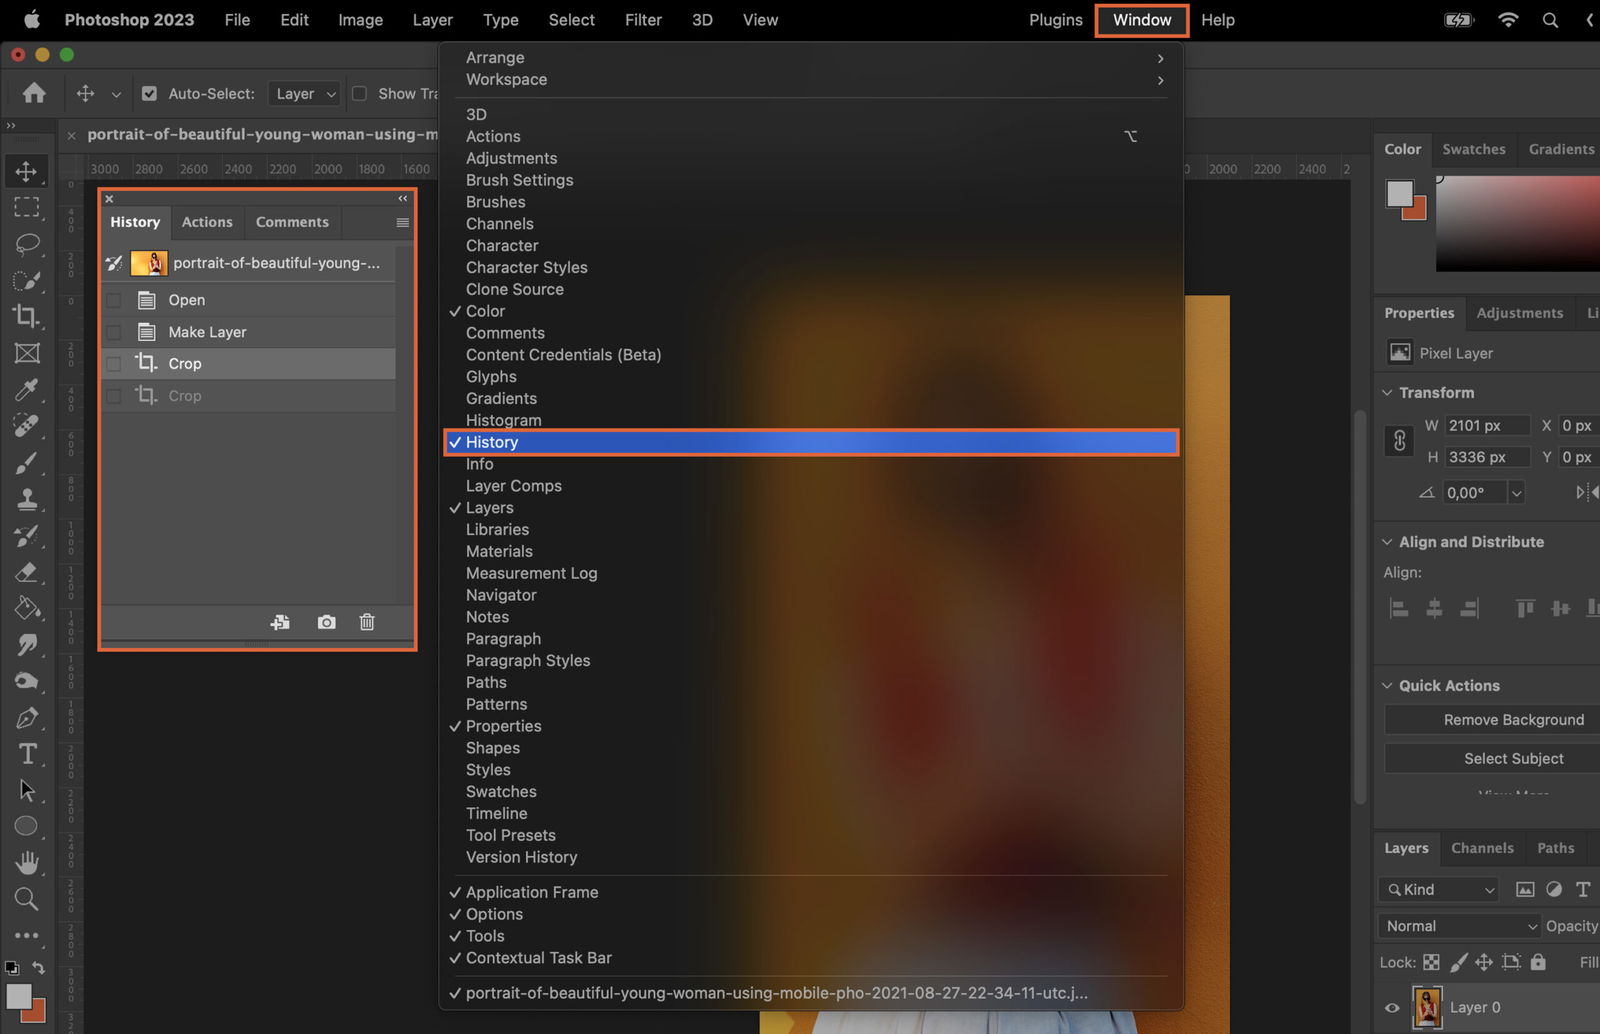
For more control over your edits, use the History Panel. It lets you go back to any previous state of your image.
Photoshop has some other tools you can use to crop your photos in unique ways.
The Perspective Crop Tool lets you crop your photo while adjusting its perspective. It’s perfect for fixing photos taken at an angle.
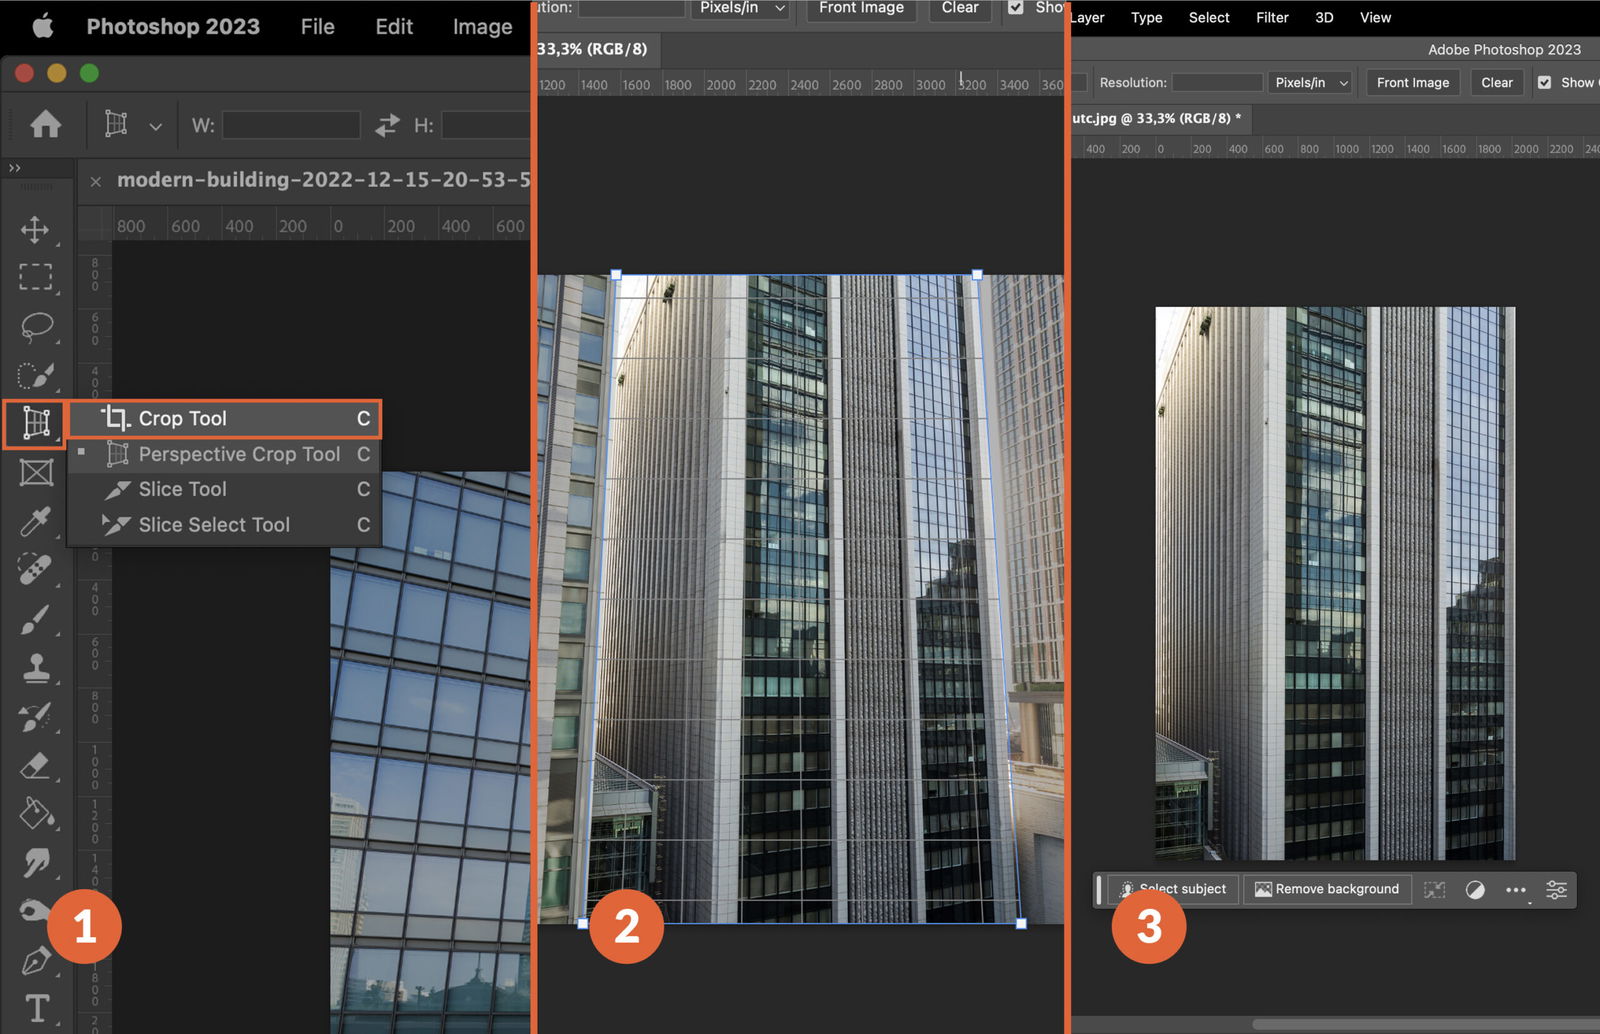
The Slice Tool lets you divide your image into sections and save them as separate files. It’s great for creating web graphics.

![P32 [Lead gen] sidebar banner Related ebook](https://expertphotography.b-cdn.net/wp-content/uploads/2021/10/P32-Lead-gen-sidebar-banner-Related-ebook-300x295.jpg)
![P32 [Lead gen] Sidebar Banner](https://expertphotography.b-cdn.net/wp-content/uploads/2021/10/P32-Lead-gen-Sidebar-Banner-300x245.png)
![P32 [Lead gen] Sidebar Banner 2](https://expertphotography.b-cdn.net/wp-content/uploads/2021/10/P32-Lead-gen-Sidebar-Banner-2-300x245.png)