Have you ever wanted to remove the background of an image to create a clean and professional look, or perhaps to replace it with a different background? Adobe Photoshop is a powerful tool that can help you achieve this goal. In this step-by-step guide, we’ll walk you through the process of removing the background of an image in Photoshop, ensuring that you’ll have a polished and high-quality result. Whether you’re a beginner or a seasoned Photoshop user, follow along and learn how to make your images stand out with ease.
Step 1. Select the Right Tool for Background Removal
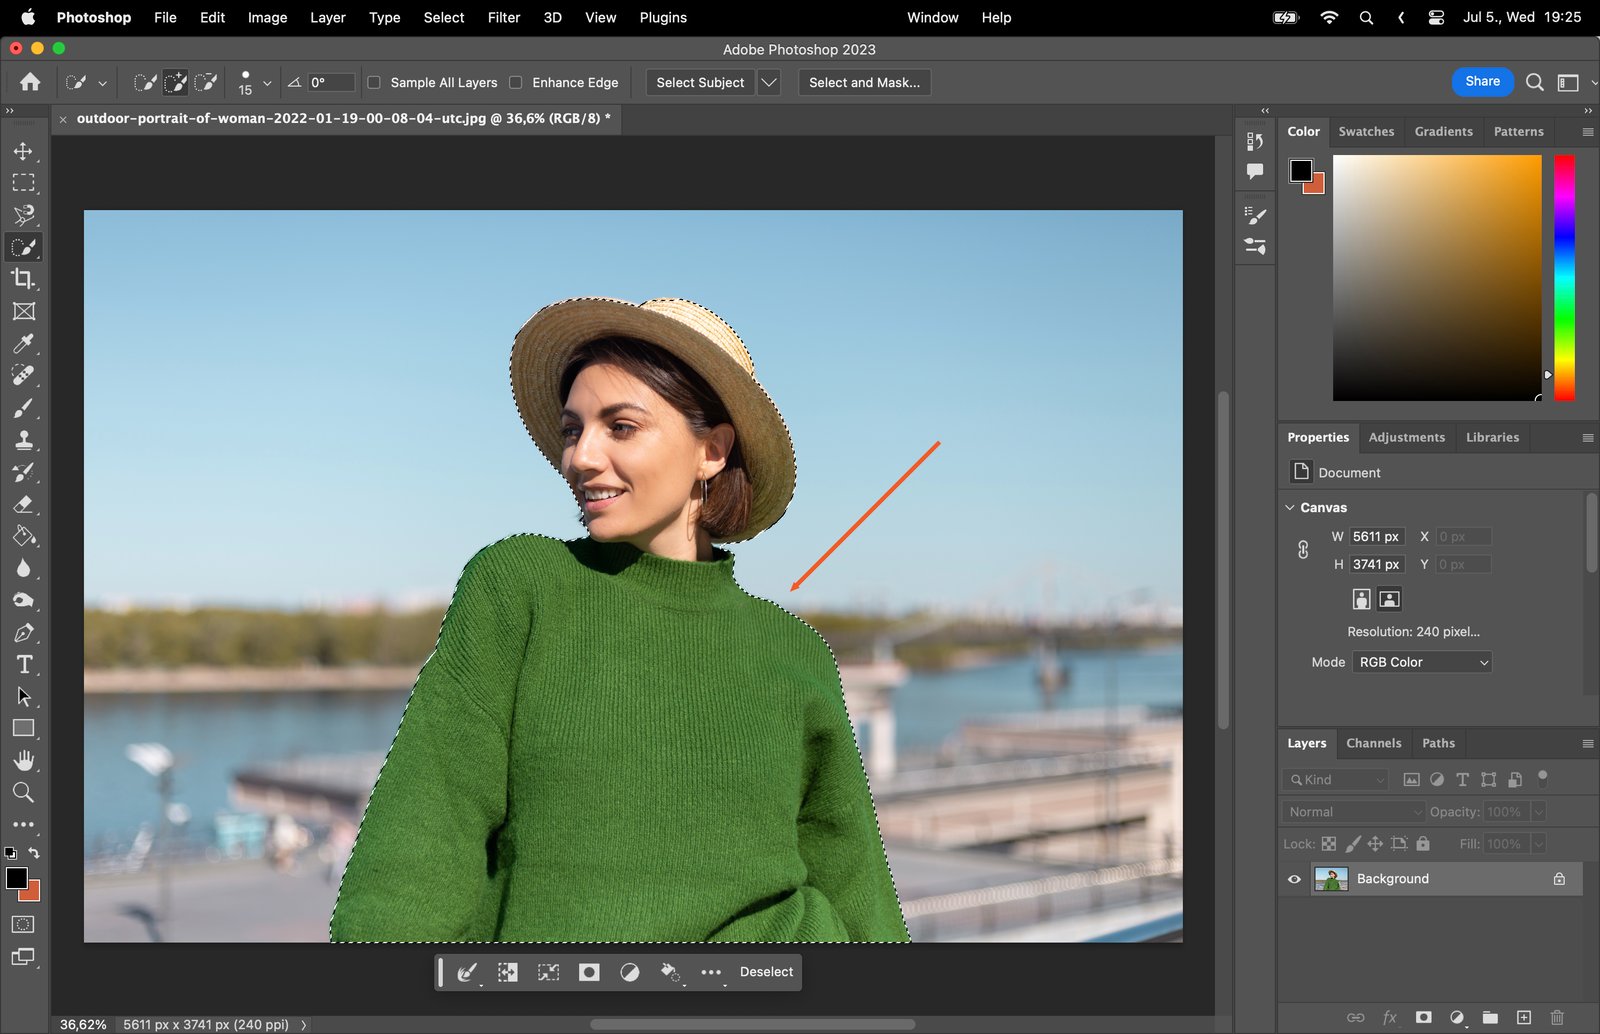
To start removing the background of an image, first, open your image in Photoshop. There are several tools available for background removal, but the most effective one is the Quick Selection tool. This tool allows you to easily select the object you want to keep while removing the background.

Step 2. Use the Quick Selection Tool
Select the Quick Selection tool from the toolbar on the left side of the screen. Once selected, adjust the brush size according to the size of the object you want to keep. Click and drag the tool over the object to make a selection. The tool will automatically detect the edges of the object and create a selection around it.
Step 3. Refine the Selection Edges
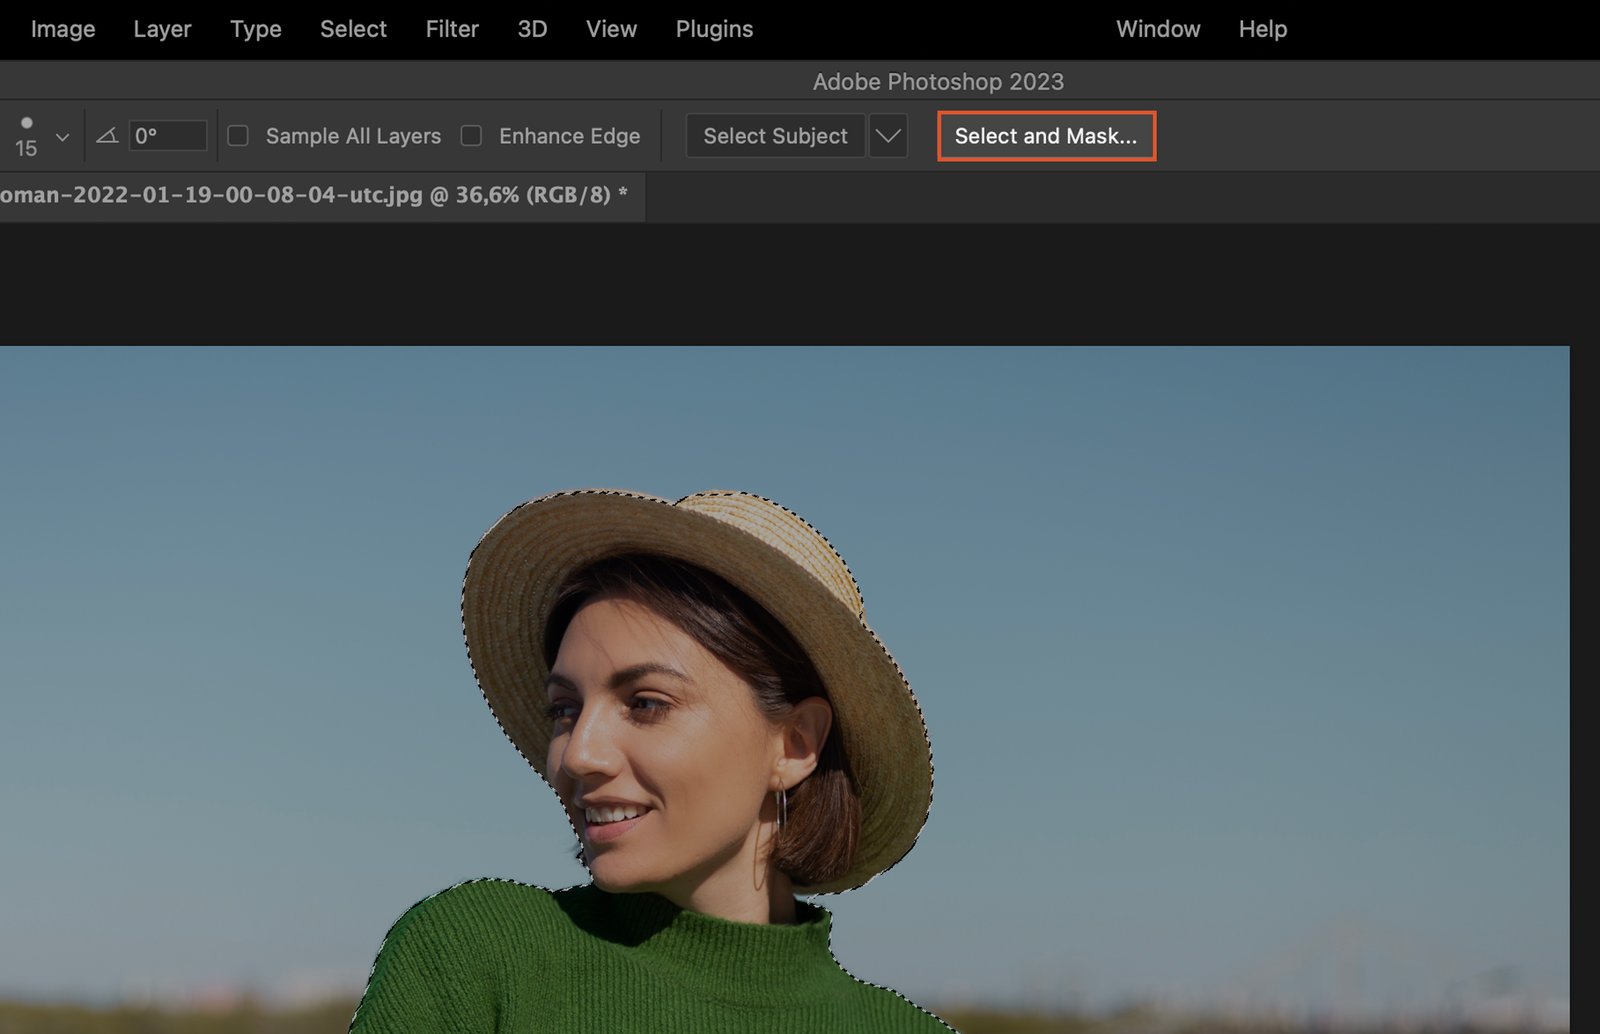
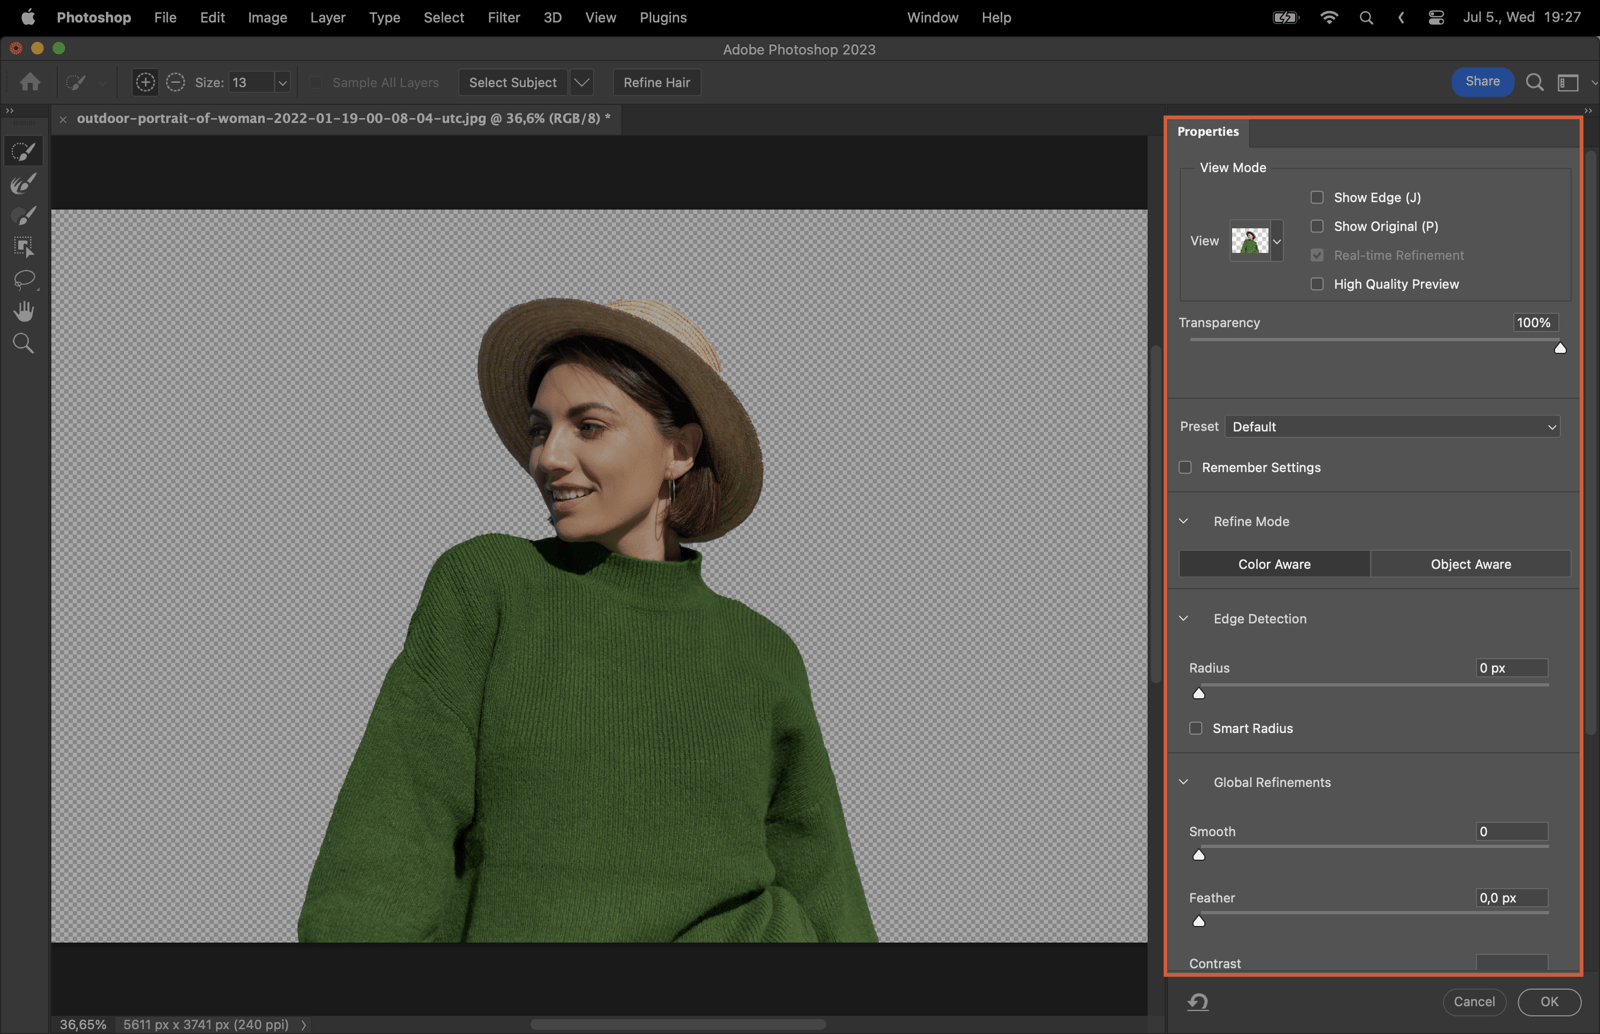
After you have made the initial selection, you may notice that some areas are not selected perfectly. To refine the selection edges, click on the “Select and Mask” button in the top toolbar. This will open a new window where you can adjust the settings to refine the selection edges. Use the sliders to adjust the Smooth, Feather, Contrast, and Shift Edge options until you are satisfied with the selection.
Step 4. Create a Layer Mask
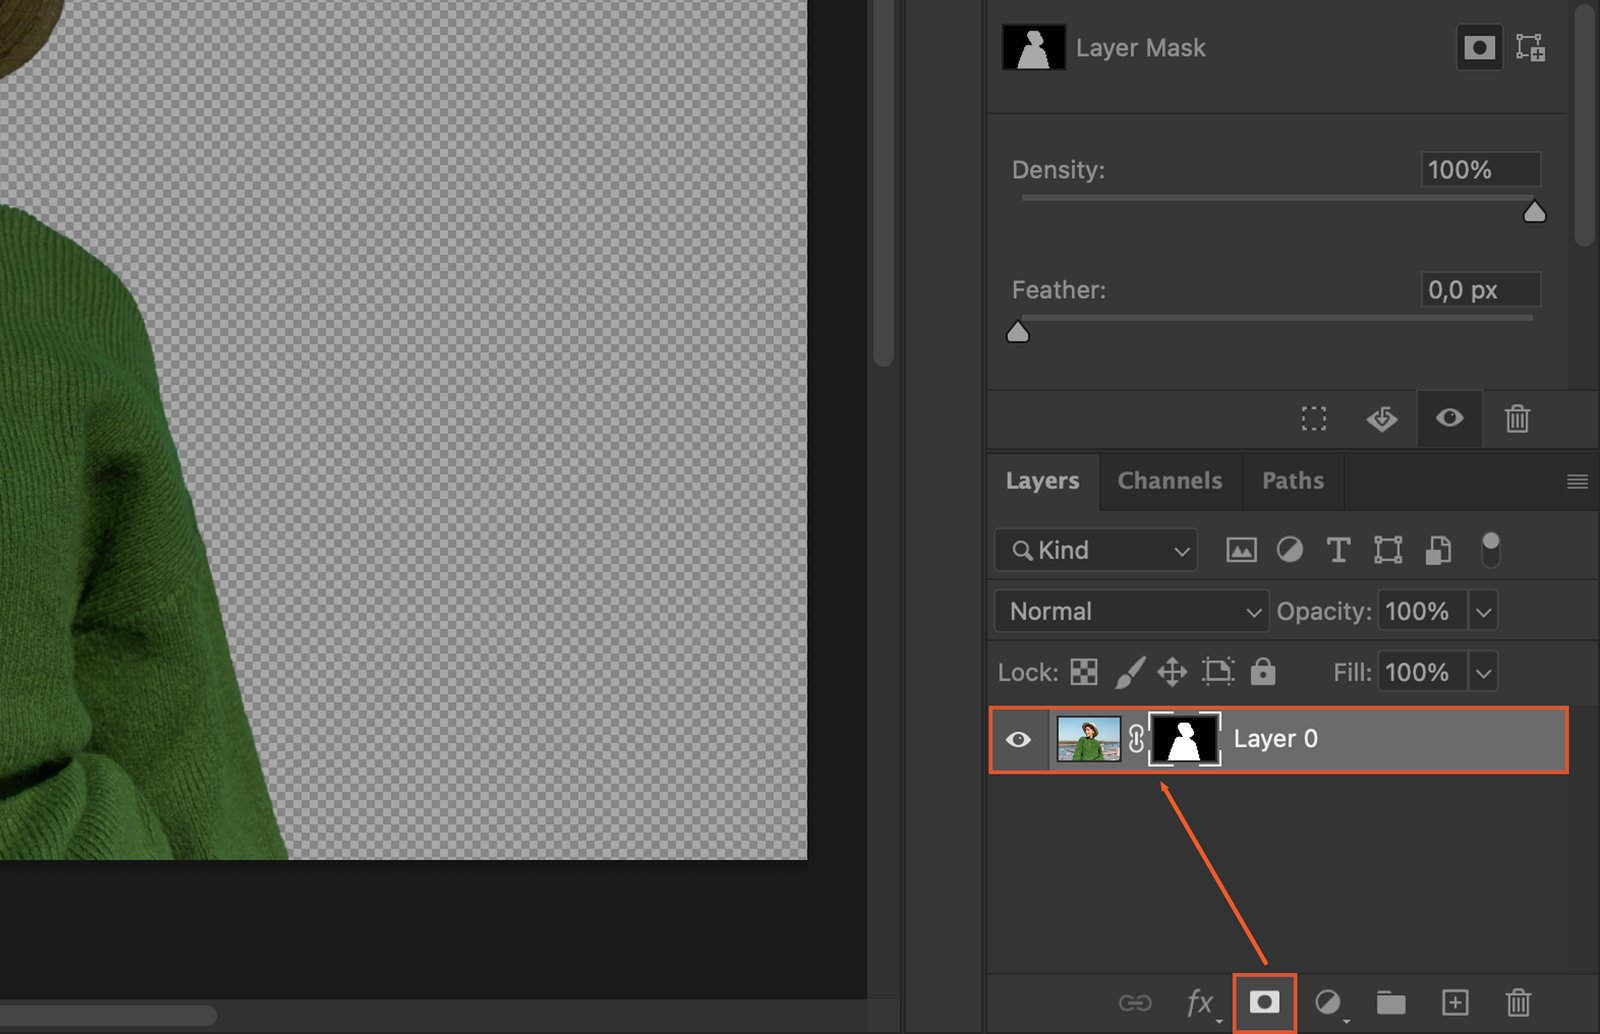
With the selection still active, go to the Layers panel on the right side of the screen. Click on the “Add Layer Mask” button, which looks like a rectangle with a circle inside it. This will create a layer mask, hiding the background and leaving only the selected object visible.
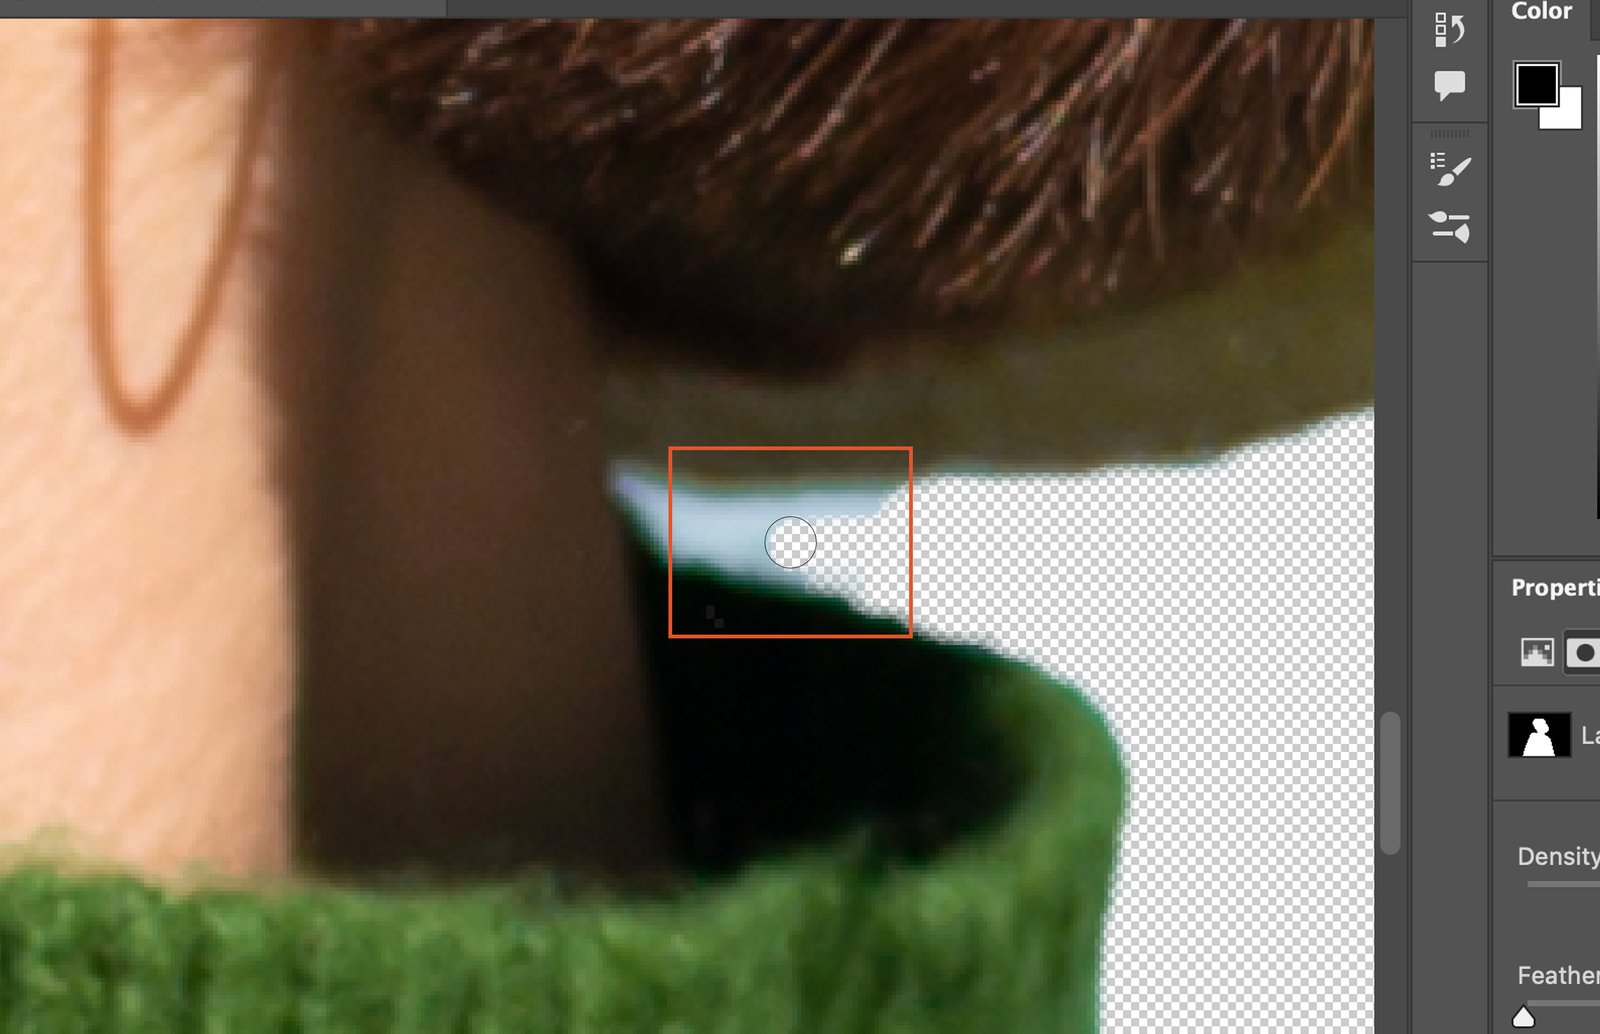
Step 5. Fine-Tune the Layer Mask
If there are still some areas of the background visible or parts of the object missing, you can fine-tune the layer mask. Select the layer mask in the Layers panel, then choose the Brush tool from the toolbar. Set the brush color to black to hide parts of the image or white to reveal them. Carefully paint over the areas that need adjustment until you are satisfied with the result.
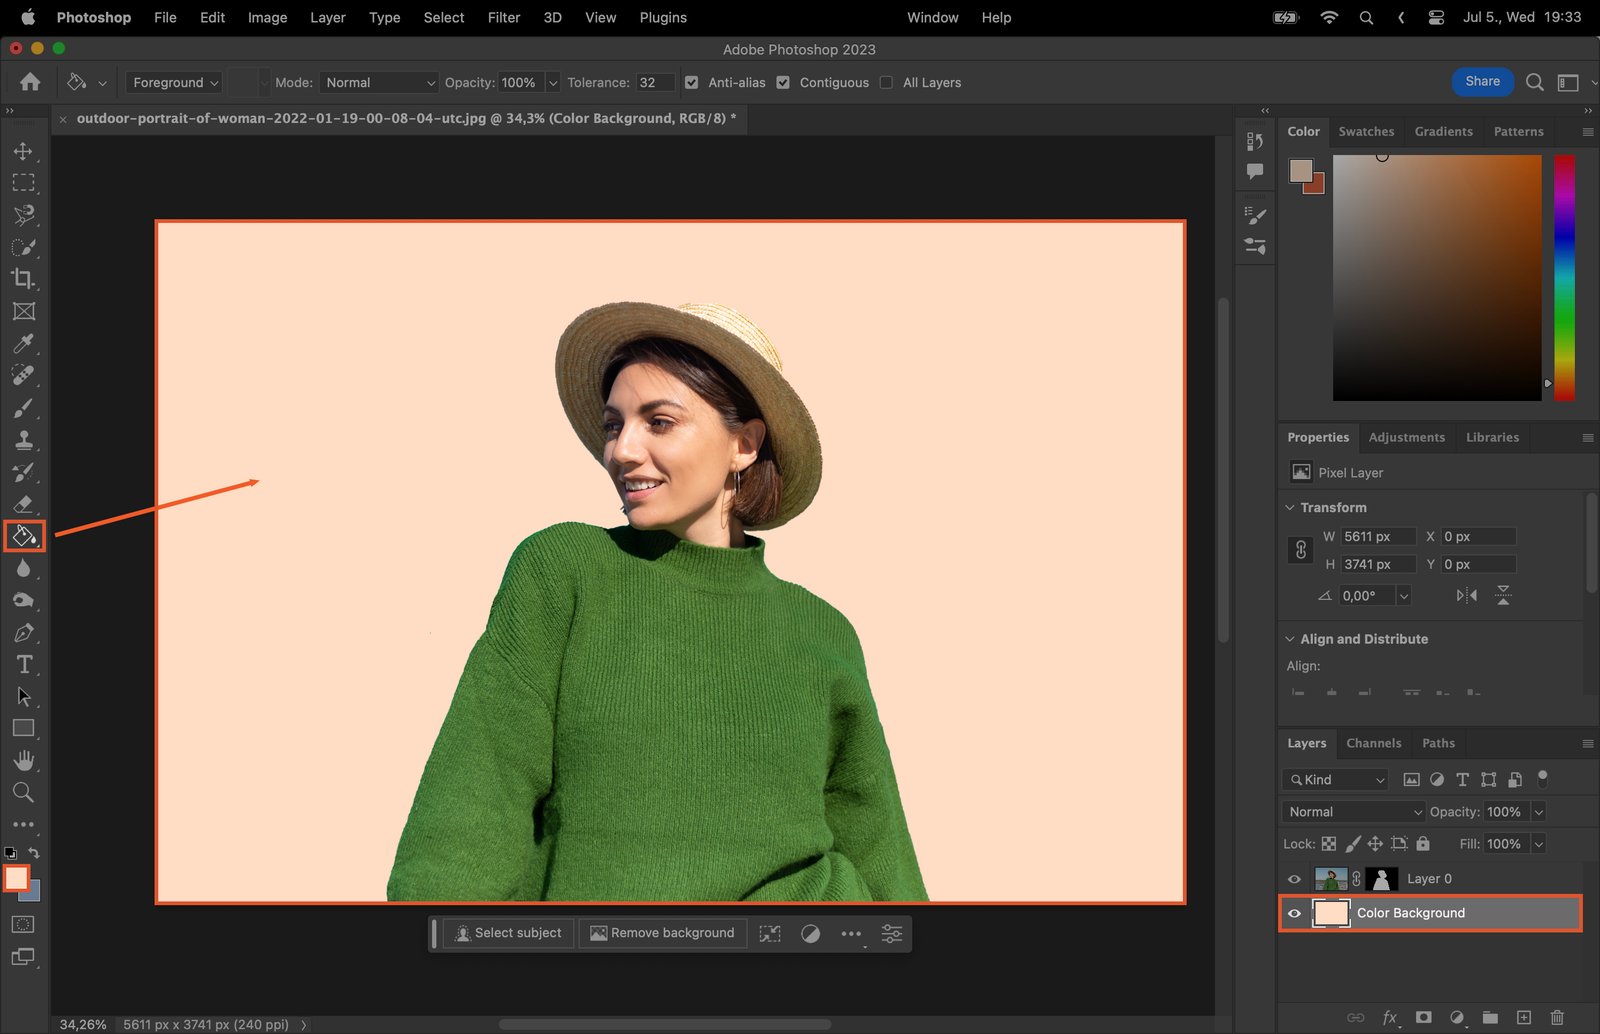
Step 6. Apply a Solid Color Background (Optional)
If you want to replace the original background with a solid color, create a new layer by clicking on the “Create a New Layer” button in the Layers panel. Drag this new layer below the layer with the layer mask.

Select the Paint Bucket tool from the toolbar and choose the color you want for the background. Click on the new layer to fill it with the chosen color.
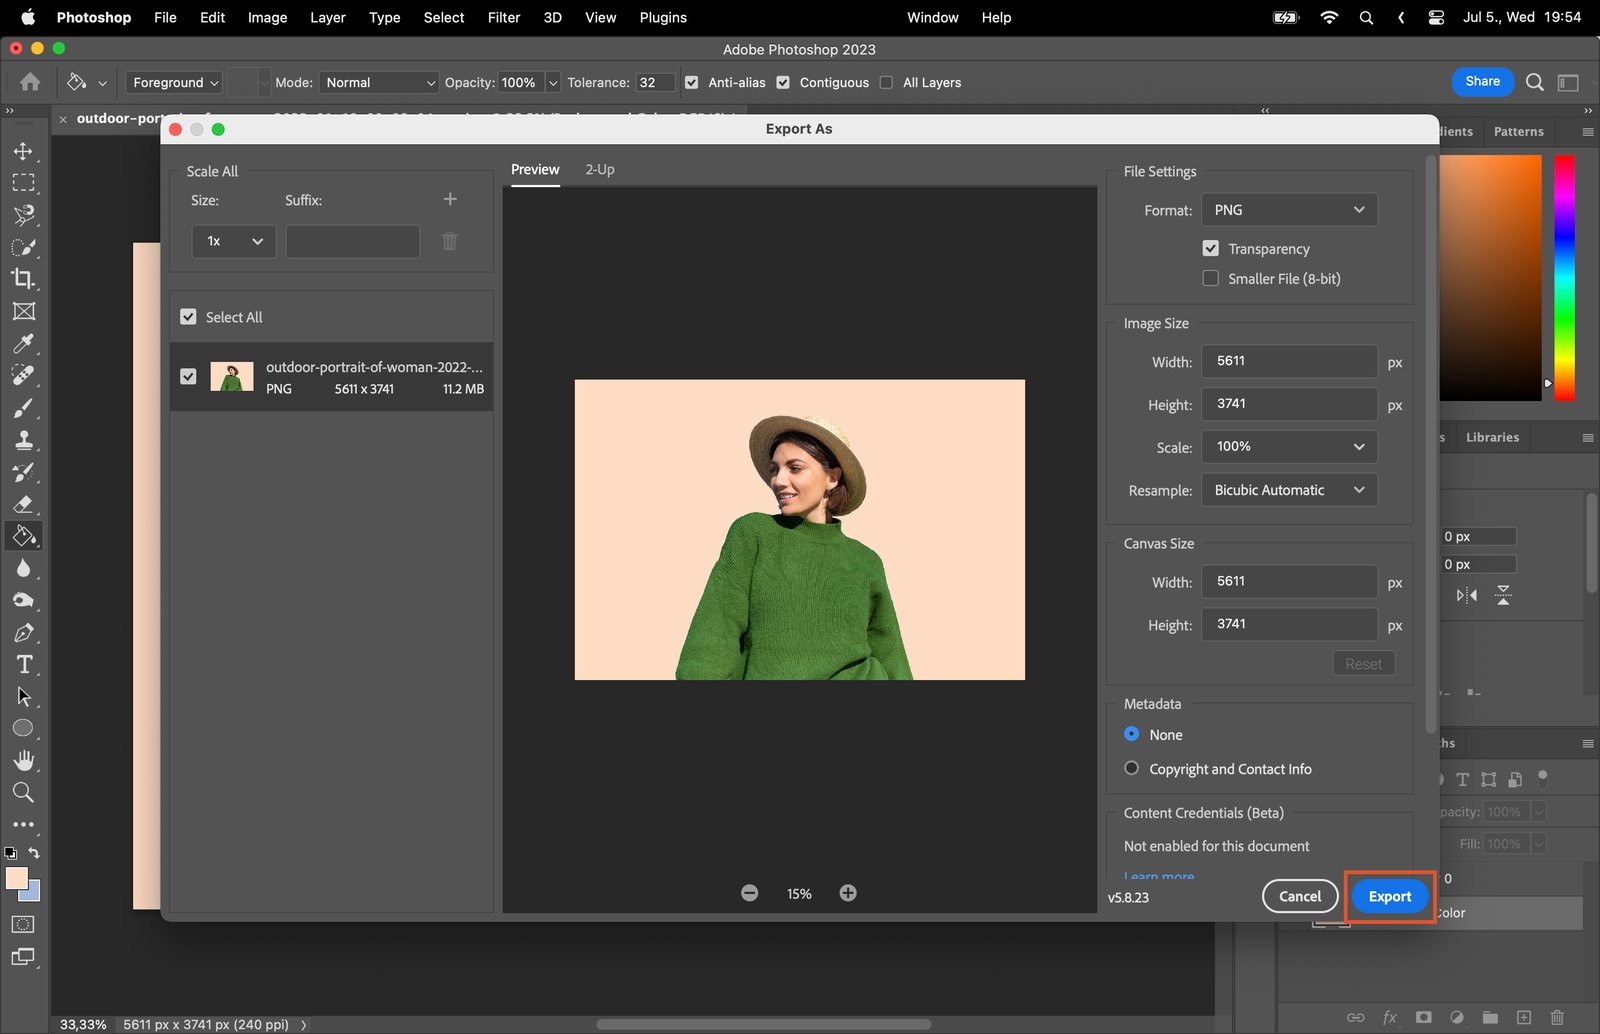
Step 7. Export the Image in the Desired Format
Once you are happy with the result, it’s time to save your image. Go to File > Export > Export As. Choose the desired format, such as PNG or JPEG, and adjust the settings as needed.
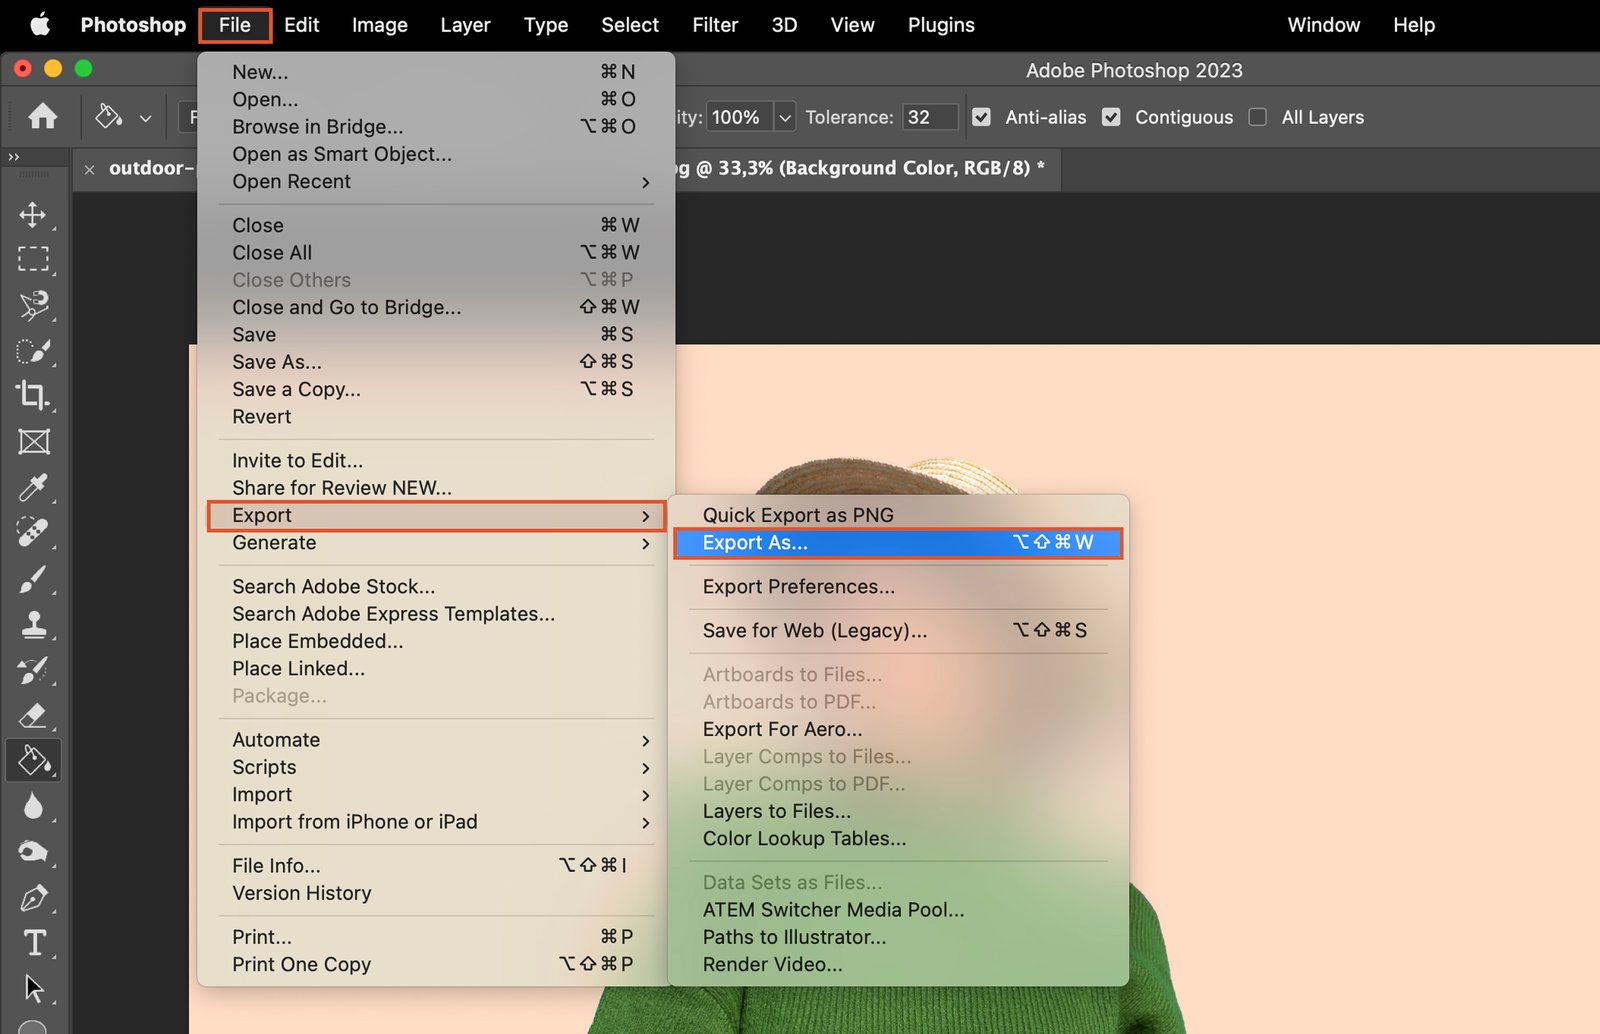
Click on the “Export” button to save your image with the background removed.