Capturing the perfect image is only half the battle in digital photography. The other half lies in post-production, which includes enhancing and refining your image to make it look its best. Among various adjustments, sharpening the image is a crucial step. It enhances the details, making the picture more appealing and professional. However, the process can seem complex if you’re not familiar with the software. This article is here to guide you through the process of sharpening an image in Photoshop. From importing your image to exporting the final product, we’ll walk you through each step in a simple, easy-to-understand manner, ensuring that you can easily follow along and achieve a sharp, high-quality image.
Step 1. Importing the Image
First things first, get your image into Photoshop. There are two easy ways to do this.
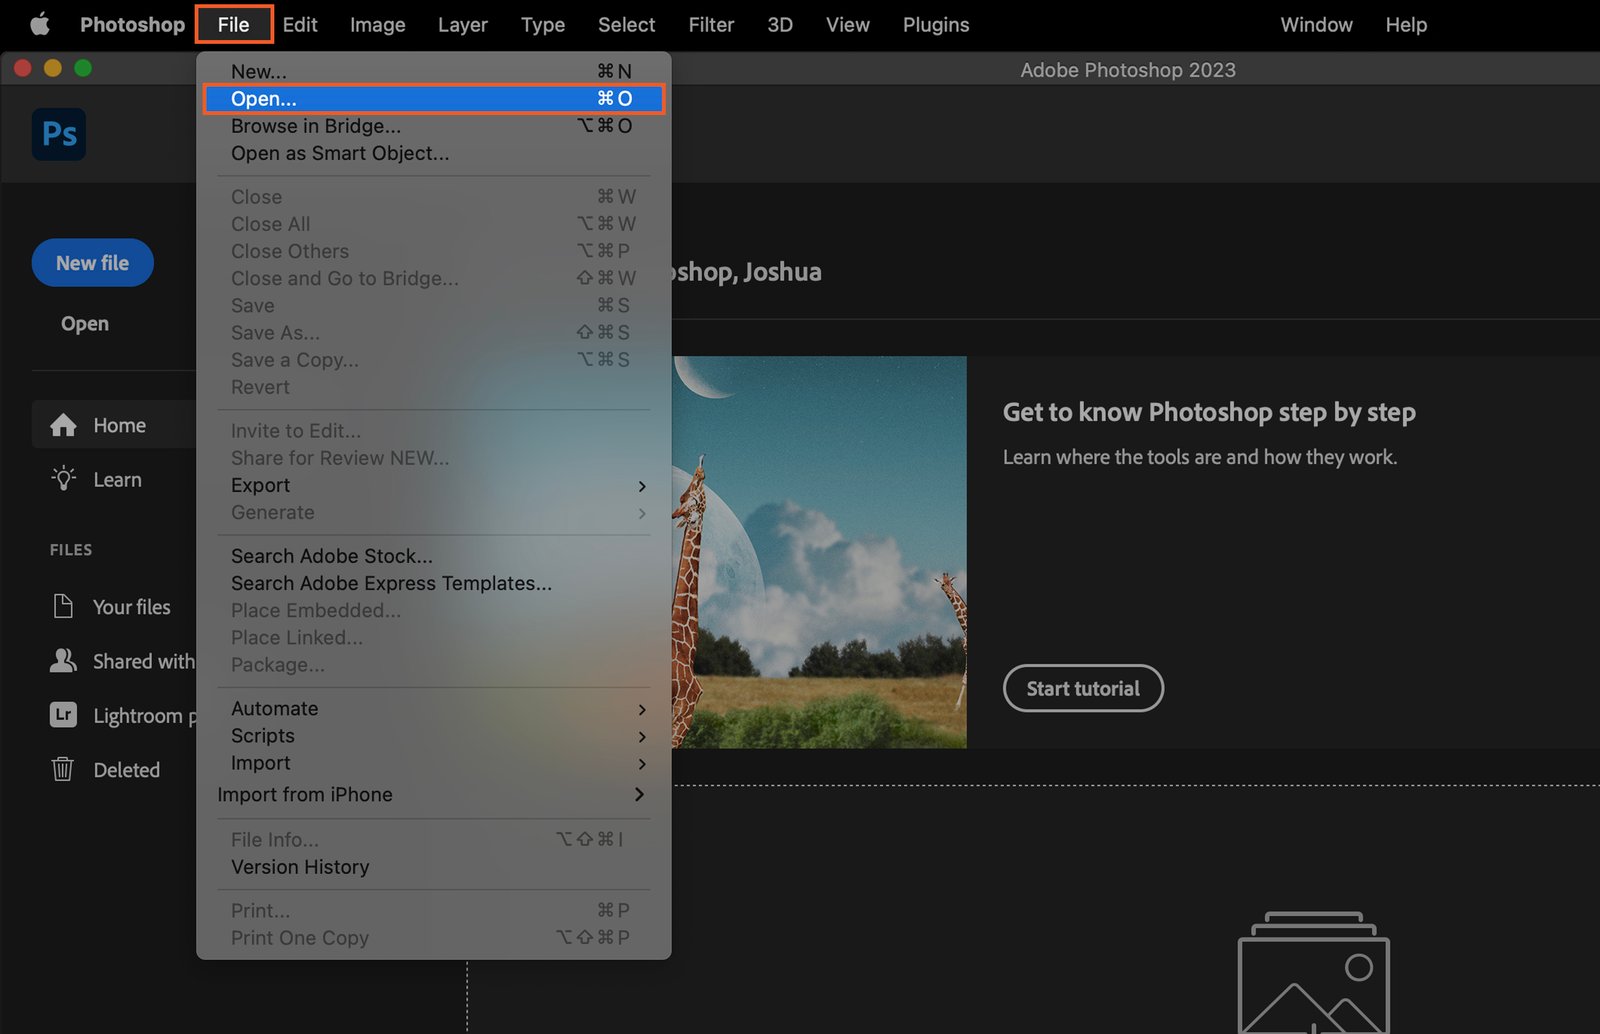
Step 1.1. Using the ‘Open’ Command
Go to the ‘File‘ menu at the top of your screen, select ‘Open‘, and navigate to your image. Click on it and press ‘Open‘ again. Voila! Your image is now ready to be sharpened.
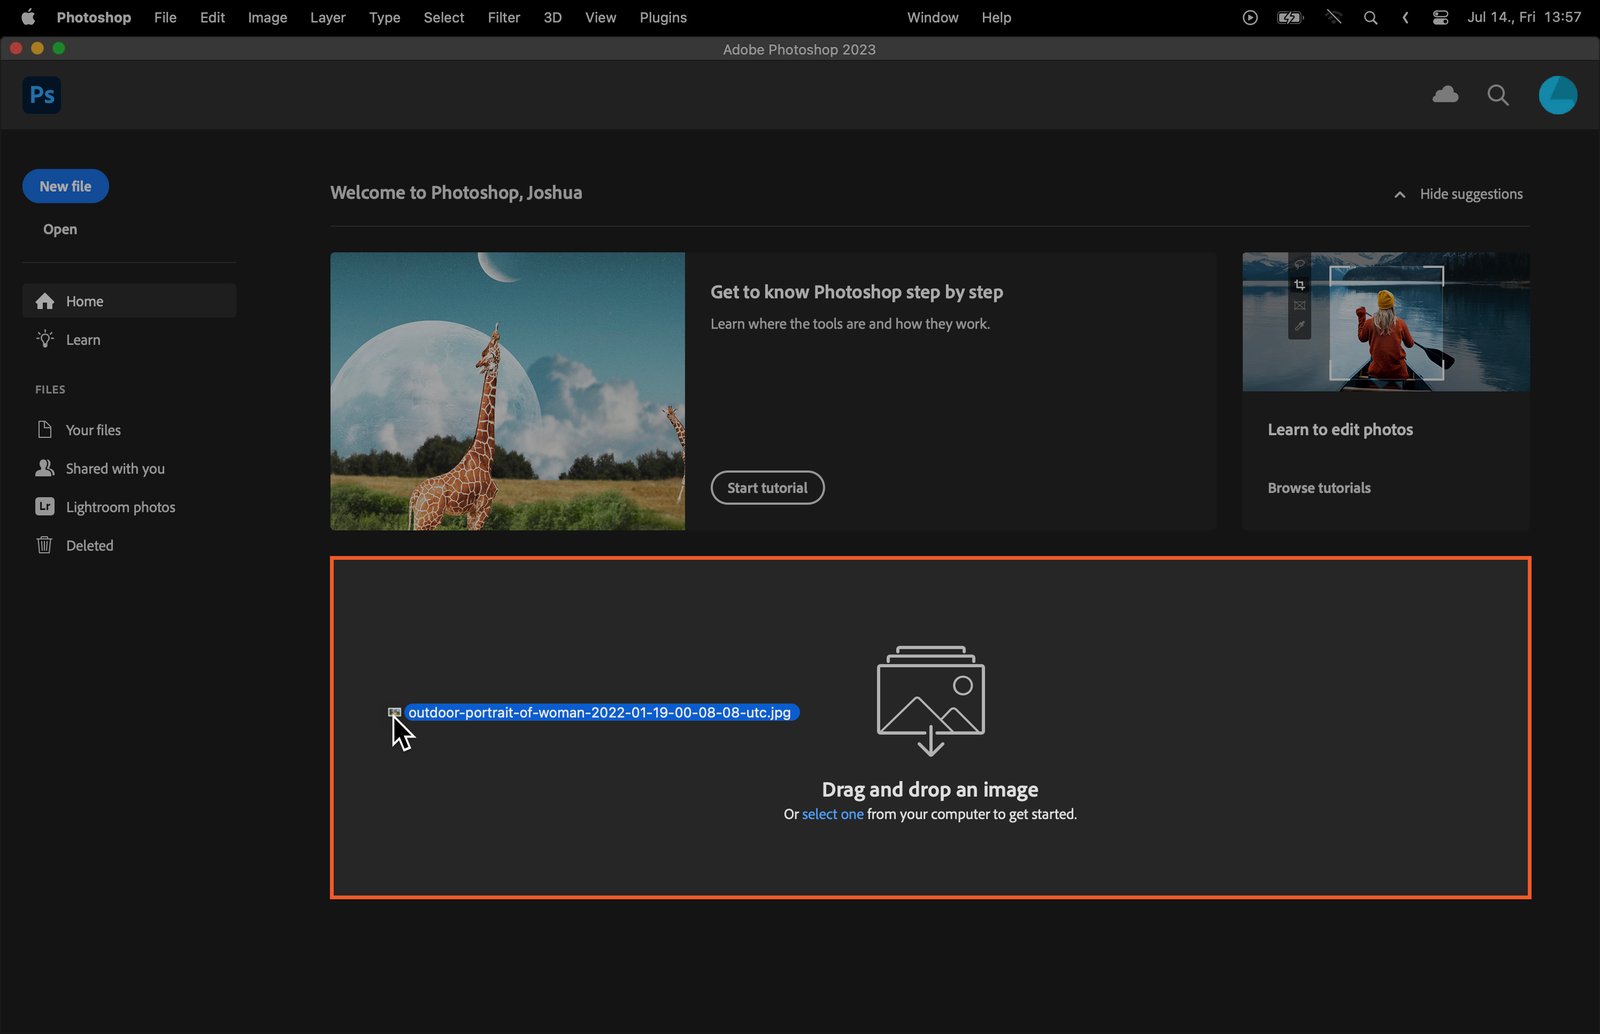
Step 1.2. Dragging and Dropping the Image
Alternatively, you can simply drag and drop your image into Photoshop. Just make sure Photoshop is already open before you start dragging.
Step 2. Creating a Duplicate Layer
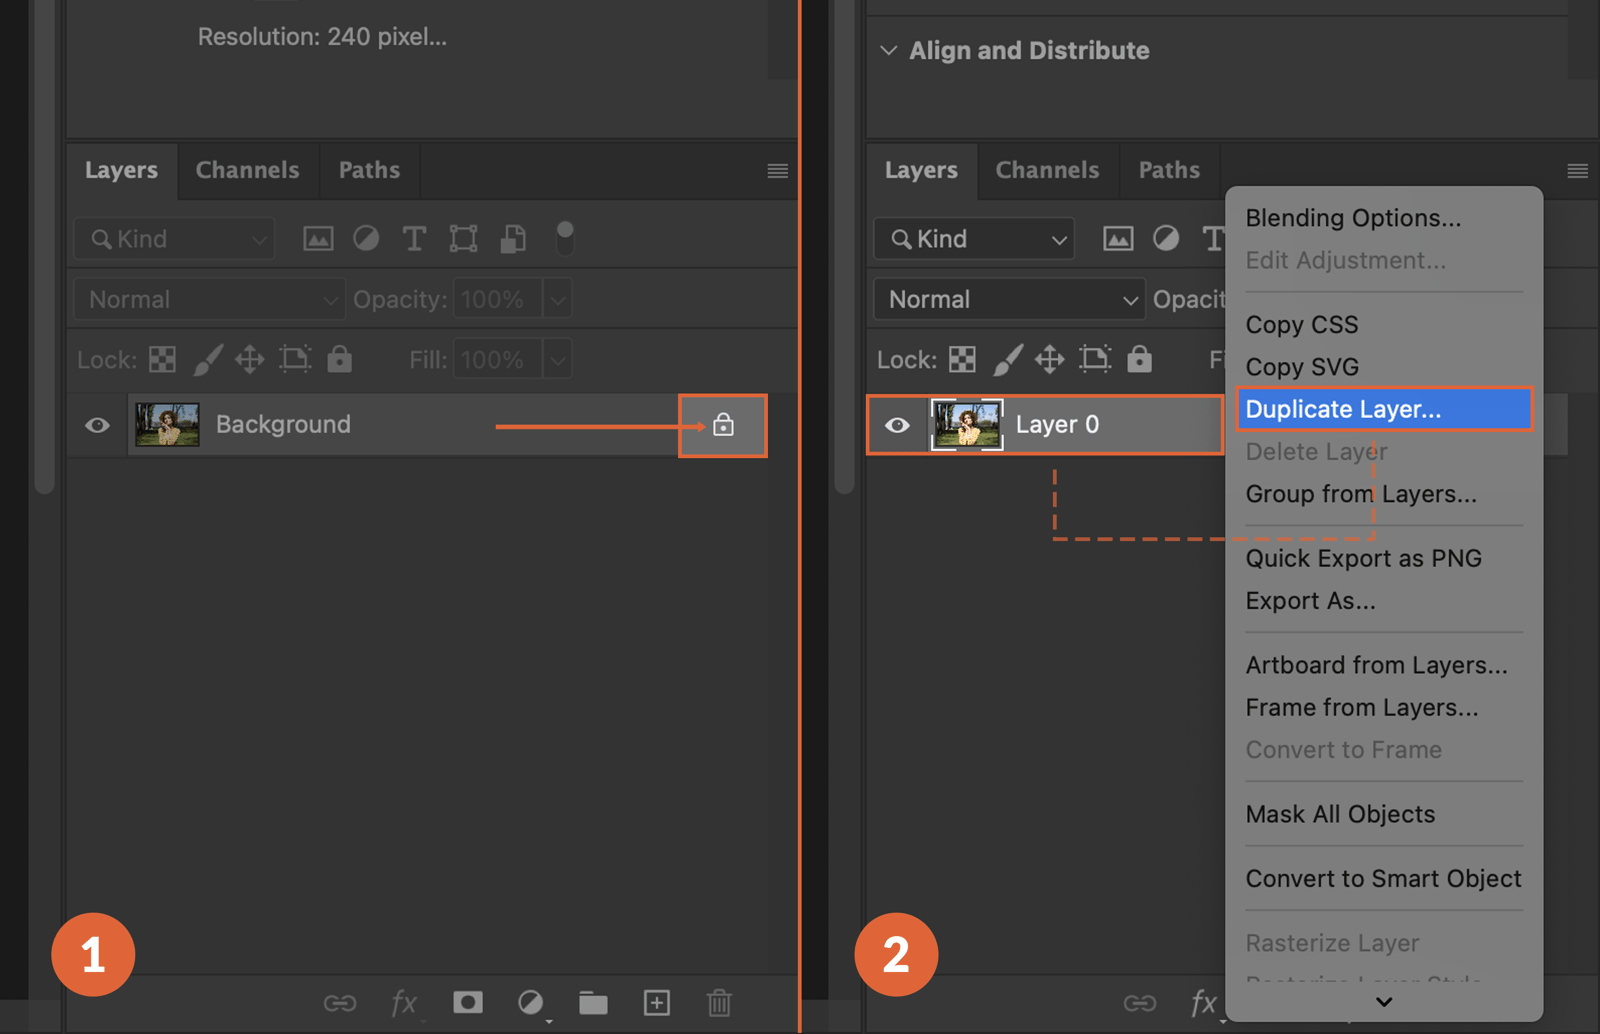
To keep your original image safe, always work on a duplicate layer. Find the ‘Layers‘ panel, right-click on the background layer, and select ‘Duplicate Layer‘. Now you’re ready to start sharpening without affecting the original image.
Step 3. Selecting the Sharpening Method
Photoshop gives you several ways to sharpen your image. Let’s look at the three most popular ones.
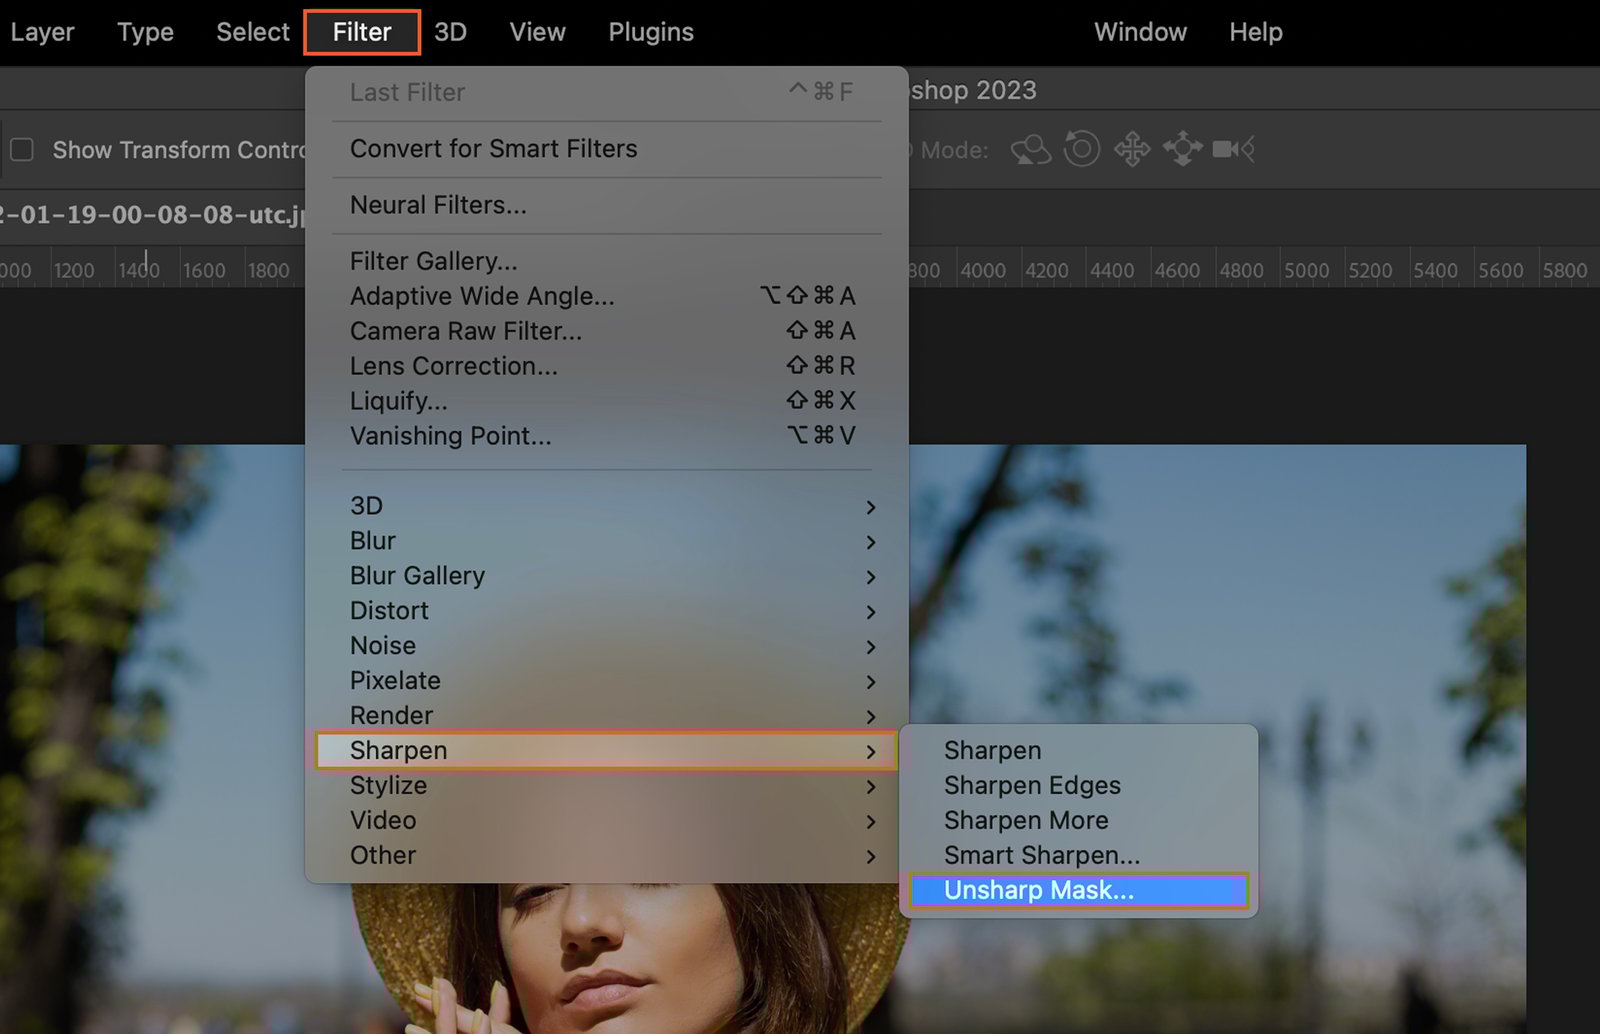
Step 3.1. Using the ‘Unsharp Mask’
Find ‘Unsharp Mask‘ under the ‘Filter‘ menu, then ‘Sharpen‘. This tool lets you adjust the amount, radius, and threshold of the sharpening effect.
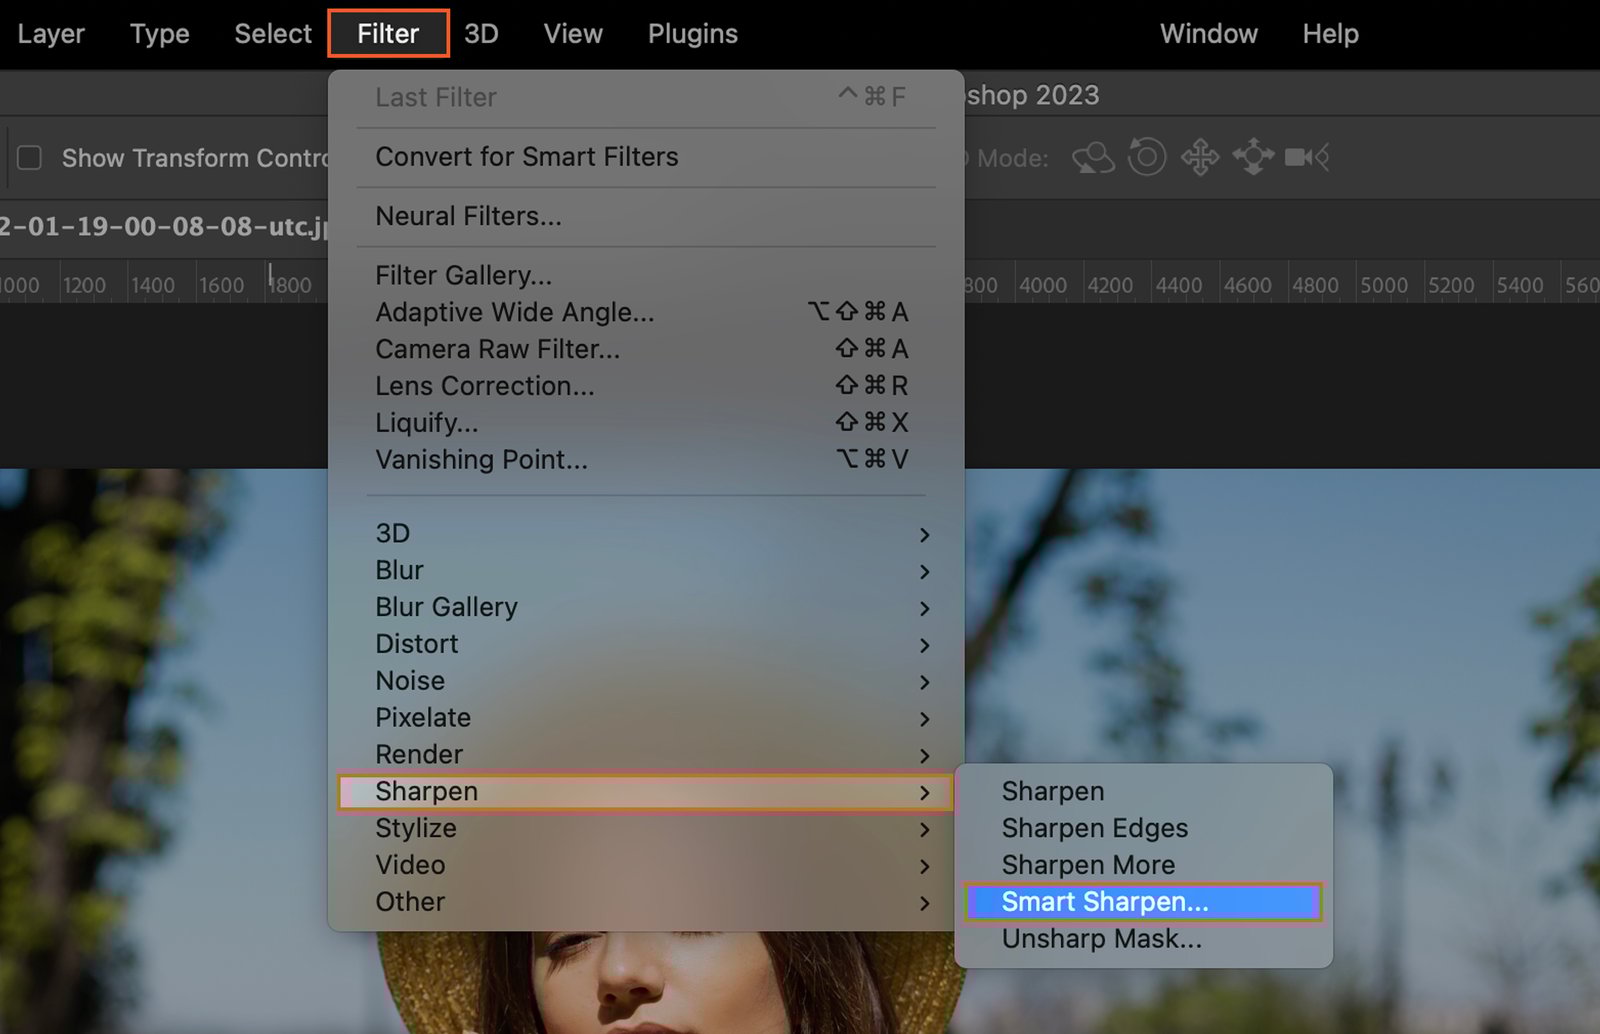
Step 3.2. Using the ‘Smart Sharpen’
‘Smart Sharpen‘ is another effective tool. You can find it under ‘Filter‘, then ‘Sharpen‘. It gives you more control over the sharpening process than ‘Unsharp Mask’.
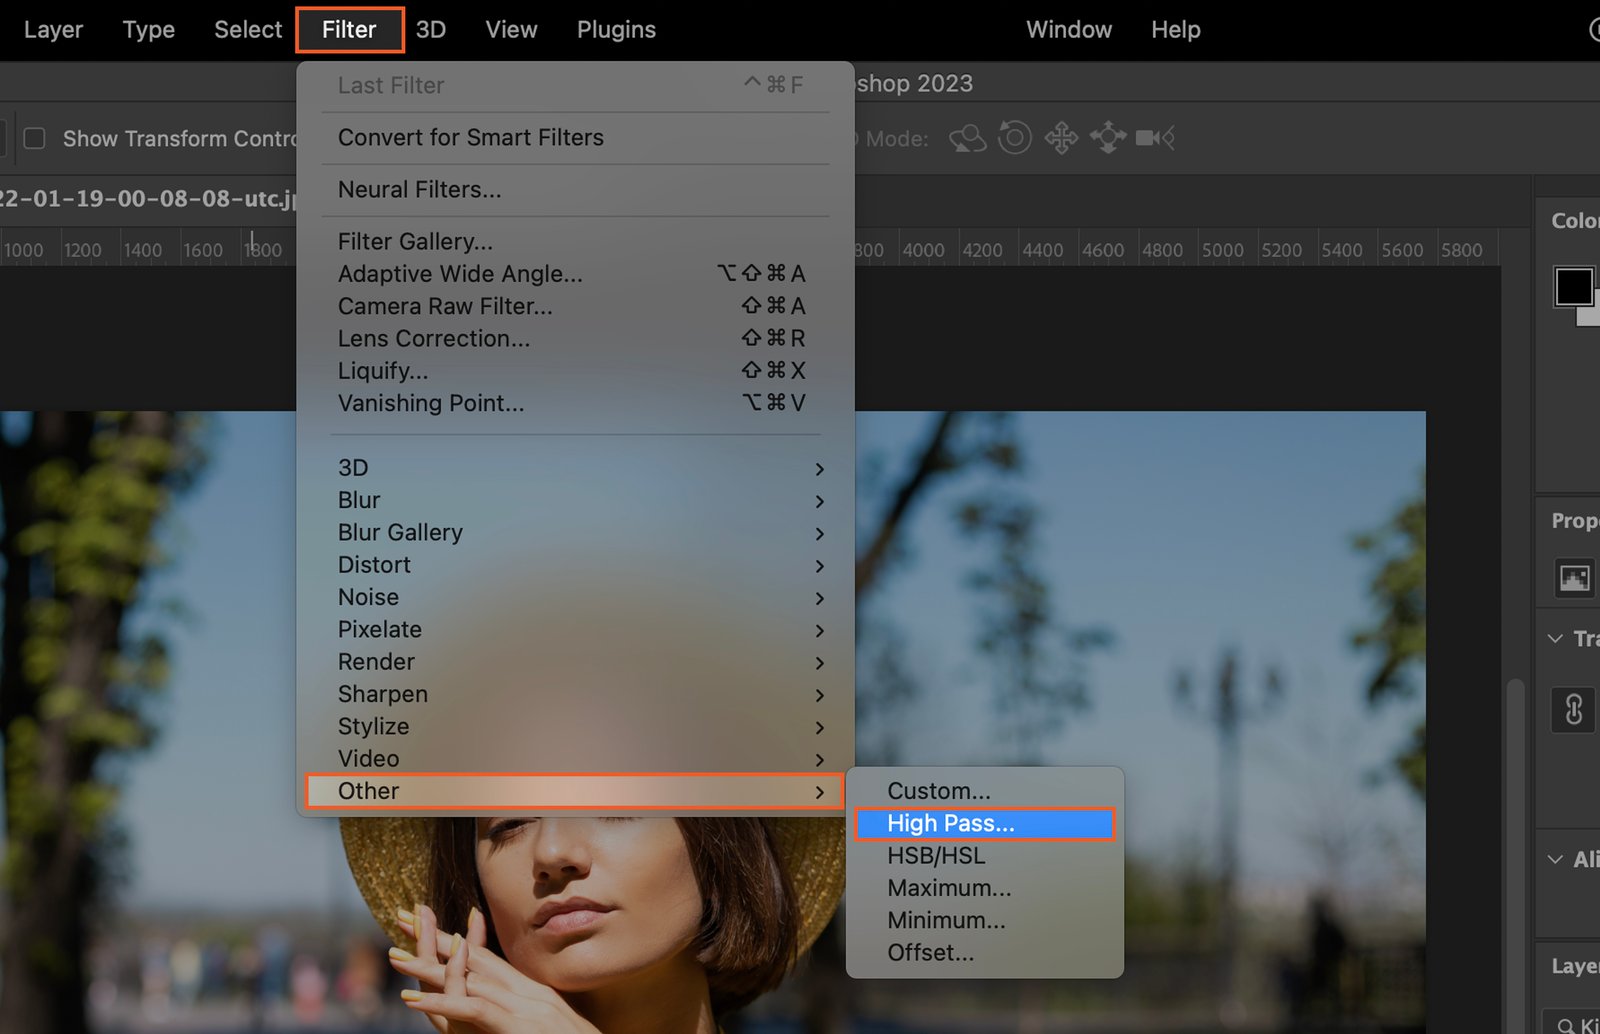
Step 3.3. Using the ‘High Pass’ Filter
The ‘High Pass‘ filter is a bit more complex, but it can yield great results. It’s under ‘Filter‘, then ‘Other‘. Use it in combination with the ‘Overlay‘ blending mode for the best effect.
Step 4. Adjusting the Sharpening Parameters
After choosing your sharpening method, you’ll need to fine-tune the effect.
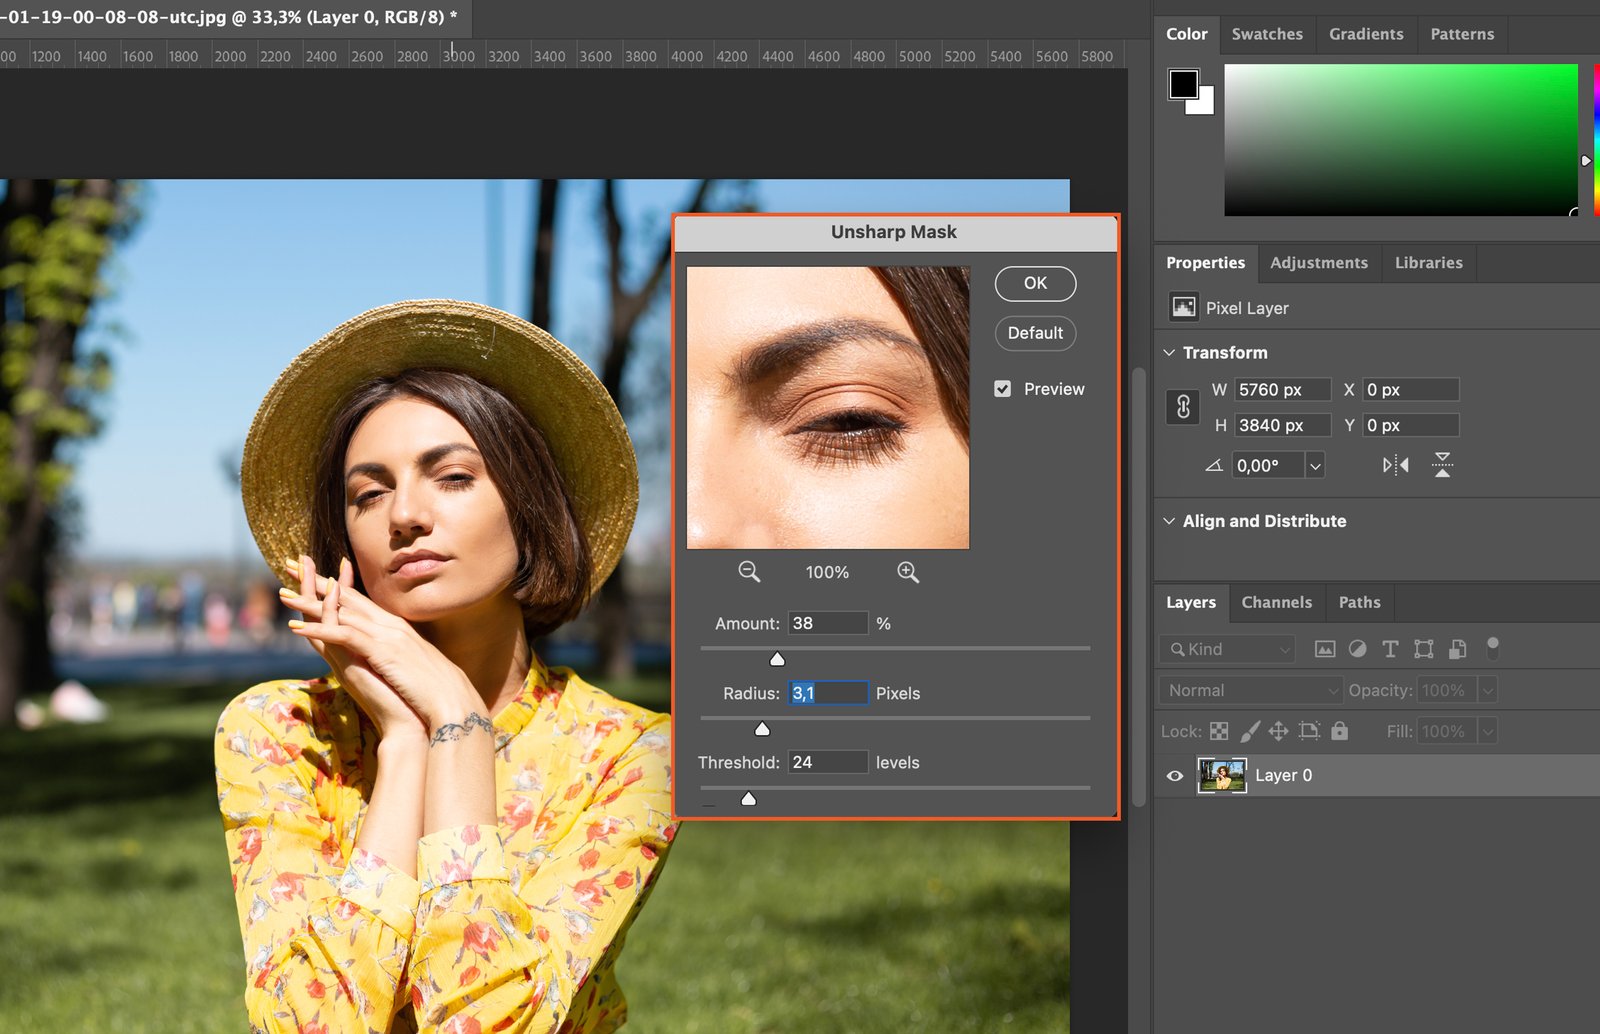
Step 4.1. Adjusting the ‘Amount’
The ‘Amount‘ controls the intensity of the sharpening. A higher value results in a more pronounced effect.
Step 4.2. Adjusting the ‘Radius’
The ‘Radius‘ determines the size of the edges to be enhanced. A smaller radius enhances smaller detail.
Step 4.3. Adjusting the ‘Threshold’
The ‘Threshold‘ setting controls the minimum brightness change that will be sharpened. This helps to avoid enhancing noise.
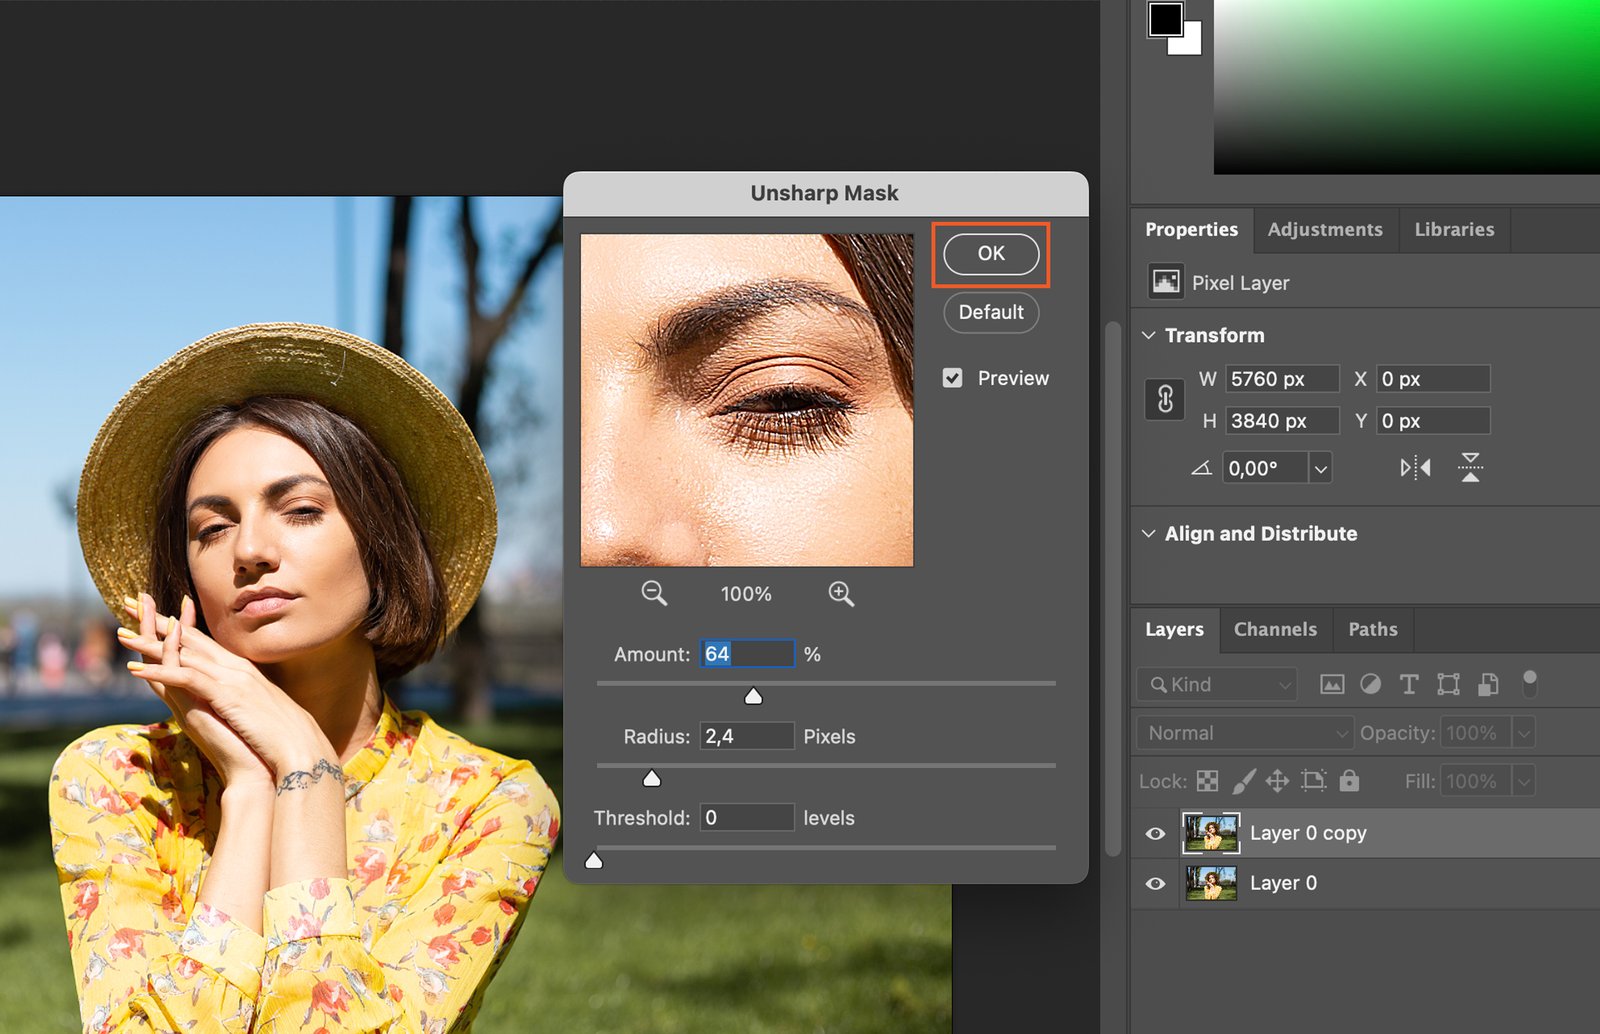
Step 5. Previewing the Changes
Always preview your changes before applying them. This way, you can make sure you’re happy with the result before committing to it.
Step 6. Applying the Sharpening Effect
Once you’re happy with your adjustments, apply the sharpening effect. You can do this by clicking ‘OK‘ in the sharpening tool dialog box.
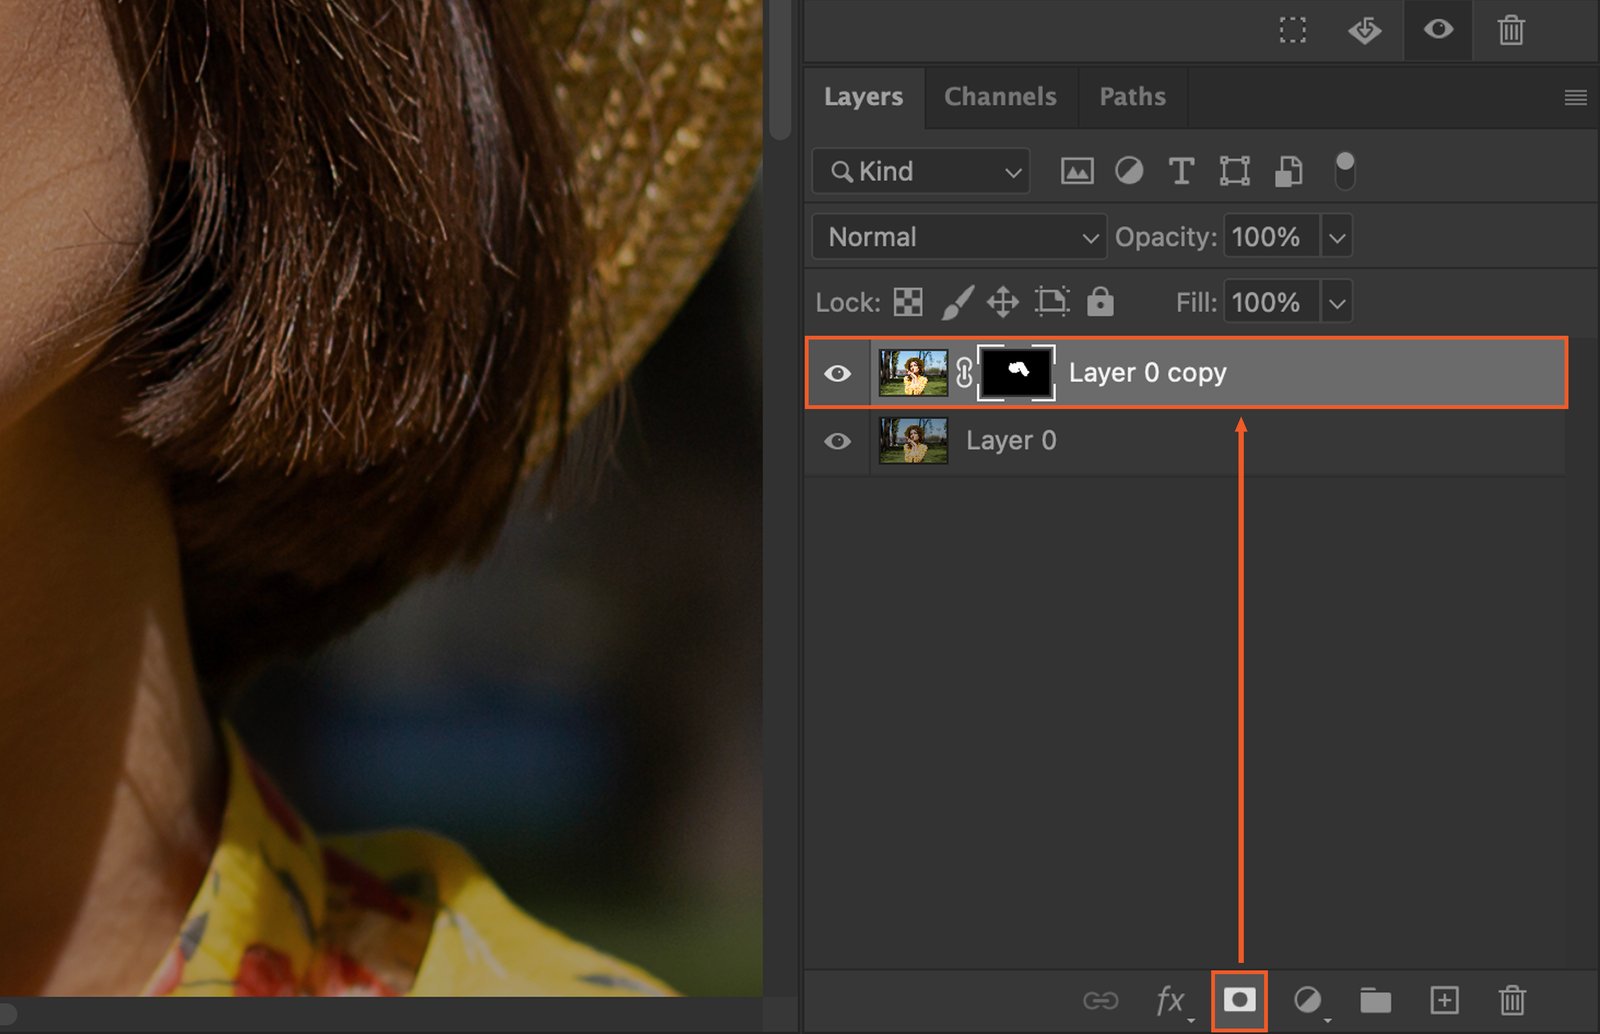
Step 7. Fine-Tuning with Layer Masks
For more control over the sharpening effect, use a layer mask. This allows you to apply the sharpening effect to specific parts of the image.
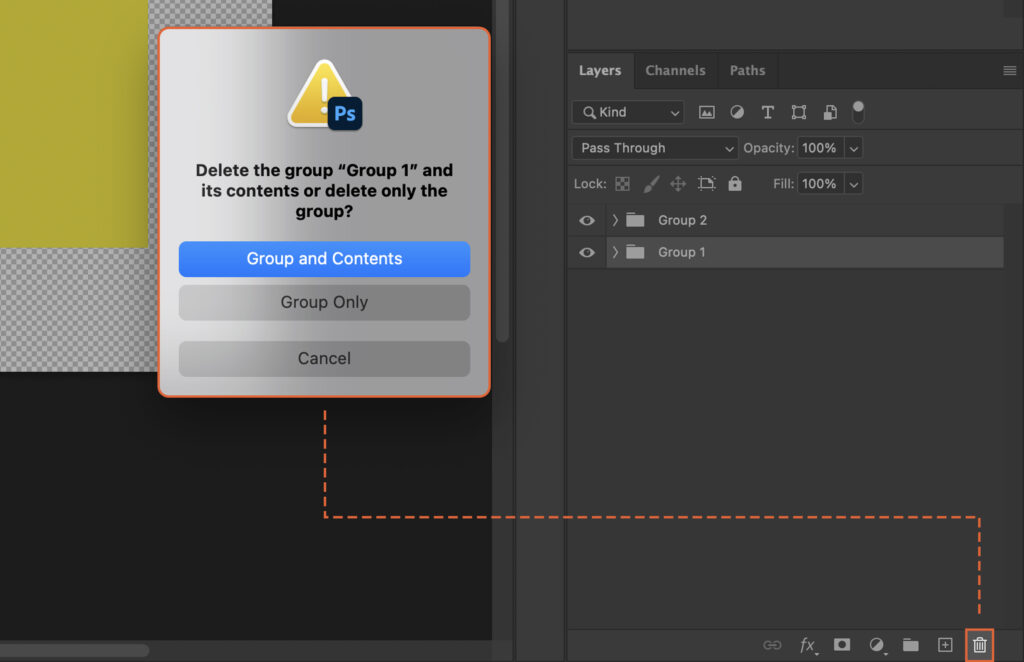
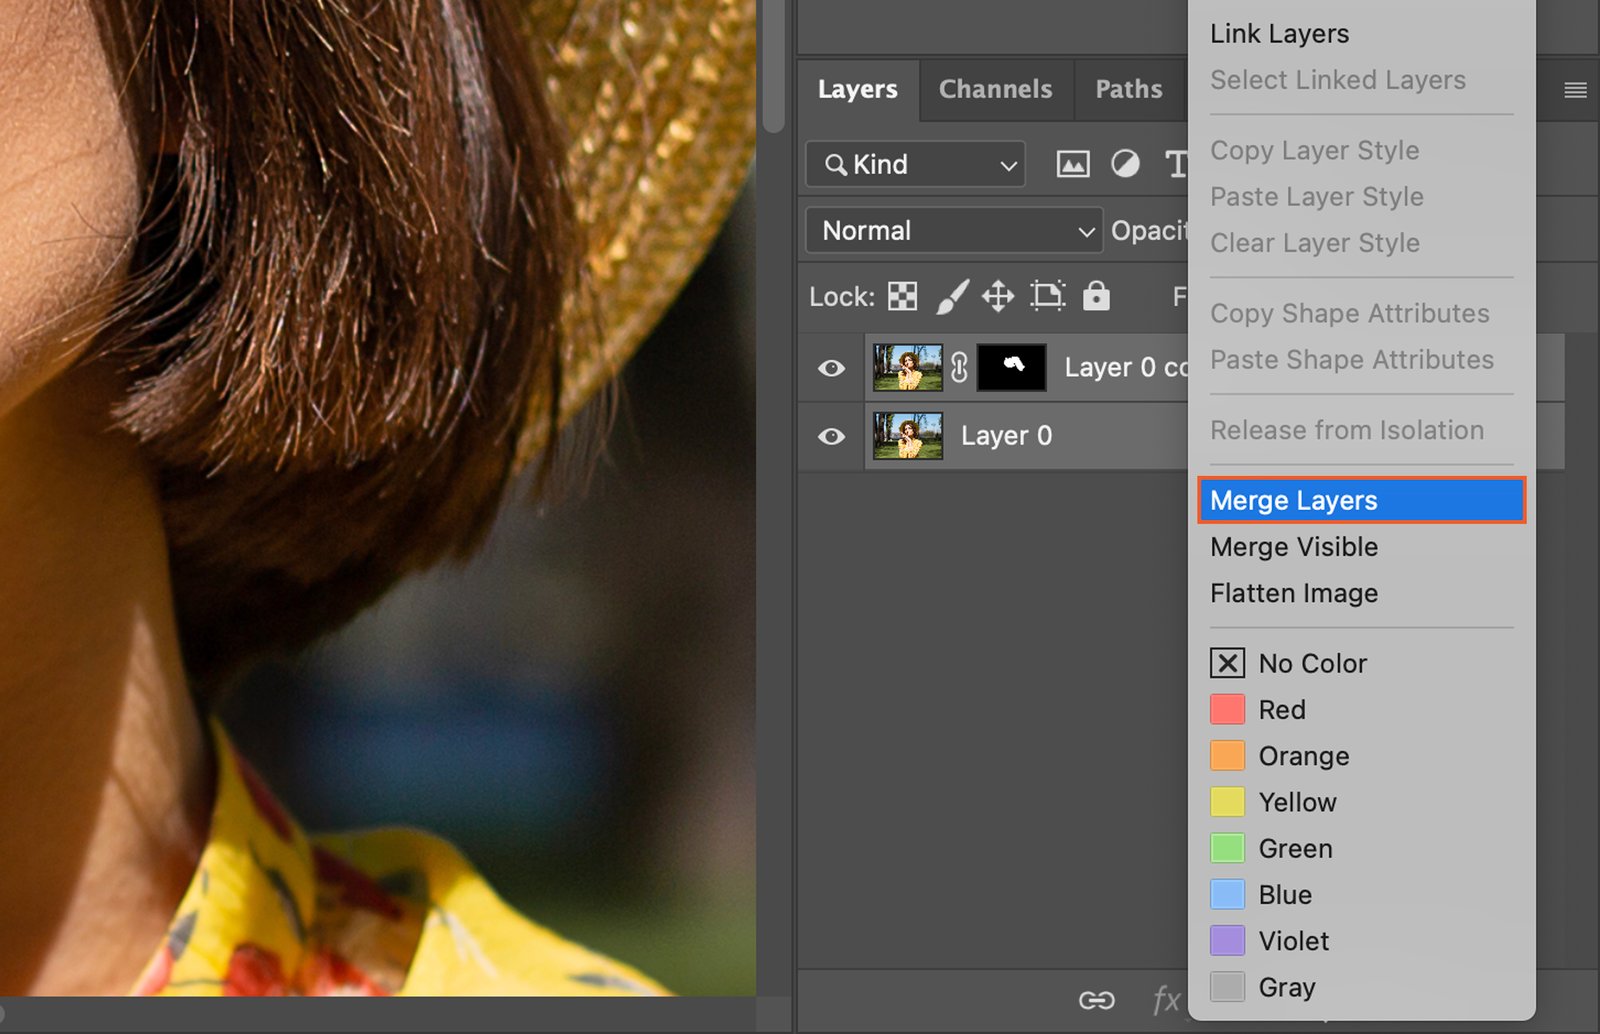
Step 8. Merging the Layers
Once you’re done sharpening, merge your layers. Right-click on the top layer in the ‘Layers’ panel and select ‘Merge Down‘.
Step 9. Adjusting Overall Image Quality
After sharpening, you may want to make some final adjustments to the image quality.
Step 9.1. Adjusting Brightness and Contrast
You can adjust the brightness and contrast of your image under ‘Image‘, then ‘Adjustments‘ or at the “Layer” panel. This can help to enhance the sharpening effect.

Step 9.2. Adjusting Saturation and Vibrance
To adjust the color intensity of your image, use the ‘Saturation‘ and ‘Vibrance‘ controls. They’re also under ‘Image‘, then ‘Adjustments‘.

Step 10. Exporting the Sharpened Image
Once you’re happy with your image, it’s time to save it.
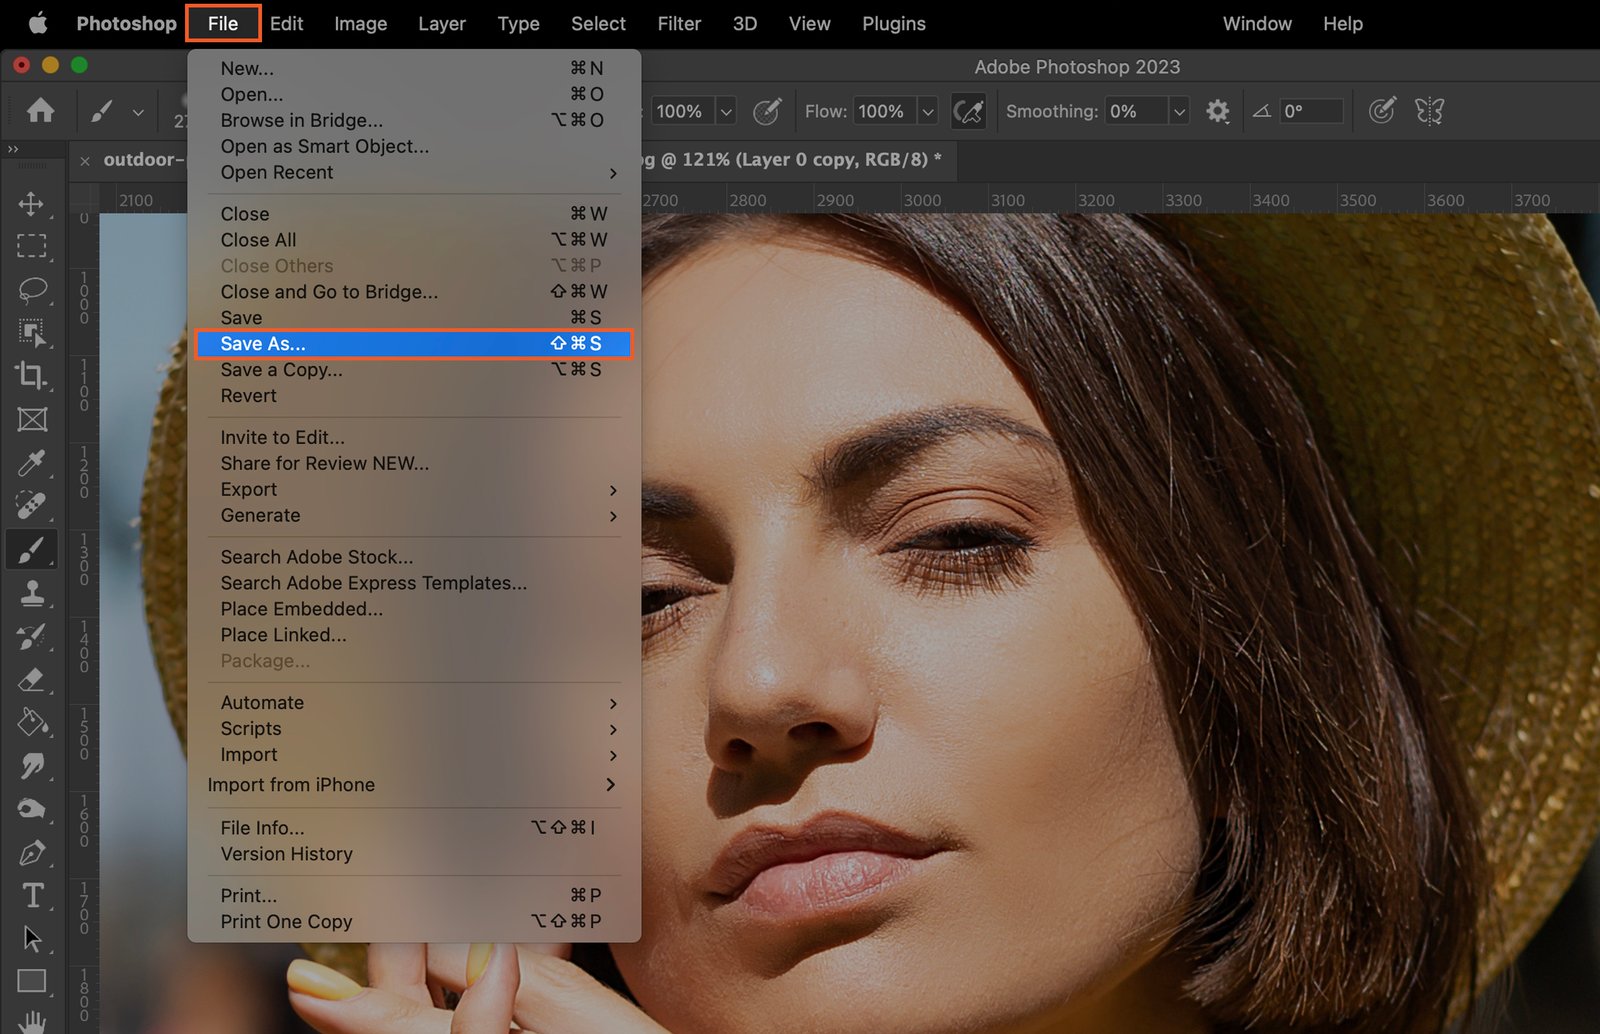
Step 10.1. Using ‘Save As’
Go to ‘File‘, then ‘Save As‘. Choose your desired format and location, then click ‘Save‘.
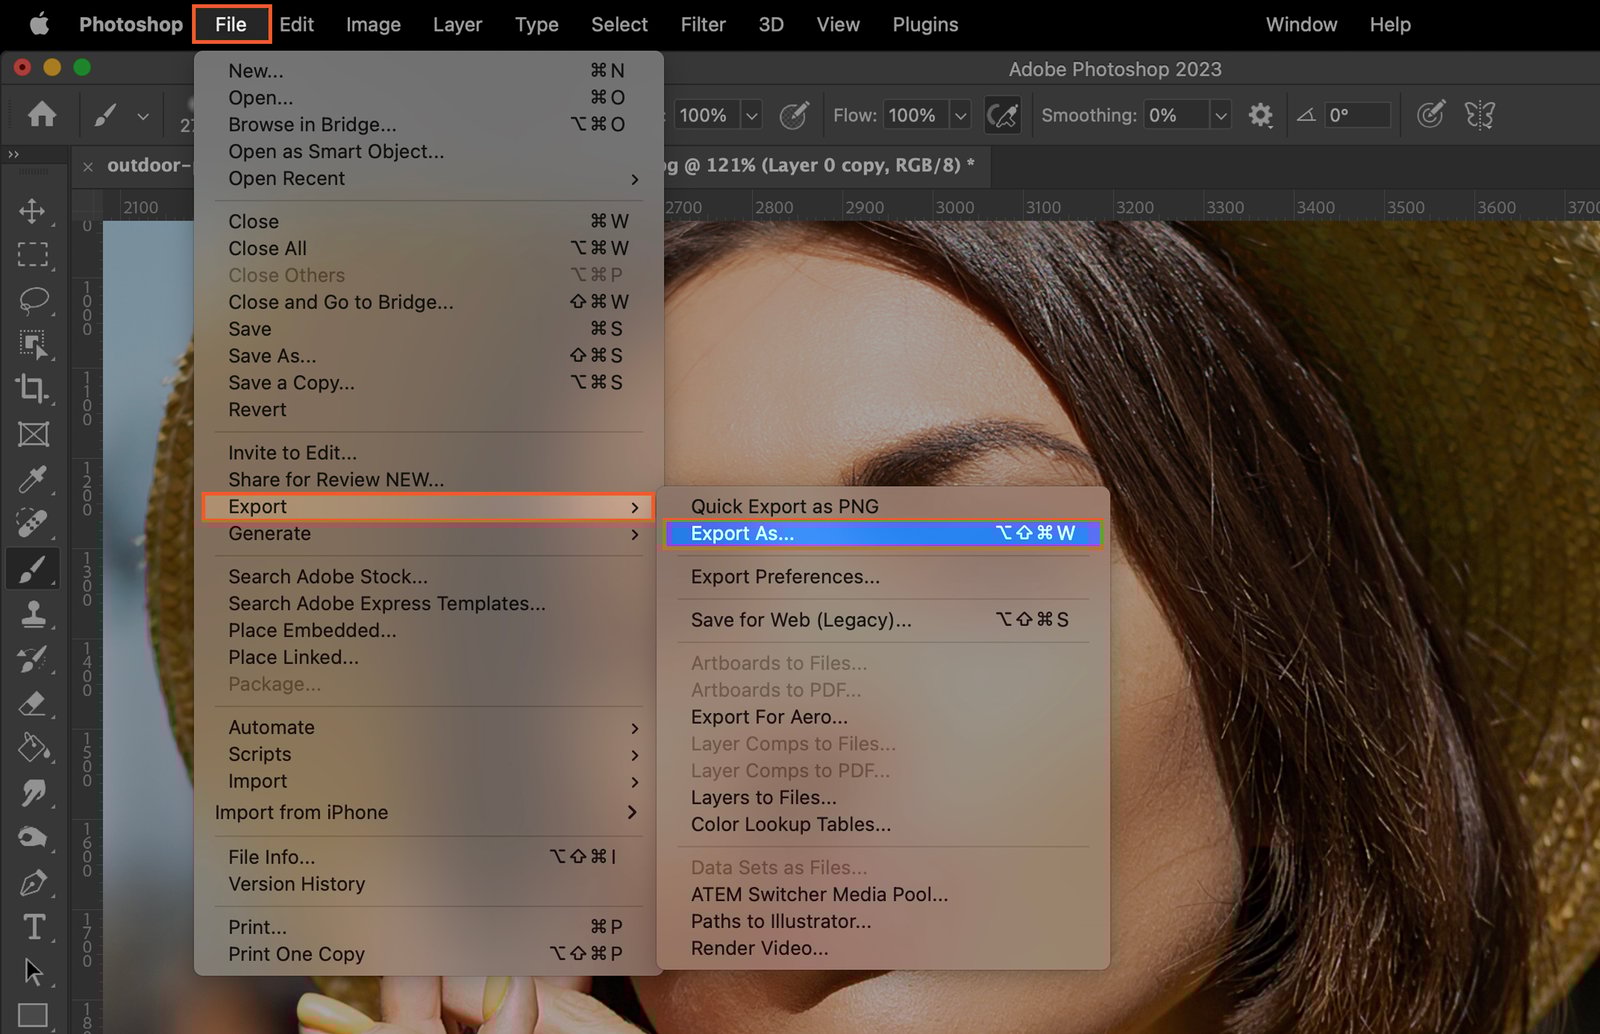
Step 10.2. Using ‘Export As’
Alternatively, you can use the ‘Export As‘ option under the ‘