Navigating the vast array of tools in Adobe Photoshop can be a daunting task for both novices and seasoned users alike. One of the most versatile and frequently used tools is the Quick Selection Tool. Mastering this tool can significantly enhance your photo editing efficiency, allowing for precise selections and seamless modifications. However, the functionality of the Quick Selection Tool is often underutilized due to a lack of understanding of its myriad options and applications. This article aims to demystify the Quick Selection Tool, offering a step-by-step guide on how to access, understand, and optimize its use to transform your Photoshop experience.


To start using the Quick Selection Tool, you’ll need to find it first. There are two easy ways to access this tool.
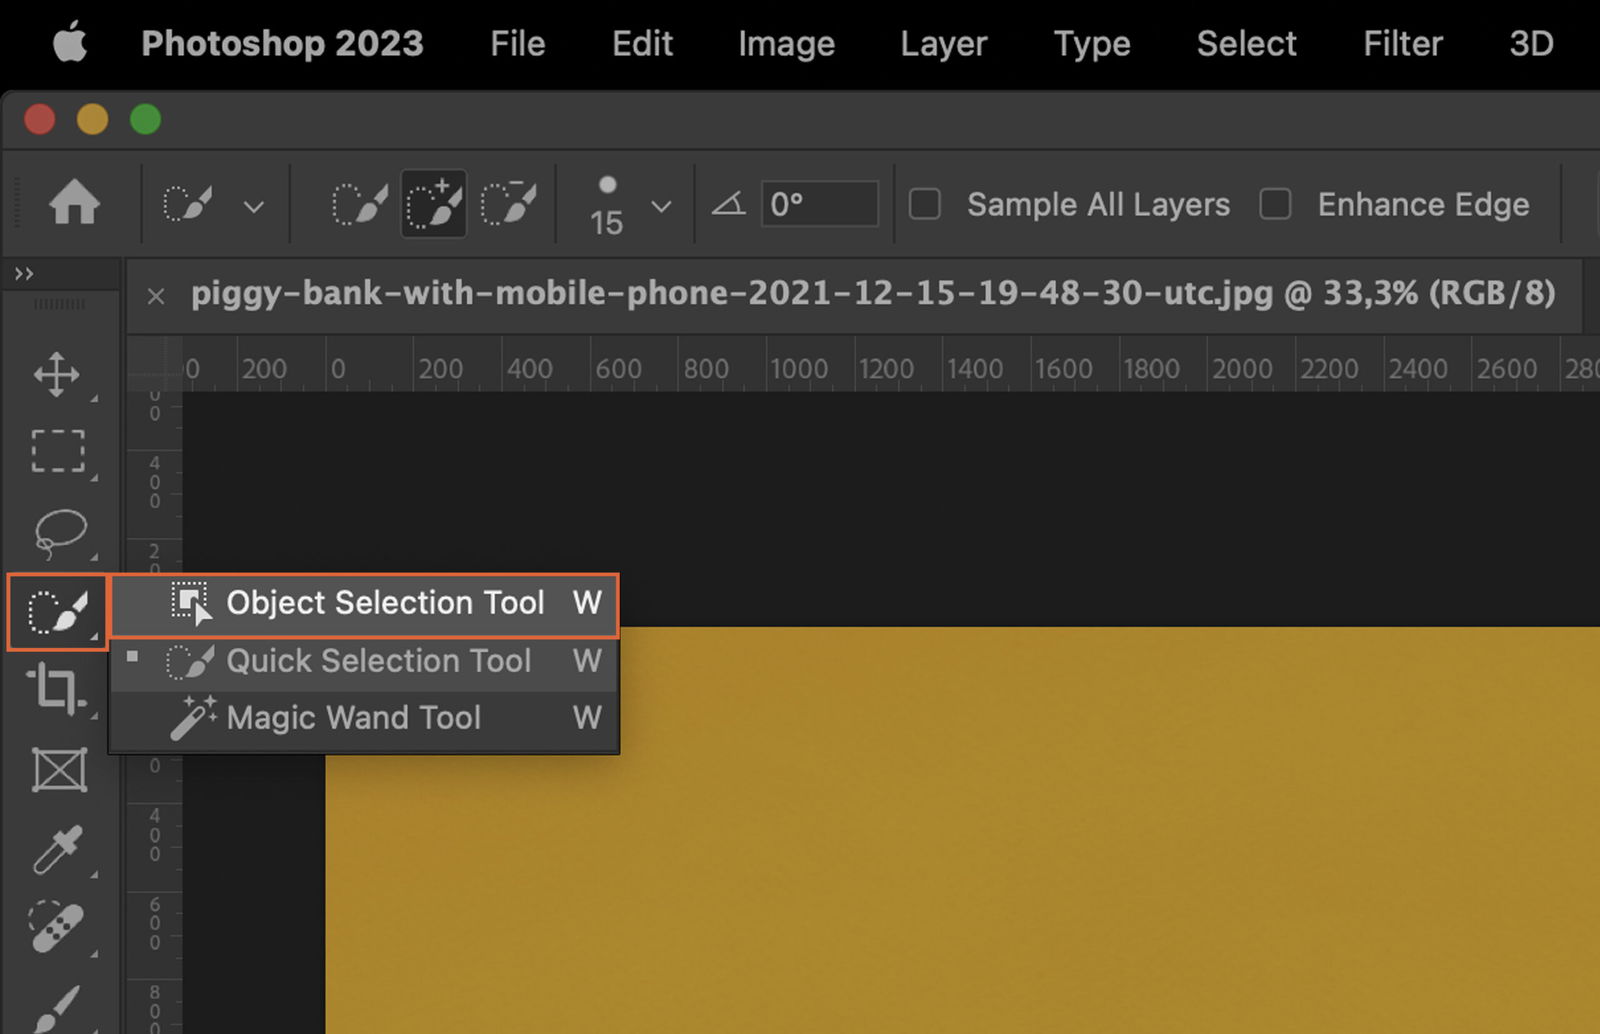
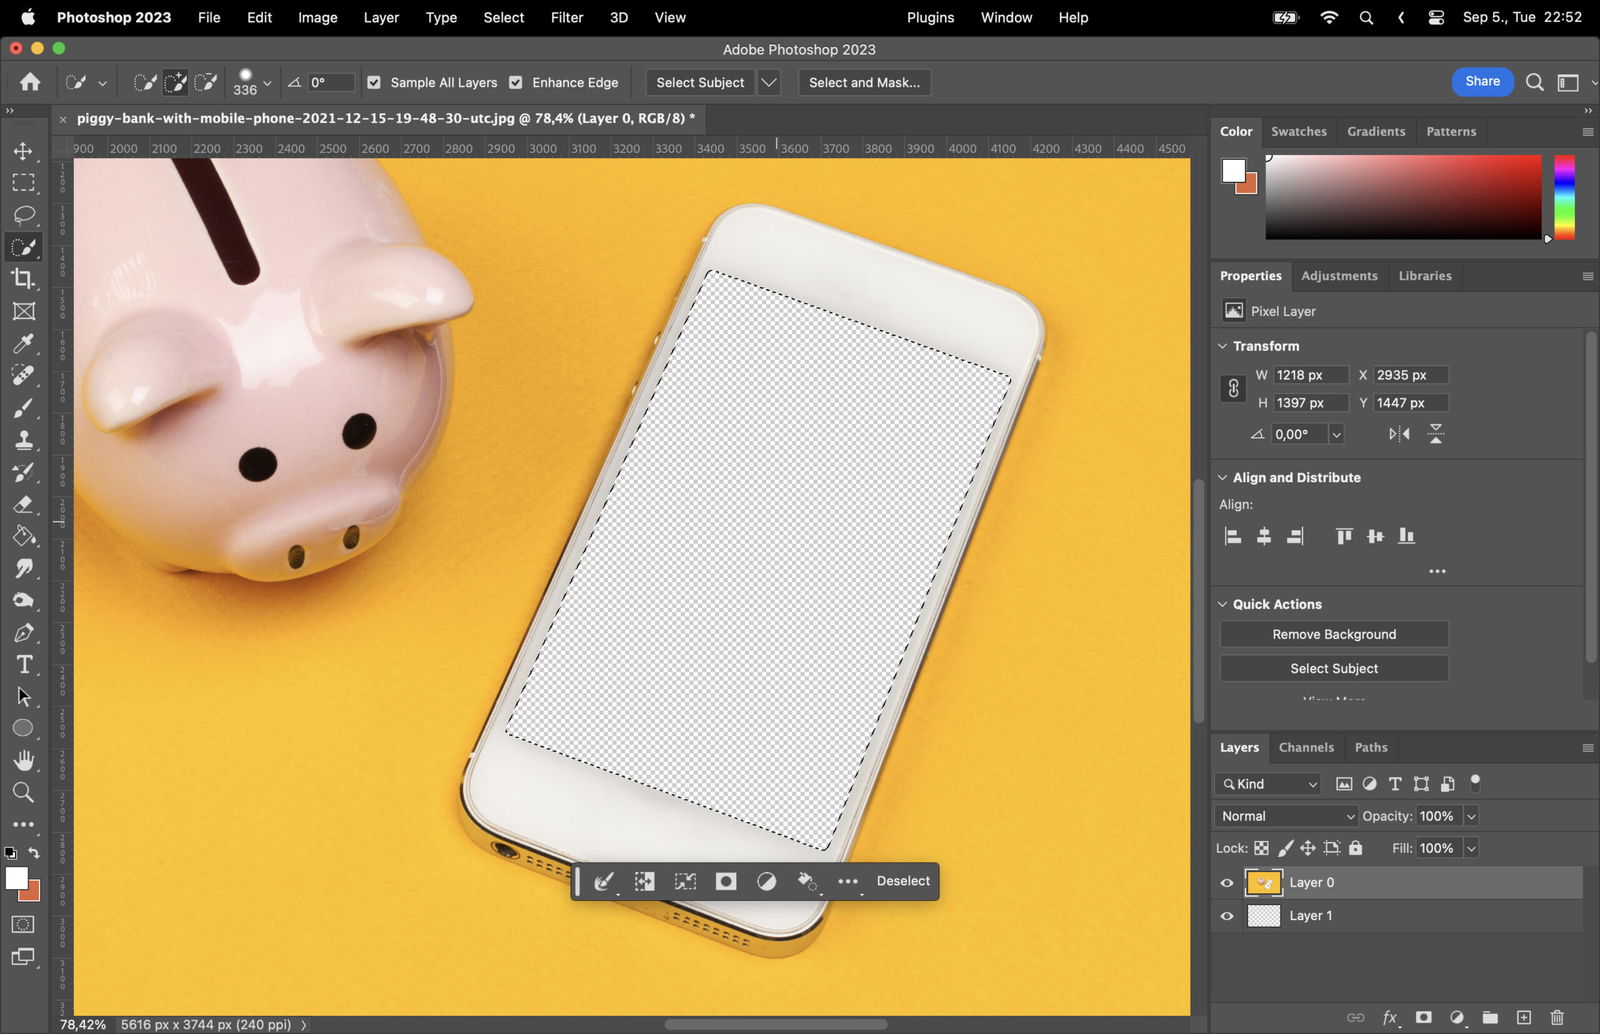
On the left of your Photoshop screen, you’ll find the toolbar. The Quick Selection Tool icon looks like a paintbrush with a dotted oval. If you can’t see it, look for the Magic Wand tool; it’s nested with that.
For a faster approach, use the shortcut key. Just press ‘W’ on your keyboard and you’re ready to go.
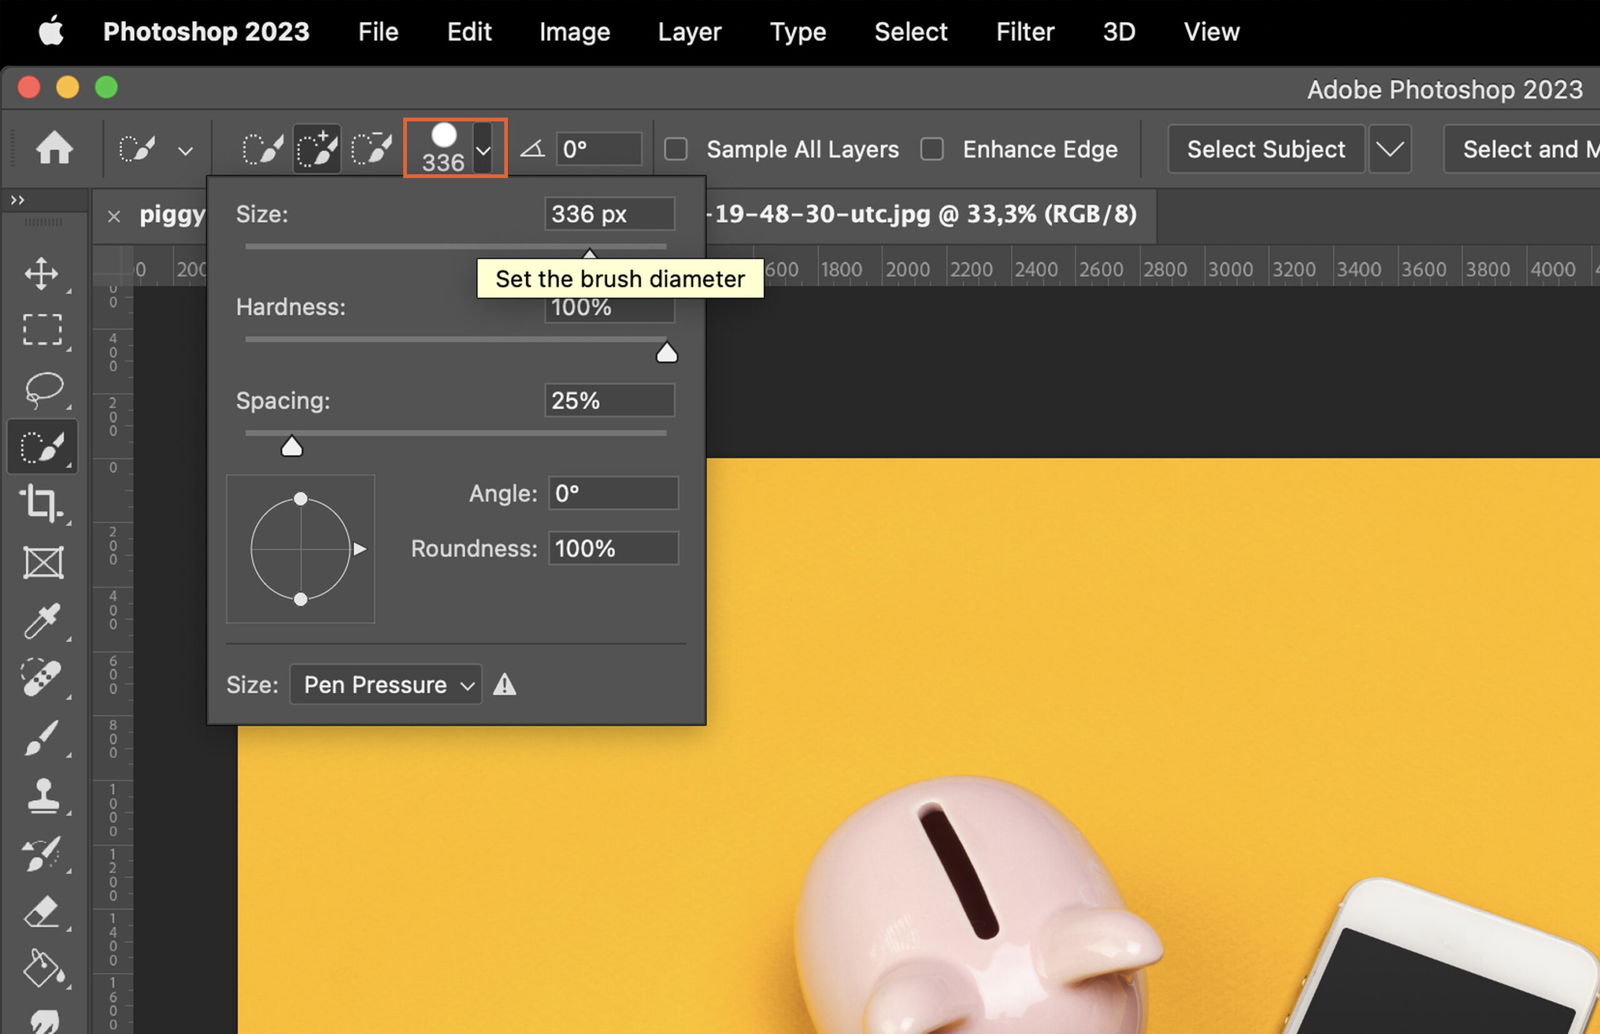
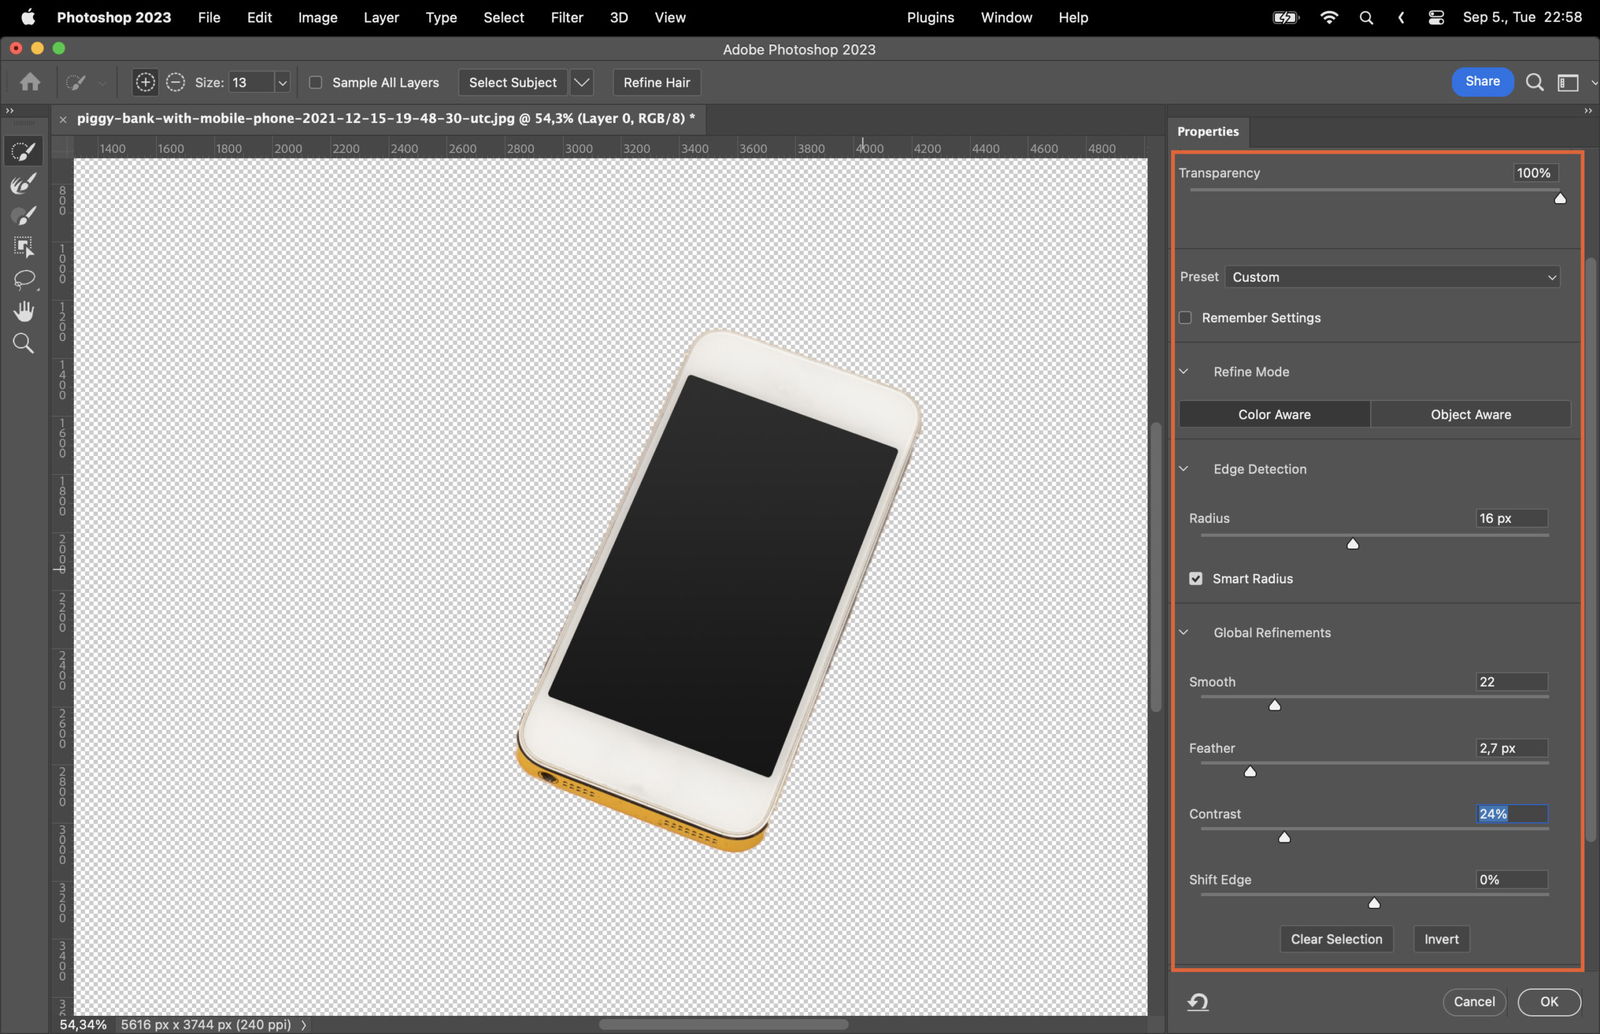
Like any tool in Photoshop, the Quick Selection Tool has several options that allow you to customize its functionality.
The Brush Size determines how large an area the tool selects. You can increase or decrease the brush size as per your need.
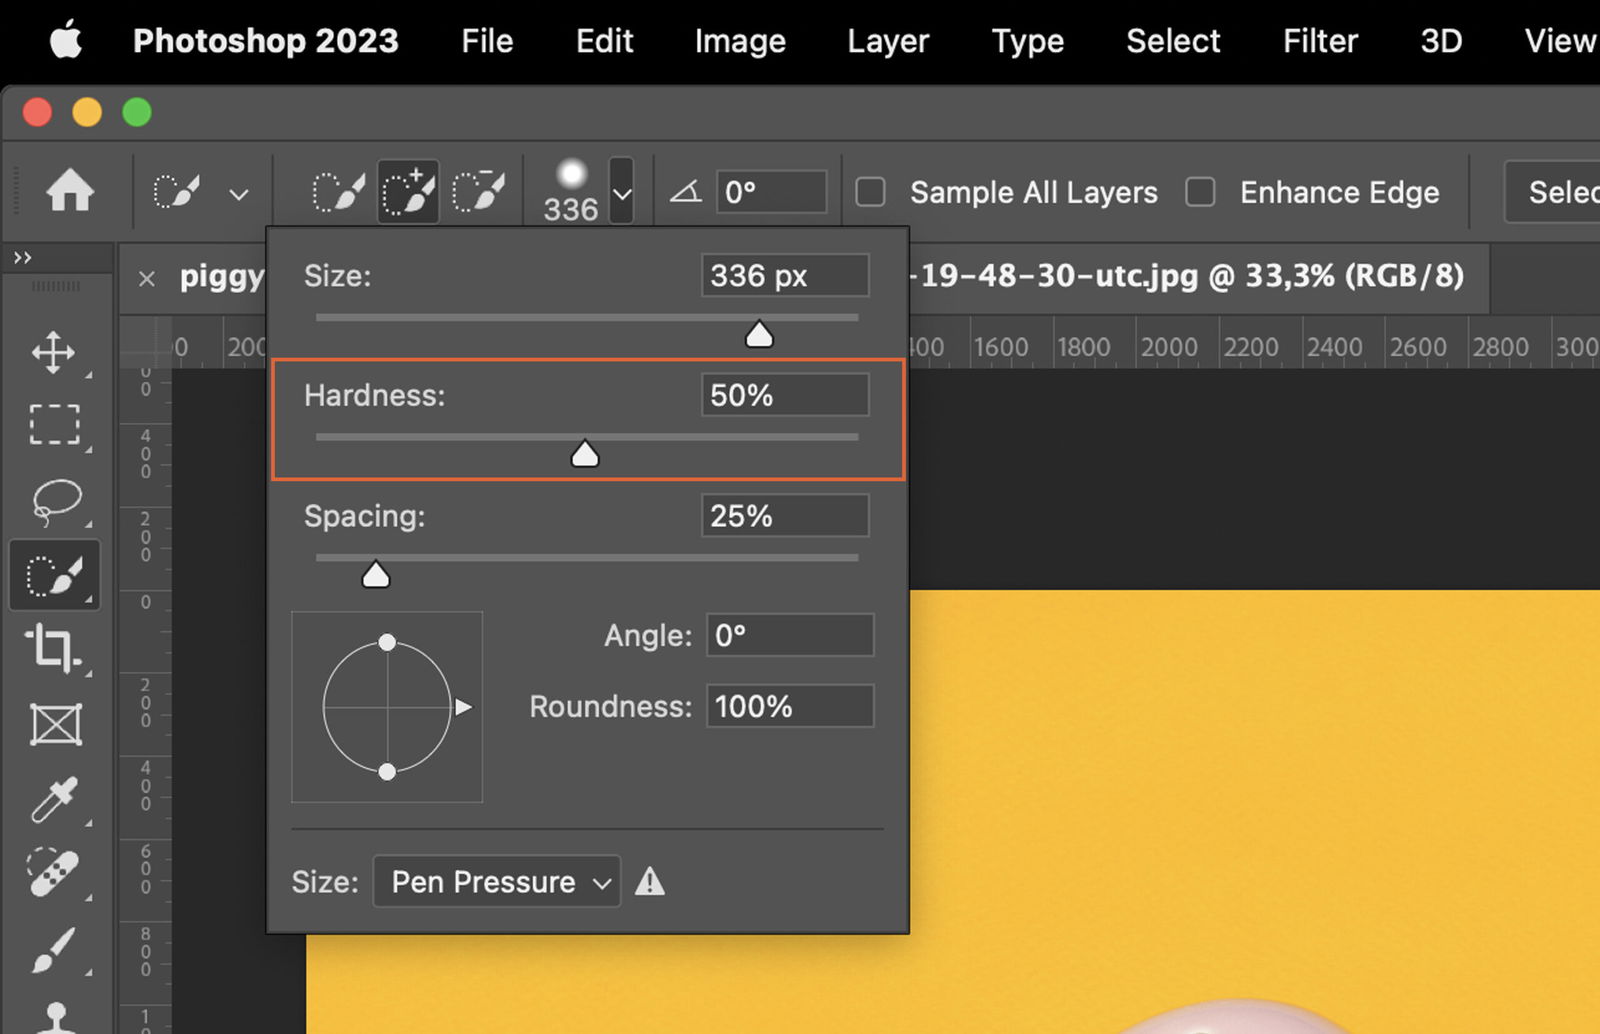
The Hardness option affects the edges of your selection. A higher value creates harder edges, while a lower value makes them softer.
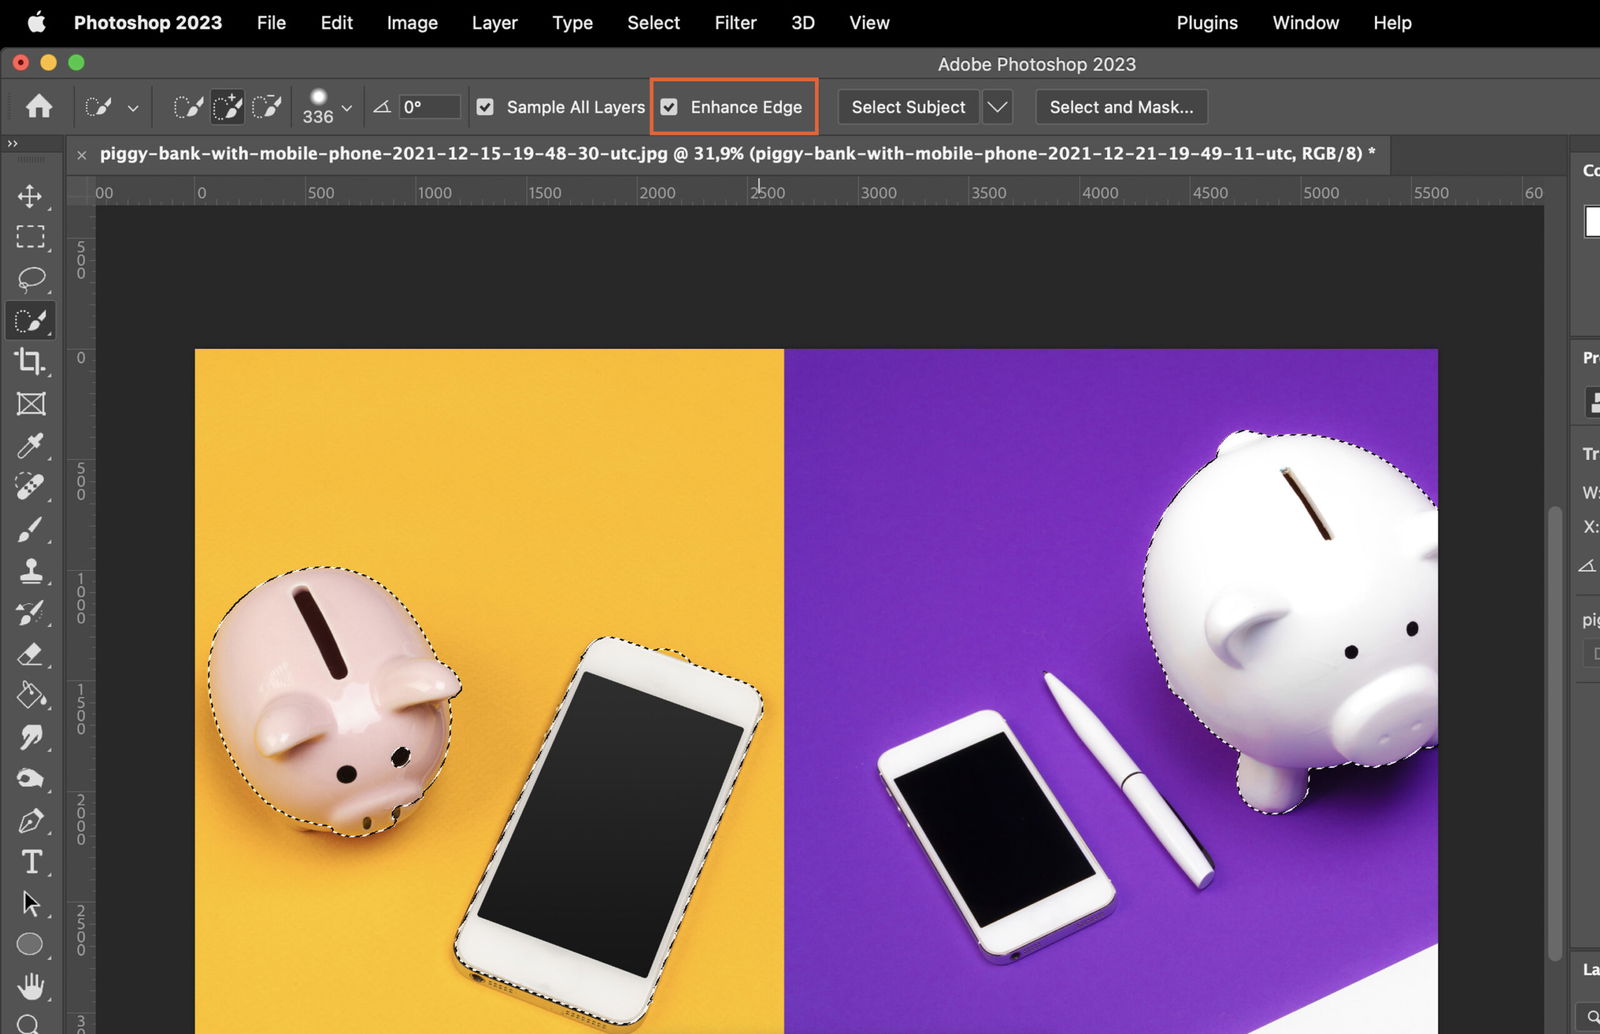
If you’re working with multiple layers and want the tool to consider all of them, use the ‘Sample All Layers’ option.

Tick the Enhance Edge box if you want Photoshop to automatically improve the accuracy of your selection.
To select an area, simply click and drag the tool over the area you want to select.
Sometimes, you might want to add more areas to your initial selection.
To do this, click on the ‘Add to Selection’ mode in the options bar, then click and drag over the additional area.
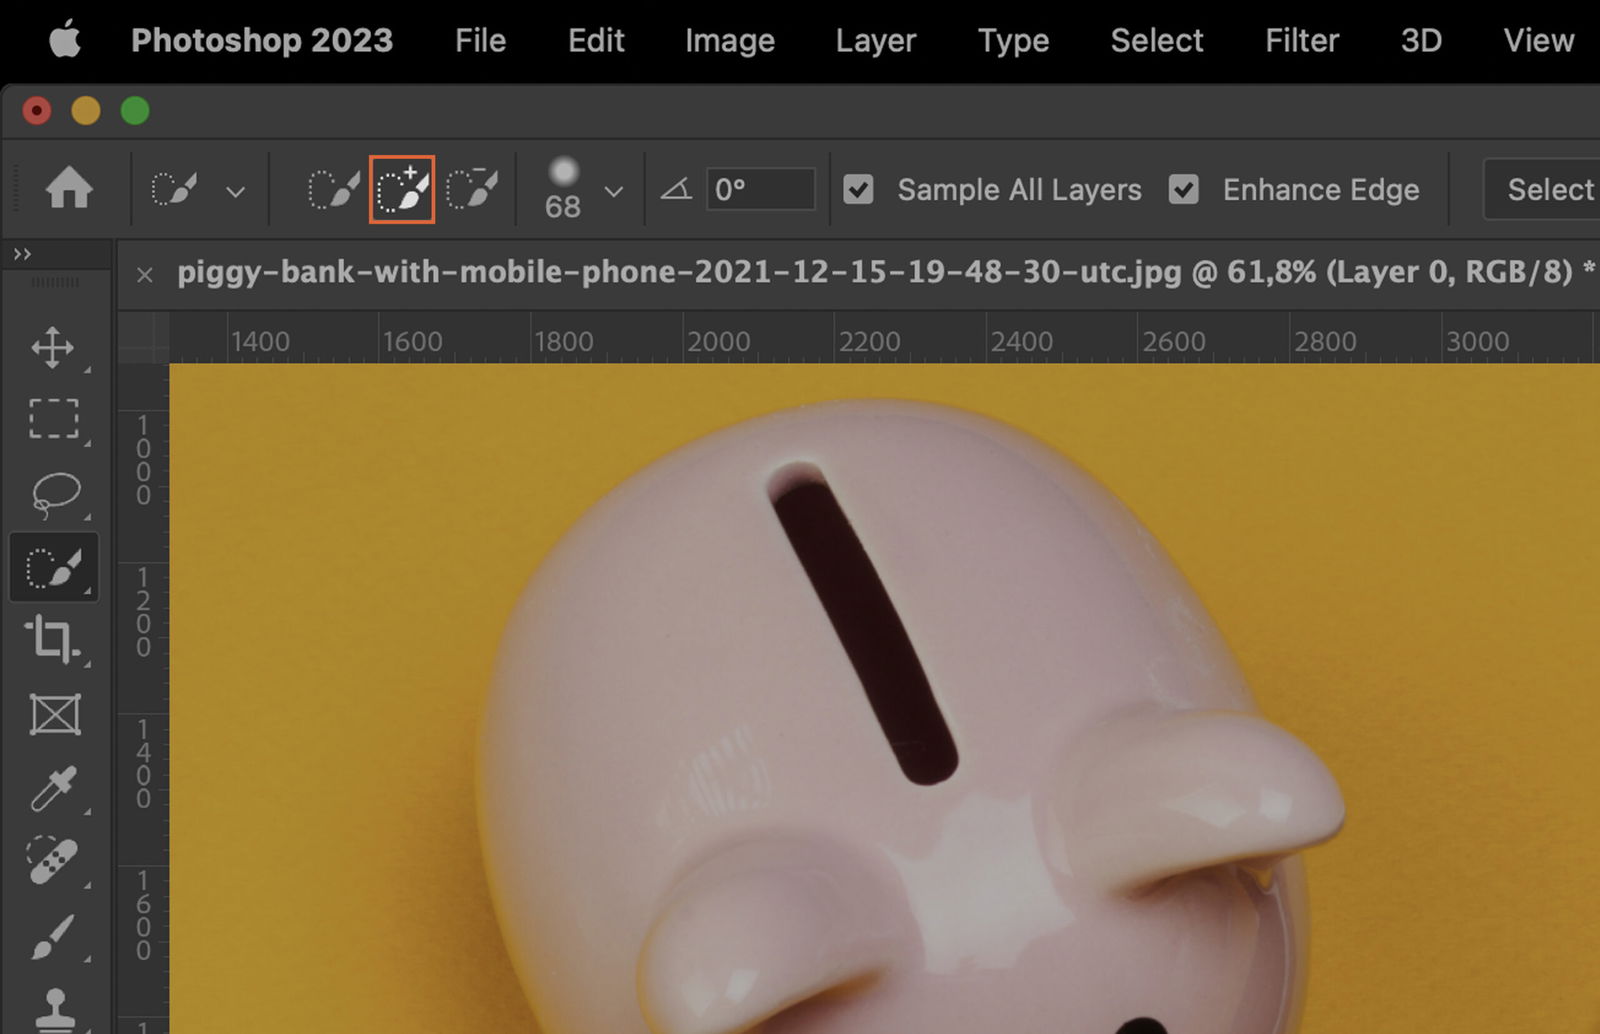
Alternatively, hold down the Shift key while dragging over the additional area.
If you’ve selected too much, you can easily remove areas from the selection.
Click on the ‘Subtract from Selection’ mode in the options bar, then drag over the area you want to remove.
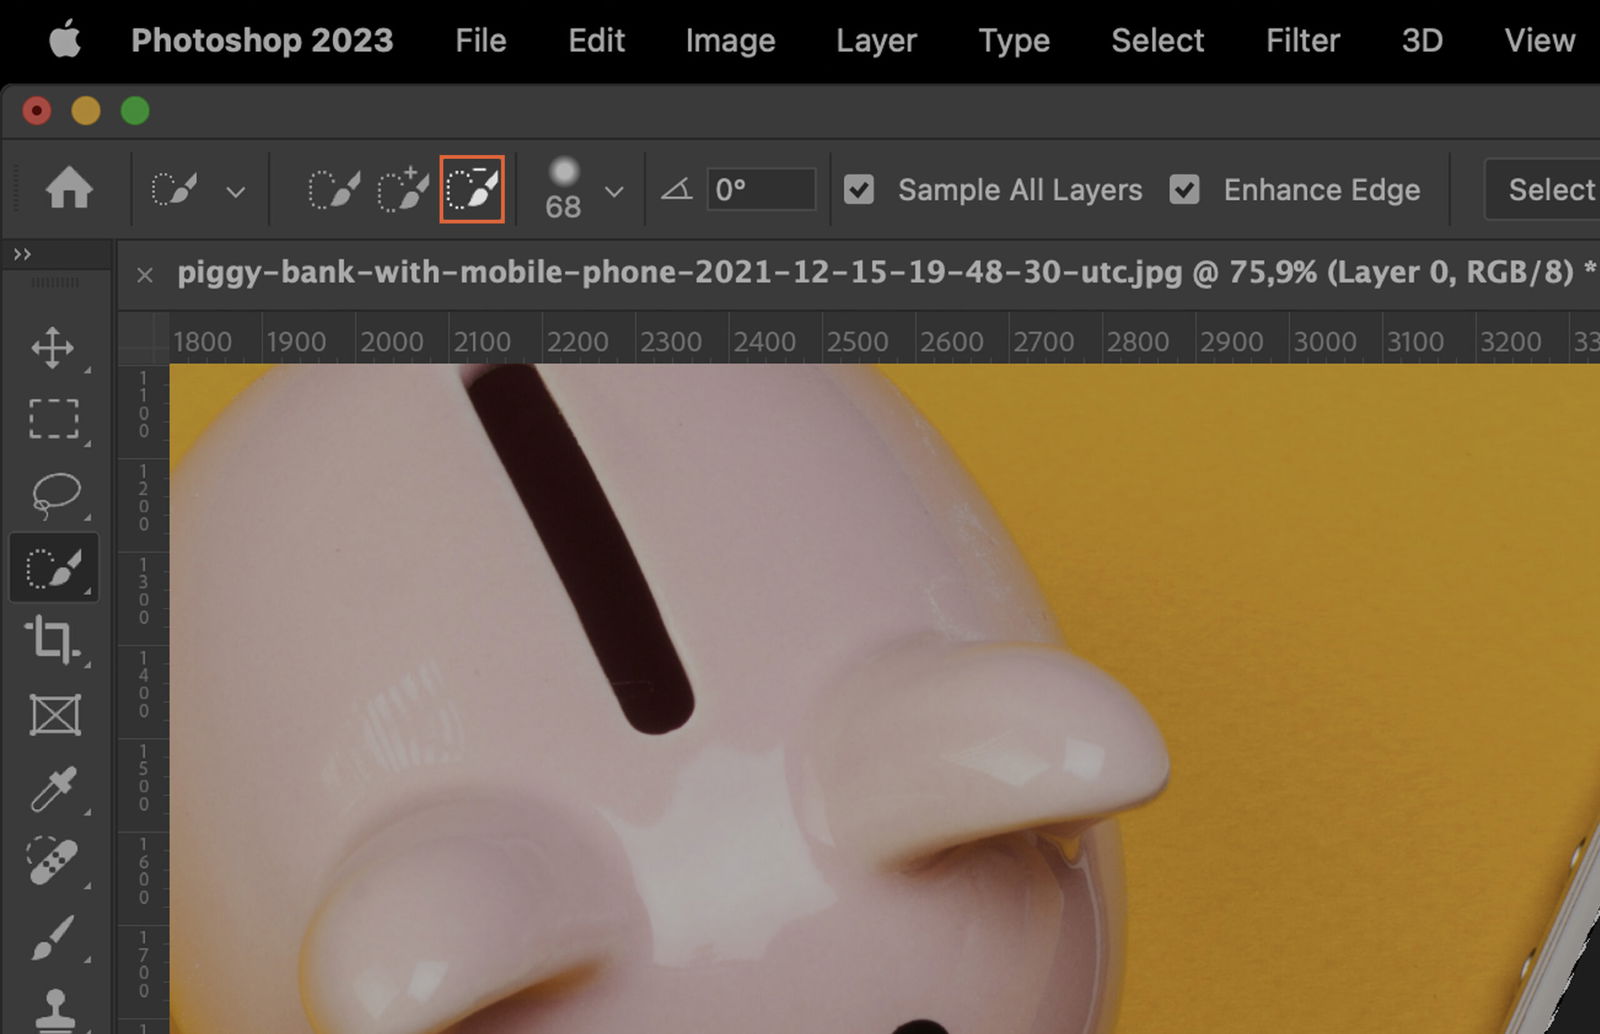
Or, hold down the Alt key (Option key on Mac) and drag over the area.
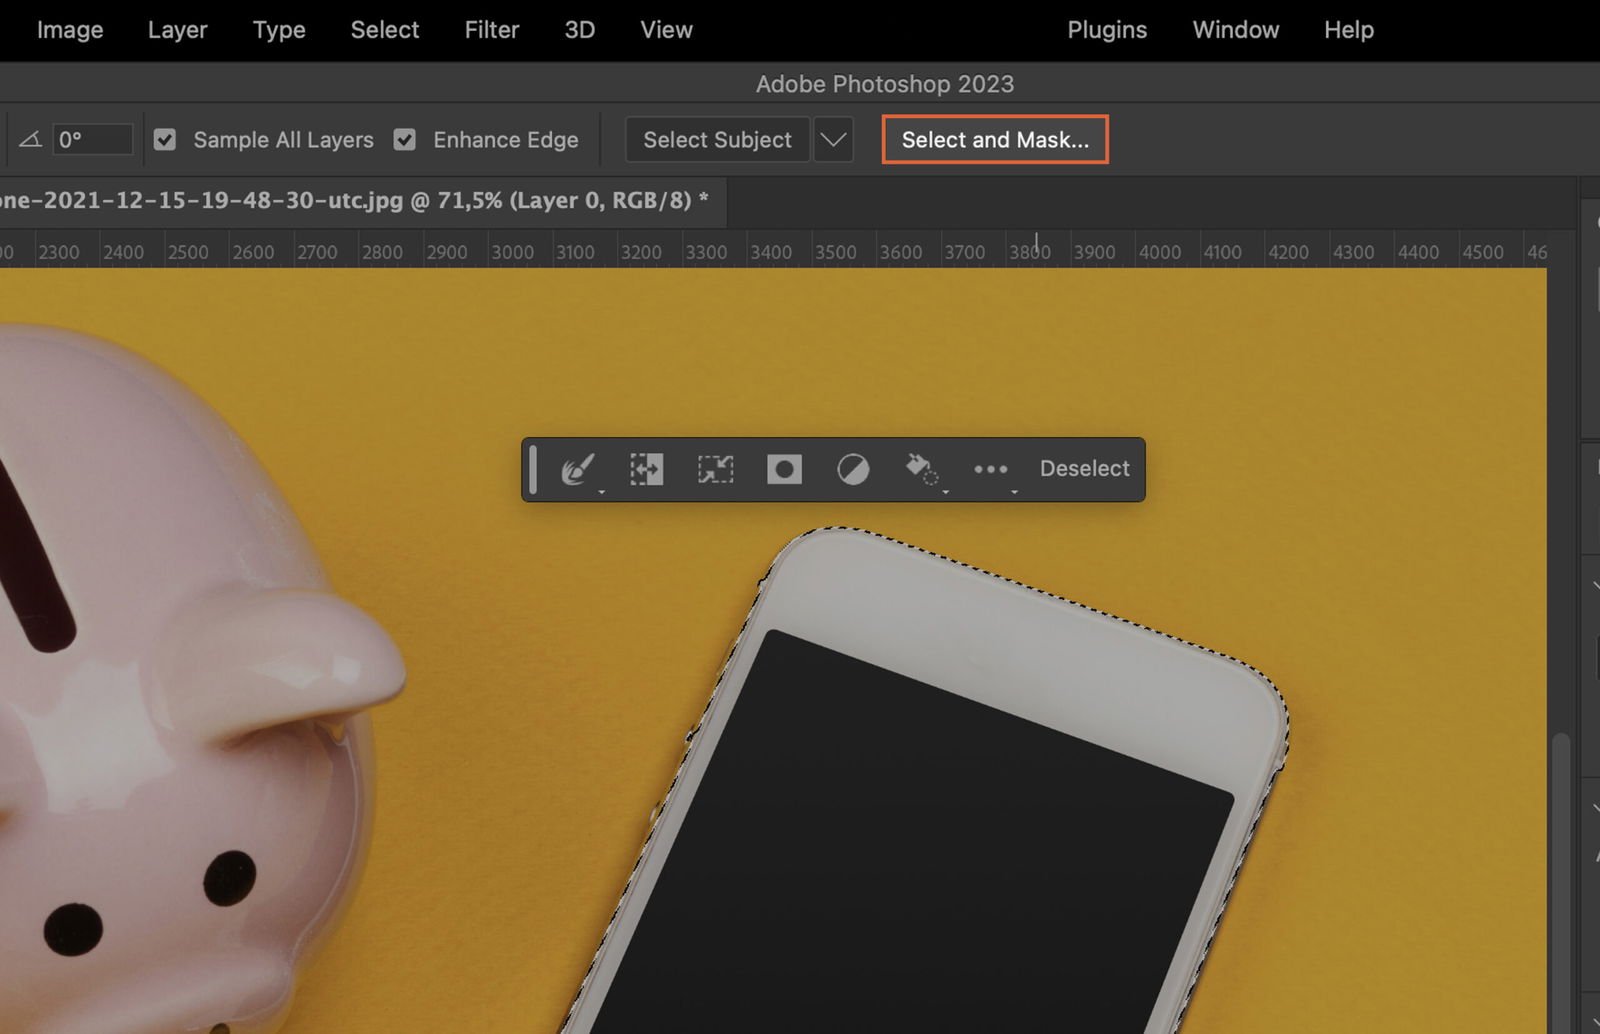
To make your selection look more natural, you might want to refine its edges.
The Select and Mask Tool helps you fine-tune the selection edges. Simply paint over the areas you want to refine.
These sliders give you more control over the edge appearance. Experiment with them to achieve the desired look.
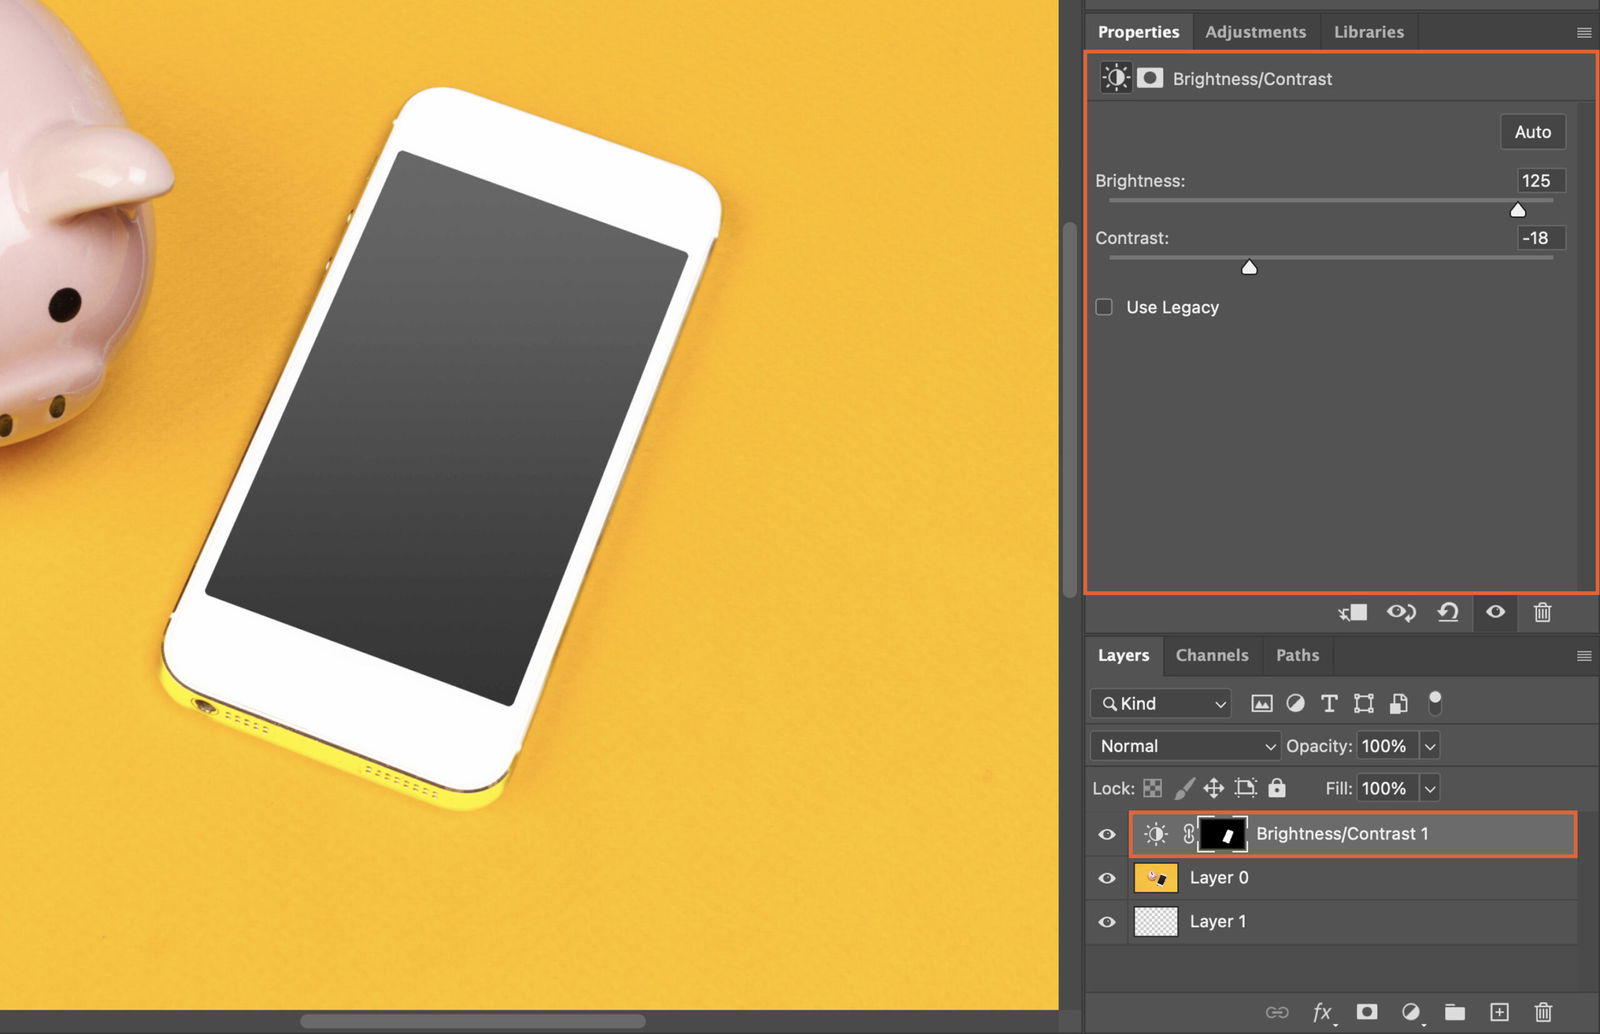
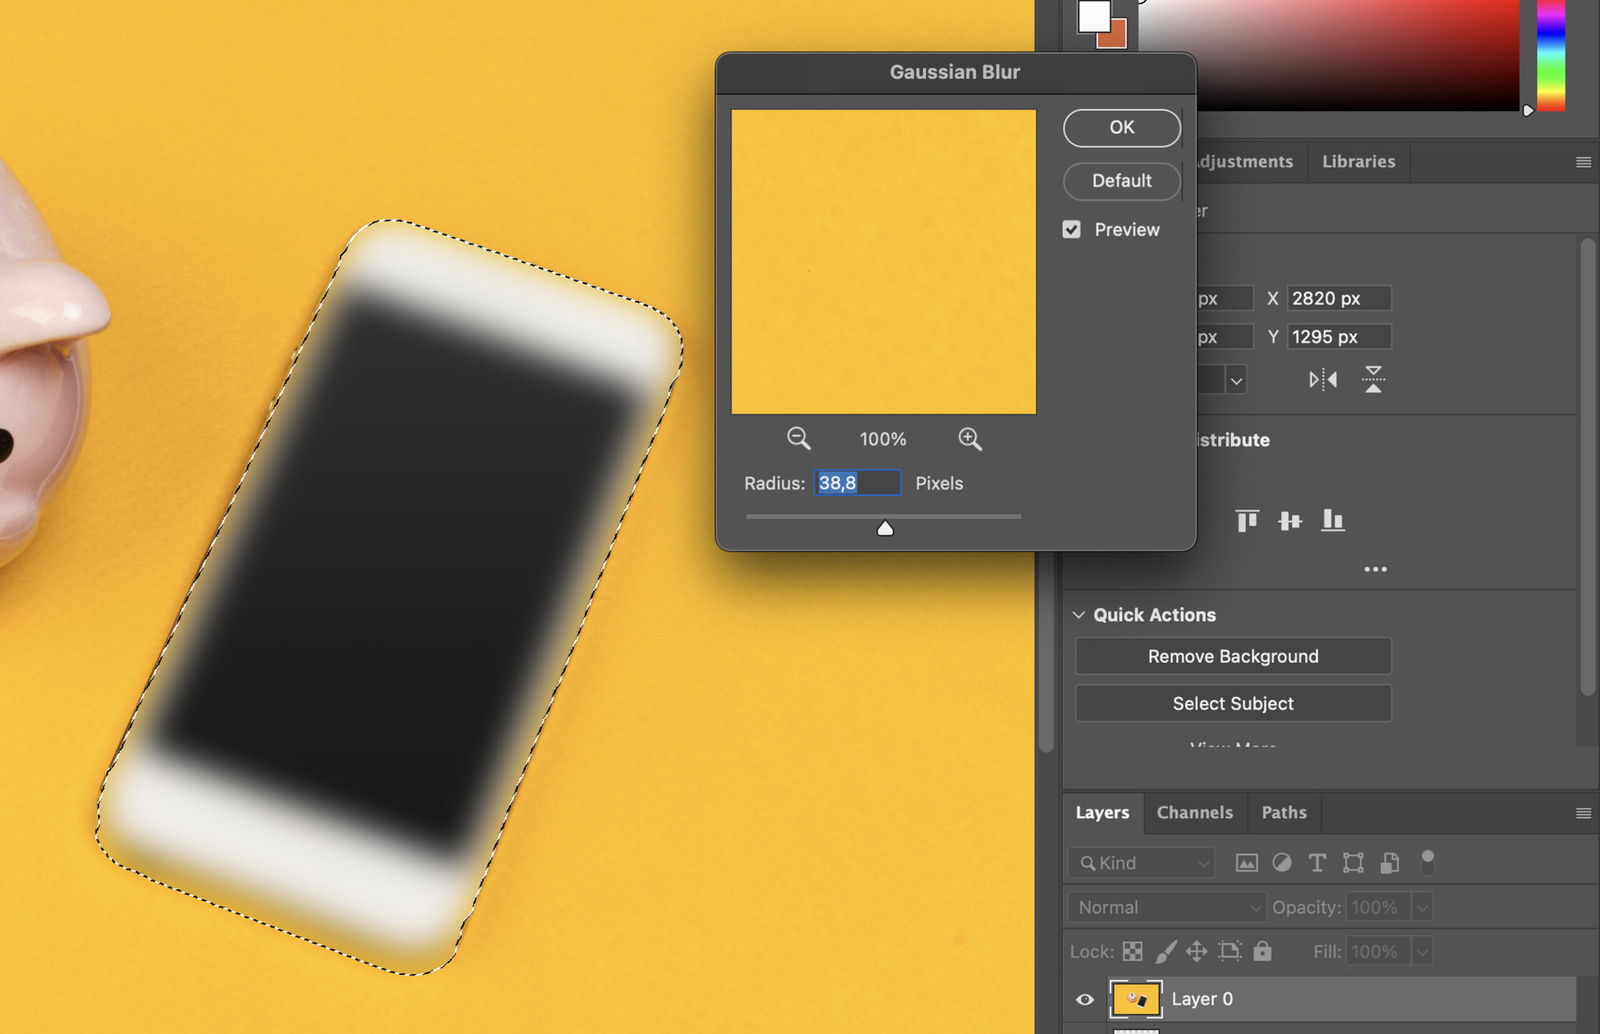
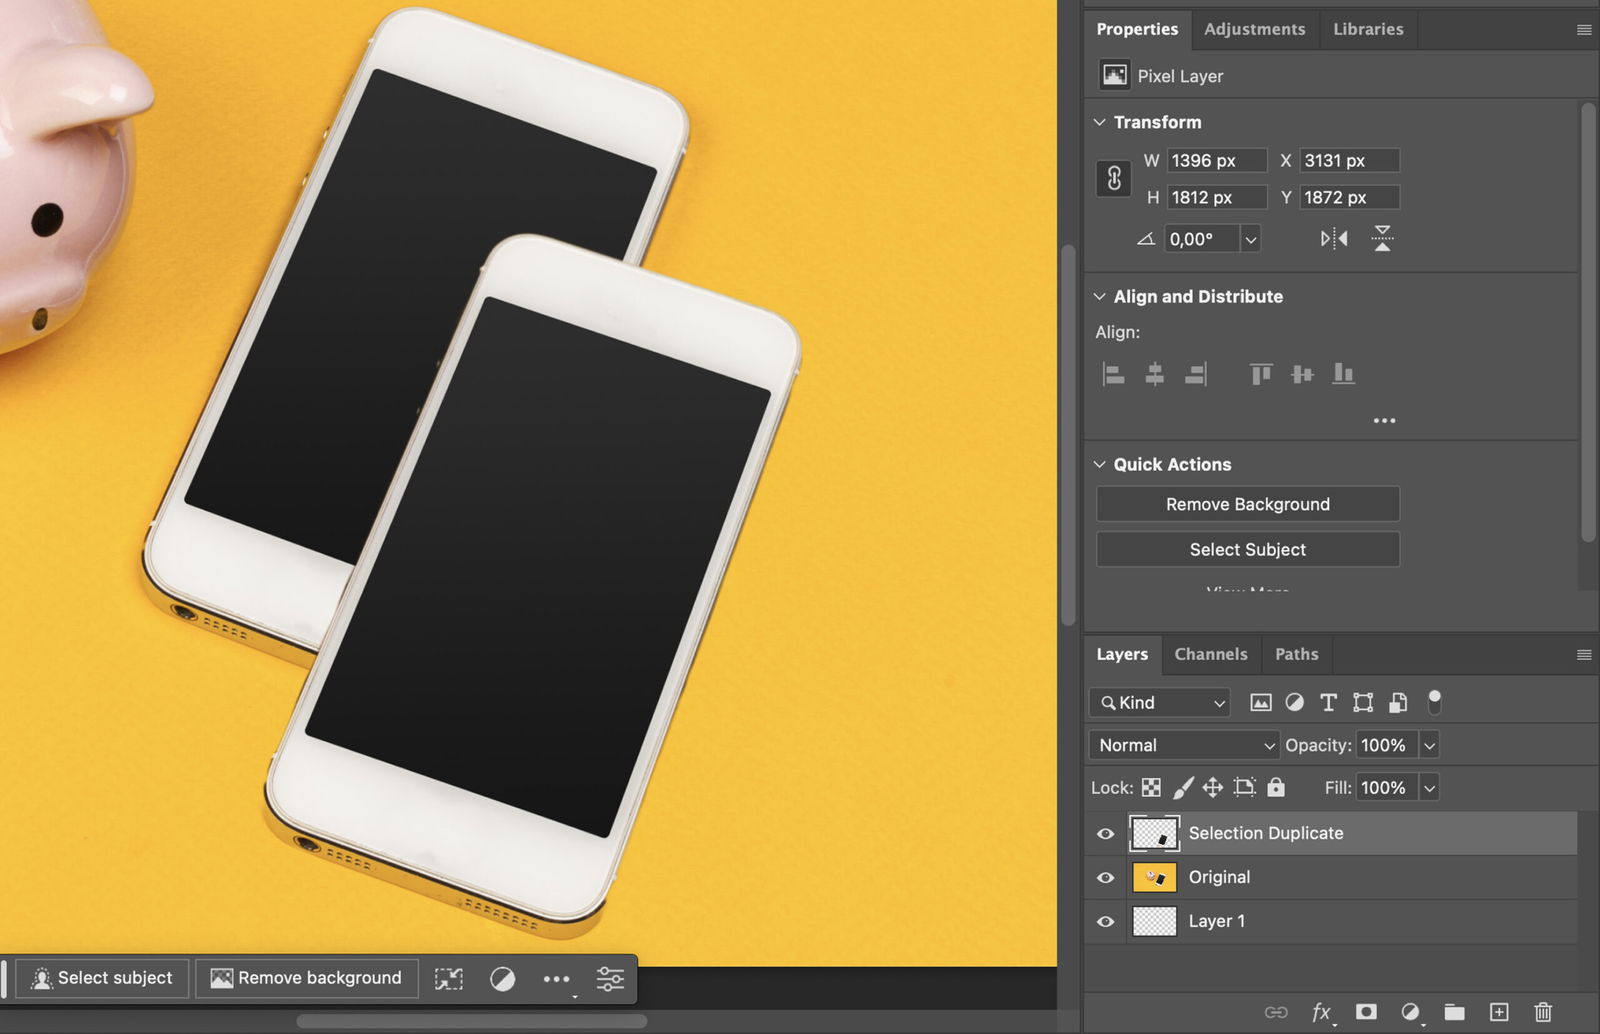
Once you’re happy with your selection, you can apply various adjustments and effects.
With your selection active, you can adjust brightness, contrast, color balance, and more.
You can also apply filters like blur, sharpen, distort, and more to your selection.
If you want to duplicate the selection, simply copy and paste it.
Finally, when you’re done, deselect the selection by clicking anywhere outside it or pressing Ctrl+D (Command+D on Mac).

![P32 [Lead gen] sidebar banner Related ebook](https://expertphotography.b-cdn.net/wp-content/uploads/2021/10/P32-Lead-gen-sidebar-banner-Related-ebook-300x295.jpg)
![P32 [Lead gen] Sidebar Banner](https://expertphotography.b-cdn.net/wp-content/uploads/2021/10/P32-Lead-gen-Sidebar-Banner-300x245.png)
![P32 [Lead gen] Sidebar Banner 2](https://expertphotography.b-cdn.net/wp-content/uploads/2021/10/P32-Lead-gen-Sidebar-Banner-2-300x245.png)