Today, we are looking at how to create an HDR in Lightroom. This is a photographic technique that involves merging two or more images together to create an even exposure. It is a unique feature of digital photography and can ensure great exposure even in the worst conditions.
Adobe Lightroom is a digital editing software that provides a brilliant process for creating HDRs. Below, we will guide you through everything you need to know when creating a Lightroom HDR. This will cover every customization option, covering both Lightroom versions.
HDR stands for High Dynamic Range. It is a technique that merges several photographs together and takes the best exposure from each area. This produces a photograph with well-exposed shadows and highlights.
To create this technique, you must first take several photographs of the same scene. For the best results, these photographs must be taken on a tripod. Then, you will have to bracket your photographs, changing the exposure settings to account for the different areas of your composition.
It is best to bracket your photos by changing the shutter speed. If you are on a tripod, a slow shutter speed will not cause motion blur. However, if you change your aperture, you risk some areas having a softer focus if you use a wide aperture.
HDRs are unique to digital photography because we use digital editing software to blend the images together.
HDRs are useful for many photography genres but are most commonly used in landscapes or cityscapes.
Adobe Lightroom now comes in two different versions: Lightroom and Lightroom Classic. Both versions have many of the same functions; what differs are the approaches to editing processes.
Lightroom favors a post-processing workflow that utilizes the cloud. This allows you to work from the same set of images on any device you want. This version also prioritizes simplicity and ease of use through a stripped-back interface. This may be easier for beginners to work through.
Lightroom Classic has an interface with which any photographer who has used the past versions of Lightroom would be familiar. It provides a wide range of features, some of which you may never need to use. You will find more in-depth controls and attention to detail in Lightroom Classic.
Both Lightroom versions produce the same results as the algorithms for adjustments are the same. They both allow you to perform photo merging. So, it will come down to personal preference or whether you need to use a very specific process. This article will outline differences in the processes we touch on in either Lightroom version.
We will now guide you through all the steps and customization options when creating a Lightroom HDR. All these actions can take place in the Lightroom version you prefer.
You will need two or more images of the same scene taken with different exposures.
First, you will need to import your bracketed photographs.
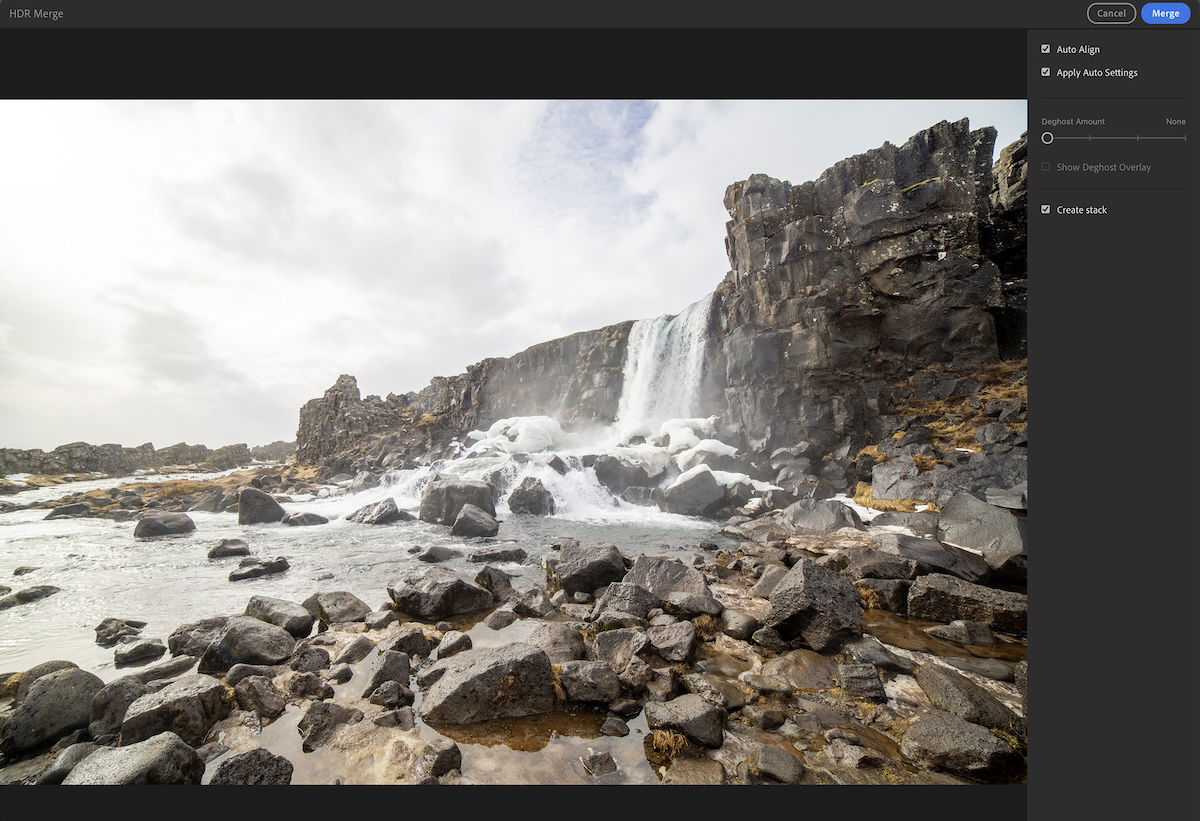
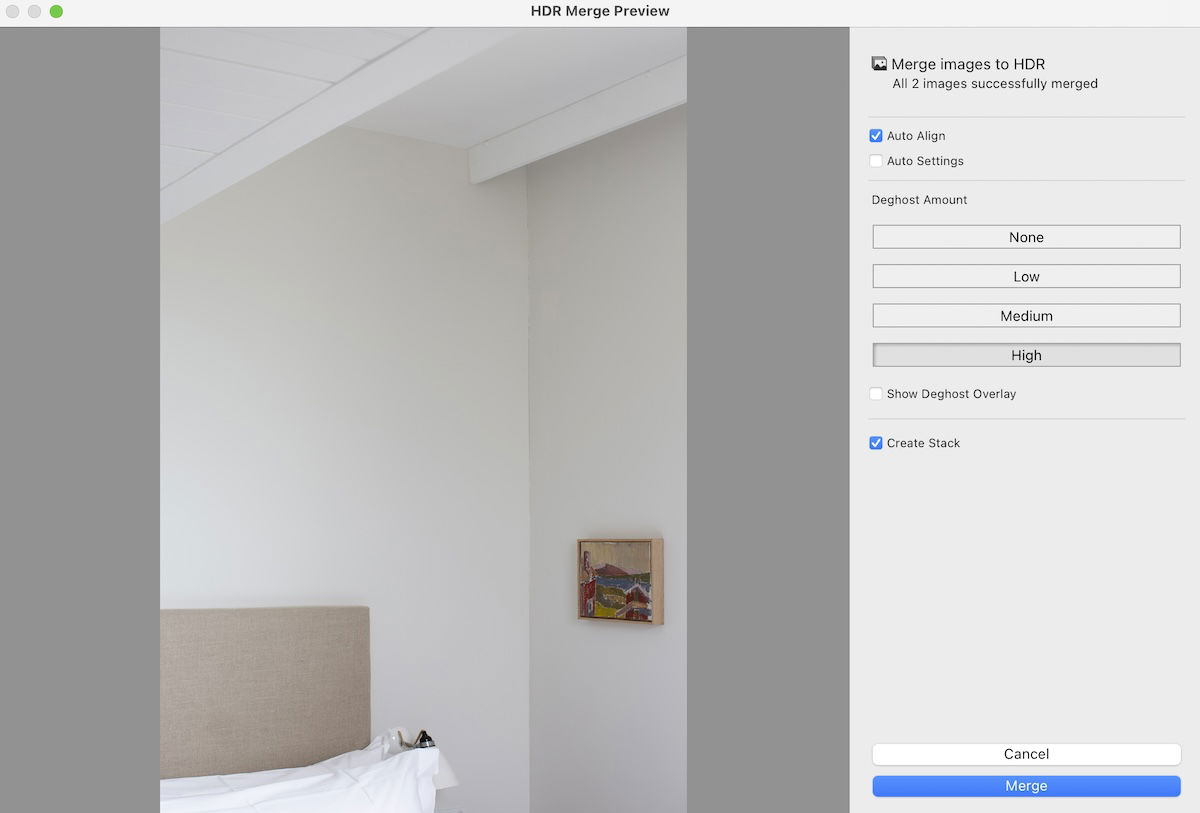
Find them in your Library and select the ones you want to merge into a HDR. Then, right-click on your images and go down to Photo Merge. Select HDR and you will now get a new dialog box to control your HDR.
Alternatively, access this dialog box through Photo > Photo Merge along the top toolbar.
We will now discuss the different options you can select from to fine-tune your HDR. These options will profoundly affect your final images, so read below and look at the images to get a full understanding.
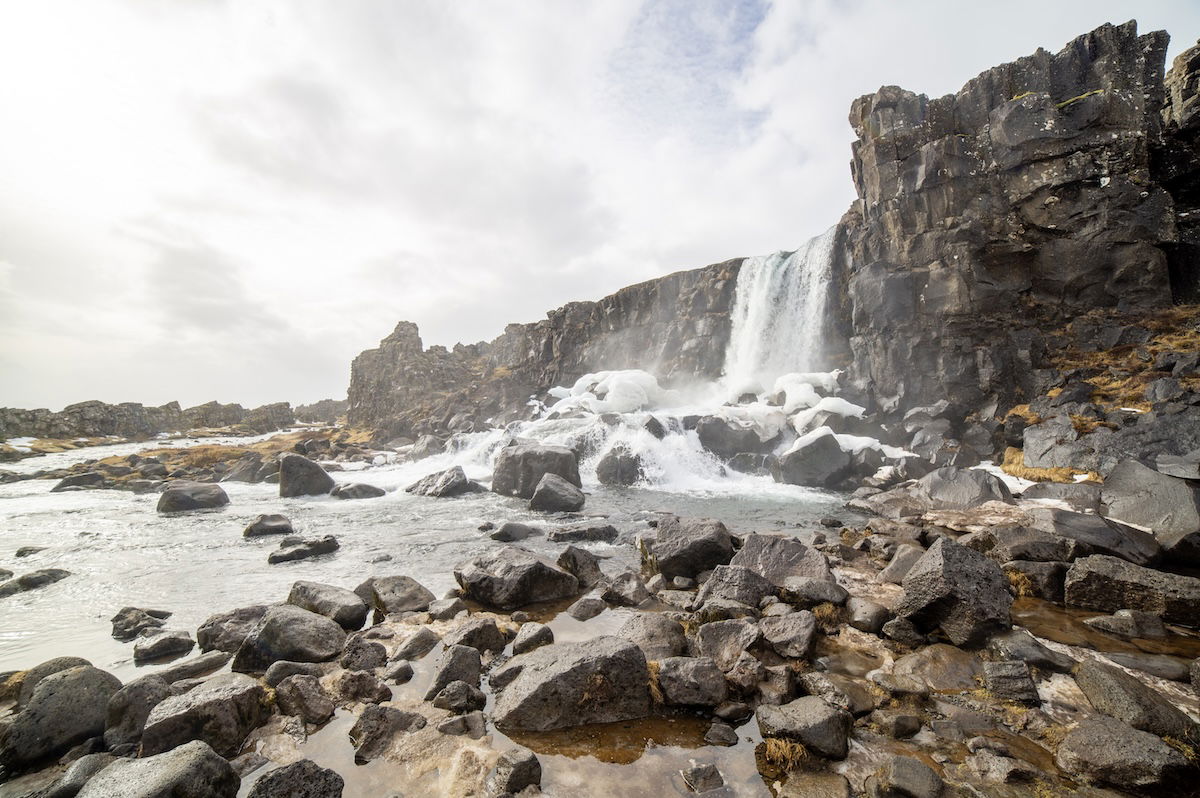
The Auto Align box is perfect for photographers who shoot in unfavorable conditions. It doesn’t produce a magical fix for shooting HDRs without a tripod. But it can save the day if the tripod is moved slightly.
By clicking this box, Lightroom will ensure the images match up. Below is an example of two handheld photos in HDR Merge. After selecting Auto Align, you couldn’t tell it was an HDR of two images.

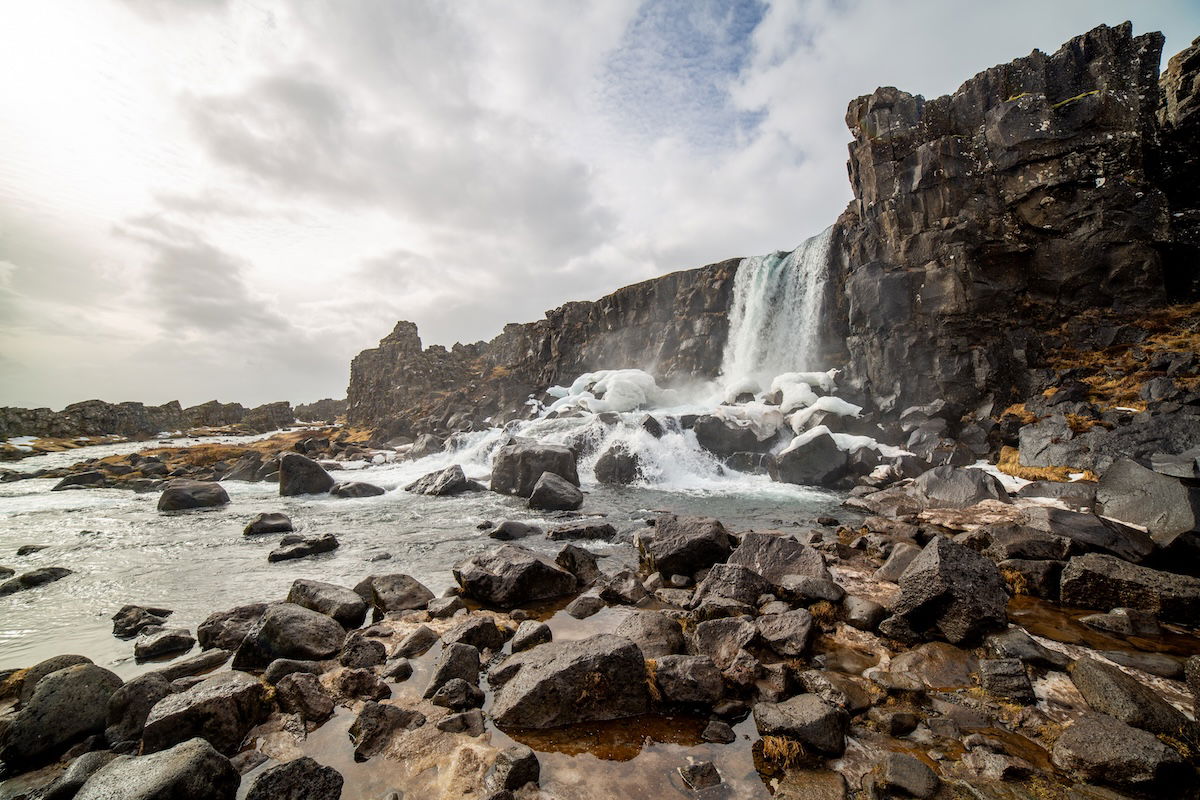
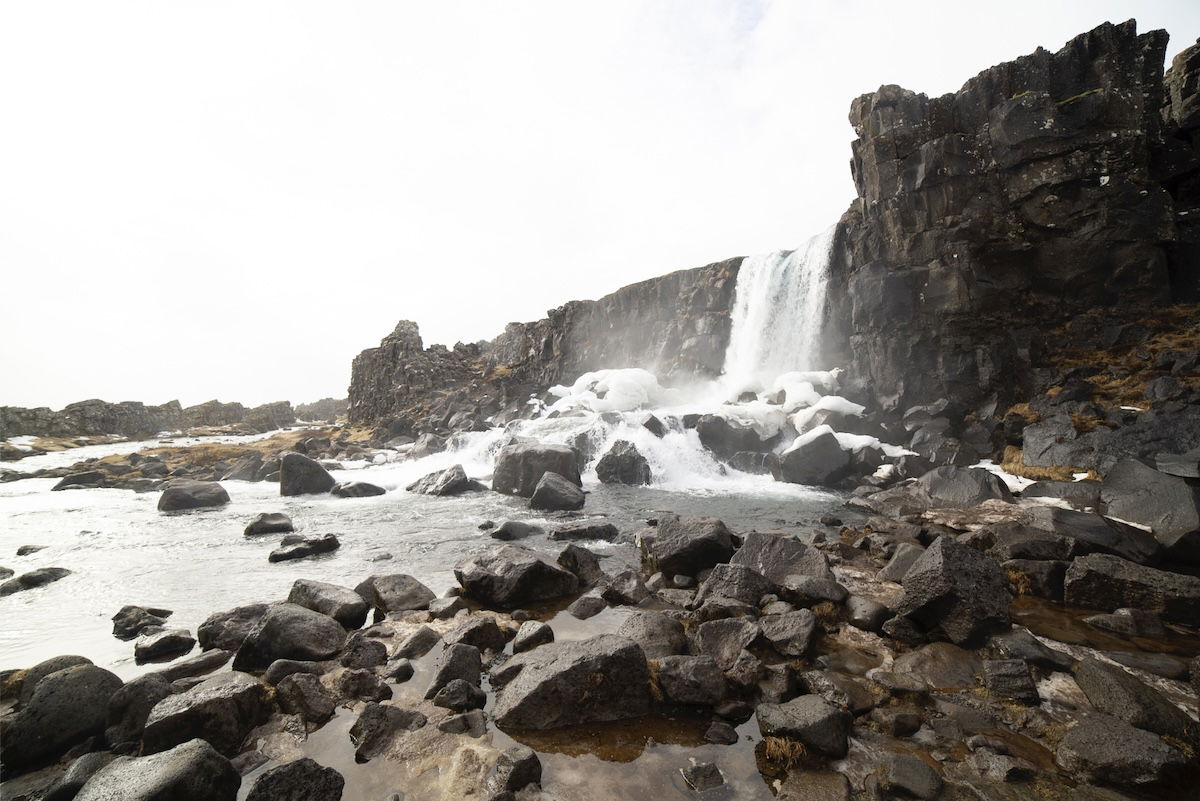
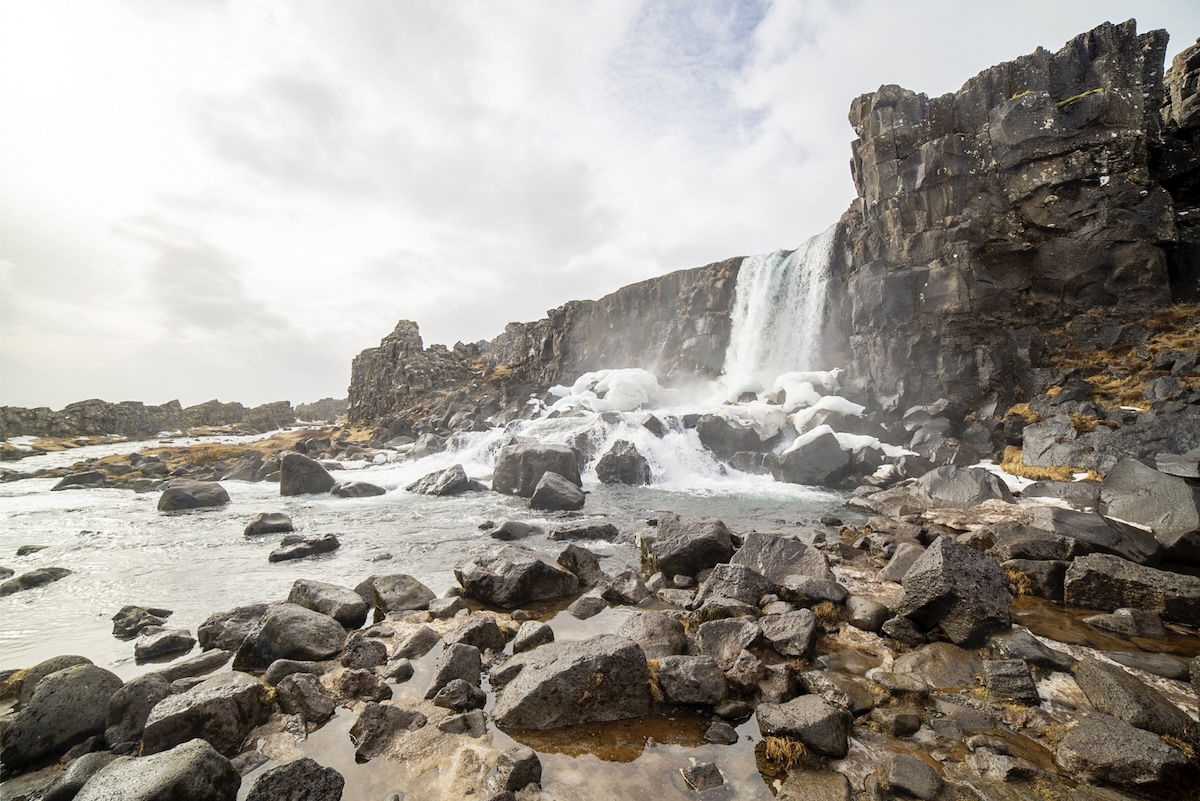
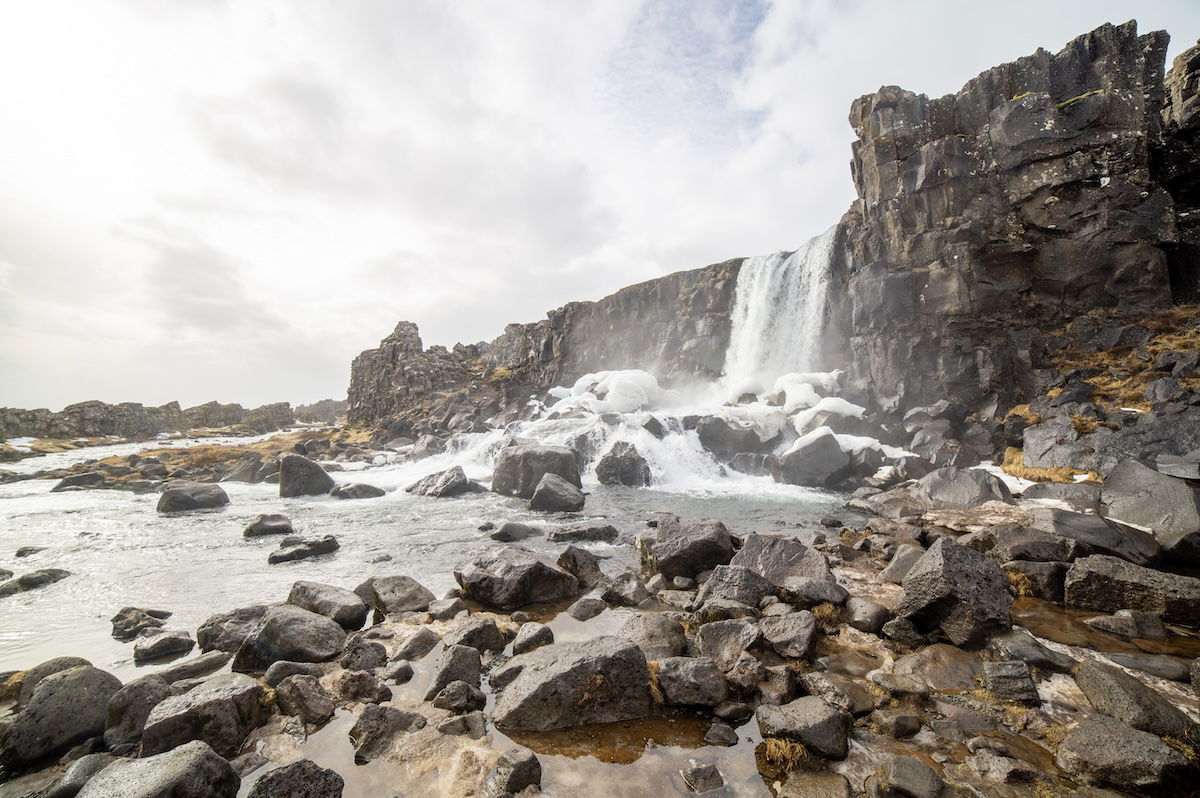
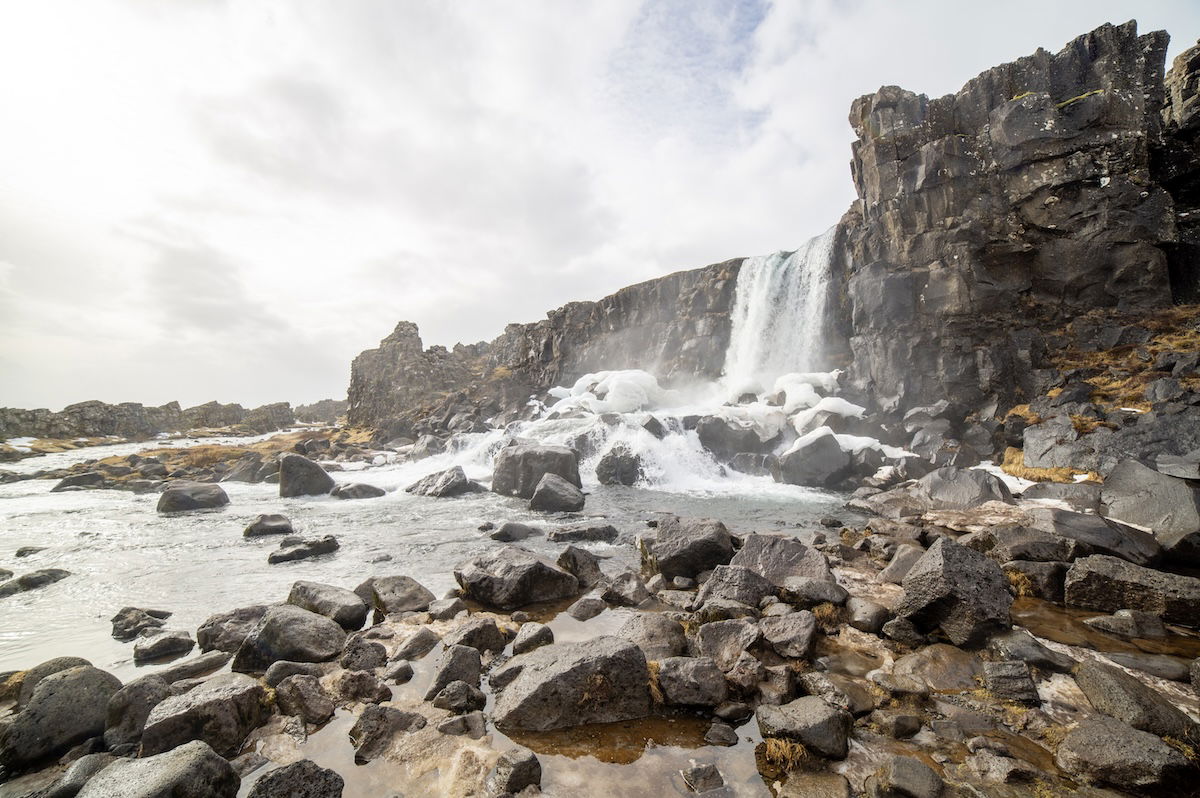
Auto Settings uses Lightroom’s brilliant technology to adjust our HDR. For this example, I am using two images to create an HDR.
Before applying the Auto Settings, my image still had blown-out highlights and dark shadows. Upon clicking the Auto Settings box, I get a nice, evenly exposed image.
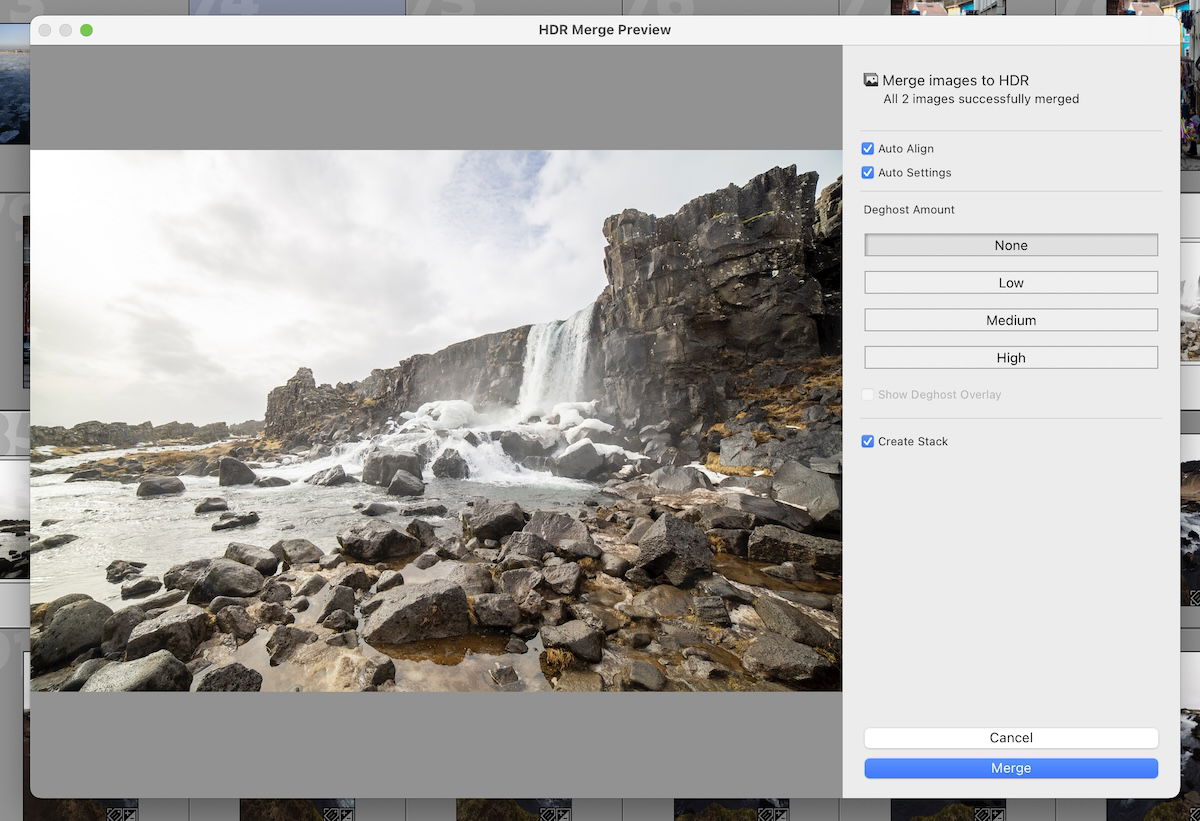
The Deghost Amount comes as a slider in Lightroom and four buttons in Lightroom Classic.
This option allows you to adjust ghosting amounts if you have shot an HDR in a place with moving elements in front of the lens. For example, a busy street with people moving around or a waterfall and its mist.
Digital editing software can create semi-transparent areas that seem unnatural when blending the images together. The Deghost Amount allows you to control this.
It is best to use None or Low Deghost Amount to have as little intervention in your images as possible. If the image does not look right, try using the Medium or High options.
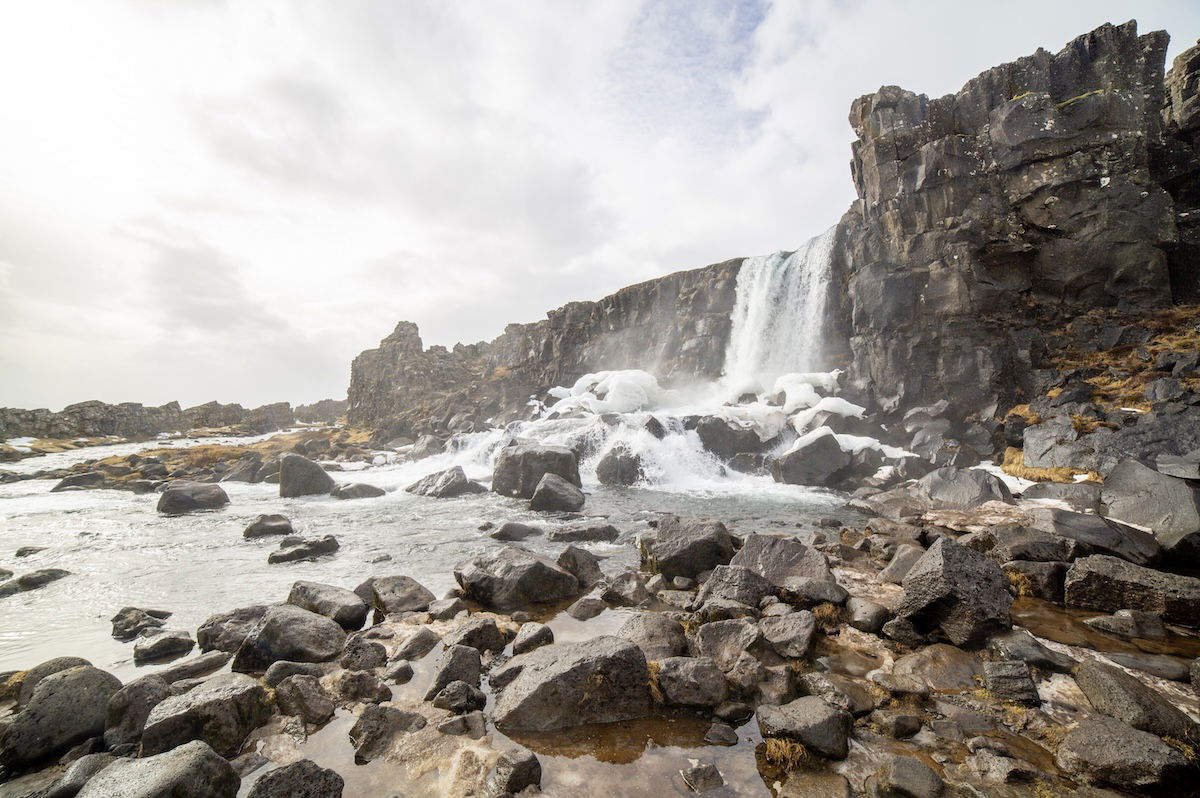
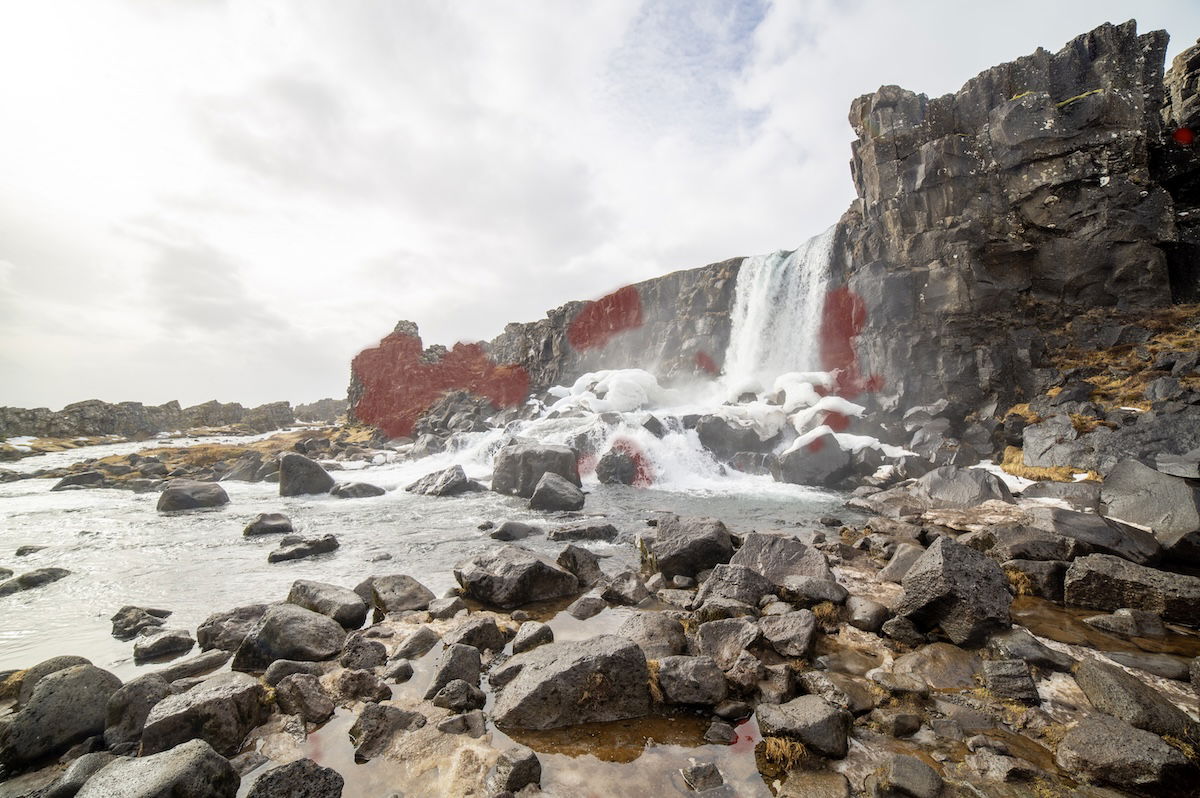
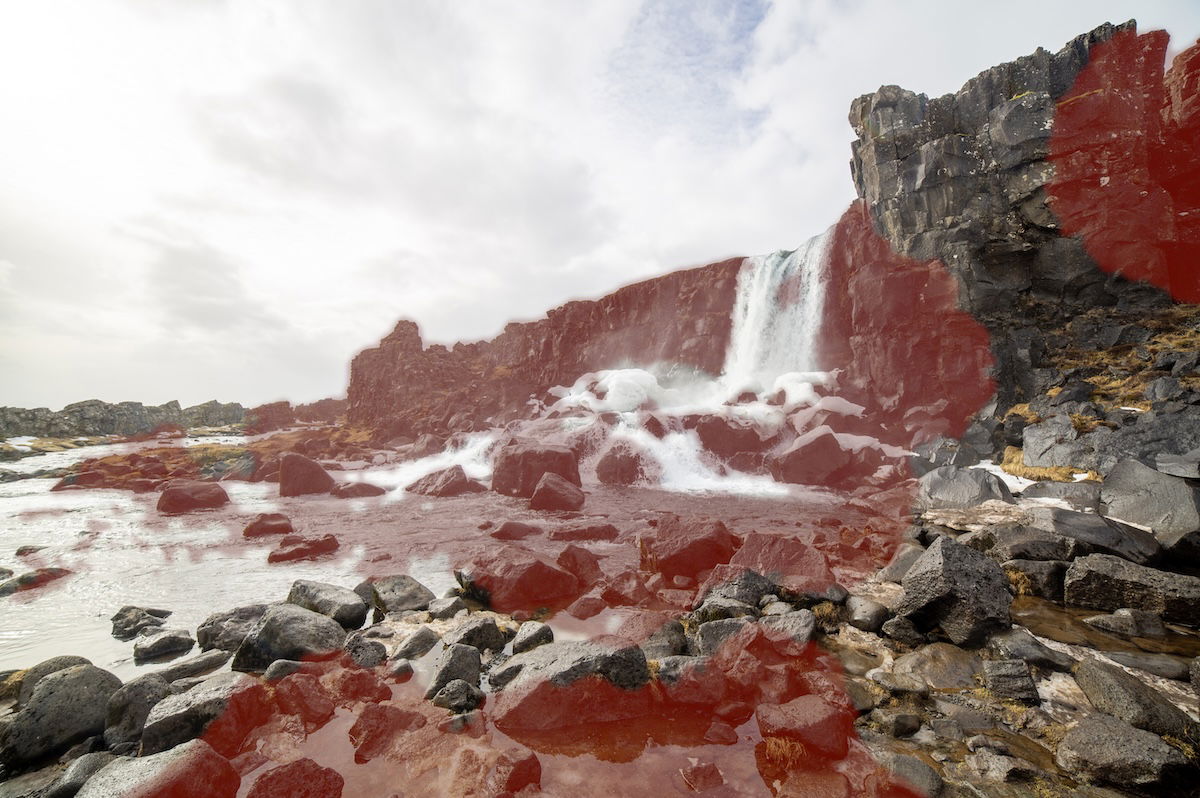
This customization option is straightforward. It allows you to visualize the deghost amount.
If I show you areas where it deghosts on Low vs. High, you will get a good idea of how this software works. These areas are worth checking in more detail to see if anything is unnatural.
This customization option helps us keep our Library clean. It does not affect the image; rather, it places all of our selected images into a stack. It is a great way to declutter your Lightroom catalog easily.
Lightroom has made creating stunning HDRs extremely easy. As photographers, we have to get everything right in camera, and Lightroom does the rest!
If you have Lightroom, try out the HDR technique. The process is quick and easy and doesn’t need any specialist knowledge like you would have to have in Photoshop. As you can see from this article, you can get brilliant photos in under a minute!


![P08 [Lead Gen] Product Sidebar_v2_date_20230223](https://expertphotography.b-cdn.net/wp-content/uploads/2023/02/P08-Lead-Gen-Product-Sidebar_v2_date_20230223-300x295.jpg)
![P08 [Lead Gen] Sidebar Banner 2_date_20230223](https://expertphotography.b-cdn.net/wp-content/uploads/2023/02/P08-Lead-Gen-Sidebar-Banner-2_date_20230223-300x245.png)
![P08 [Lead Gen] Sidebar Banner 3_date_20230223](https://expertphotography.b-cdn.net/wp-content/uploads/2023/02/P08-Lead-Gen-Sidebar-Banner-3_date_20230223-300x245.png)