HDR (high dynamic range) images require you to combine two or more photos. Choosing the best HDR software is important as it is essential for a stunning HDR image.
What is HDR Photography and HDR Software?
It is not uncommon for people to misunderstand the meaning of HDR photography. Many beginners think that HDR images have a specific "HDR feel".
Sometimes, your camera is unable to capture the full range of contrasts in an environment. HDR, in full high dynamic range, allows you to create an image that contains super high contrast.
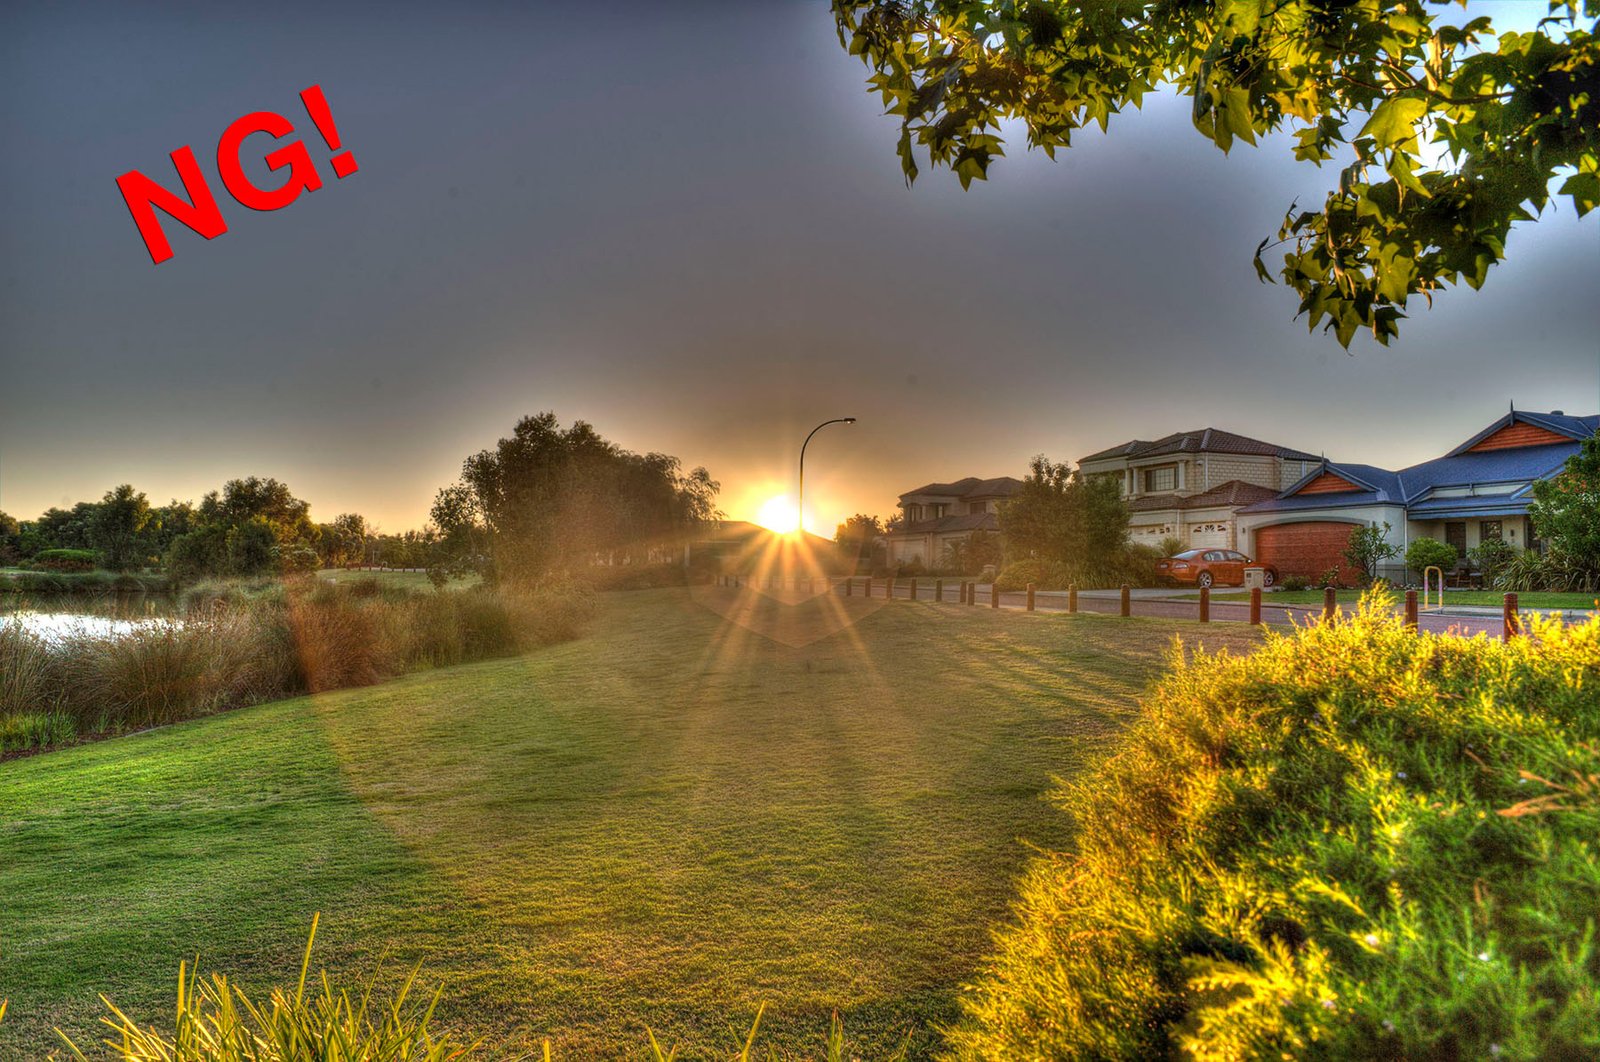
Example of a Bad Tone Mapped Image
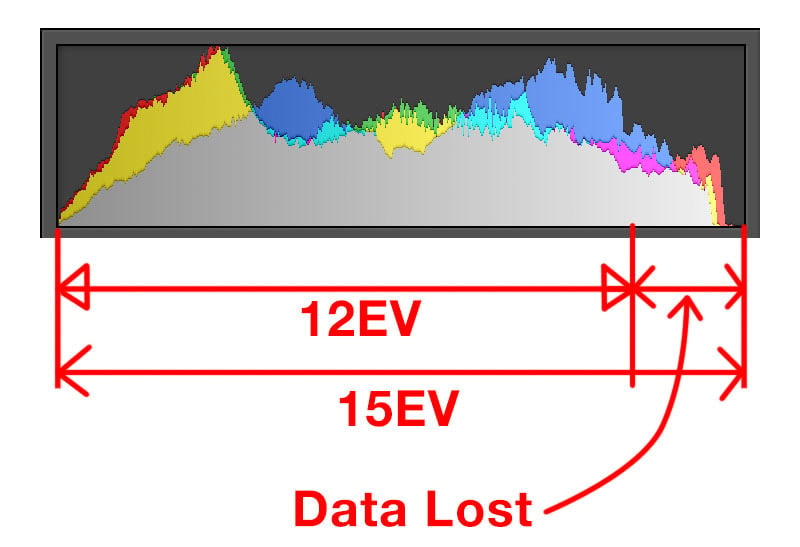
The histogram below offers a clearer review. If there are some areas under white or black clipping, you may be under an HDR environment.
Camera sensor and resolution is evolving fast. New cameras can capture more dynamic range than the old models.
For example, I recently upgraded from Nikon D700 to Nikon D810. The new camera gives me 14.8EV dynamic range while my old D700 can only capture 12.2EV. That is 2.6EV more!
However, HDR photography is still needed in some cases, such as photographing a sunset while directly facing the sun. Cameras still do not have the ability to prevent white or black clipping in these circumstances.
To create an HDR photo, you need to capture two or more different exposures and then combine them into one image on a computer. Normally, three exposures with -1EV, 0EV and +1EV will give you a good result.
What HDR Software can do for You
The most important function of HDR software is to help you combine differently exposed images into a single HDR image.
However, they normally do so much more than that. HDR software also helps you with tone mapping, image alignment, ghost removal, noise reduction, etc.
Tone Mapping
When creating an HDR image, you are compressing from a very high dynamic range into a normal dynamic rage. By doing this, it lowers the contrast of the image and turns it into a not-so-attractive photo.
Tone mapping helps you to bring back the mid tone contrast and re-map the histogram. To put it simply, tone mapping improves flat looking HDR images.
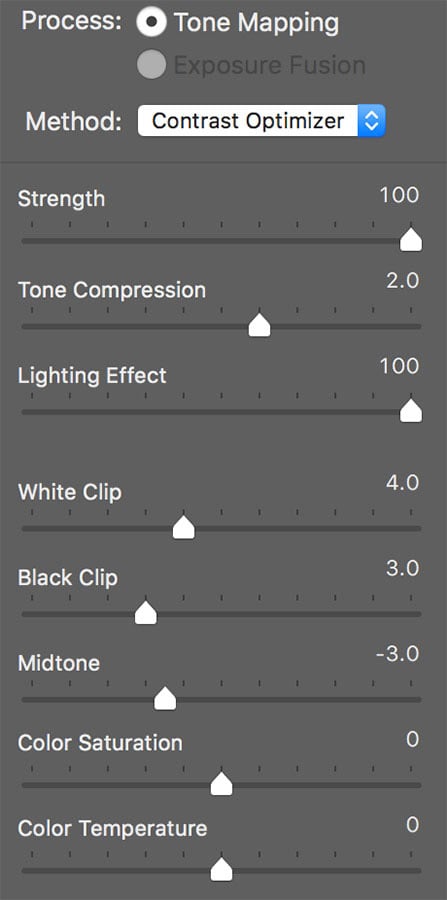
Image Alignment
Since you are combining two or more images in to one, mis-alignment is a huge issue. Although you should try to align them perfectly when shooting, in case you fail to do so, software can help you with that.
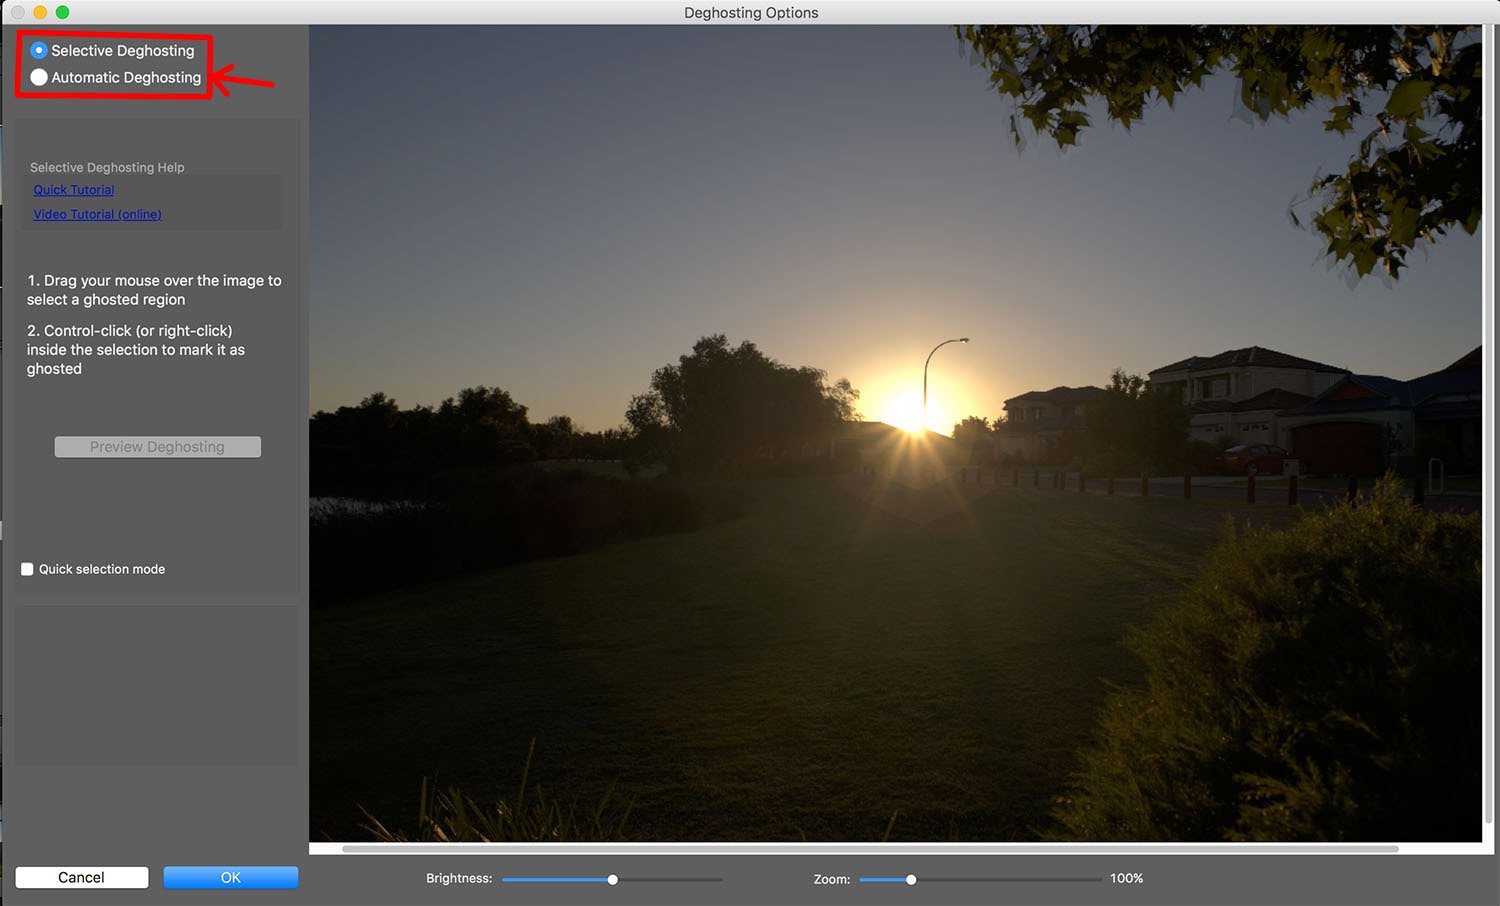
Ghost Removal
If something has moved in your raw files, there may be a ghost in the final image. You can combat this by enabling the ghost removal function in the combining process.
However, it is always best to avoid causing this problem during shooting.
Noise Reduction
Some people suggest creating HDR images from one single exposure. However, this is pointless.
If you create three different exposures from one single raw file, you are handling the same data. This causes all random noise to be located in the same position.
By combining different files, random noise can be eliminated by HDR software. This will leave you with a cleaner image.
What You Should Expect from HDR Software
- The output file will be flat before any tone mapping
- HDR images require some adjustment and tuning
- You need to focus on composition and timing
- A stunning image is reliant upon hard work, rather than just software
What You Should NOT Expect
- A quick-fix to make images more interesting
- Stunning results from one attempt
- Tone mapping with zero noise
- Ghost removal and image alignment to work perfectly every time
Choosing the Best HDR Software
There are many types of software on the market to help you combine HDR images.
Today, I would like to focus on three types: Lightroom vs Photoshop vs Photomatix Pro.
Adobe Photoshop Lightroom
Previously, you needed to install plug-ins to create HDR images in Lightroom. After the CC 2015 update, Adobe added a new function called "Merge to HDR" in Lightroom.
This is a great update for landscape photographers. You can also save money, not buying plug-ins which may not be 100% compatible with Lightroom.
Basic Workflow
If you are familiar with Lightroom, then “Merge to HDR” may be for you.
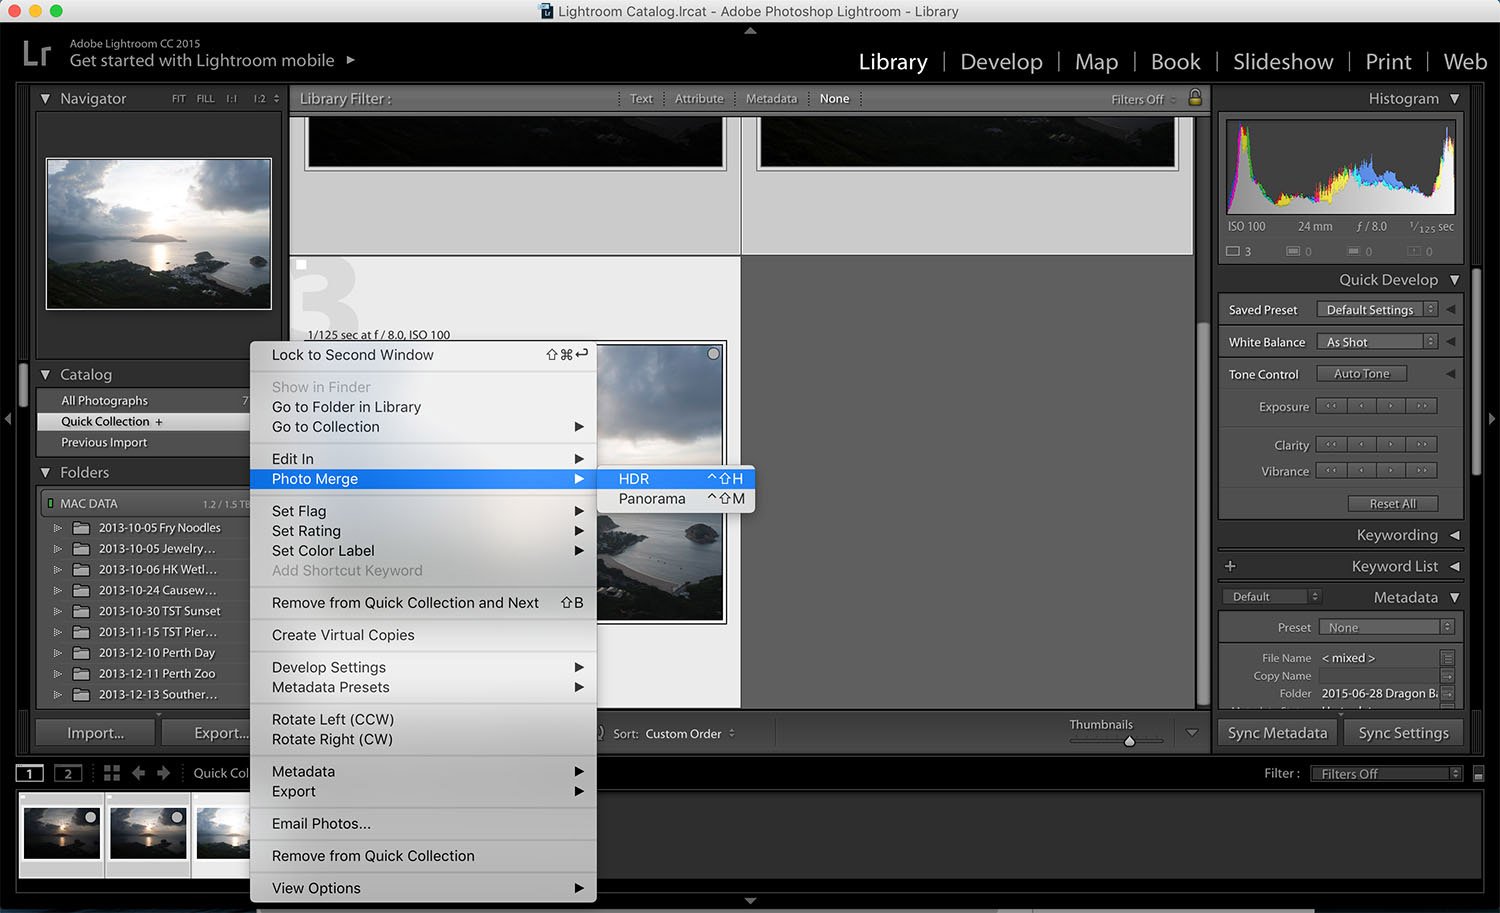
To start creating HDR images, hold down cmd or ctrl and select the exposure sequence. Right click, choose Photo Merge, and then HDR.
You can also set a shortcut key for this. The present shortcut key is control+H.
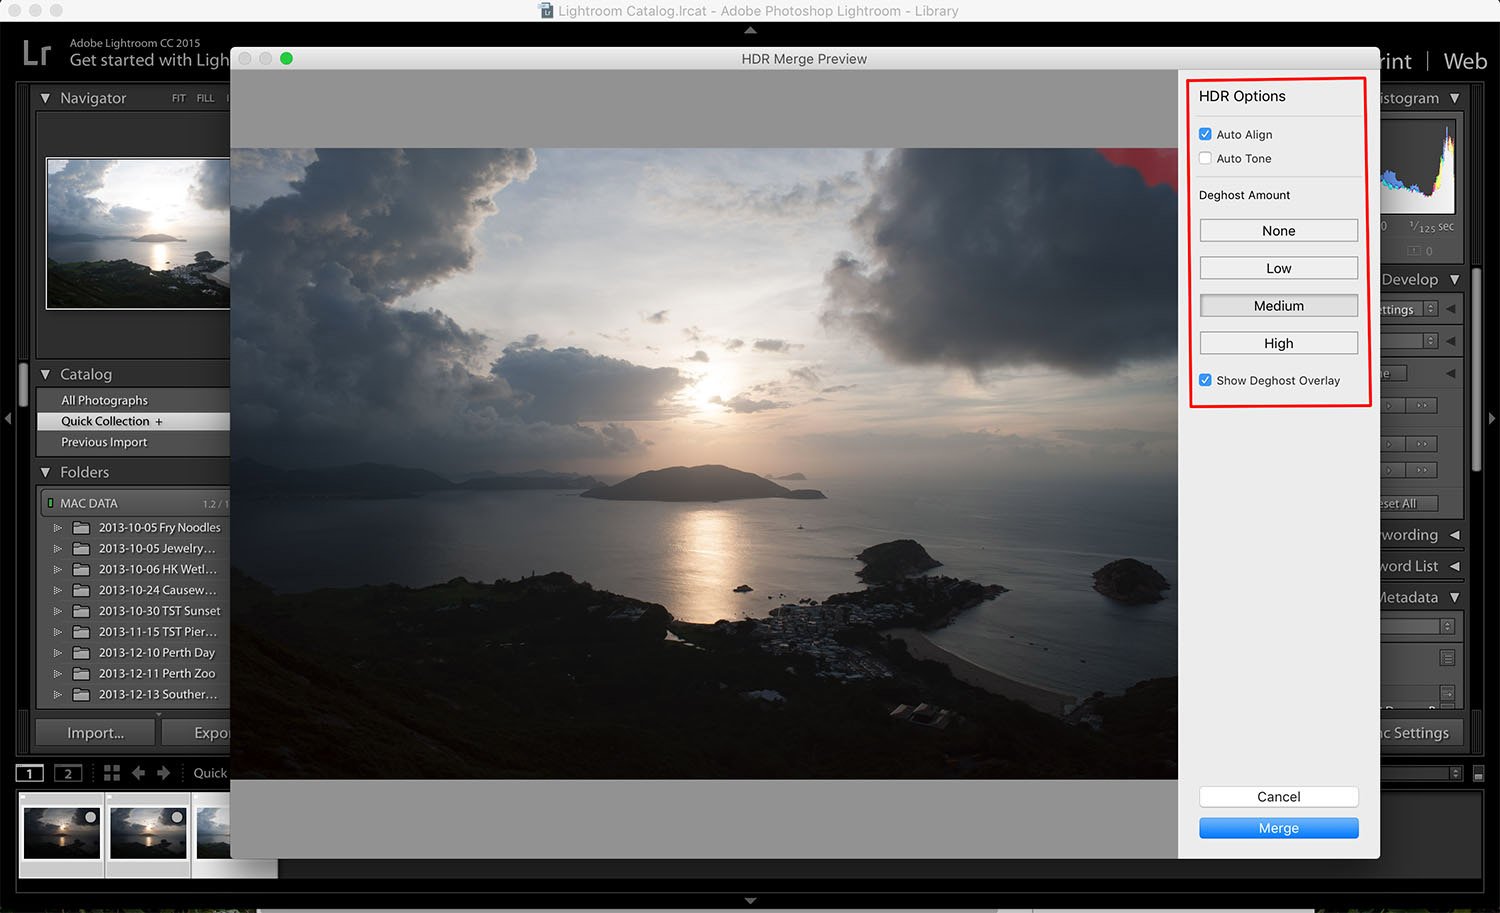
The control dialogue is extremely simple. You just need to enable or disable auto alignment, auto tone and ghost removal. After you have made your adjustments, click Merge.
Lightroom will then create and generate a new .dng image for your HDR.
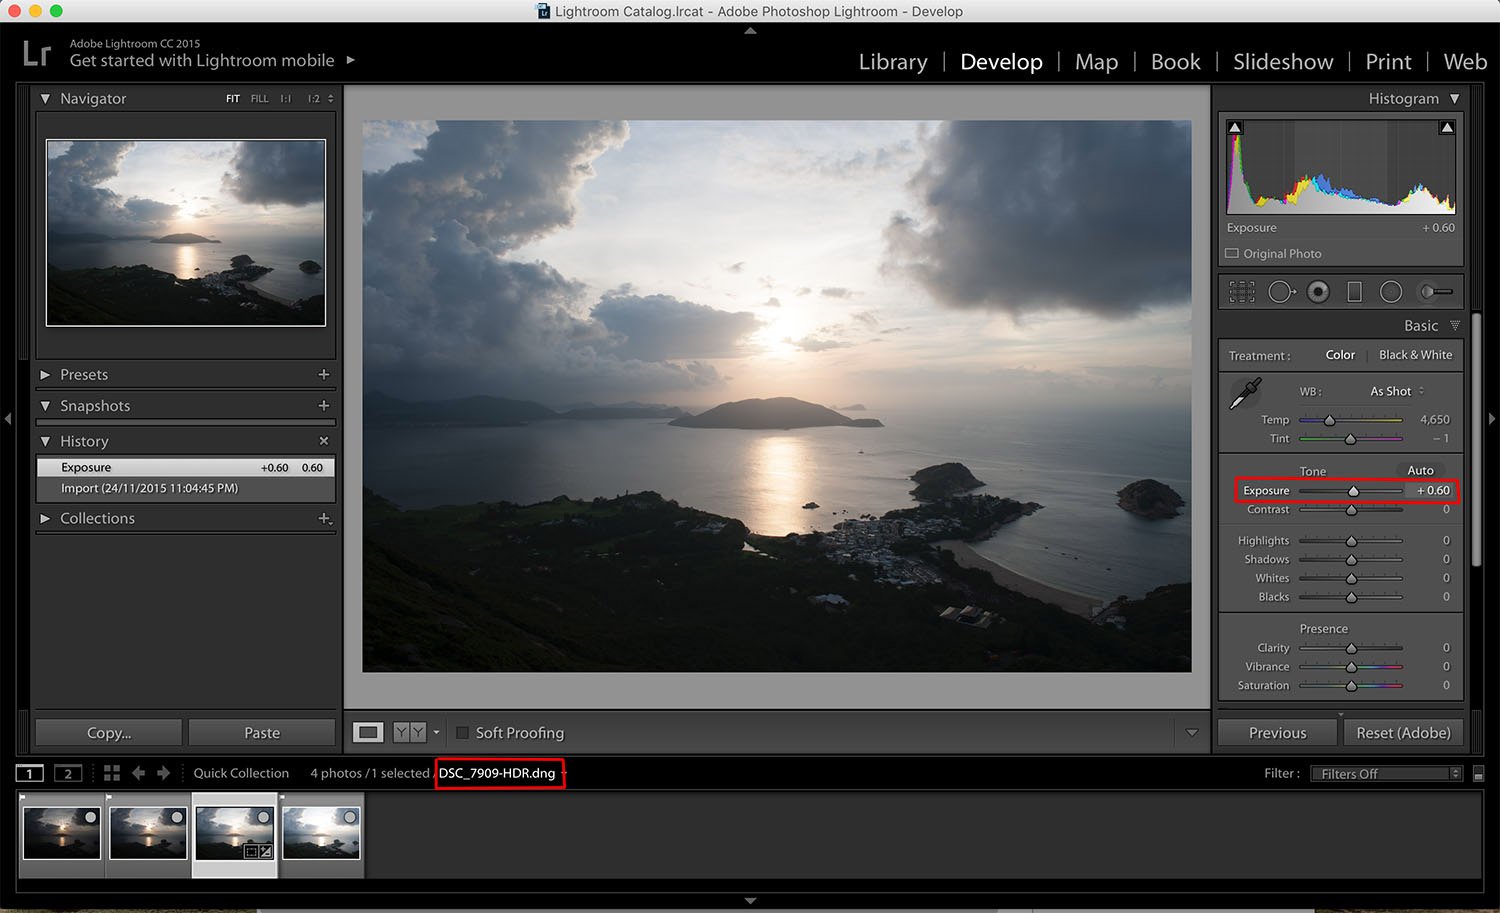
When the image is created, you can proceed to a normal Lightroom tuning process. The great thing about this DNG file is that you can control exposure from -10 to +10.
HDR merging is one of the best features that Adobe has made available. Lightroom creates a raw file for your HDR file. This means that all data is being saved and you can use it like a normal raw image afterwards. This is the first software that I have come across that can do that.
Everything has its downsides. Lightroom does not have a batch mode – you have to combine images one-by-one. For those who want to do HDR timelapse, this may not be the software you need.
For an even more in-depth look at Adobe’s Lightroom, have a look at our Complete Guide of 109 Tips for Adobe Lightroom Processing.
Adobe Photoshop
Although Photoshop and Lightroom are both Adobe's products, I think that the HDR engine is different. I have tried both Lightroom and Photoshop to combine handheld HDR sequences. Photoshop gives me better image alignment and ghost removal.
On the other hand, Lightroom sometimes creates blurry images, or more ghosts, after you enable ghost removal function.
You can have more flexibility and creative tools to retouch an image if you use Photoshop. You can also install different plug-ins to create different effects.
The disadvantages of using Photoshop is that there is a steeper learning curve if you are a complete beginner. If you are an experienced retoucher, then Photoshop may be your cup of tea.
Basic Workflow
There are two methods to trigger the HDR window on Photoshop. One is to right click on Lightroom, select "edit in" and then "merge to HDR pro in Photoshop".
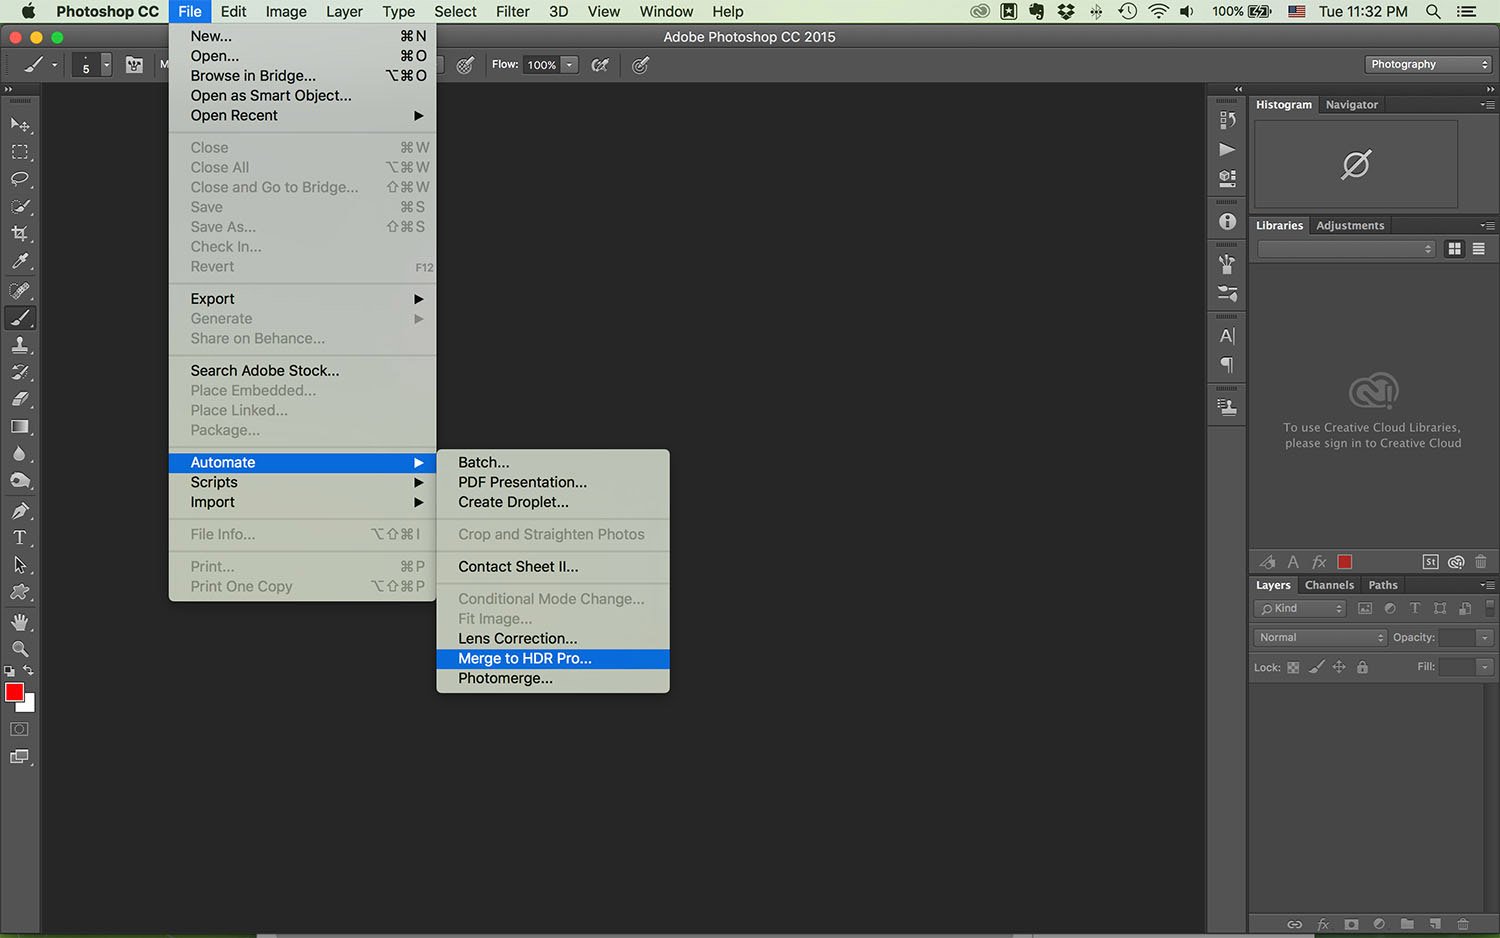
Another method is to do it in Photoshop. Go to "File" then "Automate" and then "Merge to HDR Pro…".
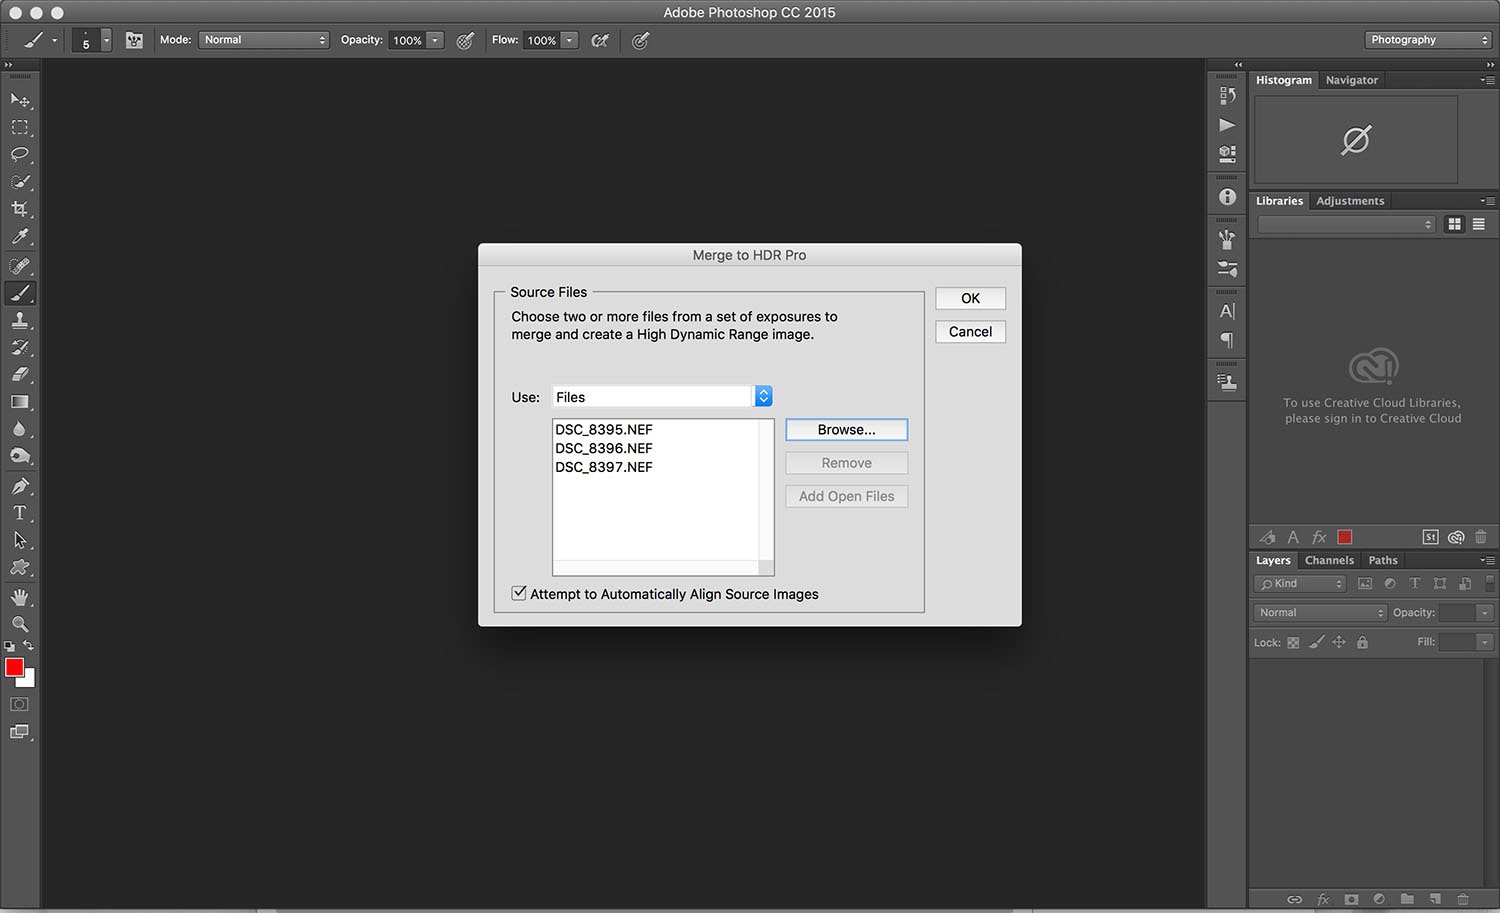
You can then choose your sequence to merge. A checkbox on image alignment will appear on the right-hand side.
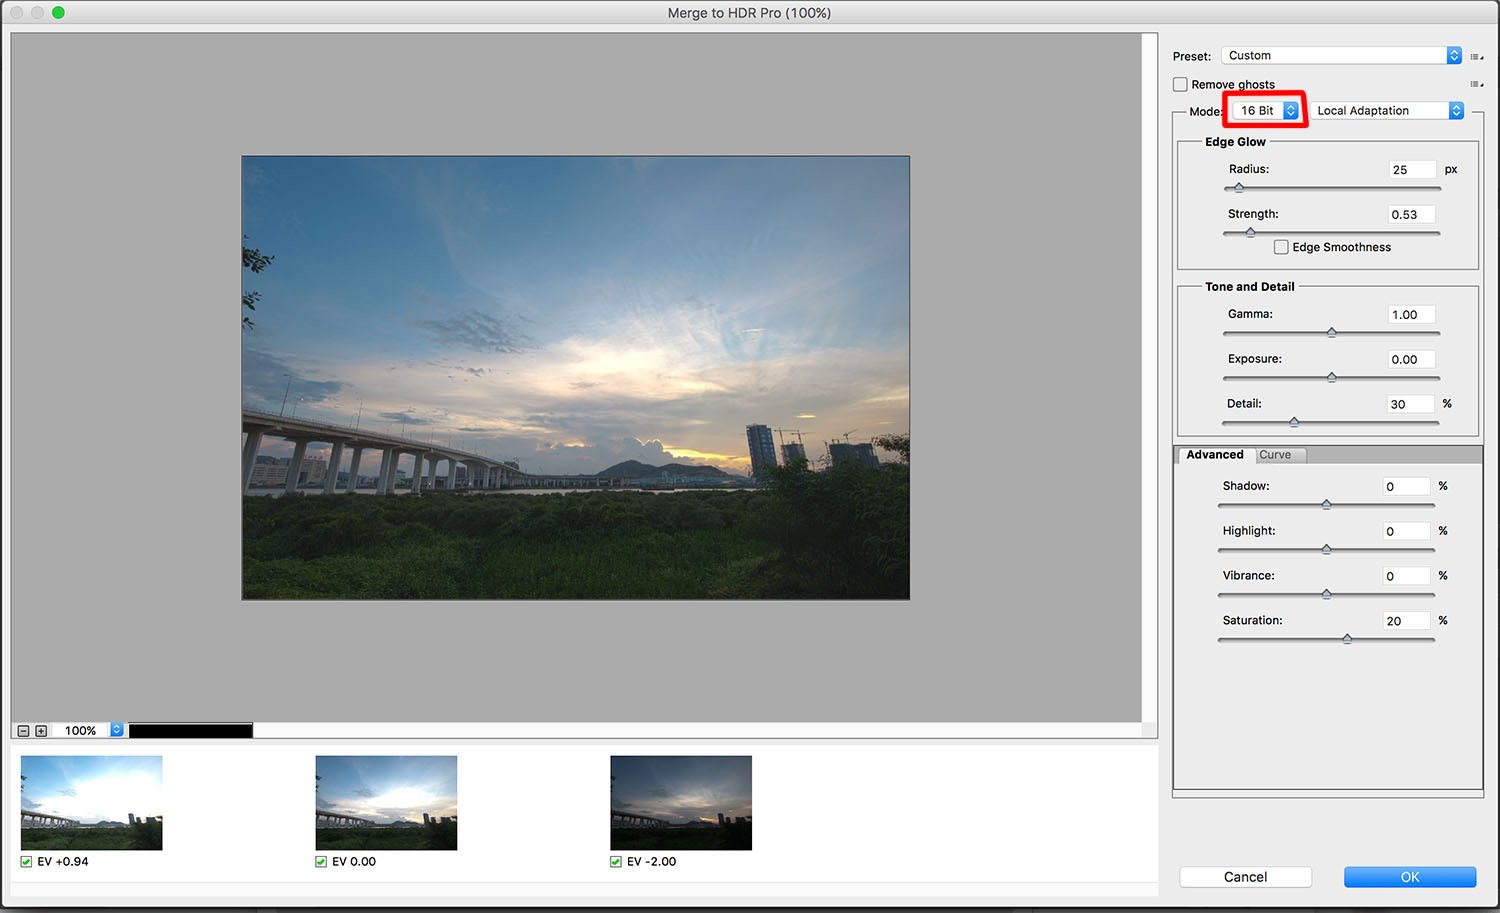
In the tuning dialogue, you can choose to use 16 bit or 32 bit. If you choose 16 bit, then you need to tune the image by different sliders like using Photomatix Pro.
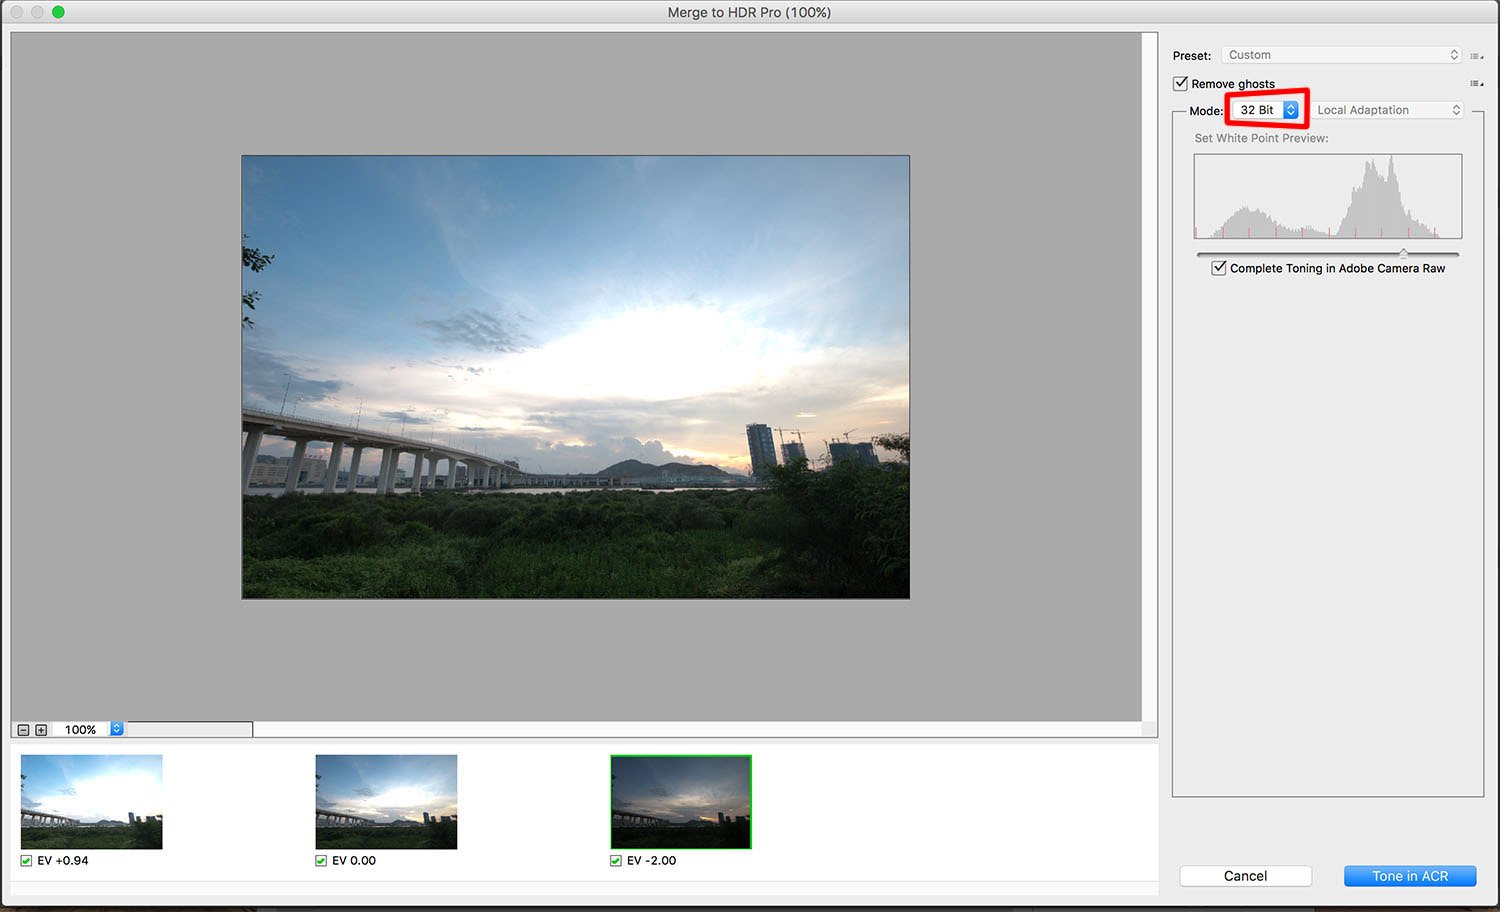
On the other hand, if you choose to merge to 32 bit, Photoshop will bring you to Adobe Camera Raw to tune the image. I find 32 bit is easier to use than 16 bit because there are more options to choose from in ACR.
After you have finished basic toning, the image will open like a normal image in Photoshop. From this step, you can apply any retouches to your liking.
Photomatix Pro
Photomatix Pro used to be my favourite HDR software. It is easier to use, faster and has more presets for you to choose from.
Basic Workflow
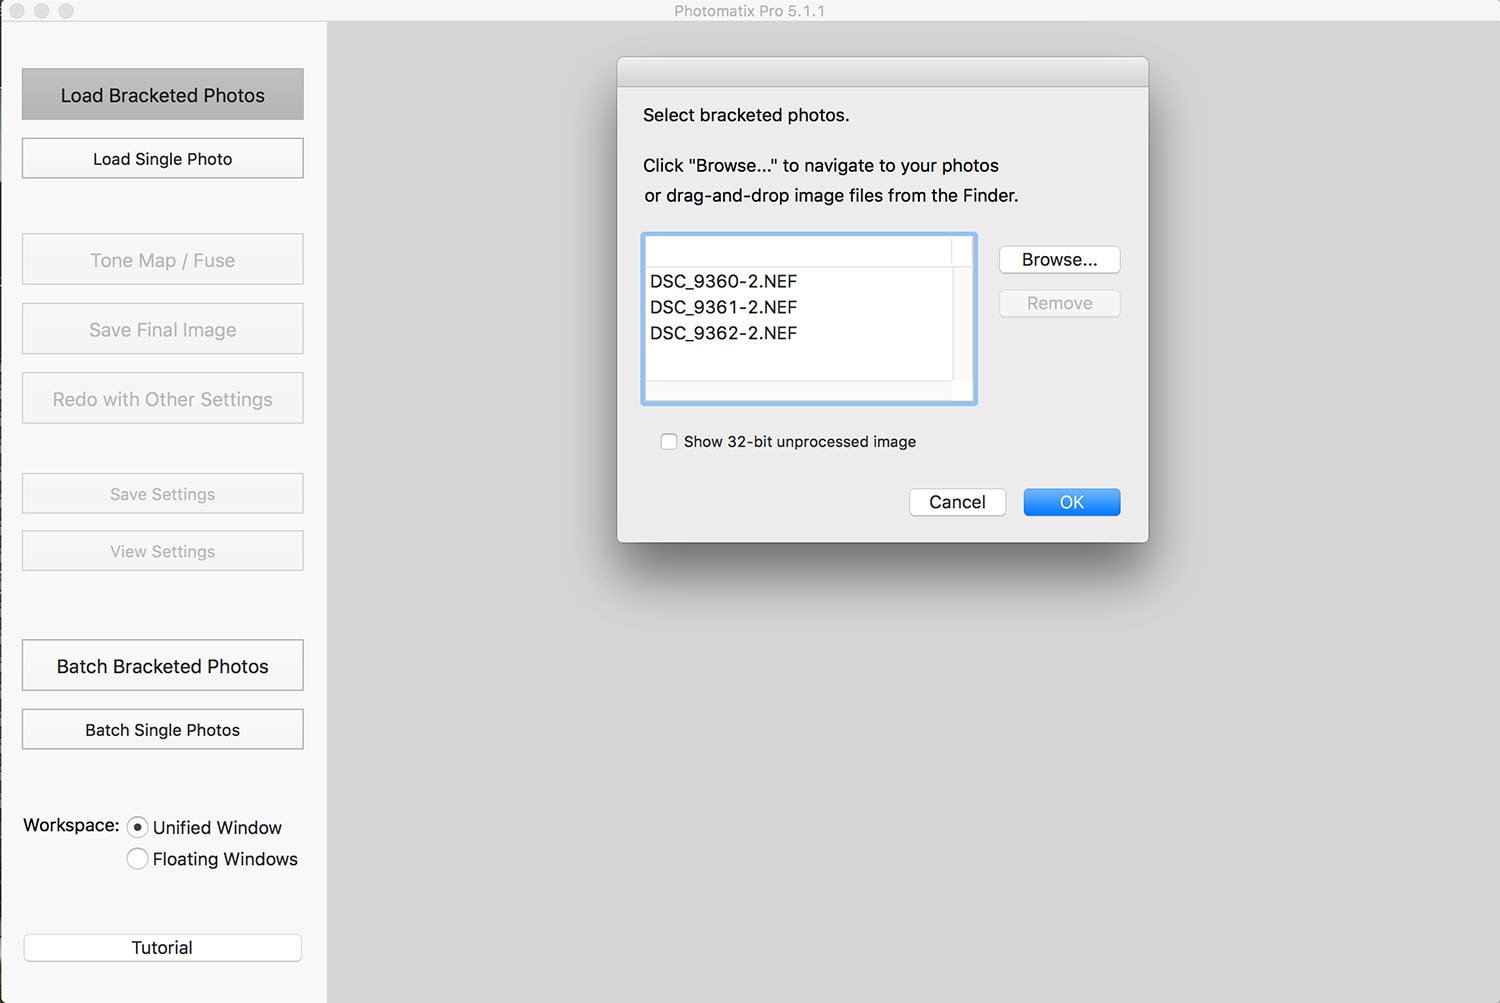
When you open up Photomatix, you can see its simple layout. Loading images into Photomatix is just as easy.
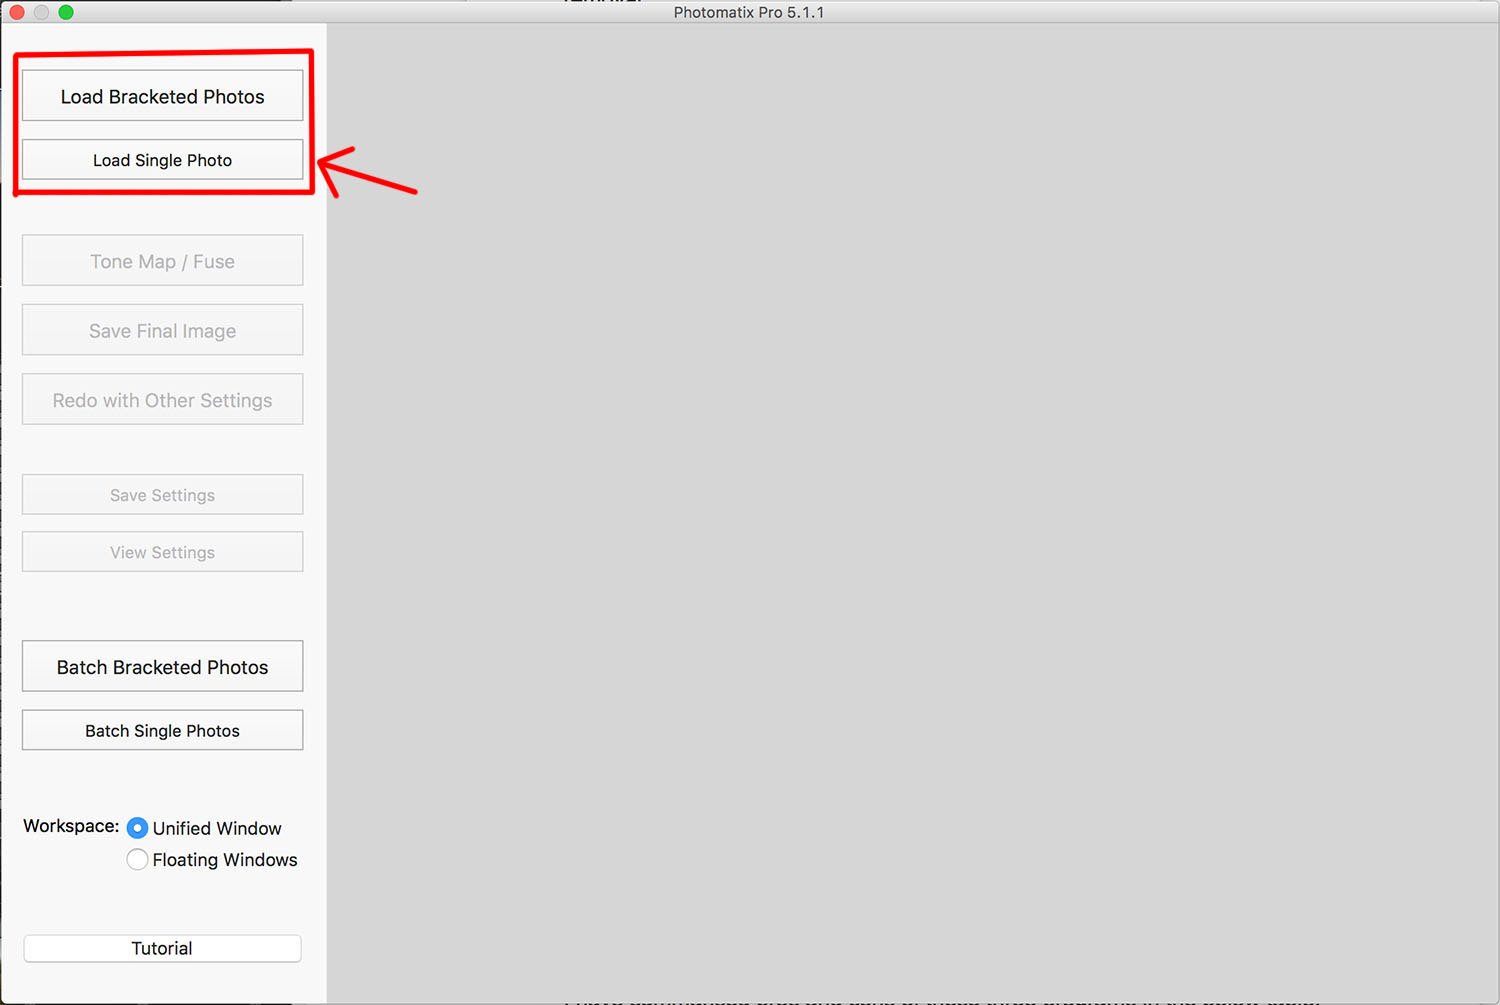
When you have chosen the image files, click OK and Photomatix will bring up the control dialogue.
You can enable or disable auto-alignment, de-ghost, noise reduction, chromatic aberrations and some simple raw settings.
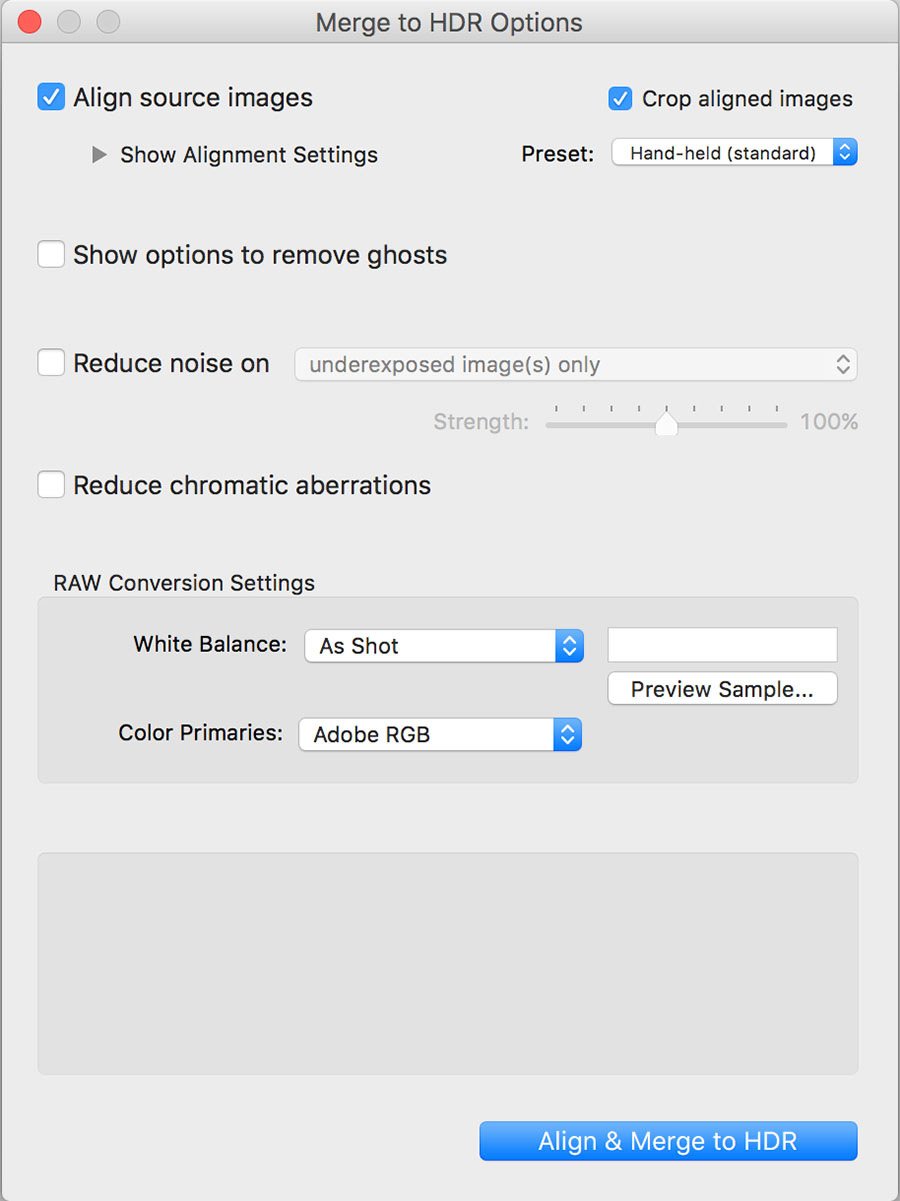
If you enable the “remove ghosts” function, you will then see the ghost removal window. You can choose manual or automatic mode.
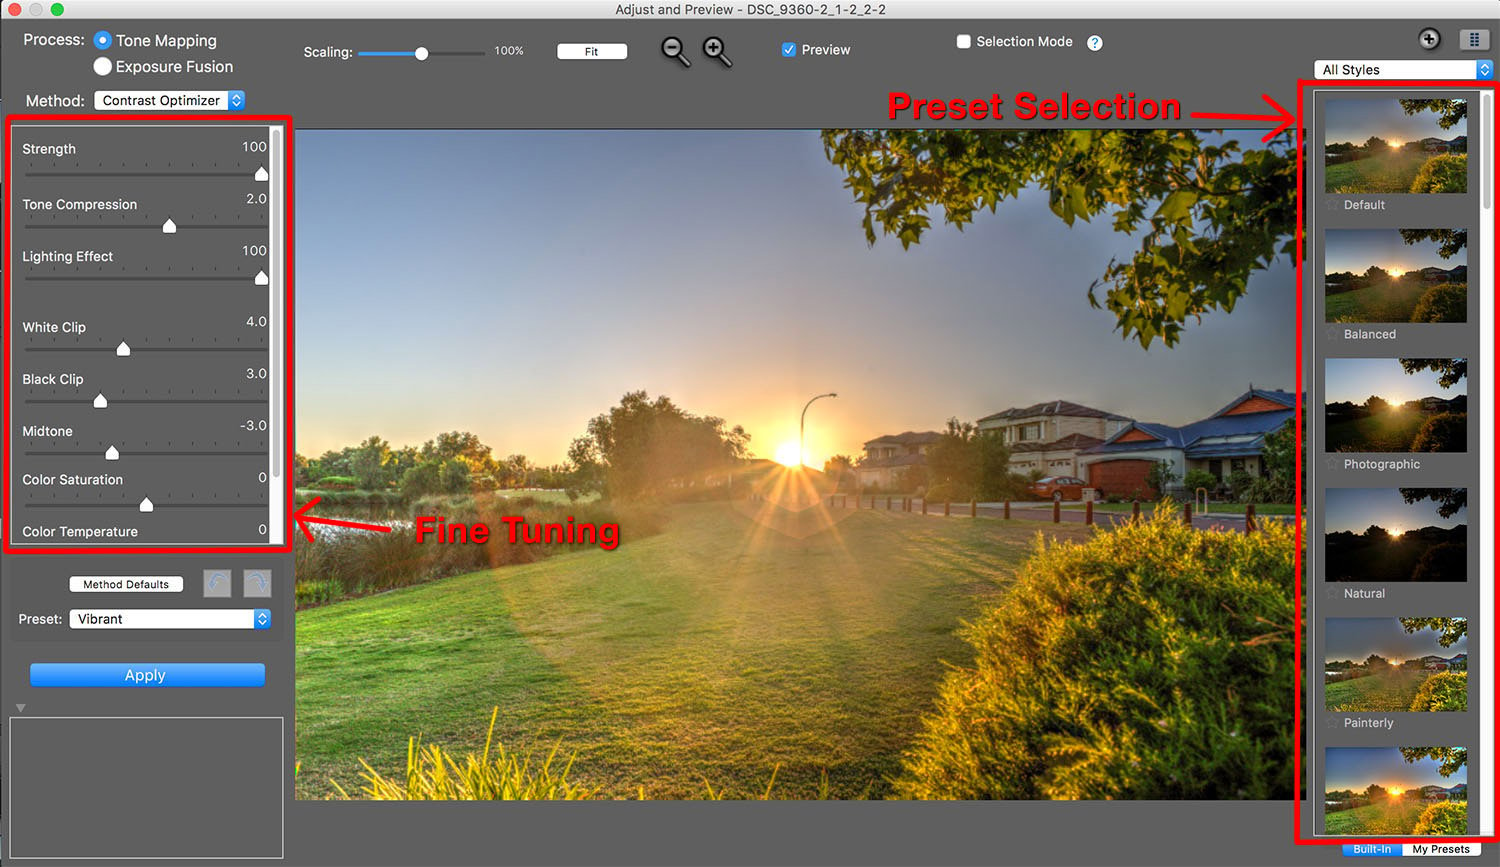
After you have finished de-ghosting, you will then get to the fun part, tone mapping the image. There are lots of presets for you to select.
If you don't like a certain setting in the preset, you can also fine tune it with the sliders on the left. When you are happy with the result, just hit apply and save.
Photomatix Pro also has batch mode. This is excellent if you want to create HDR timelapse. You just need to set it once and the program will do the rest for you – which is not possible in Lightroom and Photoshop.
However, you need to be careful when using Photomatix Pro. Since it is designed for creating HDR images, the tone mapping tools are super powerful.
You will create over saturated or over sharpened images easily.
The Best Software for HDR Photography
In my opinion, it is not suitable for me to say which program has the best HDR software because every photographer needs something different. There are no two identical photographers.
I have summarised pros and cons of these three programs in the table below.
Lightroom | Photoshop | Photomatix Pro |
|
|---|---|---|---|
| Pros | {{column-name-2}}: - can output DNG raw file - can seamlessly group together with other images - very natural looking output | {{column-name-3}}: - super accurate images alignment and powerful ghost removal - can edit final image with all Photoshop tools - lots of plug-ins for styling and toning | {{column-name-4}}: - designated tone mapping tools available - can create ultra realistic images easily - batch processing which is great for HDR timelapse |
| Cons | {{column-name-2}}: - no batch processing - no designated tone mapping tools | {{column-name-3}}: - no batch processing - no raw file output" | {{column-name-4}}: - images feel very "HDR" if you are not careful - no raw file output |
| Suitable for | {{column-name-2}}: Natural looking HDR photography lovers, landscape photographers | {{column-name-3}}: Perfectionist, photographers who need heavy retouching | {{column-name-4}}: Artistic photographers, timelapse photographers |
I hope this review can help you choose your HDR software.