HDR tone mapping is a technique that can be used to create stunning images from ordinary photos. It involves the use of three or more photos taken at different exposures, and then combining them into one image using software such as Photoshop. The results can be amazing, adding drama and depth to an image that wouldn’t be possible with a single exposure.
What is HDR Tone Mapping?
HDR stands for high dynamic range. This technique attempts to mask over a deficiency in modern cameras. Your camera only sees one dynamic range that allows your camera to produce silhouettes.
But what if you don’t want the silhouette? Well, this is where HDR comes in. The solution to your camera seeing one dynamic range is simple.
Take several photos from the same location, each with a different exposure level. Aim to get an underexposed, a normal and an overexposed photo. These photos are then merged, giving your image a high dynamic range.
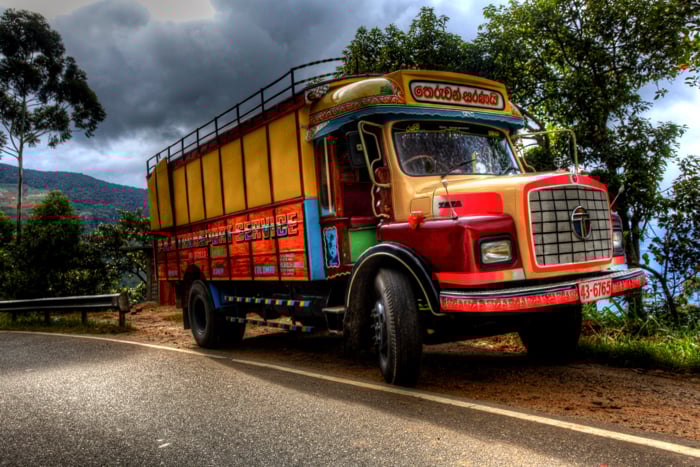
HDR is a technique used frequently to photograph cars. The surface of the cars works well with the metallic look HDR offers.
How to Take a Stunning HDR Photo
To get the best out of HDR photography, you need to prepare for the photo. There are several steps you’ll need to take, these start with shooting the picture and end in post-processing.
Best Method for Taking Photos for HDR
While it’s possible to produce an HDR image from a single photo, this is not the best practice. It’s also a good idea to take your photo using the RAW format, so your files have more information on them.
Take the following steps to get the best images for HDR photography.
- Set your camera up on a tripod.
- Compose your scene, and then use live view to focus the camera.
- Once composed and focused do not move the camera out of position.
- Now set your camera up to take a series of at least three bracketed images.
- The exposure difference between bracketed images should be no more than one.
- A set of images exposed at -1, 0 and +1 exposure value is a good place to start.
- Some photographers will bracket further than this. You can take five or even seven bracketed images in a range. The range of images could run from -3 up to +3 with an exposure interval of one.
- The main reason to use a tripod is to avoid the camera moving between exposures. For this reason, it’s best to set the camera to a self-timer. The camera will then take all bracketed images in a burst of photos at the end of the countdown.
- You now have a set of bracketed images of the same scene, and you’re ready to move onto post-processing.
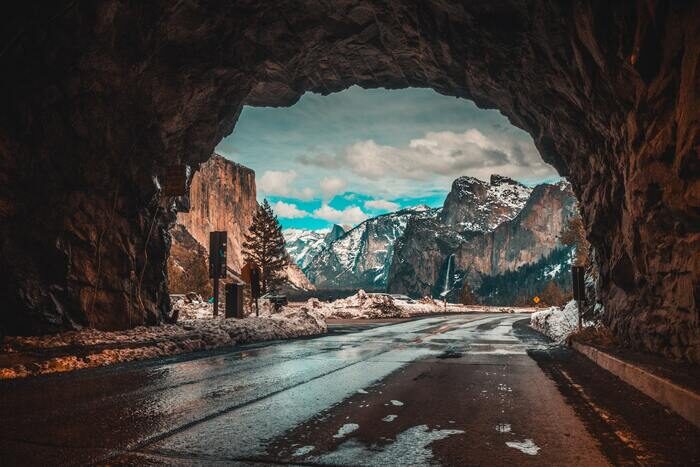
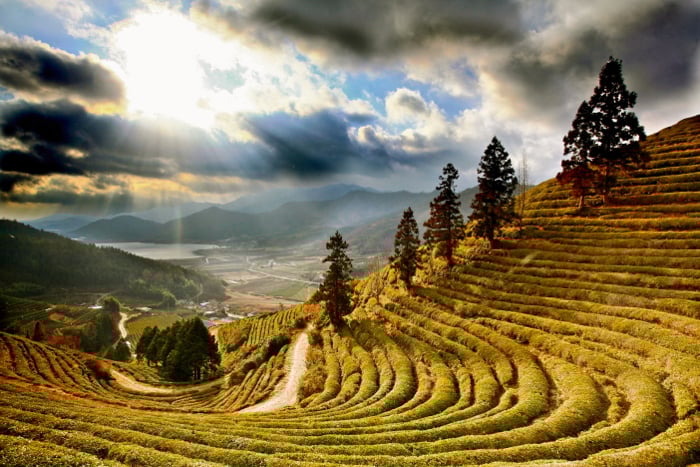
There are times when the HDR halo can work to your advantage.
How to Create Your HDR Image
The next step is to produce a HDR image. There are various programs you can use to do this. Each program uses automation, so you’re not in complete control of this step.
The options you could use for HDR are as follows.
- Photomatix – This is the most well known of the HDR programs. It is easy to produce tone-mapped HDR images using this software.
- Aurora HDR – This is a standalone or a plugin for other software such as photoshop. It’s designed by Skylum, whose packages work best on a Mac.
- Photoshop HDR pro – This is the built-in HDR software in Photoshop. It works very well to produce great results as well.
These packages allow you to select your series of images and then upload them to the program. You will get a set of options such as removing ghosting from things like moving foliage.
Your end result will be a HDR image. You could stop at this stage, but most people move onto tone mapping their image.
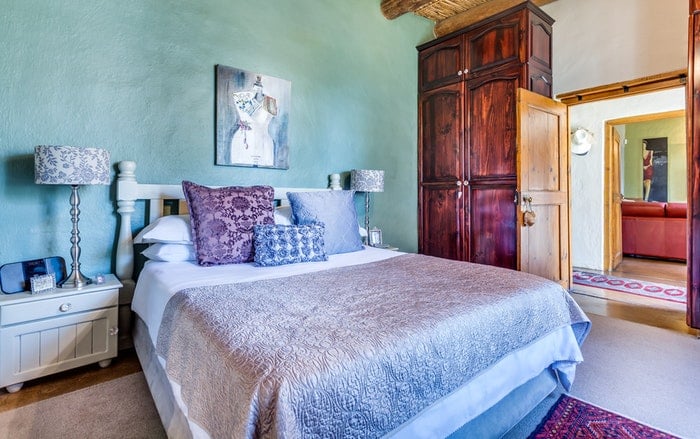
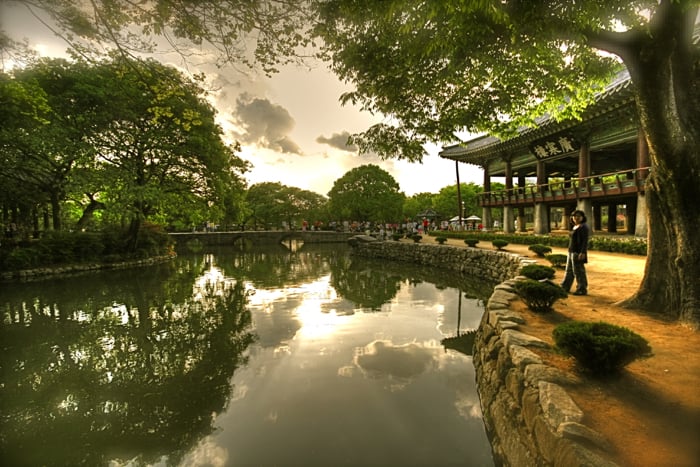
Interior photography, where you want to bring out detail across the scene, can work well for HDR. Jean van der Meulen, Pexels
Use Subtle Tone Mapping on Your HDR Image for Realistic Results
The next step is, of course, tone mapping your image. At this point in the process, you could crank up the post-processing dial. But most people agree that subtle processing is the best approach here.
You want your image to look as realistic and natural as possible. Things to avoid are the metallic blue sky and aura around tall structures that HDR processing can produce.
Let’s look at the options for tone mapping your image.
- Photomatix – Use this program to complete the workflow from HDR to tone mapping that image. Choose the preset options you desire to tone map your image. It’s best to use the more moderate filters. Adjust the dials accordingly for contrast and saturation.
- Aurora HDR – Use this as a standalone app, or a plugin for Photoshop to complete your tone mapping workflow there. The advantage of using this as a plugin is you can use layer masking in Photoshop. Selectively apply the tone mapping effect to the areas of the image that most need it.
- HDR Toning in Photoshop – As mentioned earlier, this is Photoshop’s built-in tone mapping tool. It’s a reliable option that gives you much the same editing choices like the above two packages.
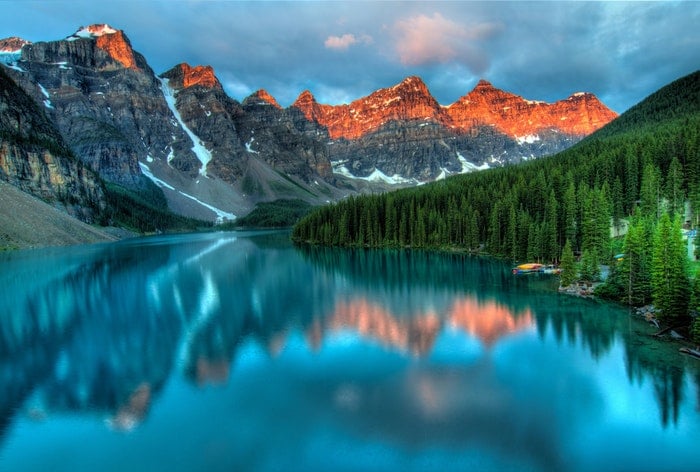
Photo by James Wheeler from Pexels
Should You Use Digital Blending Instead of HDR?
The more advanced you become at photography, the more you’ll want to control each step of the process. This is true in HDR photography as well.
You can create an image with a higher dynamic range manually. The post-processing technique for this is called digital blending. The process is best explained by a website that specializes in this technique.
The process is actually identical for the in-camera phase. You’ll need to produce a set of bracketed images. At this point, the process diverges, and you take control.
Using Luminosity Masks to Create a Digitally Blended Image
The following is a guide to the steps you take to produce a digitally blended image. Once you have that image, you may choose to tone map it or use other post-processing techniques to enhance the image further.
- This technique is Photoshop based, so you’ll need to add your photos to Photoshop.
- Now layer the images on top of each other.
- At the bottom, the base layer should be your photo that was exposed at zero exposure value.
- Create a series of luminosity masks using the base layer image. These masks will grade the brightness across the entire picture. There should be six of each light, dark, and mid-tone luminosity masks.
- You can now use these luminosity masks to selective brighten and darken areas of your base image. You’ll need to use the other brighter and darker bracketed images to do this.
This image used digital blending to increase the dynamic range across the image. The ability to manually choose where to apply this process leads to powerful results.
Common Questions About HDR and Tone Mapping
The following are some of the typical questions people ask about HDR photography. If you’re new to photography, these questions will be especially relevant to you.
What Is Tone Mapping?
HDR tone mapping is a post-processing technique. It uses a set of photos with differing levels of exposure. This technique then merges these photos to produce a picture that has more detail. The software then uses an algorithm to accurately tone map the image, to give it a realistic look.
How Does HDR Photography Work?
Your camera will only see in one dynamic range. Camera sensors are improving, but they won’t see what the eye can see. This is in contrast to what you see with the naked eye, which sees things in many dynamic ranges.
HDR photography works to emulate what you see with your eye. It does this by merging more than one photo. These photos will have different exposure levels.
What Is HDR Toning in Photoshop?
HDR toning in photoshop is an adjustment you can make to a single file. The feature has several presets. It acts in much the same way as the tone mapping element of HDR programs like Photomatix.
A typical workflow on photoshop would first merge several images using file>automate>merge to HDR pro. The next step would be to process this image using the HDR toning feature.
What Is Tone Compression?
Tone compression sets the correct tone across the image. This process in HDR photography produces a base image, from which you can make other edits.
The effect of tone compression is a brighter image, with more saturation. When done well, it adds more realism.
HDR tone mapping is often used when photographing towards the sun. Without using HDR the tree’s in this image with be dark and silhouetted.
Conclusion
Post-processing is an integral part of photography. It’s very much the digital darkroom.
It’s worth investing the time to learn which post-processing techniques work best for your photography. If you’re interested in landscape or interior photography, then learning how to use HDR is a great idea.
Have you tried HDR photography? What’s your opinion about tone mapping? Here at expert photography we value your opinion and would love to hear from you. If you have example photos that use HDR and tone mapping, please share them in the comments section. We’d love to see them!