Topaz DeNoise AI solves the problem of digital "noise." You'll know that if you've ever had to use really high ISOs, your photos can be ruined by noise. It introduces colors that aren't there and loses the detail by producing unattractive blotchiness.
But sometimes you can't avoid it. So, having a solution like Topaz DeNoise AI sounds perfect. Can it really help? Well, I've used it a lot, and this review will share my experiences with you. You'll find out the strengths and weaknesses and how to use it. Hopefully, you'll also know whether it's the right choice for you.
Topaz Labs is hosting a Black Friday sale this week, and you can get this noise reduction software for up to 60% off as part of Topaz Lab’s Black Friday offer.

Topaz DeNoise AI Review: What You Need to Know
Topaz Labs was one of the first companies to use artificial intelligence (AI) to reduce noise and improve sharpness. And that experience shows in the performance of their software.
DeNoise AI works so well because it’s based on artificial intelligence. The programmers have input millions of images (both with noise and without). And they have written a machine-learning algorithm to work out how best to reduce the noise levels.
The research continues. And one of the significant advantages of buying DeNoise AI is that Topaz Labs is constantly updating it. Yes, you must pay for those updates after the first 12 months. But it’s still worth it!
What is Noise, and How Do You Fix It?
There are two types of image noise:
- Color (chroma or chromatic) Noise—refers to pixels that are the wrong color.
- Luminance Noise—refers to pixels that are the wrong brightness.
Noise doesn’t affect the artistic merit of an image. But it can be so distracting that it’s worth trying to avoid. Plus, removing noise is best if you want to produce a print to hang on your wall.
One way to prevent or correct noise is by using specific techniques in-camera:
- Lower your shutter speed and widen your aperture to keep the ISO as low as possible.
- “Expose to the right,” meaning overexpose your image deliberately (by, say, two-thirds of a stop) and then darkening the highlights and midtones.
- Take a batch of identical images and combine them using multiple exposures or focus stacking.
But perhaps you can’t retake the photos. In that case, one of the easiest ways to reduce noise is to use noise-reduction software like Topaz DeNoise AI. The AI does the heavy lifting for you.
Is Topaz Labs DeNoise AI Meant for You?
Topaz DeNoise AI functions as a standalone program or as a plugin for other editing software such as Lightroom, Photoshop, or Topaz Studio.
It has a straightforward, intuitive interface. Plus, it has a host of tutorials on the Topaz Labs website that make it easy to learn.
There are automatic options for everything. But you can always take over and make manual adjustments if you wish. There is also a Masking tool to apply local adjustments if you only need noise reduction (and sharpening) in a small part of the image.
It would be nice if there were a slider that could dial up and down the overall effect like the one that now works with presets in Lightroom. That might arrive in a future release.
You can buy Topz DeNoise AI on its own or invest in the Image Quality Bundle. It contains the three main programs—Topaz DeNoise AI, Sharpen AI, and Gigapixel AI.
Topaz DeNoise AI has a 30-day free trial. It means you can “try before you buy.” And you can even save 15% if you use the EXPHOTO15 ExpertPhotography discount code on the Topaz Labs website.
Both DeNoise AI and Sharpen AI offer noise reduction and sharpening. But DeNoise and AI Sharpen AI are obviously better at their namesake. Gigapixel AI is used to scale up an image. It is typically used when you don’t have enough pixels to print it in a large enough size.

Key Features: How to Use Topaz AI DeNoise?
After you’ve downloaded the program from the Topaz website, it’s easy to start. You must drag your image(s) into the main window, click the “browse images…” button, or drag and drop photos onto the Topaz DeNoise AI icon in the dock on a Mac.
Alternatively, you can use the Topaz DeNoise Lightroom plugin or Photoshop plugin by right-clicking on any image and choosing DeNoise AI from the “edit in…” menu.
It’s almost “too easy” to use Topaz DeNoise AI. But you must use it correctly to get the most out of it.
Tips for Using Topaz AI DeNoise
The first thing to remember is that you should always reduce noise before sharpening. This step helps avoid “sharpening the noise.” It doesn’t matter if you reduce noise in Lightroom before you sharpen because the program “knows what it’s doing” and makes allowances.
But it doesn’t apply if you use both Topaz DeNoise AI and Sharpen AI on the same image because they’re separate programs. It’s not a huge deal as both software programs have sliders for Topaz noise reduction and sharpening. But getting your workflow right is worthwhile if you want the best possible results.
It’s also important not to go too far with your adjustments! It can be easy to overdo noise reduction and make everything absolutely smooth. But remember that your images should still have details in them. You may have to dial it back sometimes. Noise reduction isn’t everything.
Bearing those warnings in mind, let’s have a look at the main features of Topaz Labs DeNoise AI.
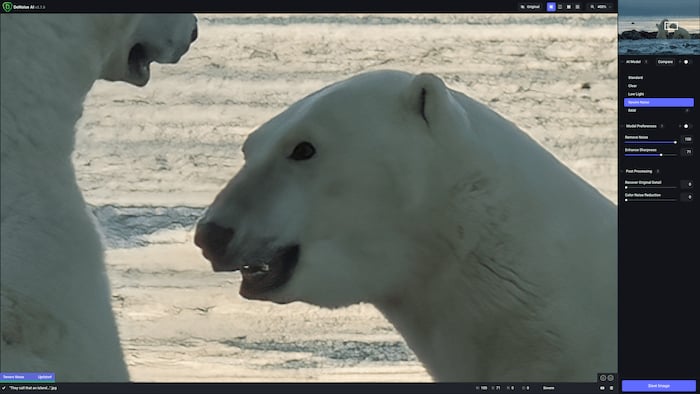
Overprocessed image in Topaz DeNoise AI. © Nick Dale
Different AI Models
Most software programs carry out each task in the same way every time. But Topaz DeNoise AI is different because you can choose from several competing AI models.
To get the best results, you must compare them and choose the best one. Then you might have to make manual tweaks if necessary.
There are 5 different models:
- Standard—is the default model.
- Clear—is best for subjects with smooth, rounded surfaces such as water and skin.
- Low Light—copes best with images taken in the dark, as the name suggests. But it’s generally the most effective option.
- Severe Noise—is designed to rescue images with very high ISOs. But you must be careful not to use it unless really needed. It can strip away a lot of detail and leaves the image looking artificially smooth and fake.
- RAW—will work best with RAW files (such as NEF images from a Nikon camera). But it can’t save them in their original, proprietary format. So you have to choose TIFF, JPEG, or DNG.
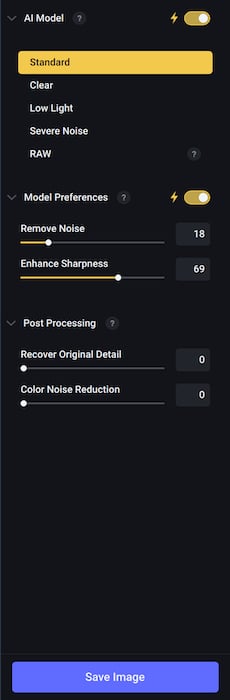
Topaz DeNoise AI Model Options
Other Ways to Choose an AI Model
It obviously slows down your post-processing workflow if you have to choose the right AI model every time. And the processing speed is not great. But you have two other options:
- Comparison View—lets you compare 4 models in 4 separate windows and select the best one.
- AI Model—this toggle switch automatically tells the program to select the model. But—and this is a big but!—it doesn’t work in Comparison View.
Whichever approach you choose, it’s sometimes not easy to find the right balance between sharpening and noise reduction. It’s always more of an art than a science. And different people have different views on what looks “natural” and what looks “fake.”
All you can do is give it your best shot. And perhaps ask a friend or colleague to check your work.
Another way to speed things up is in the Preferences menu. It’s under “help” on a PC and under “Topaz DeNoise AI” on a Mac. You can choose your “AI processor” and set the “allowed memory consumption” to “high.” Those two changes should make a big difference.
Automatic Settings
One of Topaz DeNoise AI’s strengths is its simple user interface. The key to that is the number of automated options.
The program will do everything for you if you switch on the AI Model and Model Preferences toggle switches. It chooses the model and the noise reduction and sharpness settings. And it creates a preview of the edited file, which means all you have to do is click “save image.”
If you want to customize the settings, that’s easy to do, too. You can choose a different AI model and play around with the Remove Noise and Enhance Sharpness sliders to your heart’s content.
There are even a couple more Post Processing sliders:
- Recover Original Detail—lets you add a little bit more sharpness.
- Color Noise Reduction—lets you eliminate rogue pixels that are the wrong color.
These last two sliders are nice, but they don’t make a massive difference to the final image. In any case, Lightroom is pretty good at reducing color noise if you want to use that instead.
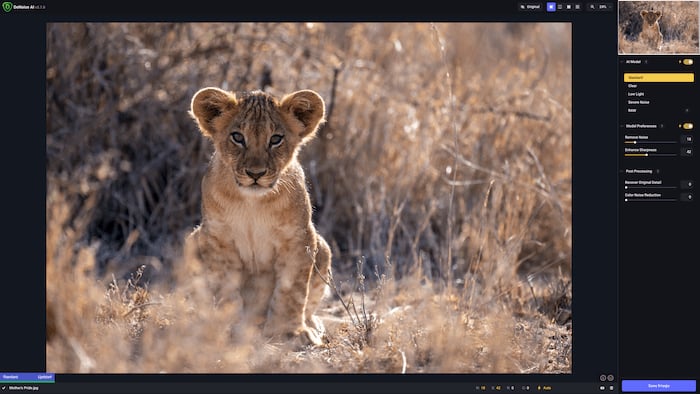
Image processing with automatic settings. © Nick Dale
Masking
Topaz DeNoise AI does its best to apply only sharpening and noise reduction where needed. But it’s not quite up to the job sometimes.
That’s where “masking” comes in. Local edits are usually more precise than global ones. And masking allows you to choose exactly where to apply noise reduction and sharpening.
A “mask” usually hides an area you don’t want to be affected. But here, it’s the opposite. It shows the area you do want to be affected.
A Topaz DeNoise AI “tool tip” pops up when you hover over the masking icon at the bottom of the window. It says, “selectively denoise your image.” The idea is that noise reduction and sharpening will only affect the masked area.
Of course, Topaz Denoise AI could be more convenient. The program could automatically select the subject for sharpening and apply noise reduction everywhere else. But that’s not possible… yet!
A dropdown Brush menu lets you add to or subtract from the mask. And sliders and buttons cover various other options:
- Size
- Opacity
- Edge Aware
- Sample Area
- Modify (Clear Mask and Invert Mask)
- Overlay (Always Show Overlay, Overlay Color, and Overlay Opacity)
Once you’re happy with the mask, click “apply” and save your image as usual.

Masking. © Nick Dale
Flexible Viewing
There are several different ways of viewing your image in Topaz DeNoise AI and Sharpen AI. You can click on the preview window to center the image wherever you want. After that, you have four different options:
- Single View—shows the edited image fullscreen.
- Split View—has a dividing line you can move from side to side. It has the original image on the left and the edited version on the right.
- Side-by-Side View—shows the edited and original images next to each other.
- Comparison View—shows previews of four different AI models in four separate windows.
Comparison View is probably the most useful. But it obviously can’t show all 5 possible AI models if you’re editing a RAW file. Select one of the windows to see the missing model and click the new AI model in the right-hand menu pane.
Other Useful Options in Topaz DeNoise AI
There are also a couple of other useful options:
- Original Button—allows you to preview changes for comparison purposes by holding it down (or you can click anywhere in the preview window). The image goes back to the sharpened version when you let go. It’s a convenient way to see before-and-after views.
- Zoom Dropdown Menu—offers “zoom to fit” presets o 50%, 100%, 200%, and 400% (with keyboard shortcuts). You can also enter any value in a text box or use the slider provided.

Comparison View in Topaz DeNoise Ai. © Nick Dale
Bulk Editing
Topaz DeNoise AI has a bulk editing option if you need to process several images. Just open all the files as usual. Then click the checkboxes to change the AI model and other settings for each one.
Just make sure you’ve selected the correct settings for all the files. It’s not apparent whether the AI model or just the sharpening and noise reduction settings will be chosen automatically. So it’s worth a second look. Once you start the bulk edit process, it’s too late to change anything.
Bulk editing is quite a convenient, time-saving option, and it’s faster than processing one file at a time. But it’s worth pointing out that Topaz DeNoise AI is not very good at choosing the right AI model. So you’ll probably get better results using Comparison View.
Challenges to Keep in Mind
You should also be mindful of how much computer memory you’re using. Topaz DeNoise AI can be demanding of system resources. Other programs may slow down while files are being saved. Plus, you’ll likely find your memory usage increases exponentially if you sharpen many files one after the other!
You can either close and reopen Topaz DeNoise AI at that point. Or you can clean up your memory using a program (such as Dr. Cleaner for a Mac).
Finally, bulk editing can be dangerous. It’s a “one-size-fits-all” solution. So it’s important to check the image quality of each individual file after processing. Make sure there are no nasty artifacts visible, and there’s an acceptable level of detail.
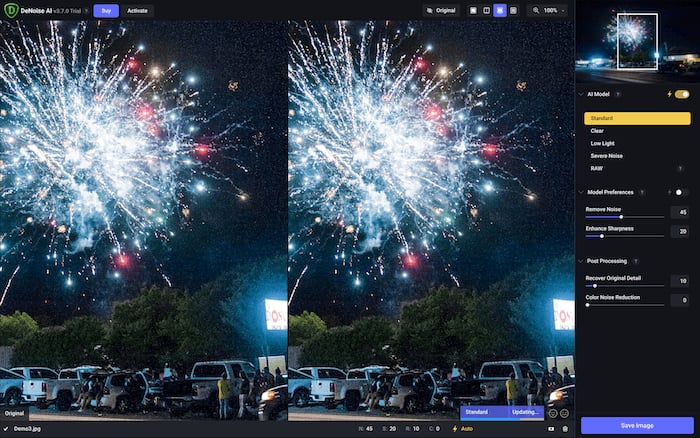
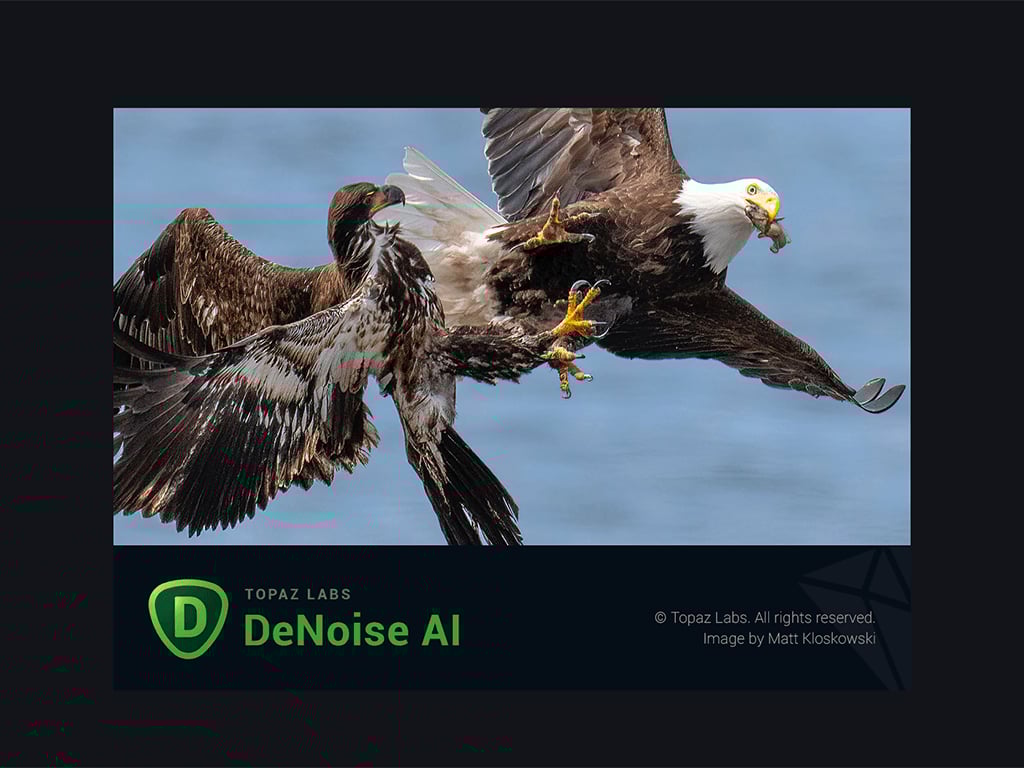
Demo picture in Topaz DeNoise AI trial
Alternatives to Topaz DeNoise AI
There are several alternatives to Topaz DeNoise AI on the market. But these are your best options:
- Adobe Photoshop—is a subscription product that can handle noise reduction. But—like so many other things in Photoshop—it’s complicated! It’s simple enough to go to the Reduce Noise menu option (under Filter/Noise) and play around with the Basic and Advanced options. After that, you might have to switch to Lab Color mode, create a new layer, select the Lightness channel, create a new Lightness channel… and so on, and so on. Are you bored yet?!
- Adobe Lightroom—is another subscription product. It has a Noise Reduction section in the Detail panel in the Develop module. This has Detail and Contrast sliders for luminance, noise, and detail and Smoothness sliders for color noise. Color noise reduction is excellent, but DeNoise AI is better at luminance noise reduction.
- Capture One Pro—is a subscription-based photo editing program similar to Lightroom. It does an excellent job of noise reduction and has a unique Single Pixel slider to eliminate individual “hot pixels.”
- Noise Ninja 4—is part of PictureCode’s Photo Ninja RAW converter. You can download it for free, but you have to pay to save files. It works as a plugin with Lightroom and Photoshop, and there are separate settings for luminance and chroma noise reduction. It’s easy to use and has a Defringe slider to remove halos. It works well. But there is often a noticeable loss of contrast.
- Skylum’s Luminar Neo—is a bundle of editing tools you can buy for a one-off fee and install as a Photoshop or Lightroom plugin. Noise reduction is just one of many AI-powered adjustments. The interface is clear and straightforward.
- DxO Pure RAW 2—is an image conversion utility you can integrate with Lightroom for a one-off payment. It’s not cheap, but the DeepPRIME noise reduction is excellent for rescuing images shot at higher ISOs without any smudging or “watercolor effect.”
Verdict
Modern cameras cope better and better with high ISOs. But there’s still a need for noise reduction programs. And that’s especially true for software based on artificial intelligence like Topaz DeNoise AI.
I hope this DeNoise AI review shows the value of Topaz Denoise AI. It is probably the best one currently on the market.
Topaz DeNoise AI has a simple interface that’s easy to work with, and masking tools are easy to use. It has a nice balance between automatic functions and manual sliders. And the results speak for themselves!
You can try a free trial of Topaz DeNoise AI out for yourself. And if you decide to buy it, save 15% using our DeNoise AI coupon code EXPHOTO15.
Scores
[scores price="no" product="30660″ tag="expertphotog-20″ toc="no" left_title="Measurement" right_title="Score"]