You’ve probably heard of RGB and CMYK. Those are the two most commonly used color spaces.
But they’re not the only color spaces. Lab Color space, for example, is the most accurate one. Here’s how Lab Color works, and how to use it in Photoshop.
What Is Lab Color?
You’ve probably heard of CMYK and RGB color spaces. As a photographer, I’m guessing you’re most familiar with RGB (‘Red, Green, Blue’). Cameras and computer screens use this color space. CMYK, on the other hand, stands for ‘Cyan, Magenta, Yellow, Black’ and is often used by graphic designers to print artwork.
© Pixabay
Lab Color is a more accurate color space. It uses three values (L, a, and b) to specify colors. RGB and CMYK color spaces specify a color by telling a device how much of each color is needed. Lab Color works more like the human eye.
It specifies a color using a 3-axis system. The a-axis (green to red), b-axis (blue to yellow) and Lightness axis.
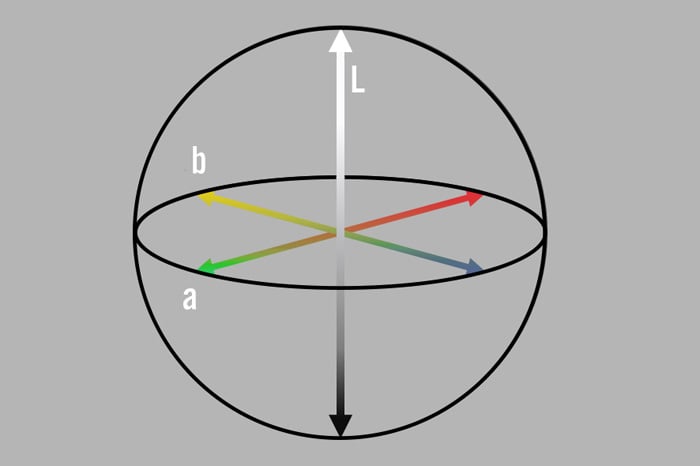
The best thing about Lab Color is that it’s device-independent. That means that it’s easier to achieve exactly the same color across different media. It’s mainly used in the plastics, automotive, and textile industry.
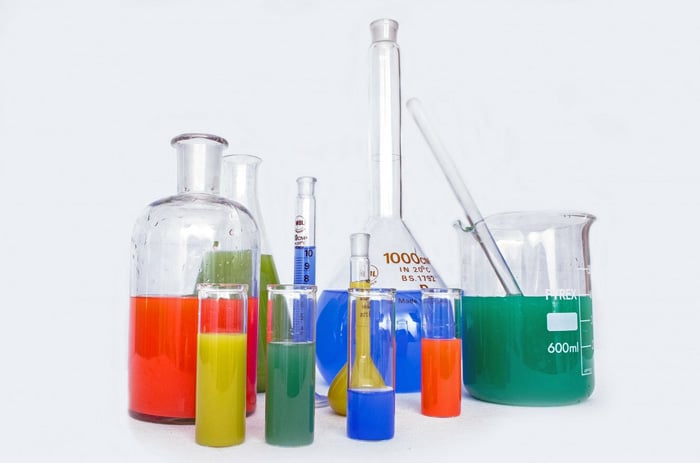
Here’s an example of how Lab Color can be used.
If your company wants to put their logo on a cup, a T-shirt, or a banner, it could be a good idea to use Lab Color. That way, you’ll be sure that the colors look exactly the same.
How to Use Lab Color in Photoshop
It’s very easy to change from RGB to Lab Color in Photoshop.
Step 1: Convert to Lab Color
Open any image in Photoshop. Go to Image > Mode and choose Lab Color.
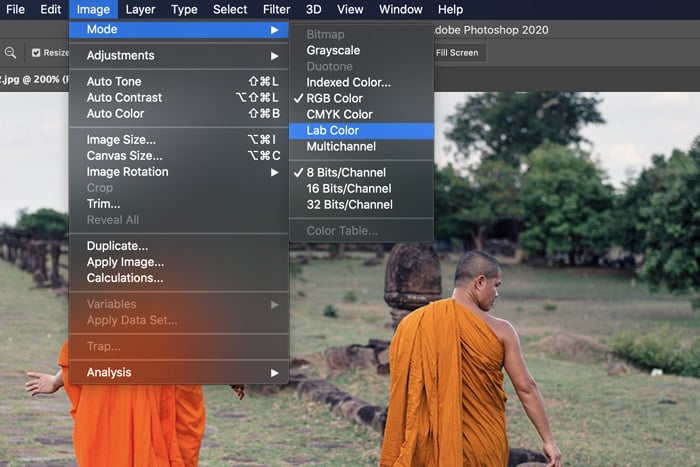
Or, go to Edit > Convert to Profile and select Lab Color.

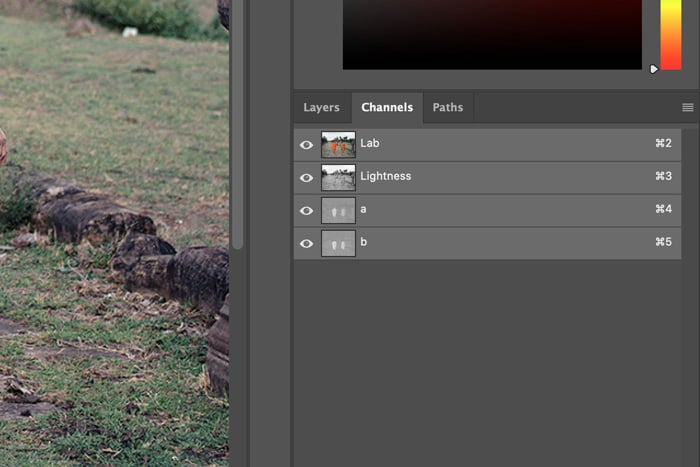
Step 2: Check Channels
Once you’ve converted your image, open the Channels panel. If the panel is not visible, go to Window in the top menu and choose Channels.
In RGB mode you would see the Red, Green, and Blue channel. In Lab Color mode, you’ll see the a, b, and L channel. The ‘a’ channel shows you the values on the red to green axis, while the ‘b’ channel shows the values on the blue to yellow axis. The ‘L’ channel shows no color info at all. Here you can see how light or dark each color is.
The Advantage of Using Lab Color in Photoshop
Because Lab Color space is such a wide color space, it allows you to do things you can’t do in RGB. You can actually make the colors in your photos look more vibrant and lively without moving the saturation slider and going over the top.
You can also use Lab Color to color grade and shift the colors in your photos. The 3 axis just opens up a lot of possibilities.
Conclusion
Even though Lab Color space is not popular amongst photographers, you should definitely learn how to use it. It offers a lot more variety which can help you when editing photos with vibrant and lively colors. Go ahead and try it out!