Exposing to the right (ETTR) is an exposure strategy that improves the quality of your final images. This technique can help you capture photos with less noise and as many details as possible in the shadows.
You can do this without losing information in the highlights. But ETTR is controversial. Many photographers agree and find ETTR very useful. But some think it is an unnecessary complication.
These differences in opinion might originate from the fact that ETTR is not the easiest technique. Using it incorrectly can ruin your exposure, and good results are not always obvious. Let’s see what it’s about, and you can decide if ETTR is for you.
- Master manual mode to capture moments you’re proud of.
- Overcome the frustration of missed shots with quick exposure settings.
- Benefit from visuals with hundreds of images and illustrations.
What Is ETTR (Exposure to the Right)?
Exposure to the right (ETTR) is a technique used in digital photography to maximize image quality. It involves intentionally overexposing an image to ensure you capture the brightest parts of the scene. Doing this without clipping (losing detail due to overexposure) is vital.
Photographers based this concept on the idea that sensors capture more data in brighter areas of an image than in darker ones. The trick is to expose the image to the right side of the histogram (hence the name “exposure to the right”).
That way, photographers can gather more information in the brighter parts of the image. Ultimately, this leads to better image quality, reduced noise, and increased dynamic range.
To apply ETTR, photographers typically use the camera’s histogram. The display helps ensure you push the exposure as far to the right as possible without clipping highlights. You often must change the exposure settings (aperture, shutter speed, ISO) to achieve the desired result.
After capturing the image, photographers may adjust the exposure in post-processing. They bring back exposure to the desired brightness level while retaining the extra detail captured in the highlights.
The Fundamentals of Exposure
Exposure refers to the amount of light that reaches your camera’s sensor. A technically well-exposed image looks bright or dark enough. You don’t lose details in the shadows or highlights. It also has a similar look to the original scene you shoot.
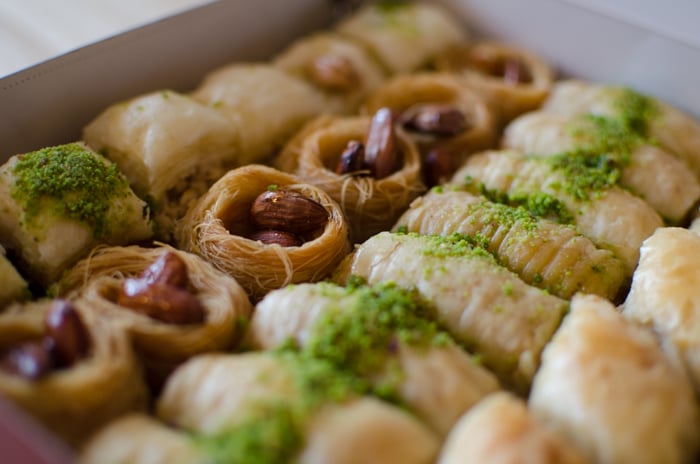
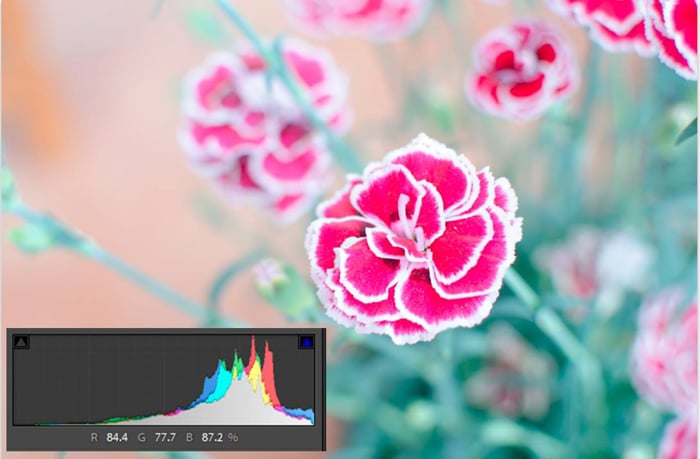
The tasty sweets pictured below look exactly as they were when I shot them. They’re not too dark or bright, so the image is correctly exposed.
Getting the right exposure requires understanding the exposure triangle. This includes ISO and exposure compensation. If you want to refresh your knowledge, read our tutorial on the exposure triangle.
How to Read a Histogram and Why It’s Important
Almost all cameras these days show the photo’s histogram. This display is a great tool for checking the exposure of your images. It’s a graph set on two axes that represent the range of tones in your image.
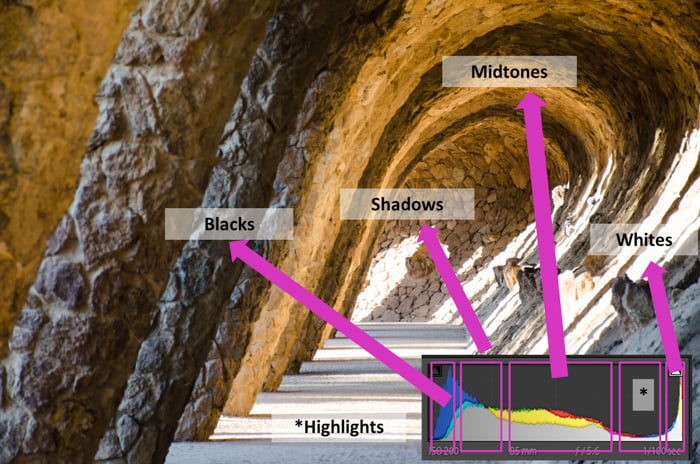
The horizontal axis represents your image’s tonal range, from pure black on the left to pure white on the right. It divides tonal levels into groups from darker to lighter. So we have blacks, shadows, midtones, highlights, and whites.
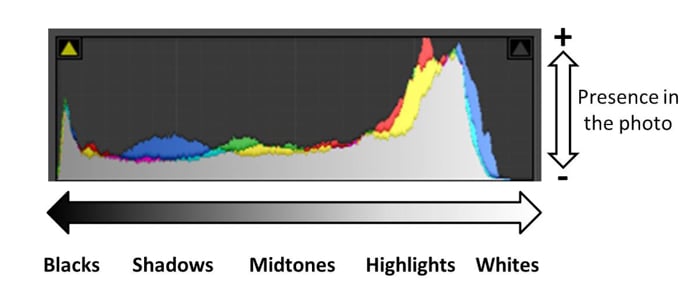
The peaks of the histogram represent the percentage of the pixels with a certain exposure value (EV). The higher the peak, the more pixels in the tone you have.
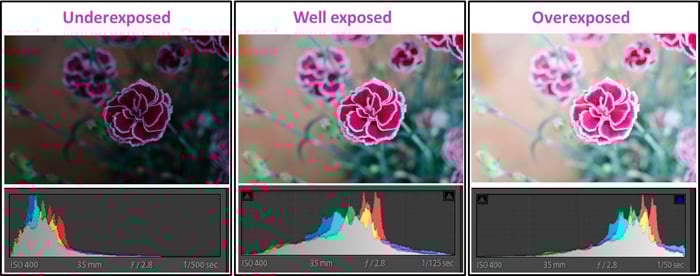
The image is well exposed if the histogram is “stretched” over the horizontal axis. If the histogram has more weight on the left side, the dark tones are predominant in the image. And you can say that your photo is underexposed.
If the histogram has more weight to the right, the photo is overexposed, and light tones are dominant. I took the three images below with different exposure settings. In the one on the far right, I exposed the photo for the highlight. This photo would work nicely for ETTR.
 It might happen that the peaks in one or both extremes are reaching out of the graph. These extremes mean you clipped the blacks (on the left side) or burned the highlights (on the right side).
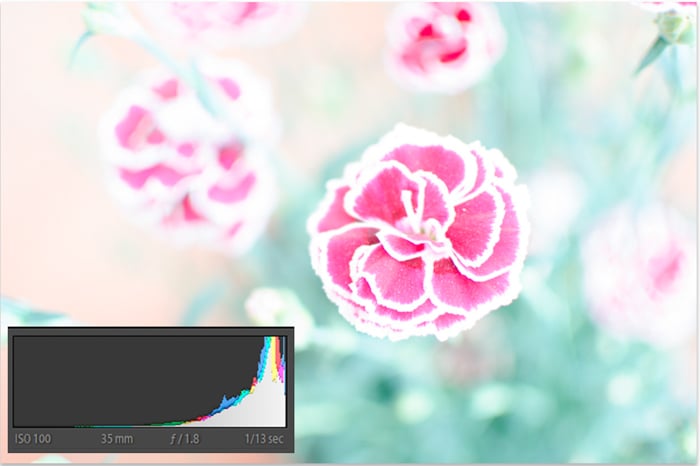
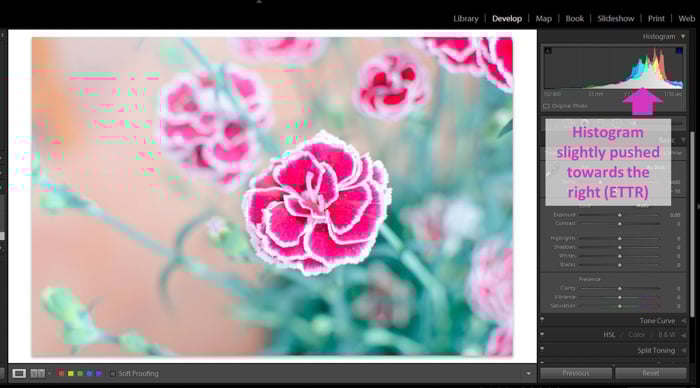
The histogram’s right side in the image below touches the graph’s border. This shift happens because I set the exposure to totally burn the whites.
Why ETTR Can Help You Take Better Images
The idea behind ETTR is to take photos with the histogram pushed slightly toward the whites. But you must also ensure you don’t burn the highlights. In other words, you intentionally overexpose your image without burning it. But what is it good for?
The theory is that you will have a higher-quality file after processing the photo back to the correct exposure. This technique is better than exposing the photo incorrectly or underexposing it.
And why is that? Well, the camera’s sensor captures light in a non-linear way. So, the sensor has less space for capturing dark tones than bright ones. For that reason, the right side of the histogram has more capacity to store information.
This detail has an important implication regarding the quality of the image file. Trying to recover details from blacks in post-processing produces noise in your image. There is not a lot of information to recover details.
Highlights can store information more easily if you want to recover details. The recovery process won’t affect the final quality of your image. And when you darken an ETTR image, you lower its ISO, reducing the photo’s noise.
How to Use ETTR for Better-Quality Images
When attempting to use the ETTR method, it is crucial to shoot in RAW. You need to post-process the images later, and RAW files allow you to make more adjustments than JPEGs.
ETTR is an easy technique. But it’s best not to burn the highlights because this can ruin your image. Use your camera’s light meter to evaluate the scene. And adjust the exposure triangle settings to be overexposed.
 Start by taking one overexposed image. To ensure you didn’t “burn” the photo, check the histogram to ensure that the highlights are not “climbing” on the right side of the graph.
Enable your camera’s display of “blinkies” (a visual indicator that marks burnt areas). This way, you can see the pure-white areas blinking. But keep in mind that blinkies are not as accurate as the histogram.
 If you think you can push the exposure of your image a bit further to the right, adjust the camera settings again and take another photo. And stop increasing the exposure when you see that you are burning the whites.
 Lastly, it’s best to decrease the exposure post-processing. You can use any editing software, like Adobe Lightroom.
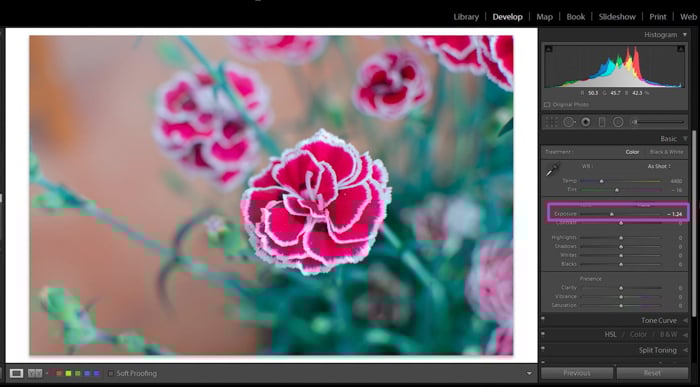
When you import the image to Lightroom, you can see its histogram in both the Library and Develop modules. In the Develop module, you can correct the exposure with the Exposure slider.
Comparison of Different Exposures and Edited ETTR Photo
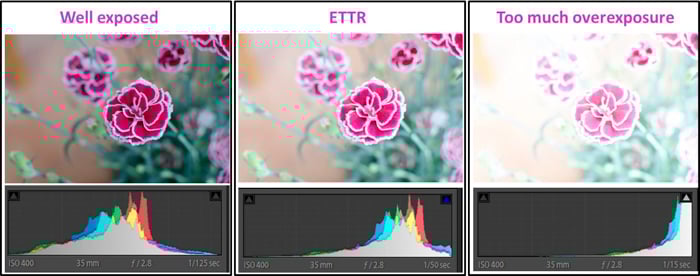
When you compare the photos straight from the camera, you can see that the ETTR is overexposed. The comparison below is between a well-exposed image and an ETTR image, both straight from the camera.
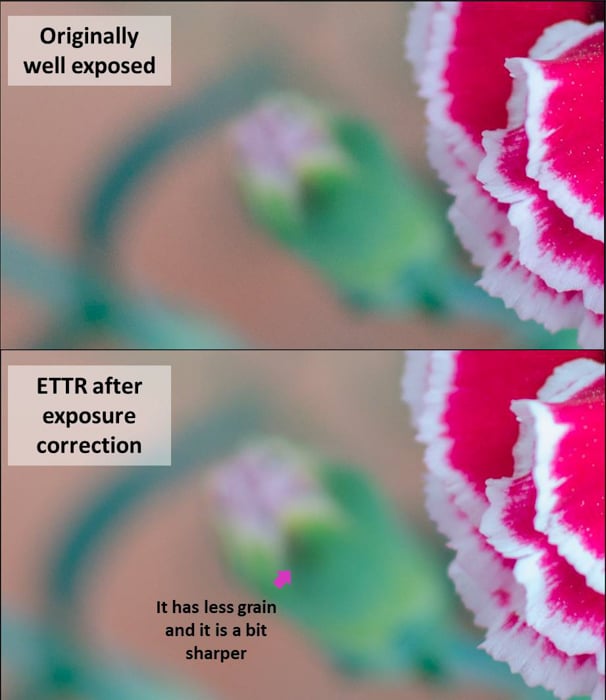
The last image is after decreasing the exposure of the ETTR image. As you can see, the two photos appear to look the same.
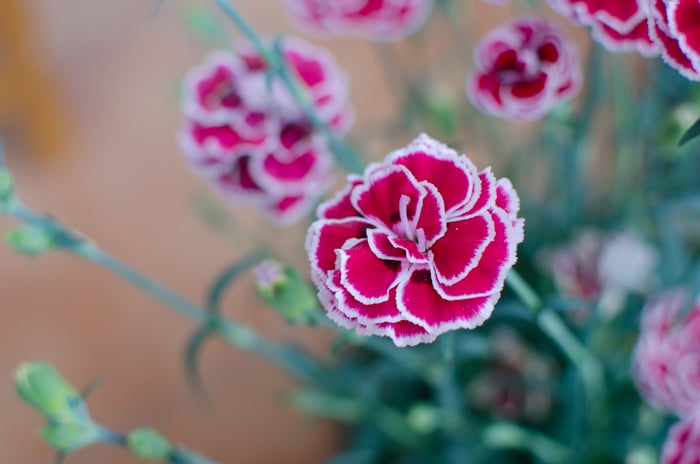
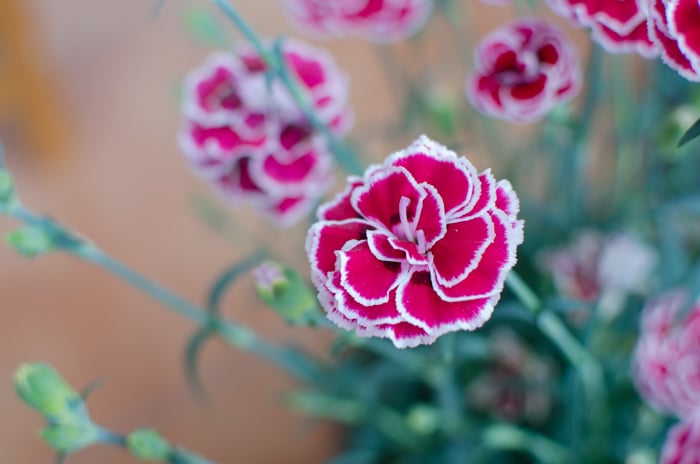
But if you zoom in on the darker areas, you can see the correctly exposed image has more noise. It’s also a bit less sharp than the darkened ETTR image. This example is what we want to achieve from this technique.
When to Use ETTR and When to Avoid It
ETTR is a good technique to know and keep in mind. Using it more or less often depends on what type of photographer you are.
Exposing to the right is useful if you can think ahead and plan the scene. You can give yourself time for a high-quality final image, so landscapes are a great subject for ETTR.
Another aspect that might influence your decision to ETTR is what you want to do with the photo. If you plan to print your image, ETTR could be very beneficial.
You might want to avoid using ETTR in other photo situations. Examples include kid’s portraits, weddings, sports, and wildlife photography. These are situations where you can’t risk missing a shot.
 You might also be restricted by the scene’s demands with the camera settings. In these cases, it’s better to be more conservative than risk burning too much of the scene.
Another situation in which ETTR doesn’t make much sense is when you need to increase the ISO to overexpose. When you increase the ISO, you also increase the noise in the photo. This example is exactly what you try to avoid when applying ETTR.
Save yourself from extra work in post-processing by taking a well-exposed photo with metered exposure.
Conclusion: How to ETTR for Better Exposure
ETTR (exposing to the right) is a seemingly easy technique. You need to overexpose your image and bring back the exposure in post-processing. But it has risks. Overexposing too much can accidentally ruin the image.
Master the histogram and use the camera blinkies to avoid overexposure. ETTR is also not useful in every situation, but keep these ideas in mind before pressing the shutter release!
- Master manual mode to capture moments you’re proud of.
- Overcome the frustration of missed shots with quick exposure settings.
- Benefit from visuals with hundreds of images and illustrations.


