Understanding the exposure triangle is crucial but a bit of a complicated part of photography.
I’ll guide you through the three elements of the exposure triangle—aperture, shutter speed, and ISO.
You will be able to understand how these settings interact with each other. Believe me. You can master the exposure triangle with a little practice!
Understanding the Exposure Triangle: What Is Exposure?
Exposure is the amount of light reaching your camera sensor or film.
It’s important to get the correct exposure. If your images are brighter than they should be, we say they are overexposed.
If you have less light than optimal, your images can be too dark. We talk about underexposed images in this case.
Both imperfections can be corrected during post-processing. But they can result in quality loss. So it’s better to learn how to find balance.

What Is the Exposure Triangle?
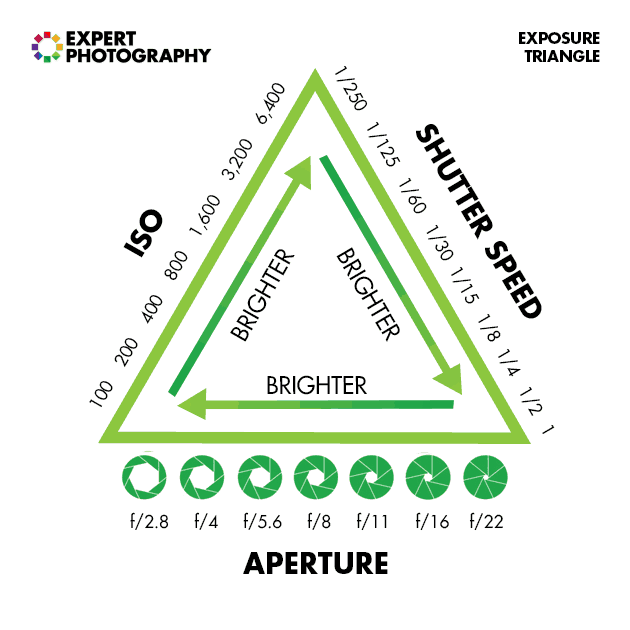
Three settings control your image’s brightness—aperture, shutter speed, and ISO. We call this trio the “exposure triangle.”
All three interact with each other and work together.
The exposure triangle can be easily visualized. As all these three elements are connected to the other two, you can get a perfect triangle if you draw it out.
They are connected because if you change one, it affects the other two. You have to adjust them to get the perfect exposure value.
 What Is Aperture?
When you press the shutter button to take a photo, the camera opens up a hole – the aperture – inside the lens. How much light falls on the sensor depends on how big the opening is.
It’s like how our pupils become small to limit the light that gets into our eyes. Also, our pupils get large in dim light to let in as much light as possible and increase how much we can see.
Photographers use a number system to refer to the size of the opening. What can be confusing is that larger apertures have smaller numbers, and smaller apertures have larger numbers.
An aperture of f/2.8 is wider than an aperture of f/16.

Aperture also controls how much of the scene is in focus. This is called the depth of field.
A deep depth of field means that more of the scene is sharp and in focus. A shallow depth of field means only some of the scene is in focus.
A wider aperture, such as f/2.8, will create a shallower depth of field than a narrower aperture, like f/22.
More of the scene will be in focus at f/22, but f/2.8 might give you a beautifully blurred background (bokeh).
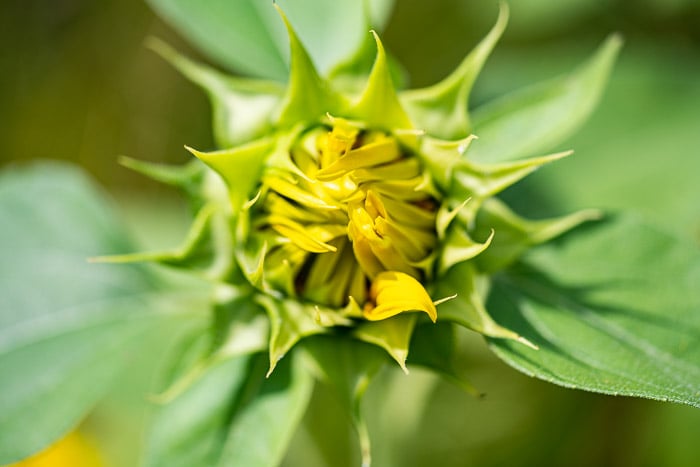
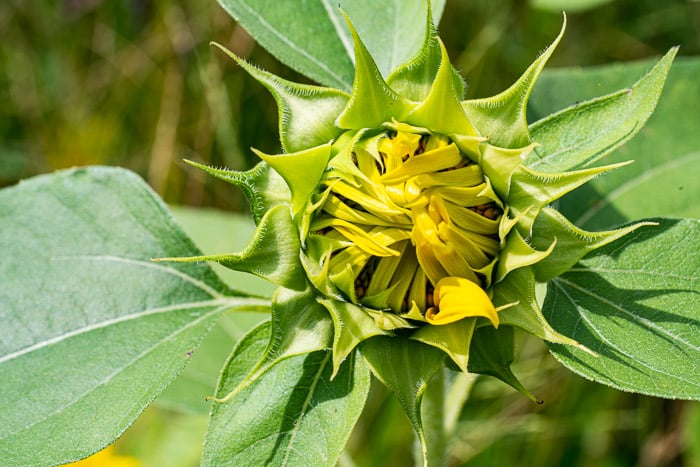
Here are two photos of a sunflower taken within seconds of each other. The only setting I changed was the aperture.
I took the first photo with an aperture of f/2.8 and the second with f/11. Notice how the focus and background change.
What Is Shutter Speed?
When you press the shutter button on your camera, you expose the digital sensor or film to light. You can open the shutter for a fraction of a second or minutes.
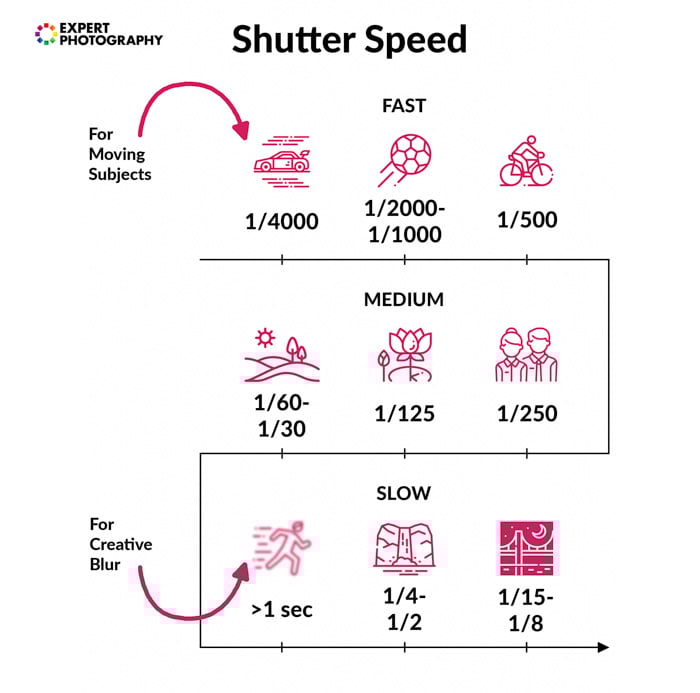
Shutter speed determines how long the light hits the camera’s sensor.
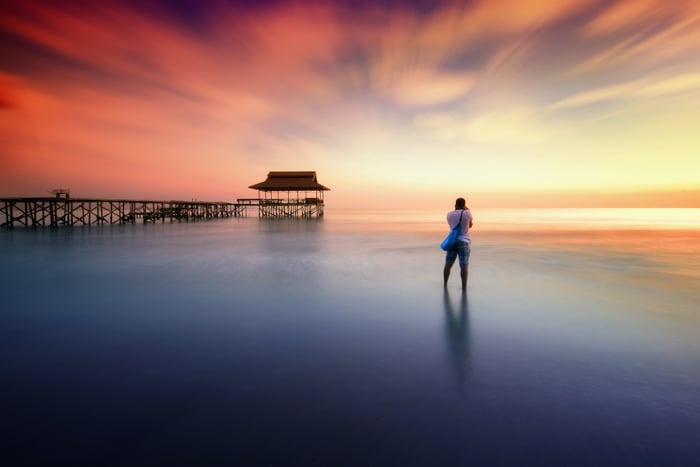
For instance, you can leave your shutter open for 1/100 s or 1 second, or even 100 seconds. The slower the shutter speed, the longer the shutter is open. This way, more light hits the sensor.
You want to gather as much light as possible into your camera in dim conditions. You can choose a large aperture. And you can leave your shutter open for a long time.
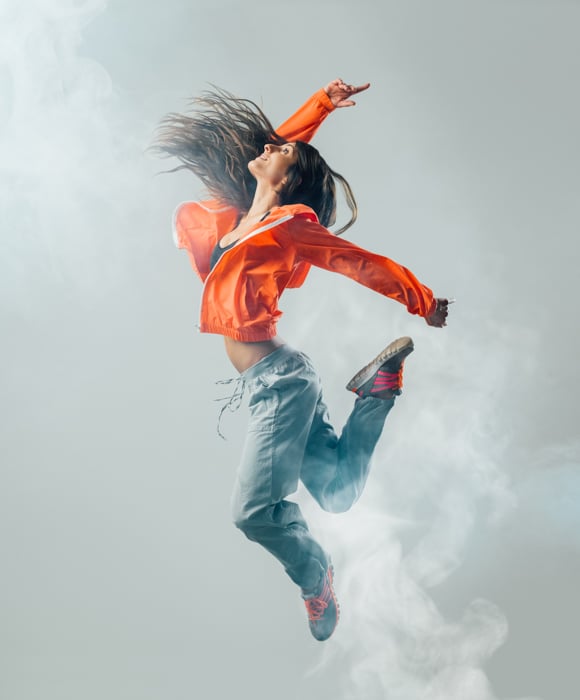
A faster shutter speed can freeze motion, while a slow value can create motion blur.
Note that a lot of cameras have a Bulb mode. It means the shutter is open as long as you keep the button pressed.
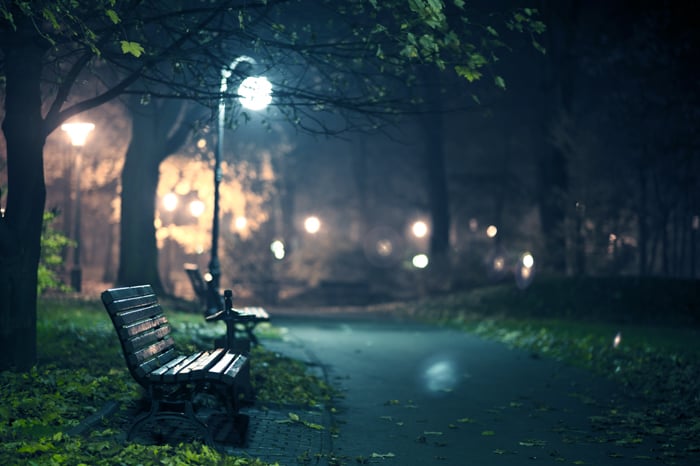
This allows you to capture the whole motion of a moving subject, such as fireworks. But it can be perfectly used for any night photography too.
For a slower shutter speed and Bulb Mode, you should always use a tripod to avoid camera shake and unwanted blur.

What Is ISO?
ISO refers to how bright your images are going to be. In film photography, it means the film’s sensitivity to light.
Photographers refer to ISO as a system of numbers. The lowest default on most digital cameras is ISO 50 or ISO 100.
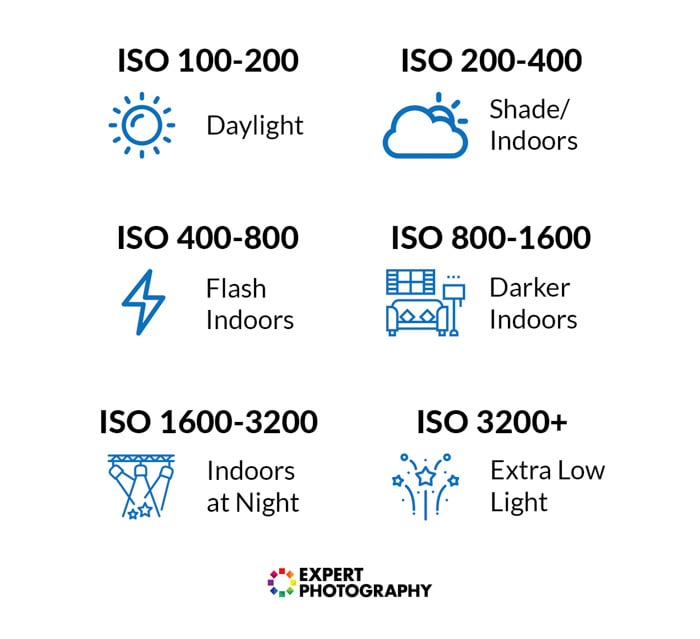
Low ISO values can be used in bright lighting conditions. Your images become brighter when you have less light and choose a higher ISO.
But a high ISO can result in digital noise and grain in your images.
Fortunately, with each generation of digital cameras, ISO performance increases. So you can set your ISO higher with little to zero visible grain. Nowadays, there are even ISO-invariant camera models.
You can also use post-processing tools like Lightroom to remove some of the grain that high ISO produces.
How to Take Correctly Exposed Images
As I mentioned, exposure is determined by the three elements of the exposure triangle. You can adjust your camera settings in many ways to expose your images correctly.
If you have the correct exposure and change the shutter speed, the ISO, or the aperture, you’ll also have to adjust at least one value from the other two.
For example, setting your shutter speed from 1/30 to 1/15 s doubles the light entering your sensor. A 1/15 s is a longer time than a 1/30 s. So you will have twice as much light as you originally had.
Therefore, you’ll have to set your ISO to a lower value. If you have an ISO 800, choose ISO 400 instead.
Which Mode Should You Use?
You can take photos in an automatic mode. If you are shooting in Auto mode, the light meter is the key for the camera to set the exposure correctly.
In this mode, your camera sets the ISO, the shutter speed, and the aperture based on what the light meter sees as correct.
You can also rely on a light meter if you are shooting in Manual mode and set the elements of the exposure triangle accordingly.
You can fine-tune your exposure value in Manual Mode as you wish.
But for this, you need to understand deeply how the exposure triangle works. You should practice, of course, but if you need to play safe, go with a semi-automatic mode.
Semi-automatic modes are also great for practicing. With them, you can also have enough control over your exposure, but they are less hard to understand and use.
Some genres, such as street photography, require the usage of these modes. You don’t always have enough time to set every value, even if you are a professional.
Try Aperture Priority mode. You may find this option labeled with an A or an Av on your camera.
Decide how much you want to blur the background or how many sharp details you want to have. And set your aperture accordingly. Your camera does the rest of the job by setting the shutter speed and ISO.
Shutter Priority mode lets you choose whether you want to freeze motion or capture motion blur. This option may be labeled with an S or a Tv on your camera. Your camera will choose the best aperture and ISO value to balance the exposure.
Try exposure compensation, too, if you want to override your camera’s suggestions. This option lets you quickly and easily make your images brighter or darker.
It works beautifully for example with snow photography. You can overexpose the scene a little bit to have the perfect shade of the snow in your images.
Even if you set everything precisely, you might need to deal with exposure during photo editing. This is one of the many important reasons you should shoot in RAW.
Conclusion: Master the Exposure Triangle
If you understand the exposure triangle, you will still need time for practice. Experiment with your camera settings. Try different modes of your camera. And see which is suitable for each situation.
You will get better and better over time! Controlling your camera lets you concentrate more on your compositions and ideas. And there will be fewer technical limits for your imagination. Plus, understanding exposure definitely improves your workflow.
Try our quick capture cheat sheets to brush up on all the essential photography concepts! These cheat sheets are the perfect visual tool to help you master photography.


