Shutter Priority is an assisted mode that gives you control of your camera’s shutter speed. Assisted modes like Shutter Priority and Aperture Priority are the perfect place to start if you want to move away from Automatic or Program mode but aren’t ready for Manual mode. In this article, we will explain what Shutter Priority mode is and when to use it. We will also explore why it is sometimes better than shooting in fully Manual mode.
What is Shutter Priority Mode?
In Shutter Priority mode, you set the shutter speed of your camera. Your camera then sets the aperture that complements your shutter speed to make sure the image is well-exposed. Aperture Priority mode is the reverse, where you select the aperture and your camera sets the shutter speed. In Manual shooting mode, you set both the shutter speed and the aperture.
Shutter speed is how fast the shutter opens and closes. This determines how much light comes into your camera. At a fast shutter speed, not much light will reach your sensor. But when the shutter stays open longer, more light reaches the sensor and so the image is more exposed.
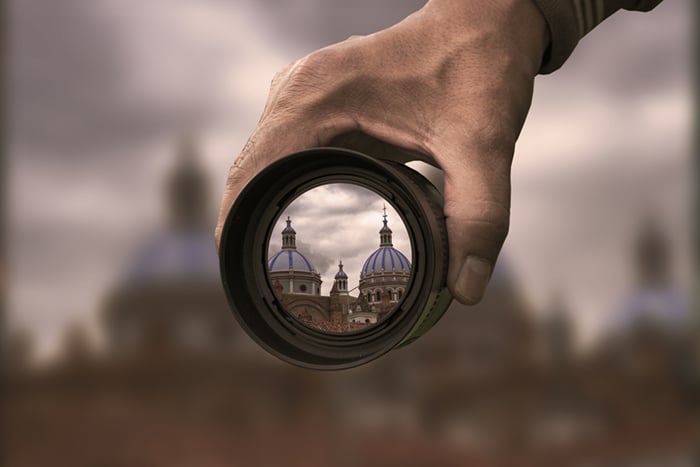
Shutter speed refers to how long your shutter is open (Image by Fernando Zhiminaicela)
In Shutter Priority mode, your camera will set the aperture to help you capture a well-exposed photograph. For instance, if you choose a fast shutter speed, your camera will set a wider aperture like f/2.8. This lets in as much light as possible during the brief time the shutter is open. If you choose a slow shutter speed, your camera sets a narrow aperture like f/16. This reduces the amount of light hitting your sensor. It’s all about the exposure triangle.
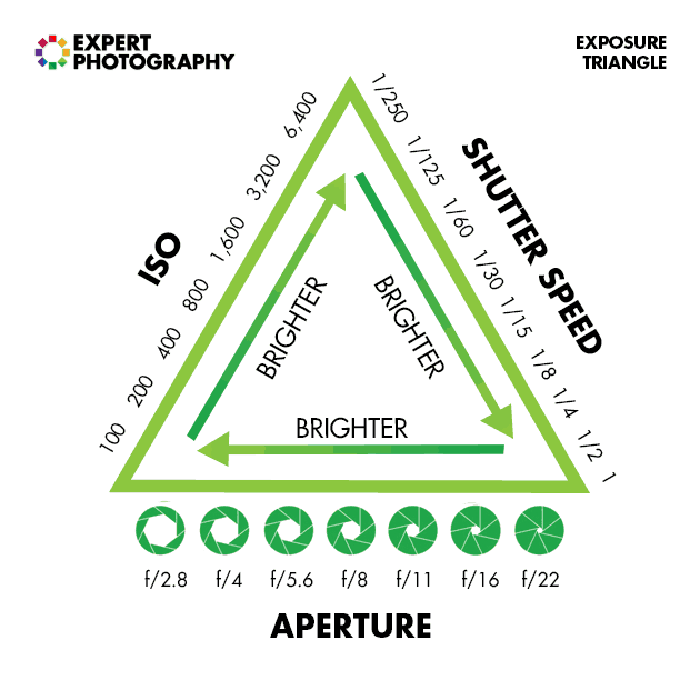
The exposure triangle shows how shutter speed, aperture, and ISO interact to create a balanced exposure
On most digital cameras, you can choose to open the shutter from between 30 seconds to up to 1/8000th of a second! For shutter speeds over 30 seconds, you can use Bulb mode to control how long the shutter stays open with a remote trigger.
How to Set Shutter Priority Mode
Cameras with Manual mode will also have Shutter Priority mode. Most cameras with this feature use a top mode dial to select Shutter Priority mode. This mode is labelled either with an “S” or “Tv”. Tv stands for Time Value. Aperture Priority mode is usually labelled with an “A” and Manual with an “M”.
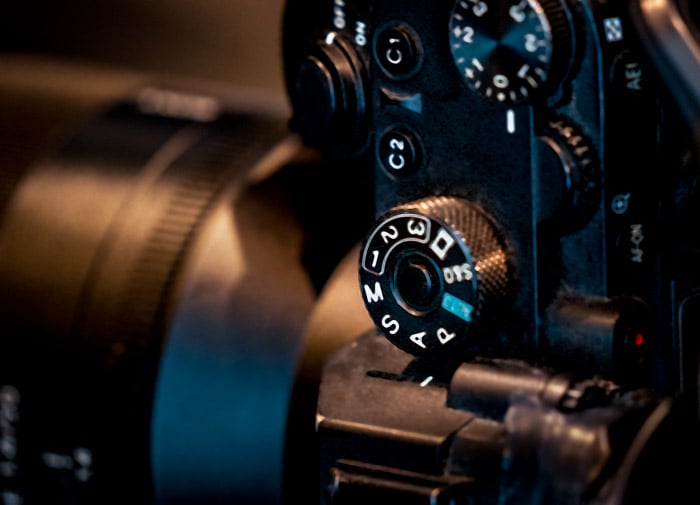
Shutter Priority is labelled as “S” or “Tv”
Set your dial to Shutter Priority mode, then choose your shutter speed. Camera models vary, but there is usually a dial on the top or side of the camera that controls shutter speed.
You can also set an ISO value along with your shutter speed. One option is to choose auto-ISO. In this mode, the camera chooses the best combination of aperture and ISO values to balance the exposure. Some cameras let you set an ISO range, where you decide on the minimum and maximum ISO. This ensures that your images will not get too noisy.
Raising or lowering the shutter speed will not change the exposure. Your camera adjusts the aperture to keep the same exposure. If you want a brighter or darker image, use the exposure compensation dial.
When to Use Shutter Priority Mode
Use Shutter Priority mode when the shutter speed is the most important factor for capturing the scene. For example, when photographing motion. Depending on your shutter speed, you can either freeze a moving subject or show motion blur.
Freezing Motion With Fast Shutter Speeds
A fast shutter speed freezes motion. This is important when photographing wildlife or sports. The faster the motion, the fast the shutters needs to be to freeze the motion. For instance, you can start with a shutter speed of 1/500th of a second when photographing birds in flight. But you may need to set a much faster shutter speed to freeze the motion of quickly beating wings.

Trumpeter Swans frozen in flight at a shutter speed of 1/1000th of a second
Blurring Motion With Slow Shutter Speeds
When you leave your shutter open longer, motion appears as a blur. Landscape photographers often like to blur water or clouds. The slower the motion, the longer the shutter needs to stay open to blur the motion. You need to leave your shutter open longer to blur clouds than when you are smoothing water. When blurring water or clouds, shutter speeds range from a half-second to minutes in length.
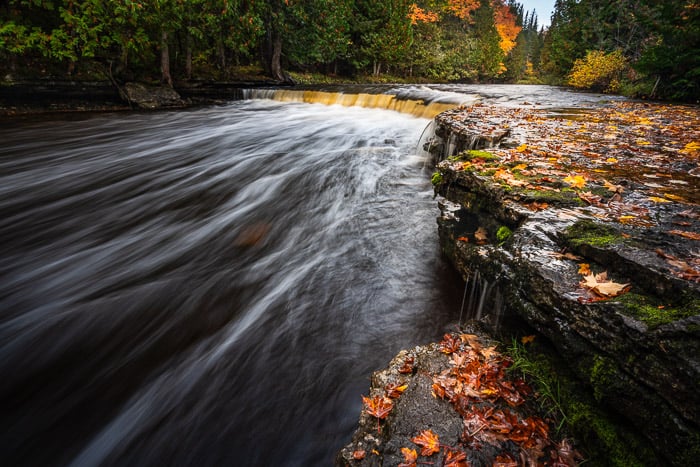
The motion of the water blurs at 0.6 seconds
You also have the option of creating motion blur for artistic effect. For instance, it is interesting to add some blur to a street scene. Or you can slow down your shutter a little bit and pan with a moving subject. Panning keeps the subject in focus but creates motion blur in the background. Try different shutter speeds to explore the amount of blur created.

Artistic motion blur of birds at 1/10th of a second
Avoiding Camera Shake at Slow Shutter Speed
When using long shutter speeds, use a tripod to stabilize the camera. A rule of thumb is to use a tripod if the shutter speed is slower than the focal length of your lens. Your shutter speed should be faster than 1/50th of a second when using a 50mm lens. But this is a rule of thumb—photographers who are more stable can handhold at a slower shutter speed.
You can use Shutter Priority mode to avoid camera shake showing up in your images. Set a shutter speed that is fast enough to avoid incidental camera movement. This is useful when you do not have a tripod handy.
Shutter Priority vs Manual
Shutter Priority mode can be better than Manual mode in some situations. For instance, if your focus is on capturing motion, you may not care as much about the aperture. In Manual mode, you have to pick the aperture setting that gives you the best exposure for the shutter speed selected.
In fast-paced situations like sports, you may not have enough time to fuss over the aperture. Also, if the lighting conditions of your scene change frequently, it’s often quicker to use an assisted mode. This may happen when the sun is moving behind clouds.
But, if you want to set the depth of field, switch to Manual or Aperture Priority mode. Depth of field determines how much of the scene is in focus. A shallow depth of field creates a pleasing background blur. One of the ways we get a shallow depth of field is by using a wide aperture.
If you use an assisted mode to shoot wildlife or sports on a sunny day, your camera will not select a wide aperture. It will try to control the bright light coming into the camera by choosing a narrow aperture. You’ll need to use Manual mode to override the camera’s emphasis on capturing a balanced exposure.
Use manual mode to use a fast shutter speed with a wide aperture (Image taken at 1/1000th of a second at f/8.0, ISO 1000)
Conclusion
Manual shooting mode is often viewed as the best and most professional mode on your camera. There are certainly times when Manual mode is the best. But many professional photographers use assisted modes like Shutter or Aperture Priority mode. If you are capturing motion, Shutter Priority mode can be much better than Manual mode.
For beginners who have only used the automatic mode on your camera, feel free to take more control using assisted modes like Shutter Priority!


