Shutter speed is the most obvious contributing factor to exposure. Alongside aperture and ISO, it has the biggest effect on your photos.
Your images will be blurred if you don’t know how to use the correct shutter speed. Understanding shutter speed helps you improve your images and even produce more creative shots.
- Learn to effortlessly set up your camera for any situation.
- Master the art of selecting the perfect exposure every time.
- Discover 10 composition rules that elevate your photos instantly.
What Is Shutter Speed?
Shutter speed is the exact time of exposure—the time your camera records an image. In all cameras, a shutter mechanism determines how long light hits the sensor.
When we take an image, the shutter opens for a given time, which is called the shutter speed. The longer it’s open, the more light hits the sensor, resulting in a brighter image.
Depending on the shutter speed, you encounter freezing or blurring moving elements in your shot. So, it is crucial to understand how it works.
Nikon D850, 66mm, f/2.8, 1/400 s, ISO 6,400. Bob Kozel (Unsplash)
Understanding Camera Shake and Motion Blur
What we most commonly associate with shutter speed is camera shake. The longer the shutter is open, the bigger the chance your hands’ vibration will cause a visible blur in the shot.
Generally, it’s best to have at least a shutter speed that equals the value of your lens’ focal length to avoid camera shake. For example, a 300mm lens (without image stabilization) needs a minimum of 1/300 s (seconds). Similarly, a 50mm lens needs anything from 1/50 s or faster.
You need to understand that these are effective values. If you’re using a camera that doesn’t have a full-frame sensor (smaller or larger), you must consider its crop factor.
A 50mm lens on a 1.5x crop camera (APS-C), like a Canon EOS R7, provides a field of view of a 75mm lens (50 x 1.5). So, you’re better off using a shutter speed faster than 1/80 s.
Using a shutter speed only slightly faster than recommended might result in some blur in your image. Your hands might be shakier than the average. The only way to know this is by experimenting.

Anything slower than this recommended value most likely needs a tripod. Image stabilization can also be a solution. Most telephoto lenses have it built-in. It’s also increasingly widespread in standard and wide-angle lenses, especially zooms.
You often want to take your photo at a comfortably short speed, such as 1/500 s for a standard lens. A fast shutter also helps freeze the movement of your subject.
Remember that this amount largely depends on the speed of your subject and how close you are to it. In most situations, slow shutter speed results in blurred images.
Like ISO and aperture in photography, we use stops to indicate changes in shutter speed. But it’s a lot easier to wrap your head around than in the case of f-stops regarding aperture.
One stop up in shutter speed (e.g., from 1/100 to 1/50 s) doubles the amount of light, and a step down (e.g., from 1/50 to 1/100 s) halves the light.
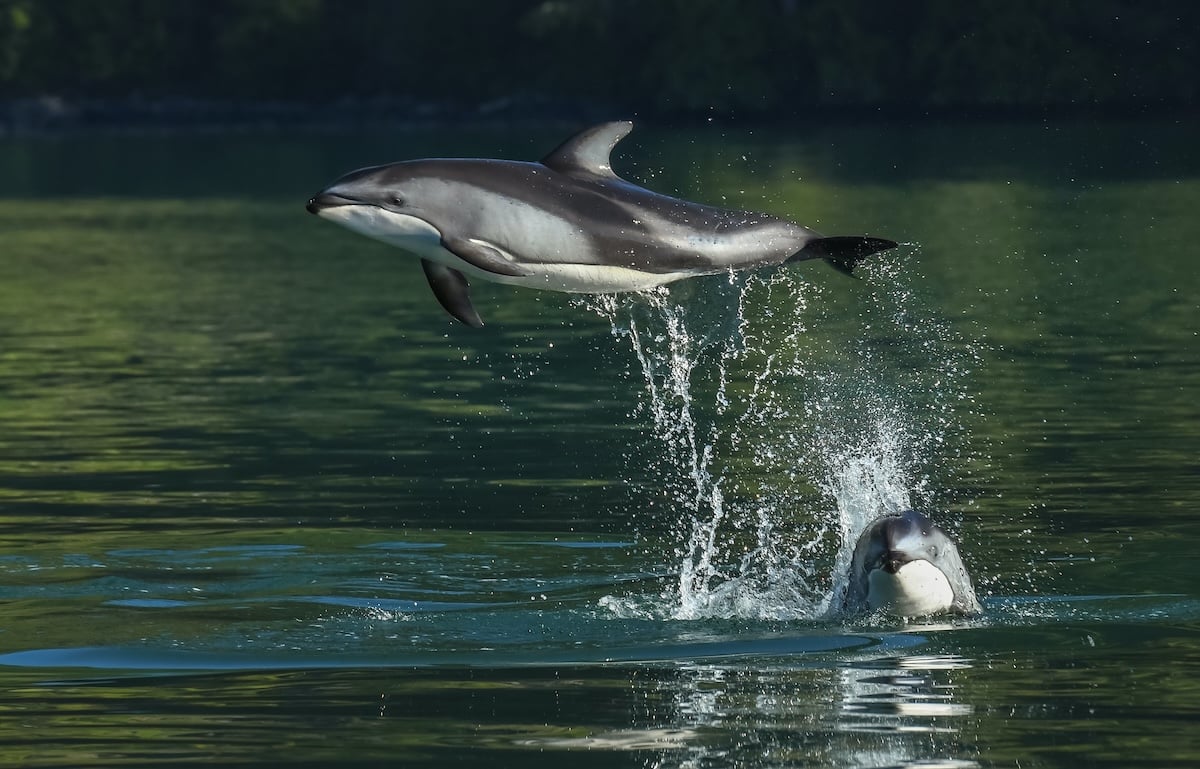
Nikon D850, 200mm, f/6.3, 1/1250 s, ISO 400. Greg Johnson (Unsplash)
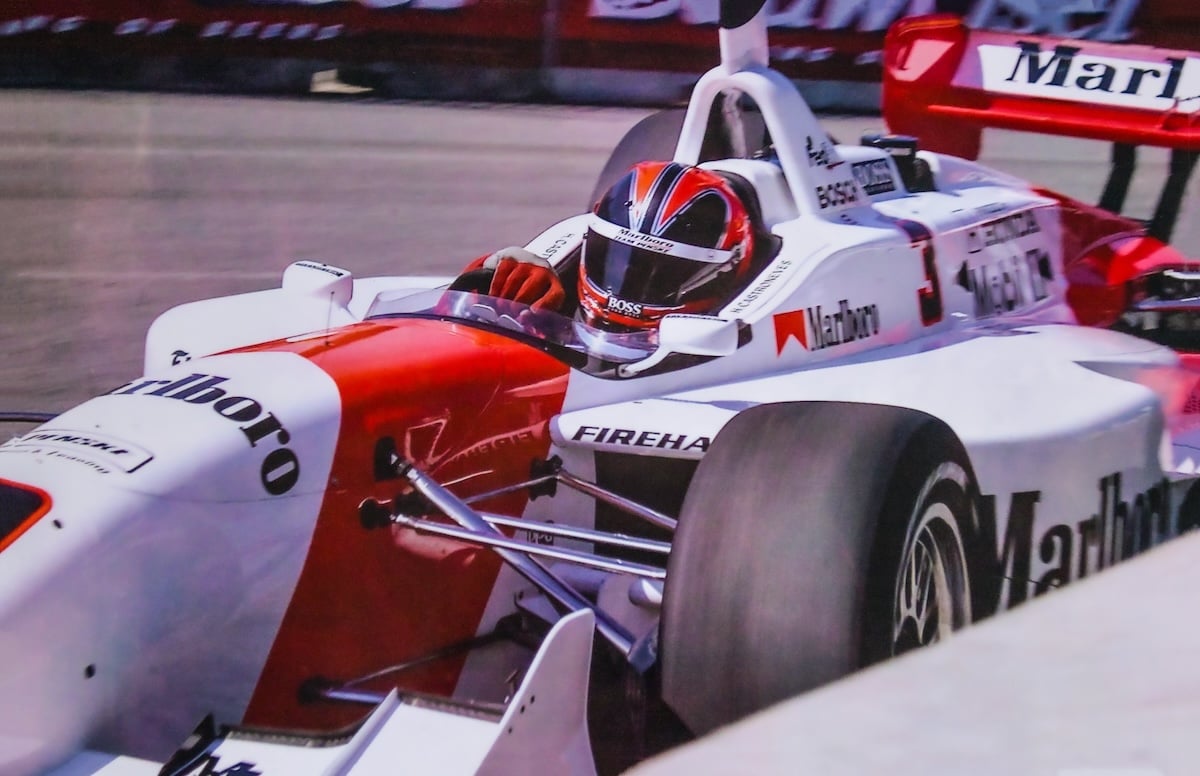
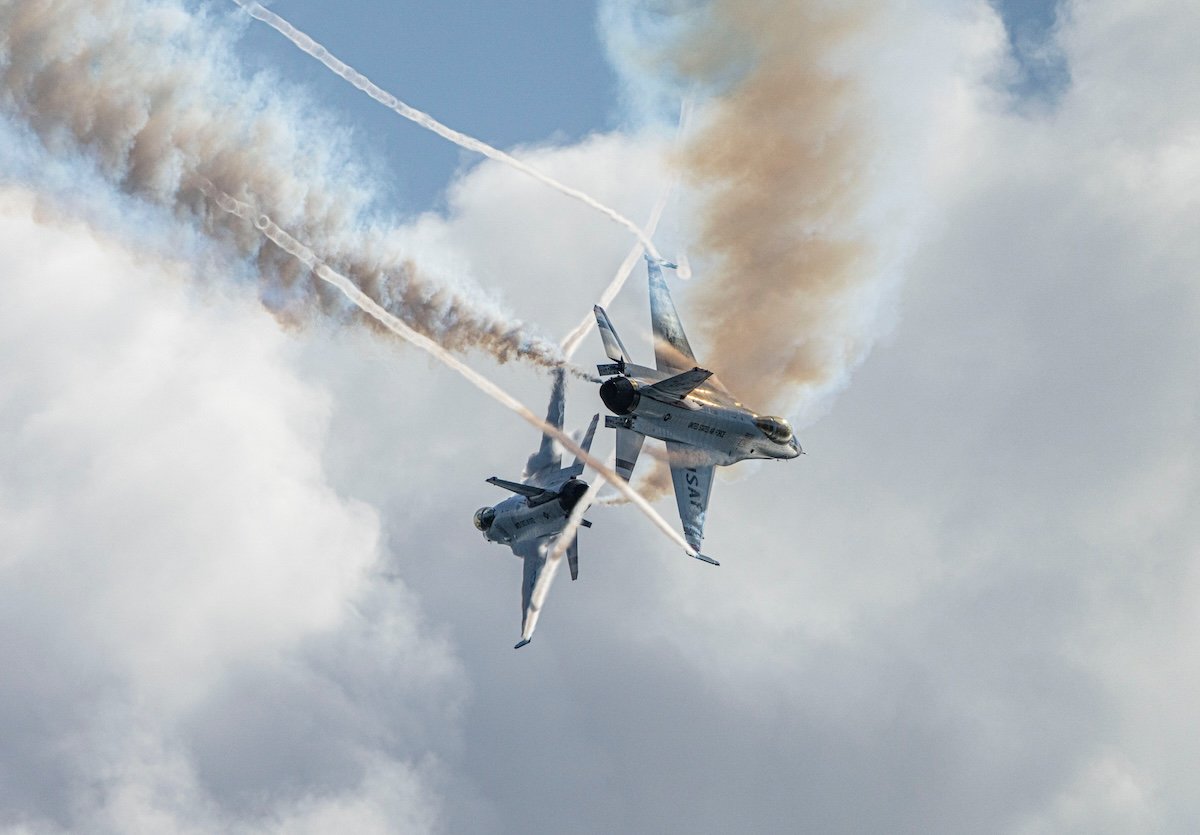
Freezing a Subject With High Shutter Speed
Freezing your subject requires a fast shutter speed. There’s no motion blur when you take a photo at a fast shutter speed (usually 1/500 s and above). It doesn’t suit all shots, as images taken at these speeds tend to appear flat.
The faster the subject moves relative, the faster the shutter speed you need. For example, a fighter jet up close will need a 1/2000 s shutter speed or higher. A person riding a bike might only need 1/500 s.
I like to include a small amount of motion when shooting a fast-moving object. Otherwise, it may as well have been sitting still.
Sony a1, 600mm, f/6.3, 1/16,000 s, ISO 1,000. Muhammad Nasir (Unsplsah)
Choosing the Right Shutter Speed for the Situation
You will notice that there are third stops between these speeds on cameras. They’re there to allow precise adjustments but don’t make a fundamental difference. Hence, I’m only listing full stops.
Many of the speeds listed below depend on how close the subject is to you. Also, our guide does not consider exposure. Our post is purely about what you capture at these speeds.
Canon EOS 6D, 105mm, f/4.0, 1/2,500 s, ISO 10,000. Minh Triet (Unsplash)
- 1/4000 s: Freezing really fast objects and sudden moments. Think of the subjects you might capture at a high speed, like a baseball pitch, a balloon pop, or a splash of water.
- 1/2000 s: Freezing the flight of birds. They move their wings very fast, so you have to crank up the shutter speed very high.
- 1/1000 s: Freezing fast-moving objects, such as moving vehicles.
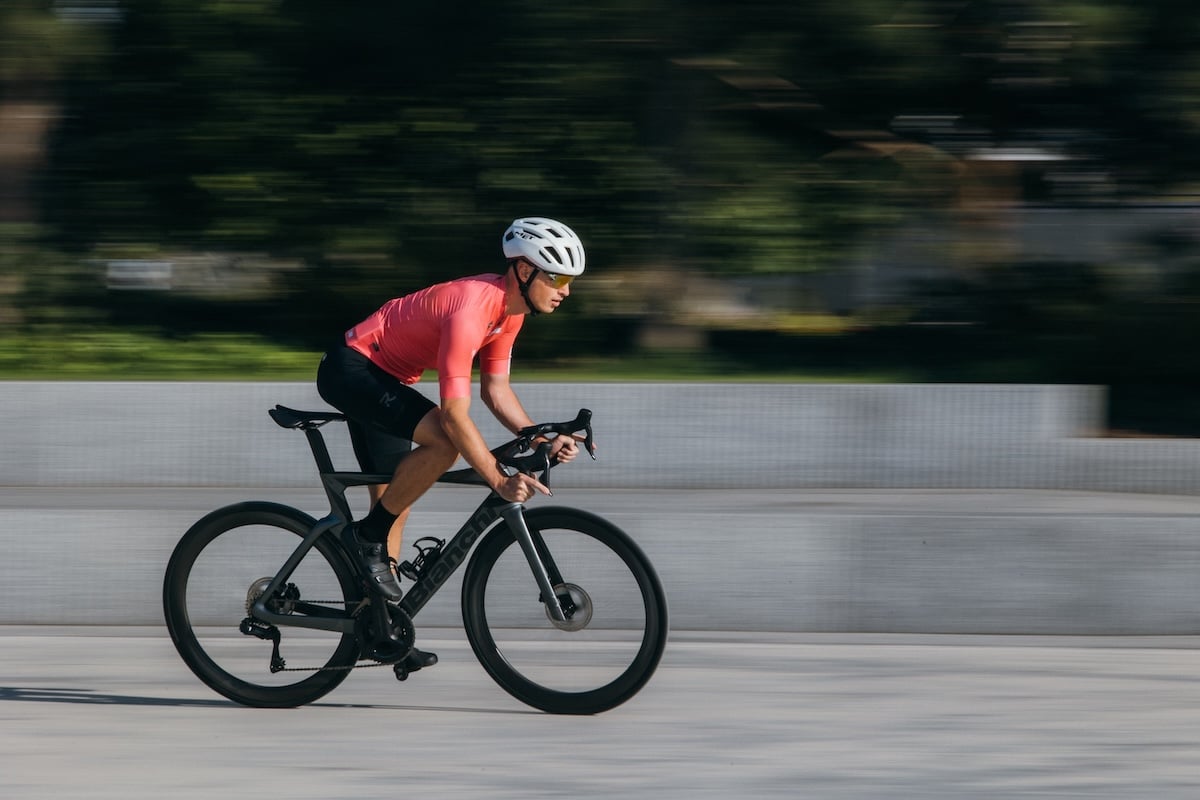
- 1/500 s: This is where you will start to freeze moving people, such as runners and cyclists.
- 1/250 s: Great for freezing your still subject without thinking too much about focal length and how that affects the motion blur. Great for portrait and macro photography.
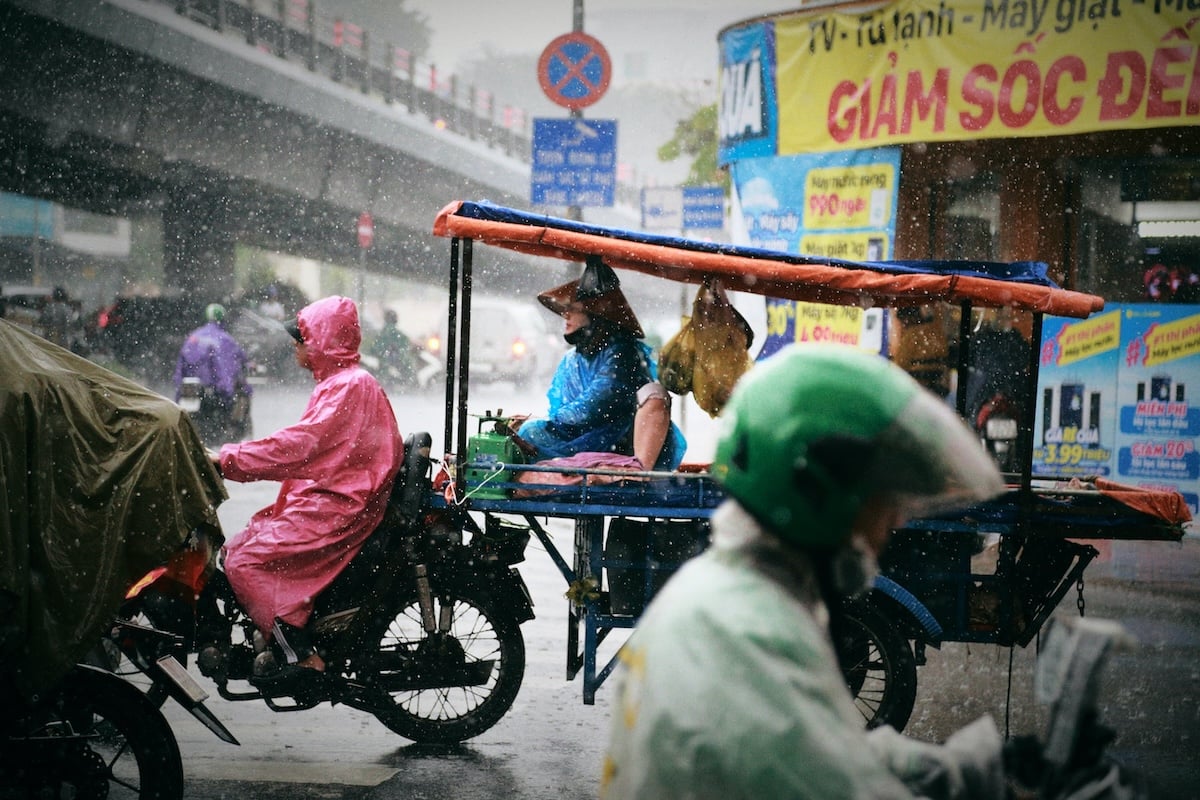
- 1/125 s: This is the minimum shutter speed for taking still-life photography. If you’re shooting handheld, you won’t typically want to go much slower than this. Otherwise, you likely capture any camera shake from your hand movement. This speed is also where you can start using your shutter speed for panning.
Shot with a Canon EOS 20D. 18mm, f/3.5, 1/500 s, ISO 1,600. Talles Alves (Unsplash)
- 1/60 s: This is an ideal speed for panning and handheld photography in low light.
- 1/30 s: This is about as slow as possible to capture panning photography. If you use a much slower shutter speed, your photo will become too blurry.
- 1/15 s: At this speed, you can mount your camera on a tripod and capture sight movement from moving objects. Examples include people walking, cars moving in traffic, and water blurring slightly.
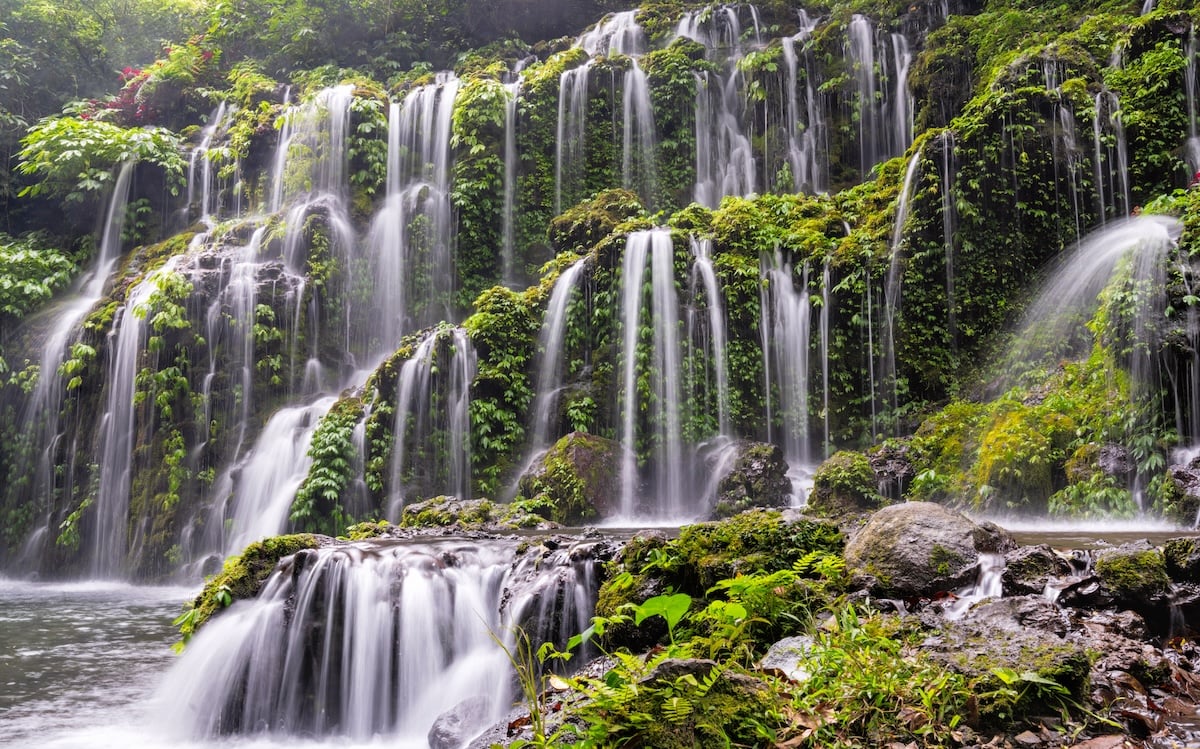
- 1/8 s: Blurring moving water, for example, waterfalls.
- 1/4 s: Creating blurred movement in a scene. Not so little that it appears accidental, but not so much that it’s hard to tell what’s going on.
- 1/2 s: This speed creates even more motion blur and has a stronger effect than the previous stop. Think of water starting to appear like mist (see image below).
- 1 Second: This is good for twilight photography. The sun may not completely disappear, but there’s not enough light to achieve the desired exposure. You might incorporate a flash and will likely use a tripod.
- More Than 1 Second: This is where night photography starts to come into play. You can play with different shutter speeds and capture awesome nighttime photos.
- Bulb Mode: Use this for exposures longer than 30 seconds, where you can manually control the exposure time with the shutter release. You can also use this mode for astrophotography, where you may want to capture star trails. Also, use it for slow sync flash, where you want immediate shutter speed control.
Sony a7R IV, 34mm, f/16, 0.5 seconds, ISO 100. Karthik Sreenivas (Unsplash)
6 Creative Uses for Different Shutter Speeds
If you aim to add blur to your image, there are many ways to do so with the creative use of shutter speed.
1. Create a Point of Interest With Creative Blur
To create a creative blur, you need a few accessories. It’s best to have a remote trigger and a tripod to hold the camera steady. You can then play around with the shutter speed settings.
This technique can create interesting images in which the blur is the main point of interest. Try a fairground carousel, Ferris wheel, or other park rides for practice.
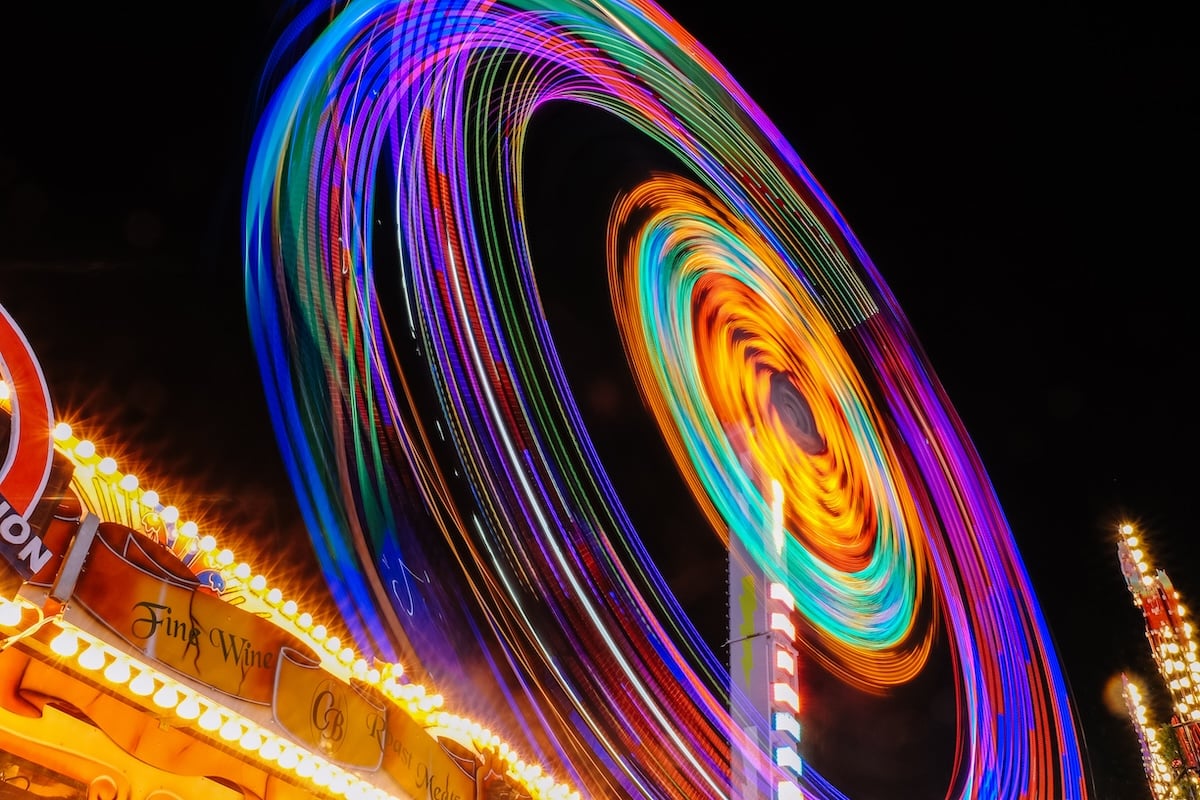
Fujifilm X-T10, 18mm, f/22, 14 seconds, ISO 200. Kinson Leung (Unsplash)
2. Try Panning to Emphasize a Moving Subject
Panning is where you move your camera to follow a moving subject. It results in an image with a blurred background but a sharp subject.
This shot was taken from a sidewalk, panning the camera with a slow shutter speed. This technique makes the sense of movement obvious.
Canon EOS R6, 200mm, f/32, 1/25 s, ISO 100. Oleg Kukharuk (Unsplash)
Controlling your shutter speed is a great way to show movement in a still scene. You can create strong motion linear blur by using a relatively slow shutter speed and panning the camera to follow a subject.
Telephoto lenses need a faster shutter speed to capture an image without blur. These lenses pick up and magnify even the slightest movement of the camera.
In contrast, a wide-angle lens needs a slower shutter speed as the image’s details are much smaller. You can create a blurred image more easily with a lens with a longer focal length.
Sony a6000, 114mm, f/16, 1/60 s, ISO 100. Isaac Maffeis (Unsplash)
To set up your camera for panning, we recommend setting it to Shutter Priority mode (“Tv” in Canon or “S” in Nikon and Sony cameras). Aperture doesn’t matter here, so why not let your camera decide?
Set the shutter speed a few stops below the value recommended by the reciprocal rule we discussed. For a 200mm lens, 1/40 to 1/80 s is generally a good setting.
Then, set the drive mode to “fast continuous.” You’re unlikely to get a great shot if you only have one frame. So, it’s best to grab at least a burst of shots to have a bigger chance of capturing the right moment.
When shooting, follow your subject’s line of movement. The goal is to keep it steady in the frame and let everything else move.
Some telephoto lenses have complex image stabilization (IS) systems. Most IS lenses have two-axis stabilization. But this is a pain if you’re shooting action shots, like sports, because you are often panning the shot. If you have two-axis stabilization active, then the lens is fighting you.
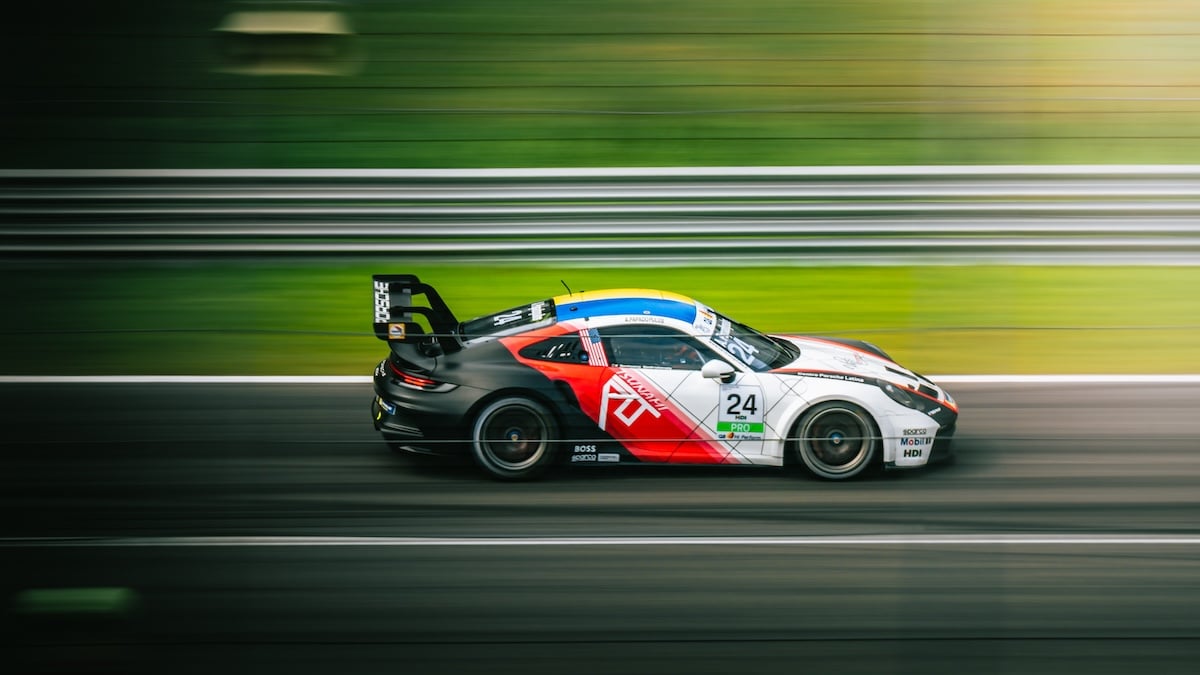
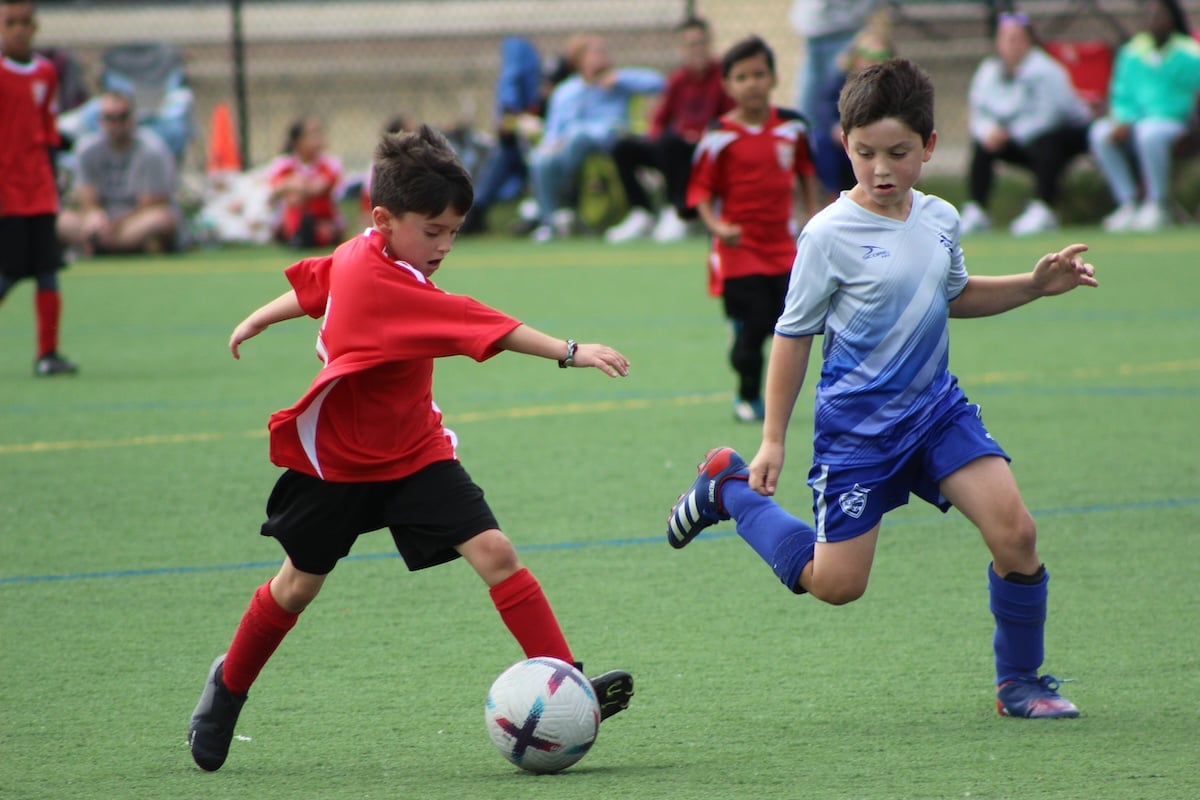
Better lenses, like the Canon EF-70-200 f/2.8L, have a mode that only stabilizes up and down for these situations. So, if you’re shooting action or sports shots like soccer or motorsports, turn one-axis stabilization on if you have it.
If you switch on this mode, your lens will only stabilize on the vertical axis. It won’t compensate for movement on the horizontal axis, which makes panning much easier and more effective.
Canon EOS Rebel T3i (600D). 300mm, f/5.6, 1/1,600 s, ISO 640. Debra Brewster (Unsplash)
3. Use a Flash for Creative Blur or Portraits
Adding flash to a photo with blur will freeze motion in the frame. Choose a longer shutter speed. Start with around 1/40 s, and experiment with different values later. Your flash will only light your subjects momentarily, creating a sharp outline.
In the remaining time of exposure, you can then move the camera around to capture the light and blur for artistic effect. This technique creates a ghosting effect.
Canon EOS 40D, 50mm, f/2.8, 1.3 seconds, ISO 1,600. Goashape (Unsplash)
The photographer used a flash to expose the photo below. It filled in the light exactly where the photographer wanted it. It’s a great tip for improving the lighting of your portrait or night photography.
Canon EOS 6D, 50mm, f/4, 1/100 s, ISO 400. Kyle Cleveland (Unsplash)
4. Experiment With Light Painting
For light painting, all you need is a long exposure and a light source. The photographer took the photo below on a 20-second, slow shutter setting. It’s an example of steel wool photography.
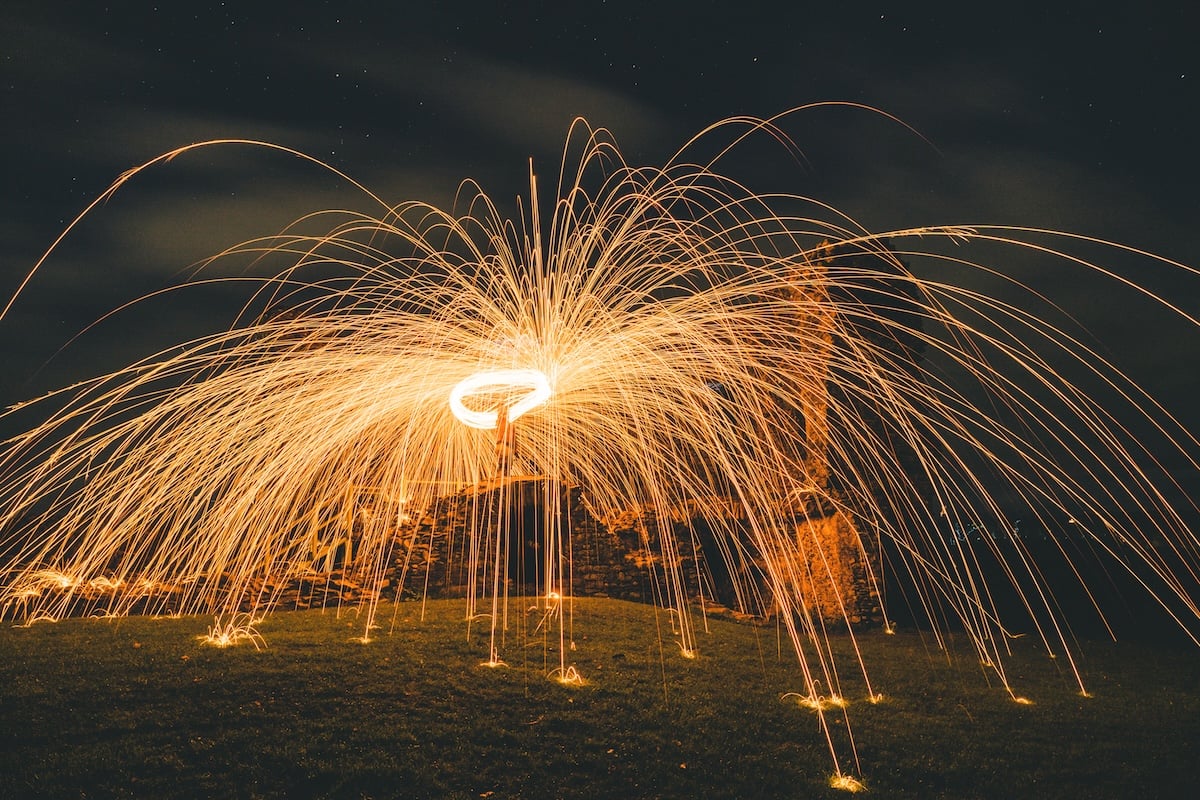
Sony a7 III, 24mm, f/5.6, 20 seconds, ISO 160. Jonny Gios (Unsplash)
5. Create Light Graffiti
A long exposure coupled with a moving, constant light source allows you to add “graffiti” to an image.
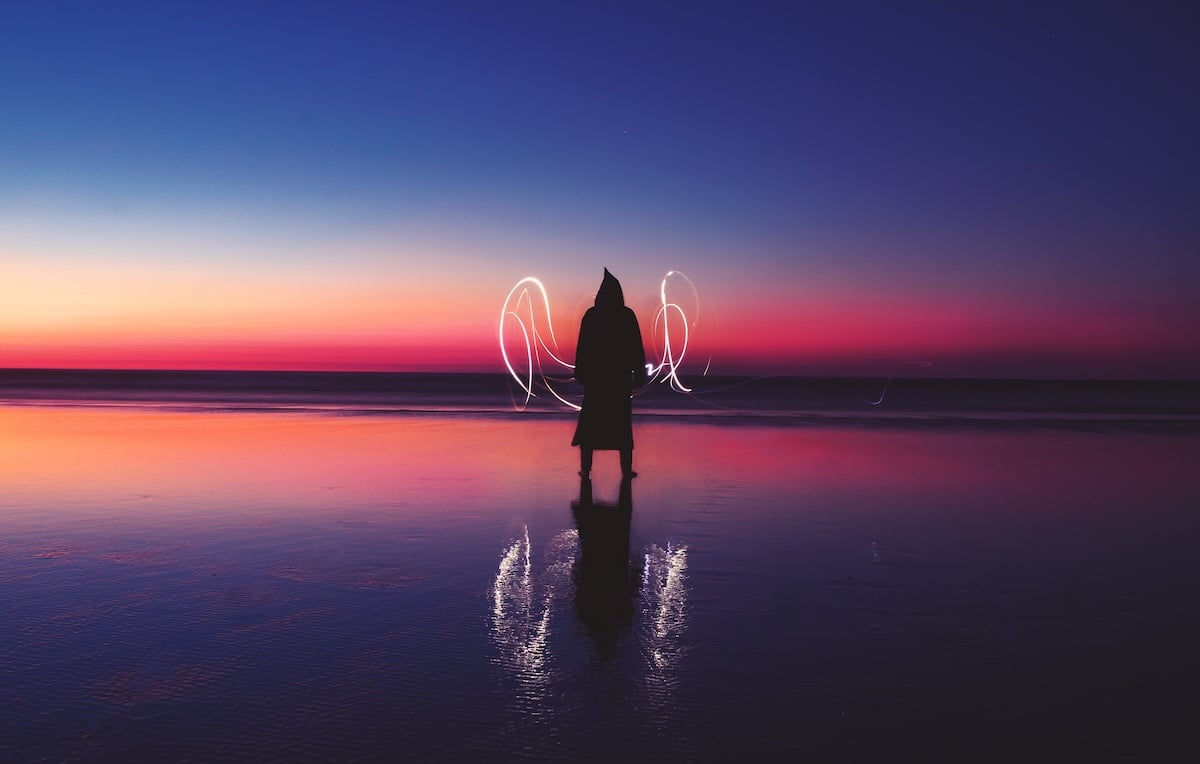
Canon EOS 7D, 20mm, f/11, 13 seconds, ISO 100. Aziz Acharki (Unsplash)
6. Use Long Exposures for Low-Light Situations
The longer the exposure is, the more light the shutter lets into the camera. This way, you can illuminate low-light situations using a slow shutter speed.
The photographer took the photo below at night, so they used a slower shutter speed than usual to gain an even exposure. Long-exposure photography is only possible with a tripod or somewhere flat to lay the camera.
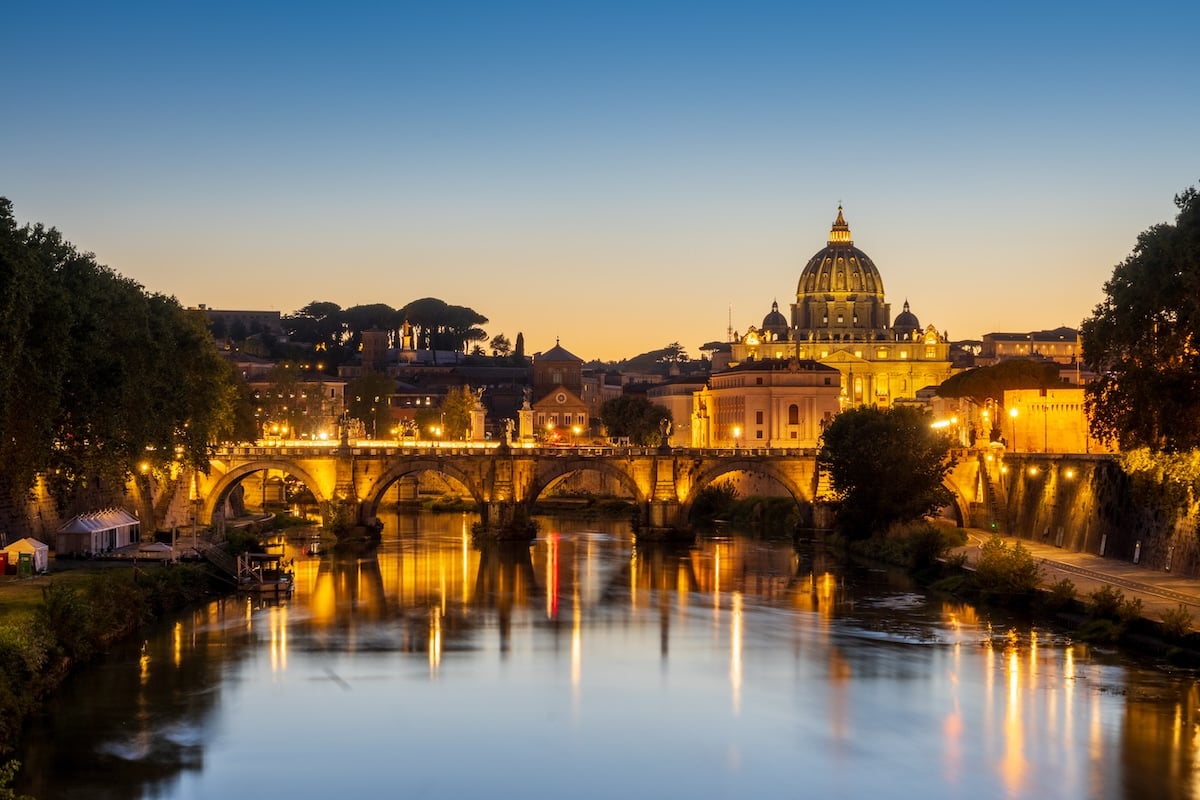
Nikon Z fc, 50mm, f/14, 4 seconds, ISO 100. Tomasz Zielonka (Unsplash)
This next photo needed a long shutter speed for a different reason. The creator of this image had to wait for a passing car to come into the frame.
Timing can be very difficult because figuring out the exact settings can take some time. Only a specific shutter speed makes the blur precisely as long as you wish in the image.

Sony SLT Alpha A55, 18mm, f/13, 5 s, ISO 100. Ahsan Avi (Unsplash)
Conclusion: What Is Shutter Speed?
Choosing the right shutter speed is crucial when photographing moving subjects. It also plays a part in creative photography and lets you experiment with different lighting and motion blur methods.
At this point, you should be familiar with everything when it comes to setting your shutter speed. The next step is to start using this knowledge in your photography. Use Shutter Priority or Manual mode to experiment with different settings and learn what you like.
To get the best start in photography, try our course, Photography for Beginners!
- Learn to effortlessly set up your camera for any situation.
- Master the art of selecting the perfect exposure every time.
- Discover 10 composition rules that elevate your photos instantly.


