Adding that wow factor to your photography is something many of us aspire to. Photography effects are a great way of reaching this goal.
Discover what the coolest photography effects are and how they can be easily applied to your work.
1. Photography Effects: Get Creative with Light Painting
Light painting requires a long exposure, and it needs to be carried out at night.
You will need a tripod, a camera capable of very slow shutter speed, and some form of light painting equipment.
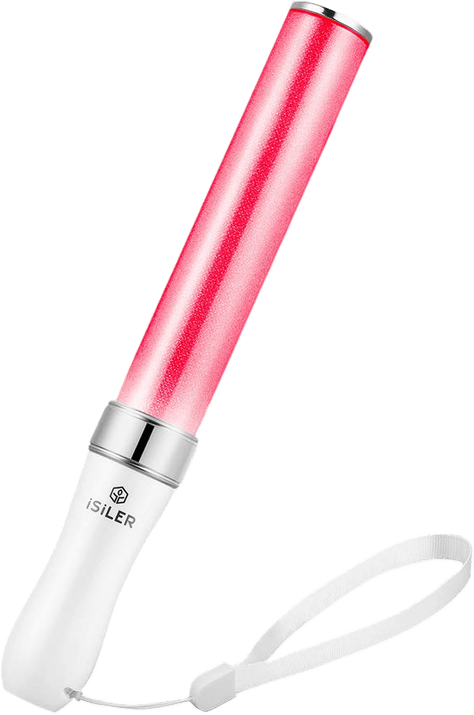
The following list includes examples of light painting equipment you could use.
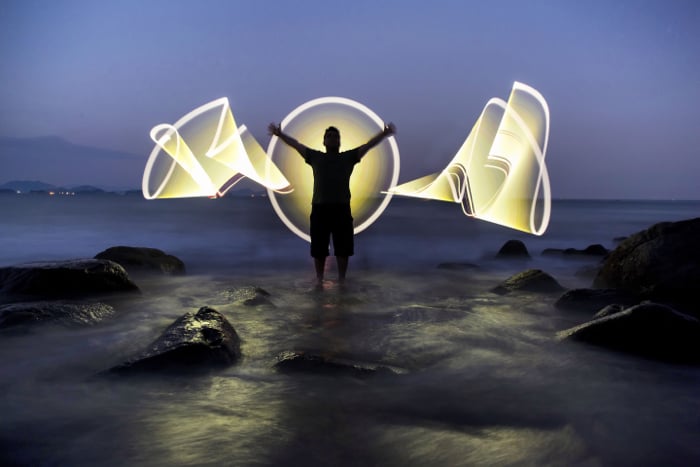
Light painting is an amazing photography effect to try. This photo was produced using a LED light stick.
Move Your Camera to Achieve Kinetic Light Painting
With light painting, the camera stays still, and the light source moves. With kinetic light painting, the camera moves, and the source stays still.
This is a type of intentional camera movement. There are three main forms of this; zoom, rotation, and random movement.
- Zoom – You will need a lens that can have its focal length moved manually during long exposures. Abstract photos are possible with exposures of around 2 seconds. Longer exposures of 20 or 30 seconds will allow the zoom effect to be combined with a static phase.
- Rotation – This works similarly to the zoom burst. Now you’re rotating the whole camera instead of zooming the lens. The effect works best when the camera is attached to a tripod.
- Random movement – Rotation and zoom are controlled movements. Random movement is a much less exact science. The best way to succeed at this is to plan the movement you will make. Keep it short and simple. You could try moving the camera from the ball head of a tripod, and lock the position after you have finished the movement.

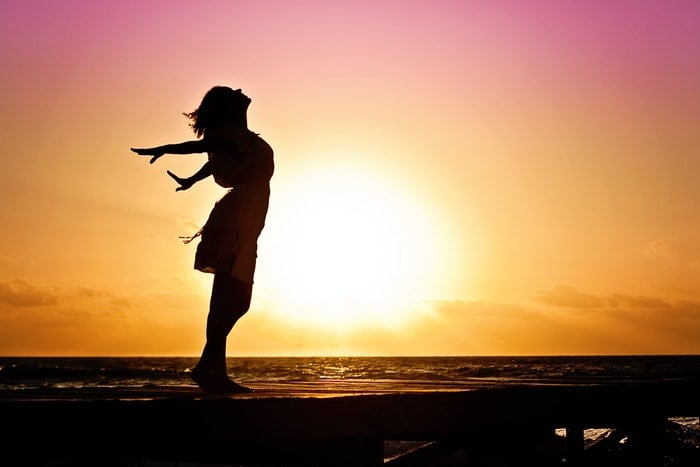
2. Create Silhouettes for a Dramatic Look
A silhouette can be created when you photograph an object or person against a much brighter sky. In terms of photography effects, this is the proverbial low hanging fruit.
It is easy to achieve, as long as you follow a few simple steps:
- Select a location where you have a clear view of the sky in the background.
- Choose an angle where you’re a little below your main subject. This will place their entire silhouette against the sky.
- If it is not possible to get this lower angle, look for places with highly reflective surfaces. The sky will be reflected against this and you will still see the silhouette.
- Make sure the light is behind the subject. Sunsets will work very well for this style of photo.
- Line up your photo, and expose for the sky. The sky should be correctly exposed. The main subject should appear as a black shape against the sky.
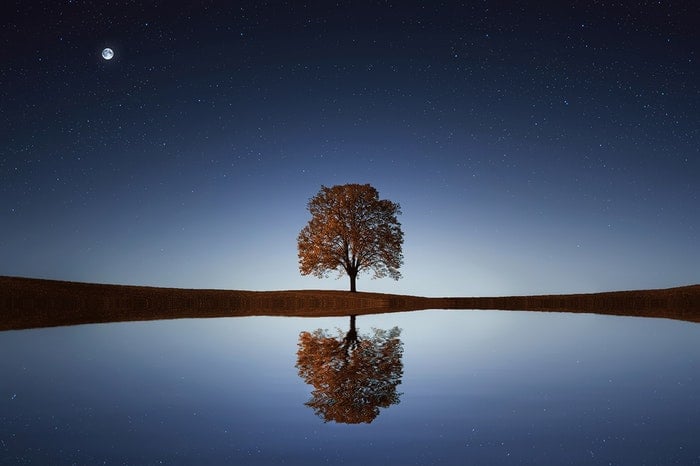
3. Amaze Your Audience With Reflection Photos
There are many locations where you can find reflections. The first that usually comes to mind is a reflection in a pond, but there are lots of other possibilities.
- A large body of water – With larger bodies of water you will need a day with no wind. Look for ponds, rivers or even the sea. Lower your angle, as this will increase the amount of reflection.
- A puddle – After it has rained, you will sometimes find puddles. These allow for great reflection images. You can also bring a bottle of water with you and create a temporary puddle. To maximise the reflection, get low to the ground, close to the puddle, and use your wide-angle lens.
- Other reflective surfaces – Water is not the only reflective surface! Other surfaces include metal, glass or marble. Modern buildings with reflective glass facades can be great for reflections. Reflections in the windows of a train can also be used for cool photography effects.
Remember to use a circular polarizing filter to enhance the reflections.
4. Experiment With Bokeh for a Spectacular Atmosphere
Bokeh is the aesthetic blur produced by the shallow depth of field.
Not all backgrounds produce good bokeh. A background of blurry clear skies would be a bad choice here. What you’re looking for instead are lights, or maybe sunlight reflecting off something in the background.
You need some separation between the main subject in the foreground and these lights in the background. You will then need a large aperture, a long focal length or a combination of these.
A narrow aperture won’t work because the background won’t be blurry. Therefore, a kit lens might not produce this effect. Instead, use a prime lens with a large aperture.
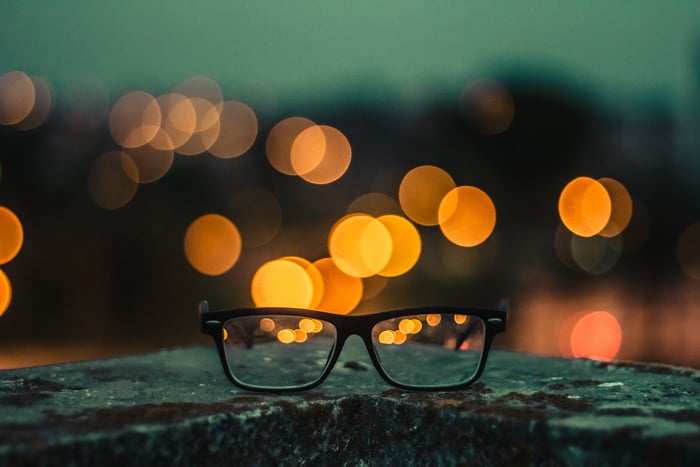
In this photo, the street lights in the background produce pleasing bokeh. Tomer Dahari- Pexels
Create Shaped Bokeh for a Unique Background
You can create shaped bokeh by covering the lens of the camera with a disc of black paper. Cut a shaped hole in the middle of the disc before placing it on your lens.
For example, you can make a star, heart, or a triangle shape. Instead of background bokeh balls, you will have lots of background shapes!

5. Turn the World Upside Down With a Lensball
One of the most unusual camera optics you can use today is the lensball. With the lensball, you can shoot upside down refracted images within the glass. This is a great piece of camera equipment to get into your bag.
Its versatility means you can use it for both portrait or landscape photography. Although it is better suited to landscapes.
There are plenty of ways you can photograph the ball. The typical way is to use a macro lens, so you can focus on the image in the ball while blurring the background into bokeh.
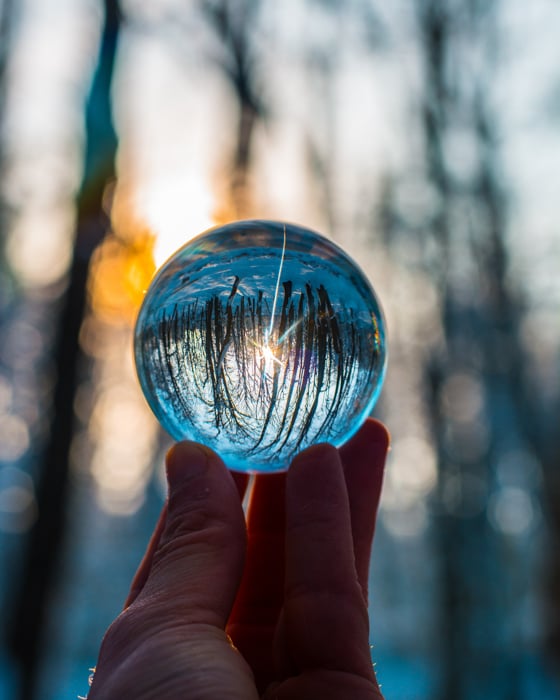
Refracting a background photo within a lensball can be a lot of fun. Bogdan Dirică- Pexels
6. Get Extraordinary Photos With Infrared Photography
Through the use of picture filters or an adapted camera, you can shoot infrared photos. This is the part of the spectrum that you can’t see with the naked eye, so when you get your filter it will appear black.
The filter will let infrared light through, and you can use this to create a dreamscape-like effect. When using a filter, you will be taking long-exposure images, so you need a tripod as well.
This photography effect also requires a bright sunny day.
The initial photo produced with this type of photo will be red. To create the desired photo you then either need to adapt the white balance in-camera or edit it further during post-processing.
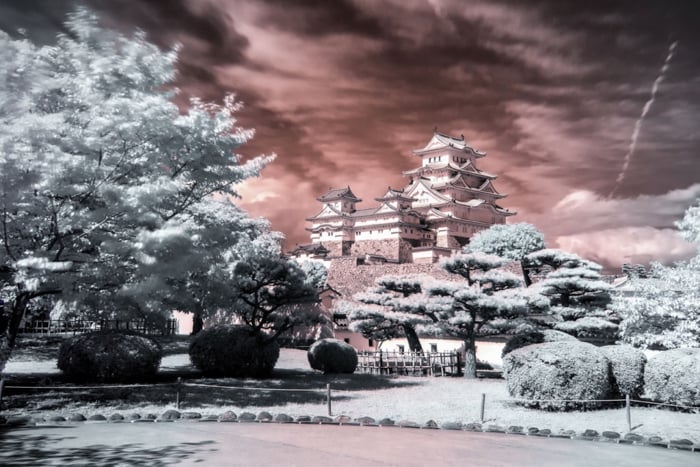
This photo of Himeji castle was a great location for infrared photography. The sky with some nice clouds was also perfect.
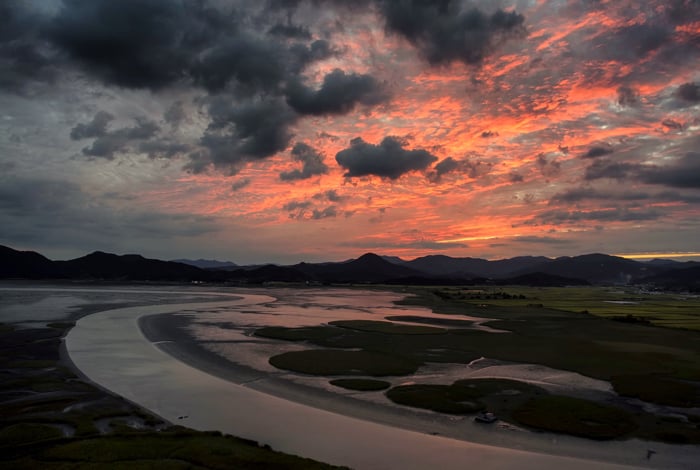
7. Use Long Exposure to Show How Time Passes
Apart from light painting and infra-red photography, there are many other ways to use a long exposure. You will need a tripod for all of the examples.
- Traffic light trails – This effect is a form of light painting. In this case, you’re not controlling the light source yourself, but you can predict its movement. It is typical to photograph car light trails moving along the road. You can photograph boat trails as well.
- The Milky Way – You can capture the Milky Way with long exposure as well. The aim with Milky Way photography is to correctly expose the stars, without them moving across the frame as the Earth rotates. To do this you will need a wide-angle lens with a large aperture. The wider the angle you use, the longer you can expose for.
- Moving water – Anywhere you find moving water is a potential location to try long exposure photography. This could be waves crashing against rocks or a waterfall. Long exposure will give this white water a misty silk-like look. Flattening the sea is another thing you can do. You will need to expose for at least 10 seconds to achieve this look.
Want to learn more about long exposure? Check out our Infinite Exposures course! You can learn how to take amazing images, like the one below. 
8. The Best Effect for Landscape Photos: Digital Blending
This effect is the landscape photographer‘s best friend. It is HDR post-processing using the manual setting.
For digital blending, you will need luminosity masks in Photoshop with a set of bracketed images. The aim is to balance the light across the frame in an as natural and believable way as possible.
A lot of HDR programs are plug and play, with the option to adapt a few settings. Digital blending gives you complete control.
If you’re a landscape photographer, this is the photo effect you really must learn.
Sunset photos are good subjects for digital blending.
9. Add Mystery to Your Photos With Low Key Lighting
Low Key Lighting is one of the favourite effects of portrait photographers. This is where you make the background dark and only light the face of your model.
You can create this using natural or artificial light. Using off-camera flash will give you a much higher degree of control over this type of photo.
- A shard of light – In this case, you’re looking to use sunlight to brighten up someone’s face. This light needs to come through a window, a gap in a market roof, or between leaves of a tree. This shard of light will hit your subject much brighter than areas in the fore- and background. You can light up a person’s face, expose for the brightness on the face, and then make the background black.
- Off-camera flash – With off-camera flash, you can get a very similar effect. But you don’t need to go looking for a specific shard of light. Instead, you will create your own. To do this, you’re going to put a snoot over your flash, effectively turning it into a spotlight. Using a black background will help here. You don’t want any light bouncing around your scene.
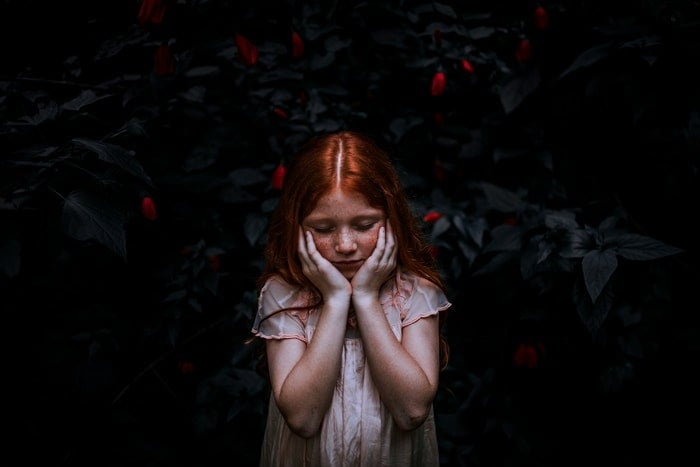
Photo by Matheus Bertelli from Pexels
10. Use Panning to Capture Movement
Panning is the effect produced when you follow a moving object with your camera while using slower shutter speed. You can pan any moving object. Cyclists and cars tend to be the easiest to get sharp images of.
The faster the moving object is, the faster your shutter speed can be whilst still retaining motion in the background. If you’re panning Formula-1 motor racing cars, shutter speed around 1/80th might be slow enough. A walking person, however, is likely to need a shutter speed of 1/10th.
This technique is usually carried out handheld. If the situation allows, you can try photographing from a tripod. The tripod should ensure smoother motion as you follow the object you’re panning.
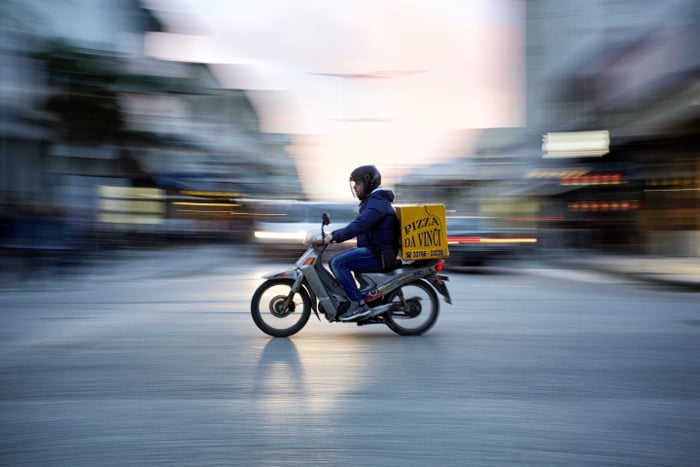
Motorbikes are amongst the easiest the pan. There are no moving parts, and they have a smooth motion.
Conclusion
There are many photography effects you can use to amaze your viewers. You can also use post-processing to achieve an even more outstanding look.
Have you ever tried any of the effects listed in this article? If you have, feel free to share your photos in the comment section of this article. If you haven’t, now is a great chance to go out and try something new!