Aperture is a fundamental part of photography. It makes up one-third of the exposure triangle and is relevant to every photo you take. Aperture gives you creative control over exposure and depth of field.
If you’re getting started in photography, you must know about aperture. But what exactly is aperture? How does it work? And how can you use aperture to affect your photos?
These are the questions we’re going to answer in this post. We’ll give you all the aperture information you need to know. And by the end, you’ll be an aperture expert.
- Learn to effortlessly set up your camera for any situation.
- Master the art of selecting the perfect exposure every time.
- Discover 10 composition rules that elevate your photos instantly.
What Is Aperture?
Generally speaking, an aperture is a hole or a gap. When we discuss aperture in photography, we refer to the lens hole. The lens aperture lets light reach the film or camera sensor, exposing the image.
The aperture of a camera lens is adjustable. Light conditions vary depending on when and where you’re shooting. Thus, different situations require different light to be exposed correctly.
The lens aperture can be changed from narrow to wide (small to large). A small aperture allows less light to pass through it. And a large aperture lets in more light. A good camera lens will have a series of aperture sizes, ranging from small to large.
The lens aperture works like the pupil of the human eye. When conditions are bright with lots of light, the pupil is small. But when it’s dark, the pupil expands to let more light into the eye. It’s the same principle for aperture in photography.
Following this logic, we can use a smaller aperture if we’re working in a scene with a lot of light. This prevents too much light from getting to the sensor and overexposing the image.
If the scene is darker, we can go for a larger aperture. The wider aperture allows more light to the sensor, so our image isn’t underexposed. You can also use the aperture to make a light scene darker or a dark scene brighter.
The basic theory of a camera aperture is simple enough on its own. But the aperture is only a third of the story. To fully understand the aperture in photography, we need to look at the whole exposure triangle.

Shot with a Canon EOS 6D. 100mm, f/2.8, 1/90 s, ISO 400. Eberhard Grossgasteiger (Unsplash)
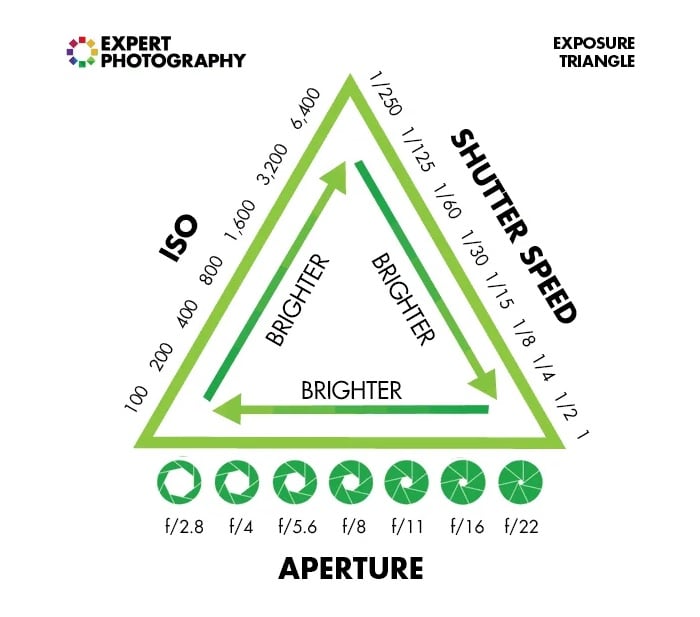
The Exposure Triangle
The aperture is one corner of the exposure triangle. The other two are shutter speed and ISO. The basic art of photography is balancing these three components to achieve the perfect exposure for your images.
Exposure
Exposure is the amount of light that reaches the camera sensor or film. If your image is overexposed, it has received too much light. If it is underexposed, it has not received enough light.
Shutter speed, ISO, and aperture settings must work harmoniously to get the perfect exposure. The other two must also change whenever you change one of these settings.
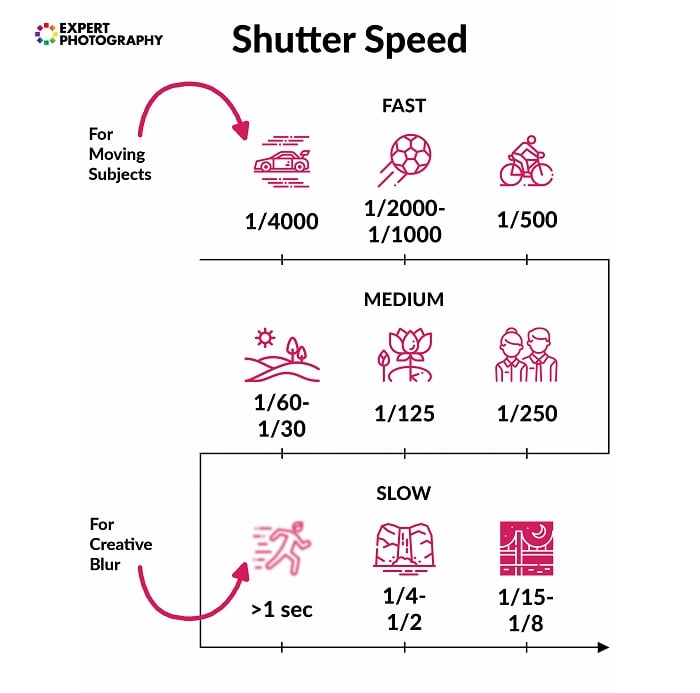
Shutter Speed
Shutter speed refers to the amount of time your camera shutter is open. Although the shutter is usually closed, it opens when you press the button to take a picture. When the shutter opens, light passes through the aperture onto the sensor.
If you use a fast shutter speed, like 1/1000 s (seconds), the shutter is only open briefly. This means only a tiny amount of light gets through. A slower (longer) shutter speed allows more light onto the sensor.
You need a larger aperture for the correct exposure if you use a fast shutter speed. If the shutter speed is slow, you need a small aperture. But if you’re using a shutter speed slower than 1/125 s, you see motion blur and camera shake in your images.
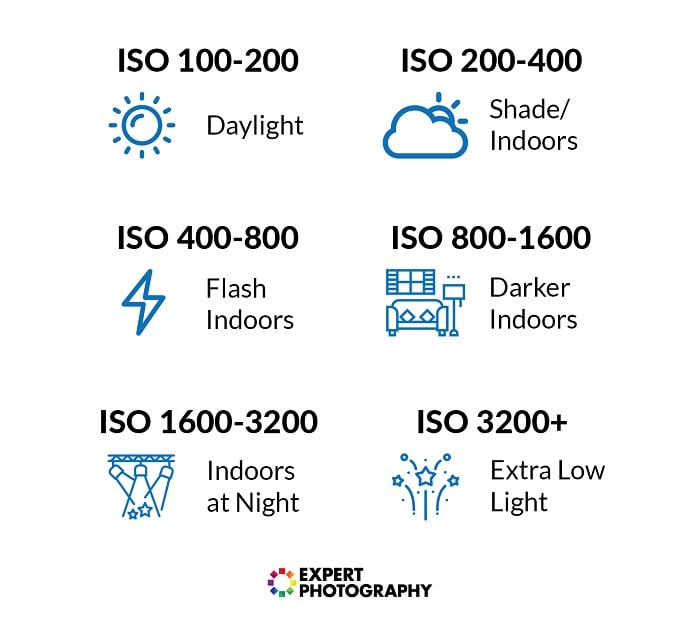
ISO
ISO refers to how sensitive a film or camera sensor is to light. In film photography, each roll of film has a fixed ISO number. But you can adjust the ISO with a dial or menu settings on a digital camera.
A number identifies ISO. This number tells you how sensitive your film or sensor is. The lower the ISO number, the less light sensitivity you have. The higher the number, the more sensitivity.
While higher ISO numbers work better in darker conditions, they come with a cost in photo quality. The higher the ISO, the more grain and noise you experience in your images. Lower ISOs, like 100 or 200, are limited to bright conditions, but the image quality is better.
Finding Balance in the Exposure Triangle
No matter what camera you use, photography is a case of finding the correct settings for aperture, shutter speed, and ISO. Each setting has to balance the other two so you don’t underexpose or overexpose your image.
Setting choices are also affected by lighting conditions. If there is a lot of light, you may want to use a low ISO for maximum quality. Then, you have to adjust for slower shutter speeds and larger apertures.
If you’re shooting fast action, like sports, you usually want a fast shutter speed so there’s no motion blur. You must change to a larger aperture and a higher ISO to compensate.
Mastering these three elements is the key to photography. Balancing them for perfect exposure gives you a great deal of freedom.
But it’s not just about getting the perfect exposure. You can use aperture for other creative effects, like depth of field. We’ll look at how aperture affects depth of field later in this article.
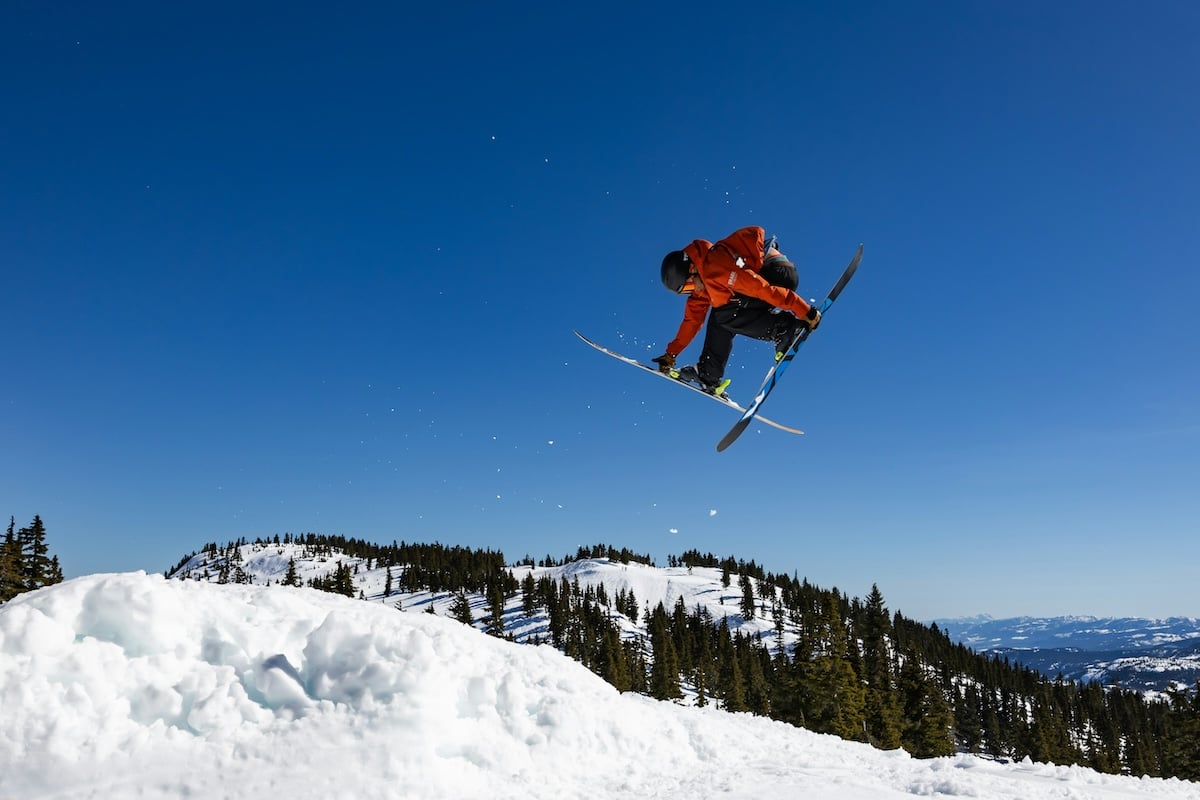
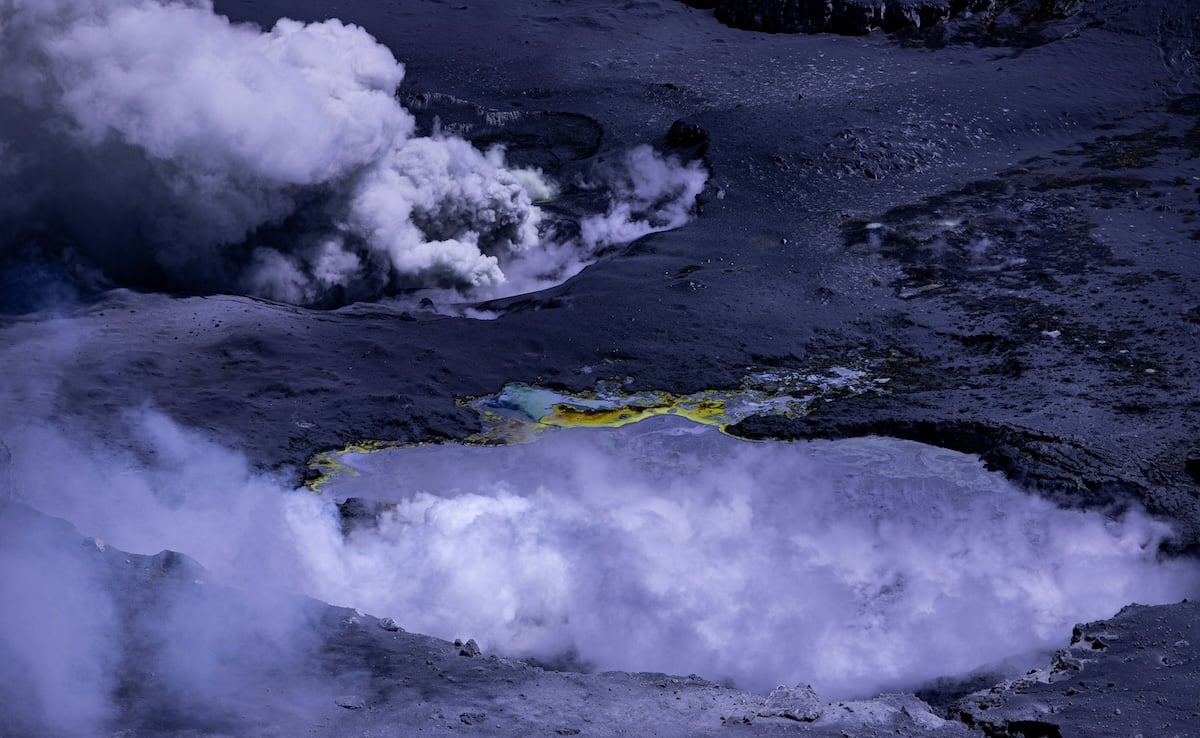
Shot with a Canon EOS R. 24mm, f/7.1, 1/1,000 s, ISO 100. Greg Rosenke (Unsplash)
Understanding Aperture in Photography
Photography has a lot of terminology and jargon that goes with it. You get used to it after you’ve been around the block a few times. You’ll even start using these complicated terms. But when you’re just starting, the language can be confusing.
Aperture has its own words and terminology that can make your head spin. But we’ll help you understand so you become an aperture master.
People use different words when referring to the size of the aperture. Some say a lens aperture is large or small, while others say it’s wide or narrow. Both are perfectly acceptable.
The maximum aperture is when the hole is as wide open as possible. And the minimum aperture is when it’s at its smallest.
You also need to know about “fast” lenses. You might assume this refers to zoom or autofocus. But a fast lens has a large or wide maximum aperture. This term is usually associated with prime lenses.
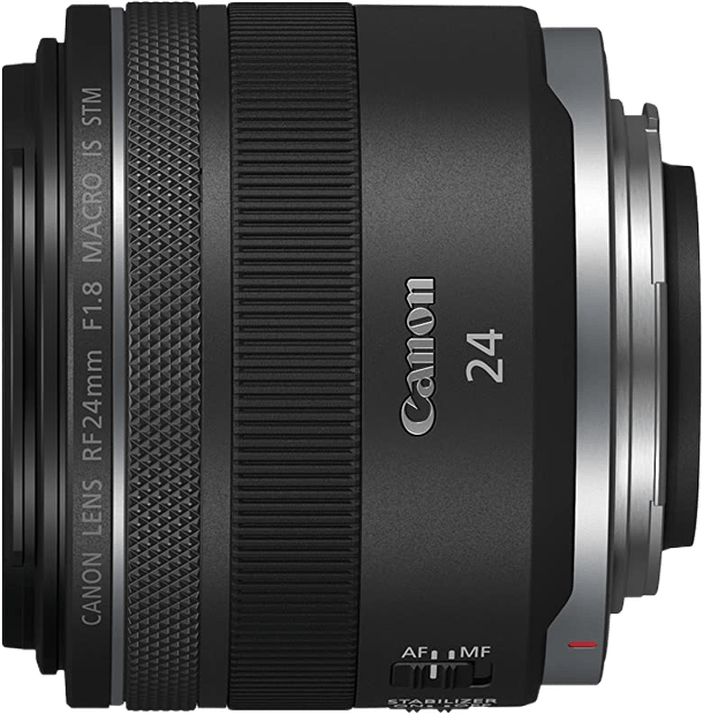
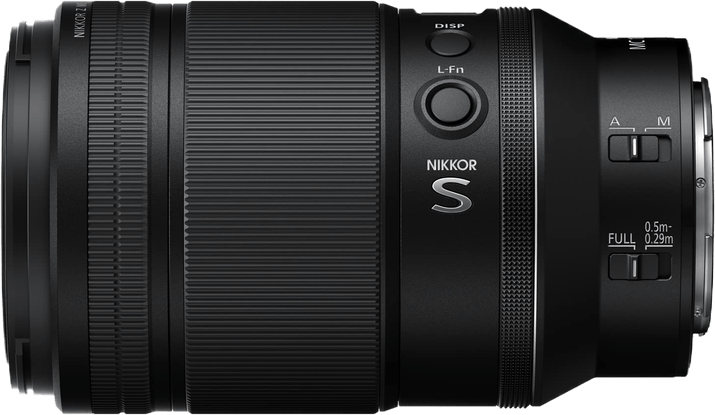
Top Prime Mirrorless Lenses

The F-Stop Scale
So far, we’ve referred to aperture sizes in general terms. They’re either small or large (wide or narrow). But lens apertures in photography are measured on an exact scale. Every camera and lens manufacturer uses this measurement scale, consistent across all brands.
Apertures are measured on the f-stop scale. This is why aperture sizes are denoted as f/1.4 or f/22, for example. You see this in photography literature and camera manuals. People might also say f-number, f-stop, or f-stop number.
You see these numbers on your lens’s aperture control. But most lenses have the numbers without the “f” and forward slash before it. Digital cameras are a bit more straightforward. They display an aperture number with the letter “f” on the control screen.
The “f” in f-stop stands for “focal length.” The number following is a fraction of the lens’s focal length. For example, if you’re using a 50mm prime lens, the lens’s focal length is 50mm.
Here are a couple of examples of f-stop settings:
- A 50mm lens with an aperture of f/2 has a lens opening 25 mm wide (50mm divided by 2)
- A 50mm lens with an aperture of f/8 has a lens opening 6.25 mm wide (50mm divided by 8)
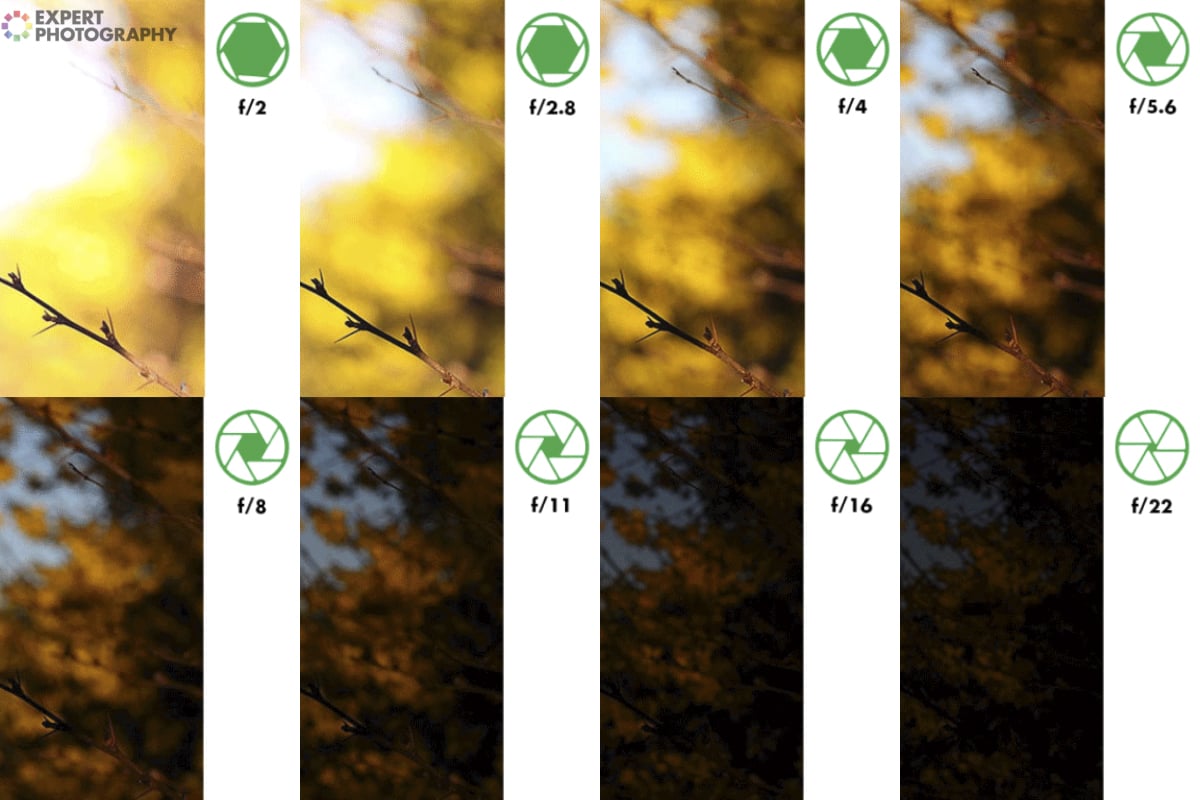
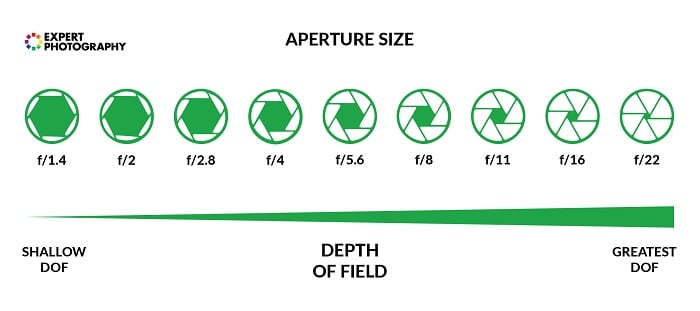
You can see an example f-stop scale in the image below.
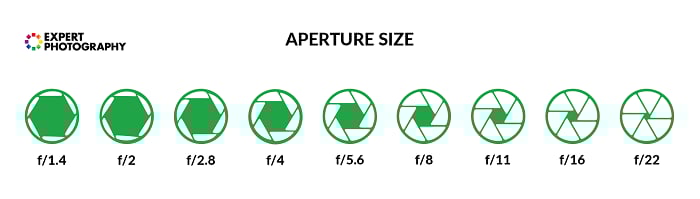
Main f-stop settings
Notice that wider apertures have smaller f-numbers, and narrower apertures have bigger f-numbers. This can be unclear at first because they are measured in fractions. The larger the fraction, the smaller the aperture.
An f-number doesn’t have an exact universal measurement across all lenses. An f/8 aperture on a 50mm lens will be a different size than an f/8 on a 200mm lens. But this fractional system of measurement is universal across manufacturers. All brands stick to the same system.
Some of the latest digital cameras have increased the number of available f-stops. They’ve introduced “third-stops,” which sit between the standard apertures on the scale. For example, you might find an f/3.2 in between f/2.8 and f/4. This gives you more aperture control.
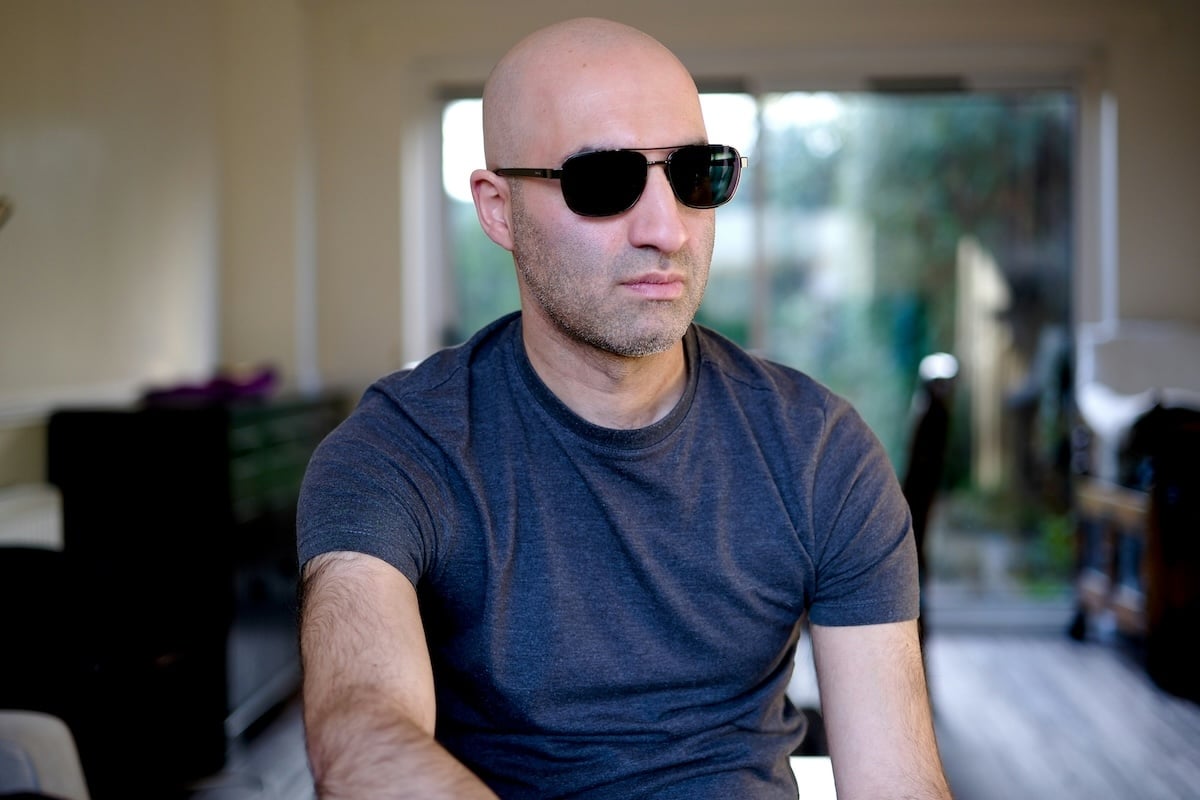
Shot with a Fujifilm X-T3. 30mm, f/2.5, 1/13 s, ISO 200. Tim JT (Unsplash)
Lenses and Aperture in Photography
This section looks at how different lenses affect the aperture settings. We look at the difference between prime vs zoom lenses and their relation to your aperture options.
Prime Lenses
A prime lens has a fixed focal length, meaning it doesn’t have zoom capabilities. But they’re often favored by professionals because of their quality and usability.
Another reason for their popularity is the aperture range and control they give the user. A good quality prime lens has a maximum aperture of f/1.4. You might even get an f/1.2 if you’re lucky.
A wider maximum aperture gives you greater creative control when you shoot. Wider apertures also let you shoot in low-light conditions. And a wide aperture range means you don’t have to change the lens if conditions change.
The wider apertures also give you more control over the depth of field. We’ll discuss depth of field in more detail later in the article. But achieving a soft bokeh effect with a shallow depth of field makes prime lenses popular in portrait photography.
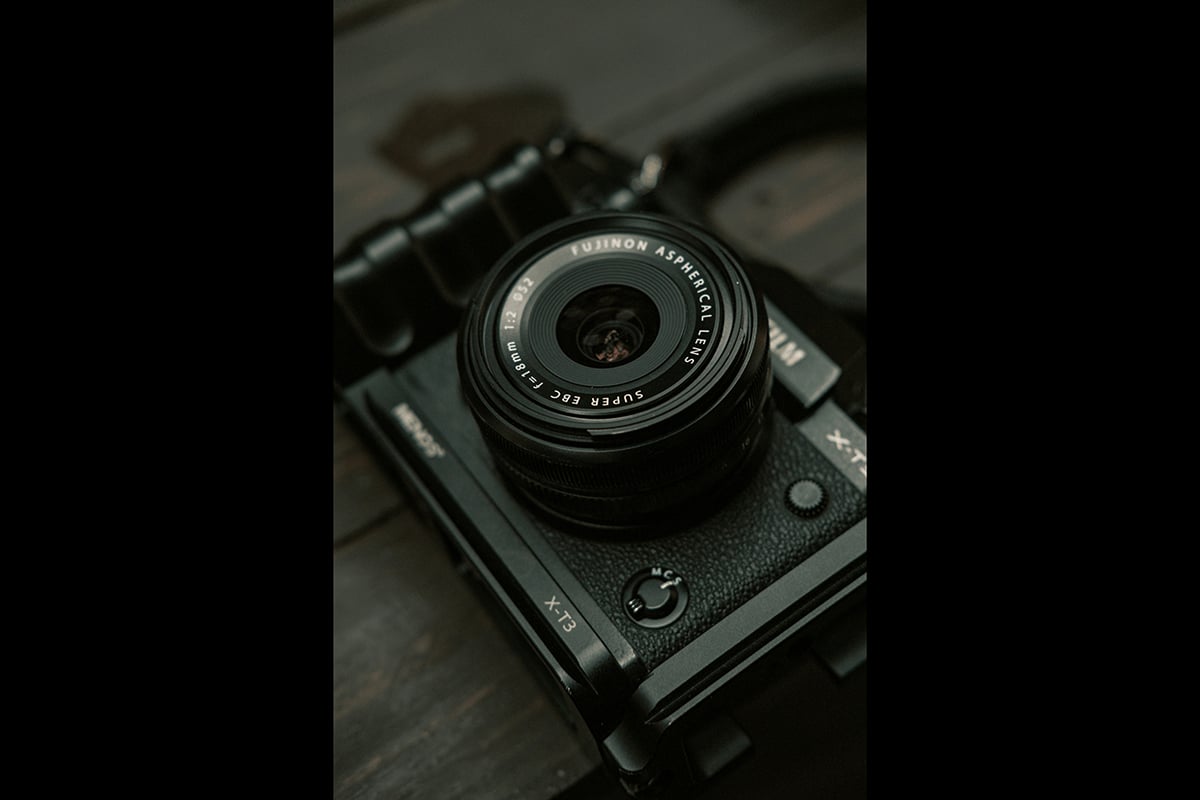
X-T3 with an 18mm f/2.0 prime lens. 35mm, f/2.0, 1/160 s, ISO 160. Nguyễn Hiệp (Unsplash)
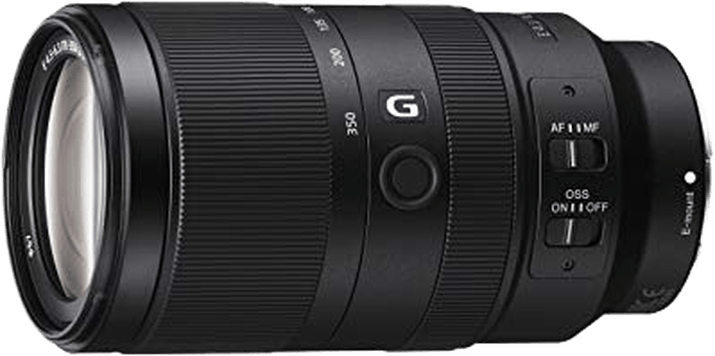
Variable Aperture Lenses
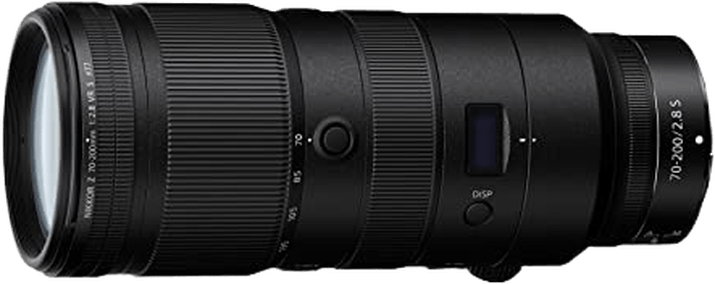
Variable aperture lenses are a type of zoom lens. Zoom lenses have a changeable focal length, unlike prime lenses. If you have a 70-200mm zoom lens, you can adjust the focal length between 70 and 200mm. And the lens zooms as you move to the higher end.
Moving from the minimum to the maximum focal length also affects the aperture. With variable aperture lenses, increasing the focal length can prevent access to some of the wider apertures.
When using the lens at 70mm, you might have a maximum aperture of f/2. But as you zoom in, your maximum aperture becomes smaller. At 200mm, you might have a maximum aperture of f/4 or f/5.6.
A reduced maximum aperture means you lose some creative control. You need more light to get the correct exposure. And you don’t get the effects of a wide aperture, like a shallow depth of field.
Variable aperture lenses don’t affect the minimum aperture of your lens. You can go as high as you like across the focal length range. So you can use aperture f/11 from 70mm to 200mm. Variable aperture lenses tend to be at the cheaper end of the market.
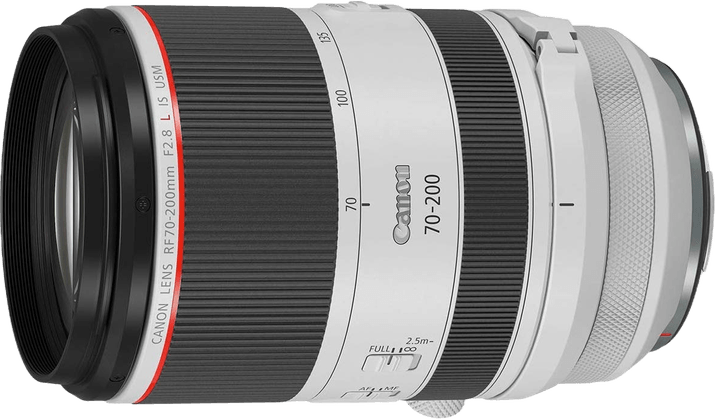
Top-of-the-range zoom lenses have a fixed maximum aperture. It’s usually not as wide as the maximum of a prime lens. But you can still find “fast” zoom lenses with a wide aperture. You need to consider the maximum aperture when buying a zoom lens.
Thankfully, the maximum aperture is often in the lens’s name. For instance, the Canon RF 70-200mm f/2.8L USM lens has f/2.8 as the maximum aperture.
Controlling Aperture
Theoretically, the aperture is one of the most straightforward controls on your camera. You select the aperture you want to use and start snapping. Sometimes, it is that simple. But there are certain things you need to consider, and there are different ways of controlling it.
We’ve seen how the lens you use can affect your aperture options. And different cameras have different aperture controls. Some are manual, while others have auto and program modes or an aperture priority mode.
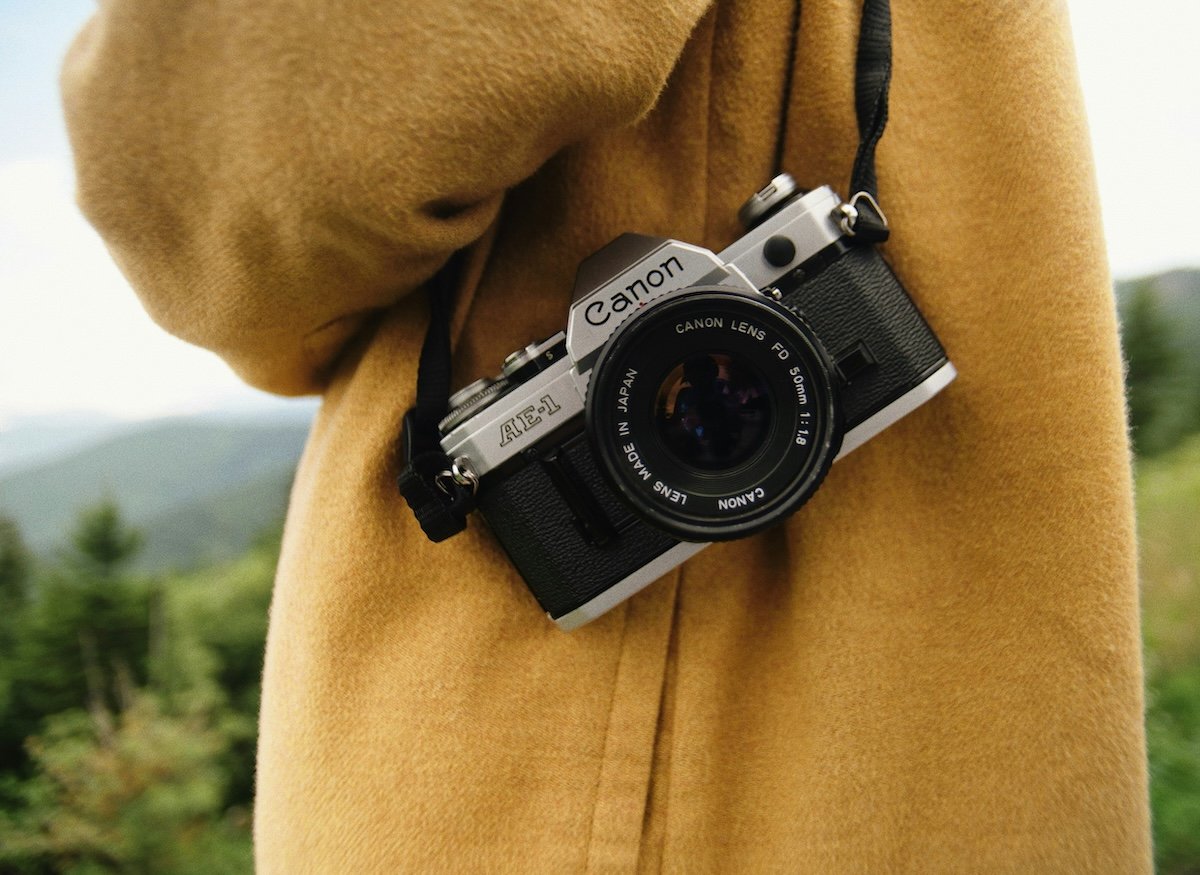
Film Cameras
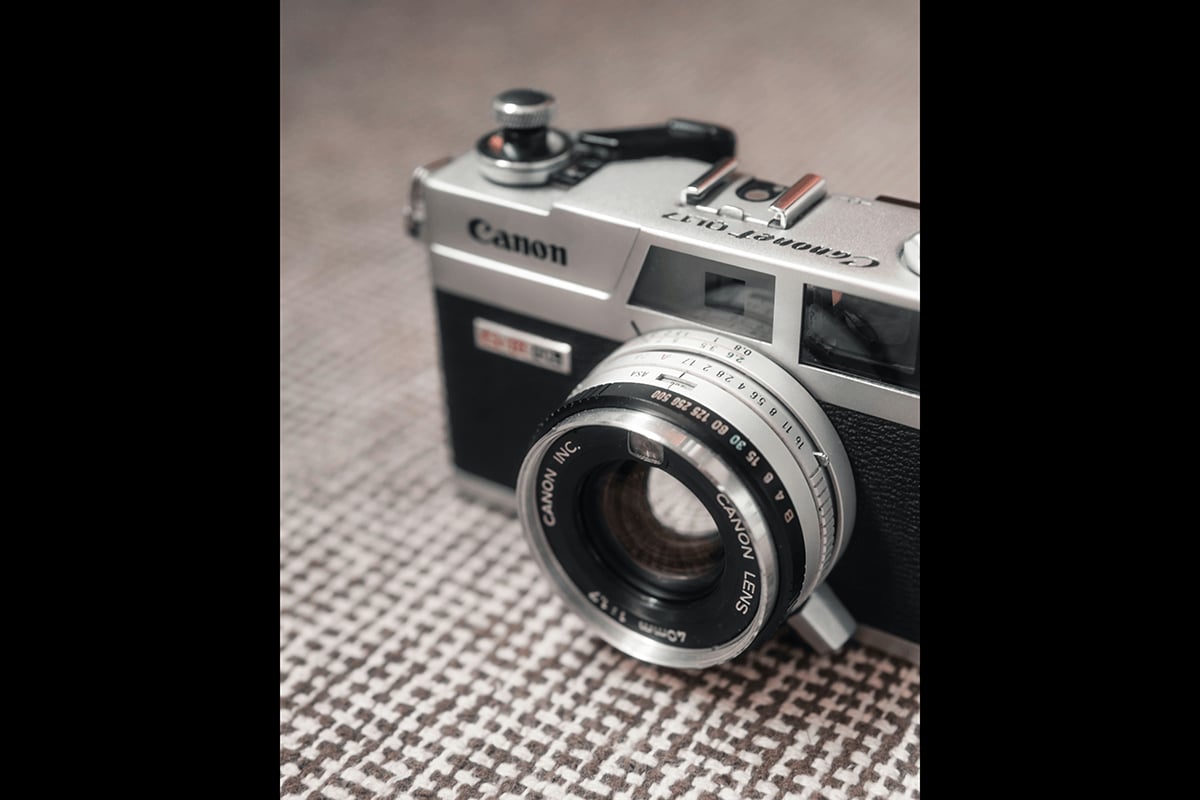
When working with traditional 35mm cameras, the aperture control is on the lens, not the camera. All the f-stops are listed on the lens, although just the number. To change the aperture, you turn the ring to the f-number you want.
Early-generation SLR cameras had nothing to help achieve proper exposure. Setting the correct aperture, shutter speed, and ISO was up to the user. But later, cameras introduced an internal light meter.
The internal light meter recommends an aperture based on the other settings and available light. You then turn the aperture ring to the correct f-stop. Later, SLR models introduced more manual aperture settings. The Canon AE-1 introduced an Auto-aperture mode.
The camera automatically chooses the best aperture setting when you turn the ring to the “A” option. You set the ISO and the shutter speed, and the system selects the appropriate aperture.
Later, the Canon A-1 introduced a shutter speed priority and aperture priority mode. Automated exposure settings became a standard feature for film cameras until their demise in the 2000s.
Shot with a Panasonic Lumix DC-GH5. 1/50 s, ISO 200. Drew Willson (Unsplash)
Digital Cameras
You’ll see that most lenses for modern digital cameras don’t have an aperture ring. They may not even have the available apertures on them at all. This is the case for DSLRs and mirrorless cameras.
Since the world turned to digital photography, aperture controls have changed. You can change the aperture on your digital camera’s menu screen. There will also be a button or wheel on the outer shell. The exact location depends on the camera model.
Nikon cameras have a wheel to change the aperture. It sits on the right side at the front of the camera, so you can change it with your index finger while you shoot. Canon cameras also have a wheel, but it sits on top of the other controls. Other camera brands vary.
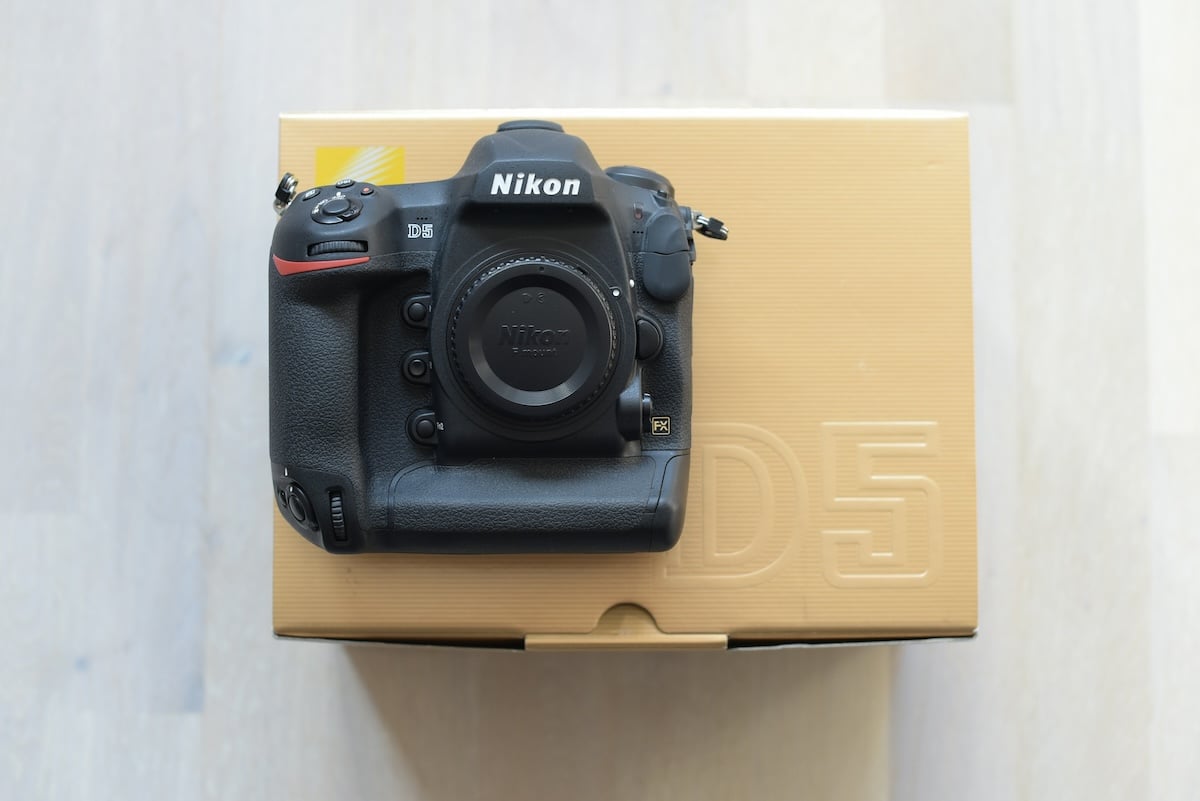
A Nikon D5. Plentypix (Unsplash)
Full Auto Mode
Most digital cameras have an auto mode. To use it, you simply point and shoot. The camera does all the exposure calculations for you. It sets the ISO, shutter speed, and aperture for the light conditions.
The camera calculates exposure using the internal light meter. The newest top-end models have very sophisticated light meters. You don’t need to worry—the camera exposes your shot perfectly.
Auto mode is great for beginners or quick snapping. They’re excellent if you must concentrate on what’s happening around you. You don’t want to miss the shot by getting lost in your settings.
But auto modes offer no creative control. They’re designed to achieve the “perfect” exposure. The computer doesn’t make artistic decisions. It only wants a well-exposed image. It’s best to take back control to see how the aperture affects your image.
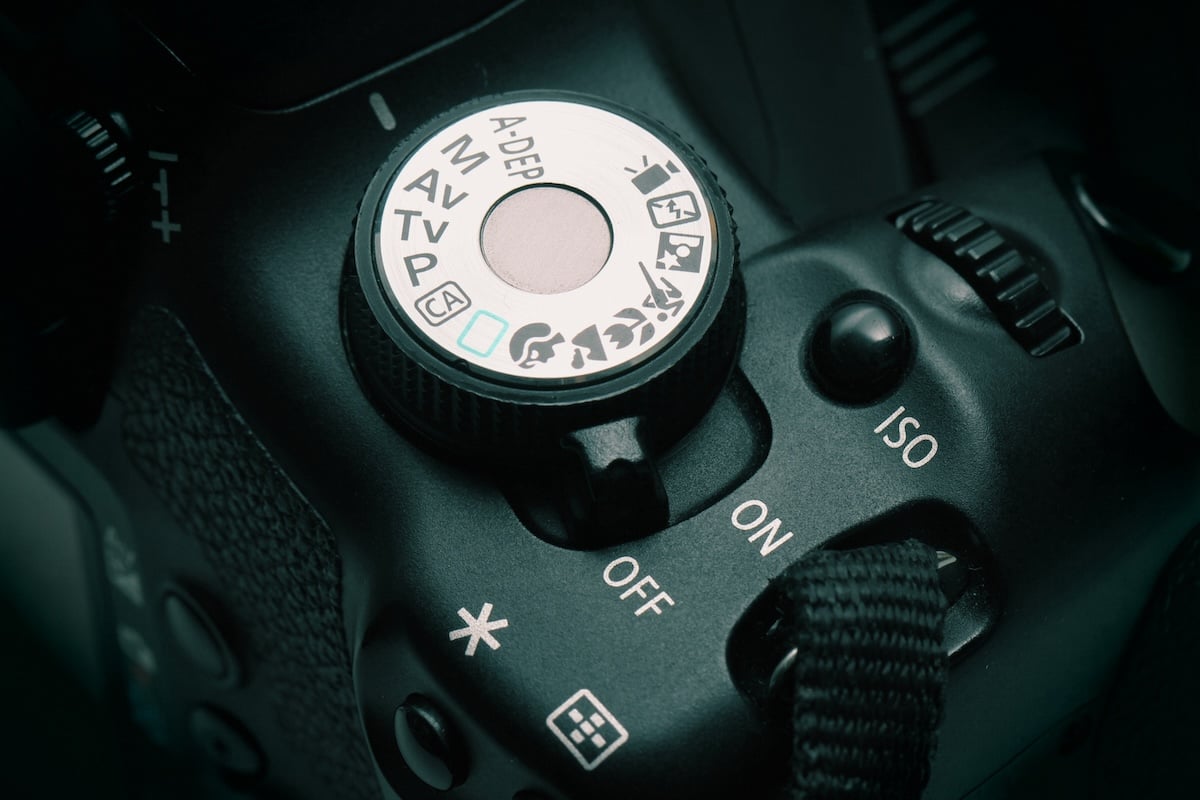
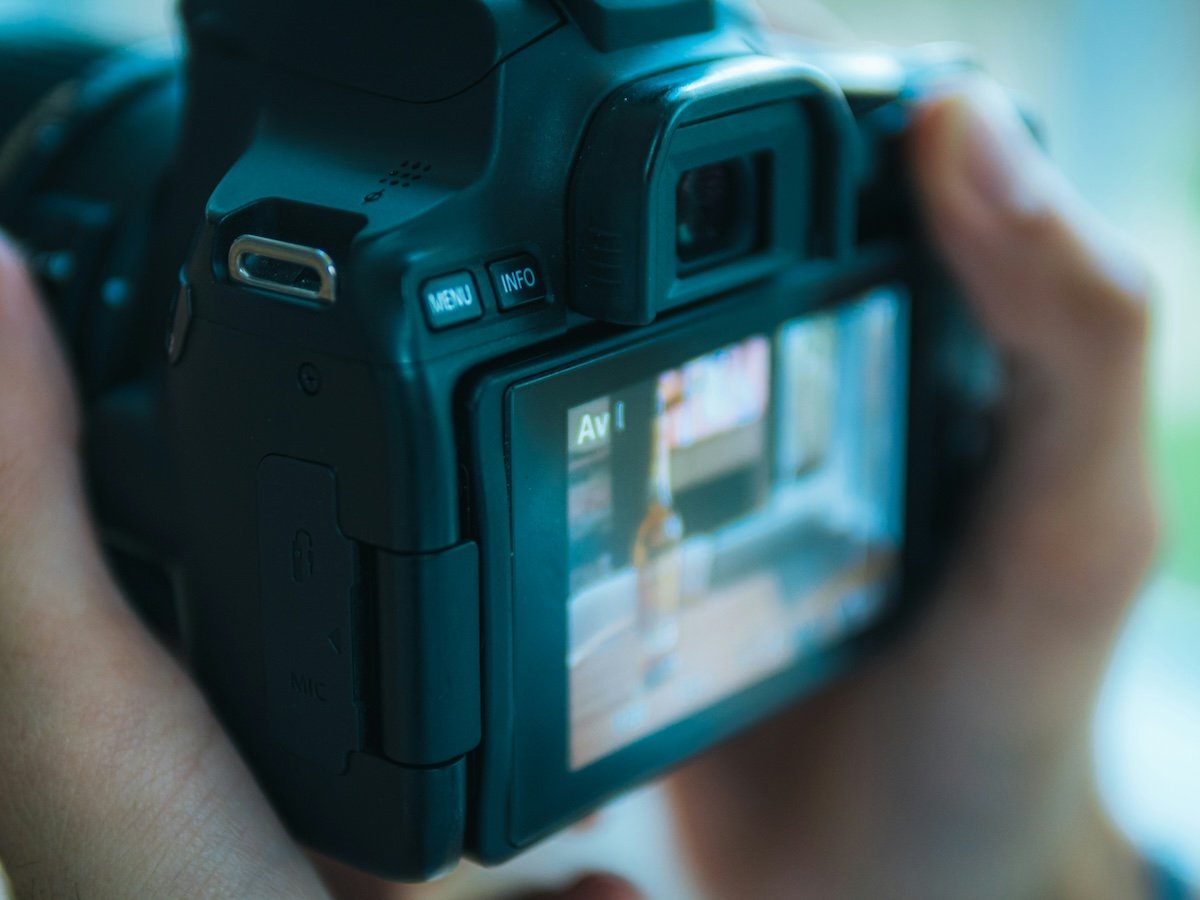
Mode control buttons on a digital camera. (Adobe Stock)
Aperture and Shutter Priority Modes
If you look at the mode knob on the top of a Canon camera, you’ll see Av and Tv modes next to Auto. This is “A” or “S” on Nikon cameras and may be different on others.
These are two semi-automatic shooting modes. They allow you to concentrate on what you’re shooting while giving you more creative control than auto mode.
A or Av is the aperture priority mode, and Tv or S is the shutter priority mode. These modes let you collaborate with the camera’s computer to share the exposure burden. They’re an excellent way to leave full auto mode and ease your way into manual controls.
Aperture Priority Mode
Aperture priority mode puts the aperture controls in your hands. You’re free to select whichever aperture you have available. And you’re only limited to the f-stops of your camera lens.
While you have the power over the aperture, the camera adjusts the shutter speed and ISO to balance the exposure. You share the exposure responsibilities with the camera.
If you shoot landscape photography, everything in the shot should be in focus. You need a narrow aperture for this kind of photography, like f/16 or f/22.
After you select your aperture, the camera will not change the setting. Instead, it adjusts the shutter speed and ISO to compensate for the narrow aperture. This works around your aperture choice to ensure your shot has enough light.
If you want a shallow depth of field for a portrait, you can fix the aperture to an f-stop at the other end. If you select f/1.8, the camera works around that decision. It selects the appropriate shutter and ISO settings.
Aperture priority mode is a great tool for learning how to use aperture for creative photography. You can move away from Full Auto mode, but you’re not jumping into the deep end immediately.
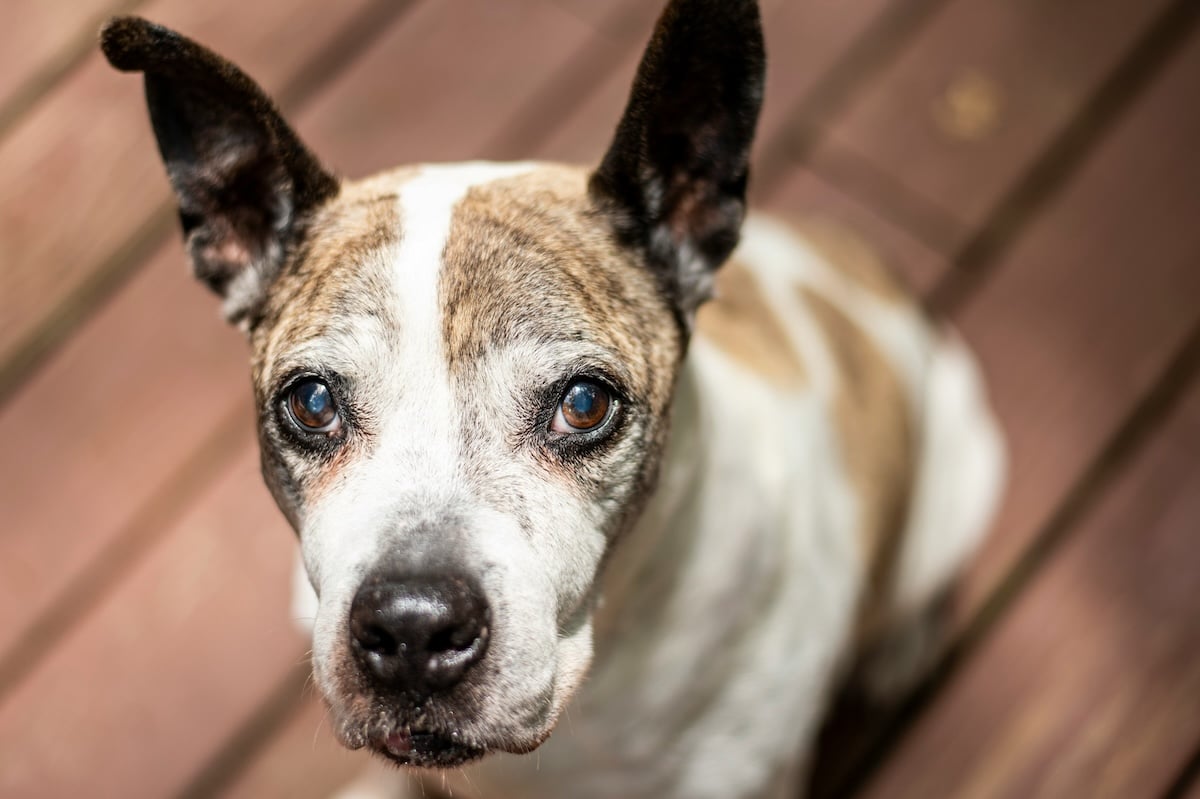
Shot with a Nikon D750. 50mm, f/1.8, 1/640 s, ISO 100. Amin Hasani (Unsplash)
Shutter Priority Mode
Shutter priority mode works much the same way as aperture priority. But this time, you’re in control of the shutter speed. You select the shutter speed you want. Then, the camera adjusts the ISO and aperture settings to balance the exposure.
This mode is useful when shooting fast-moving action, like sports photography. Using a fast shutter to capture the action without motion blur is best. A football match turns into one big blur with a slow shutter. The same goes for fast-moving animals with wildlife photography.
Shutter priority mode is another excellent tool for learning on the job. You can take some of the responsibility away from the camera, but you’re not left on your own. You can focus on getting the needed shots without getting bogged down with settings.
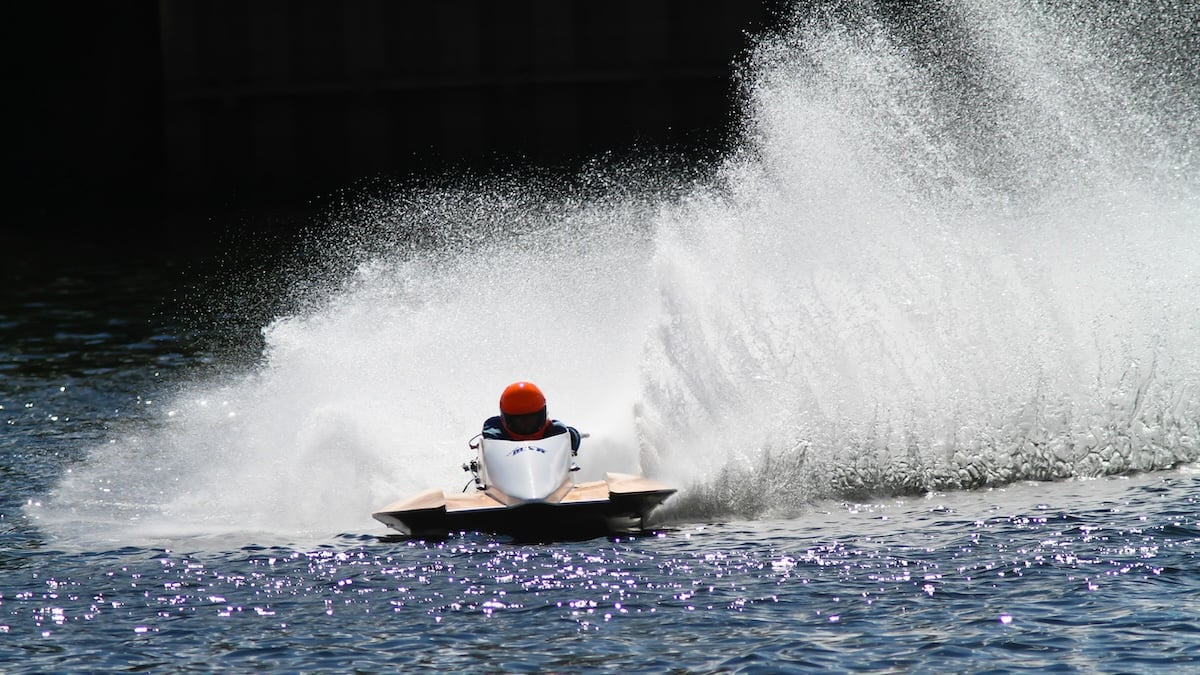
Shot with a Canon EOS 7D. 420mm, f/5.6, 1/2,000 s, ISO 200. Jim Weatherford (Unsplash)
Manual Mode
Manual mode puts you in the driver’s seat. Switching to manual is like Luke Skywalker turning off his targeting computer. The aperture, shutter, and ISO are all in your control. Achieving the correct exposure is up to you.
Going manual might seem daunting if you’re a beginner. But it’s the best way to learn about aperture in photography. You learn how the aperture affects your photos. You can also see how to balance the aperture with the other exposure settings.
It involves a lot of trial and error, and that’s only natural. But you can always switch back to aperture priority or shutter priority mode if necessary.
The priority modes can help if you need to get certain shots. But if you have the time, manual mode is the best way to learn.
Shutter priority mode (Av). Panasonic Lumix DC-G9. 30mm, f/1.4, 1/125 s, ISO 640. Maxime Doré (Unsplash)
Using Aperture for Creative Photography
We’ve seen how aperture affects exposure with shutter speed and ISO. Getting good exposure is about balancing those three settings. But getting textbook exposure isn’t always what a photographer wants.
You can also use the aperture for creative photography. The most obvious example is darkening your image using a smaller aperture. This technique can change the mood and atmosphere of your image.
A basic photography theory says you need to change the shutter and ISO if you’re using a small aperture. But you can use a smaller aperture without changing anything if you want a darker image.
Looking at the image below, you can see how the image changes as the aperture goes from wide to narrow. It gets darker with each f-stop change.
You may not always have the conditions you need, and the light may not be correct for the type of shot you want. So, changing the aperture size can help you get what you need, even when conditions are against you.
Working in bright sunlight, you can change to a smaller aperture. This reduces the light getting to the camera sensor, making your shot darker and moodier.
You can open the lens to a larger aperture with poor light. This lets more light in and gives you a brighter picture.
Aperture and Depth of Field
Now, we need to look at how the aperture affects the depth of field. We’ve already mentioned depth of field several times in this article, But we’ve yet to explain what it is and how aperture controls it.
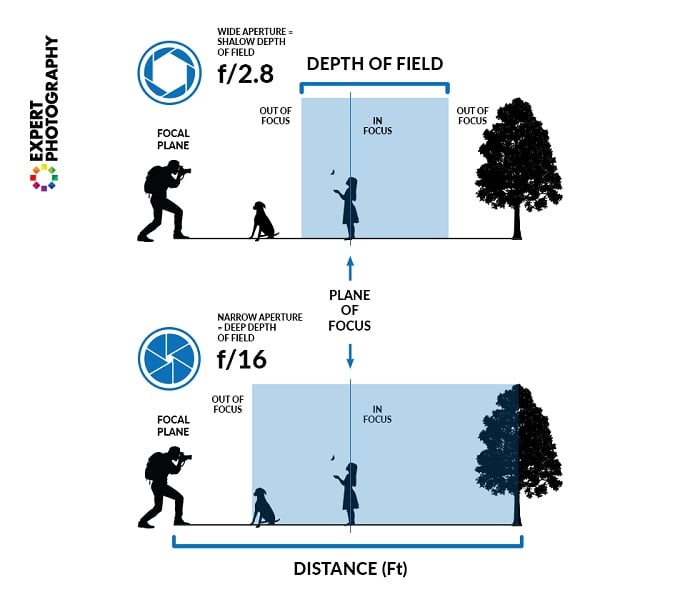
What Is Depth of Field?
Depth of field refers to how much of your photo is in focus. It’s the distance between the closest object in focus and the farthest object in focus. You can have a shallow or deep depth of field. And it’s all controlled by the aperture.
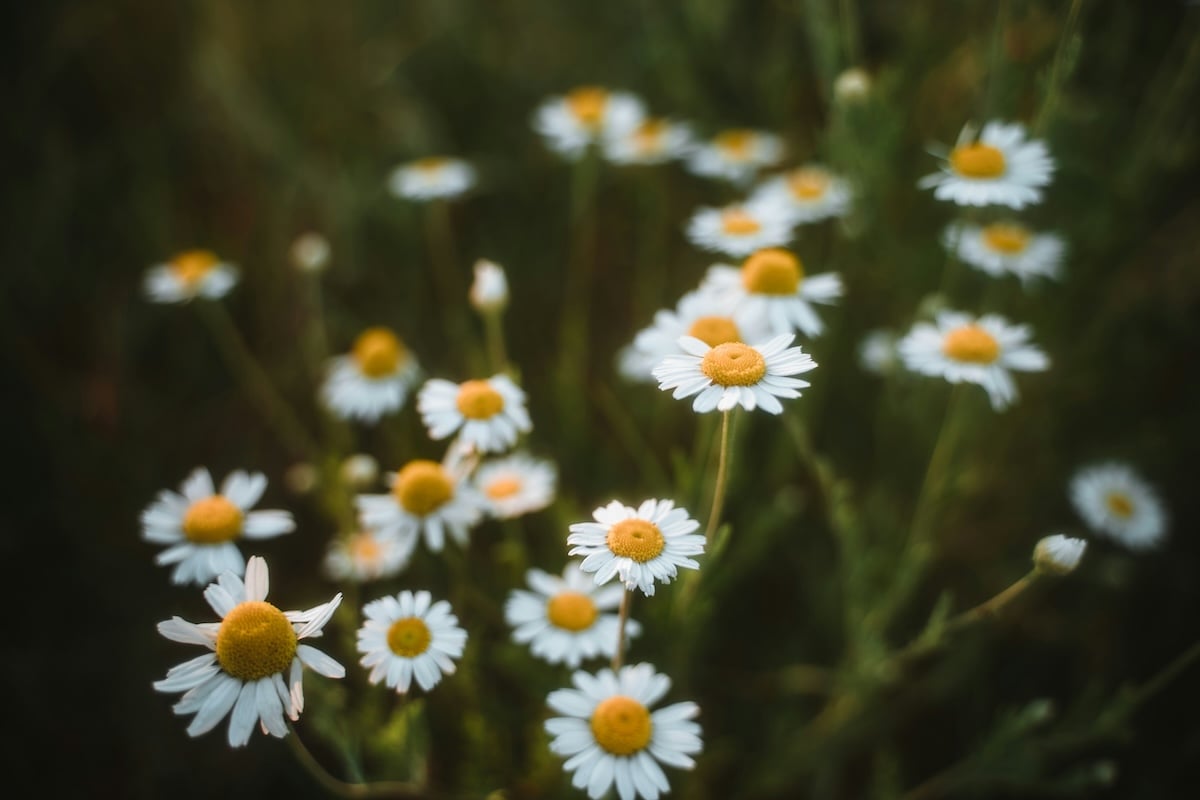
A shallow depth of field is when only a small area of your shot is in focus. It’s common in portraits and macro photography. You’ll see the subject in focus, but the background and foreground will be out of focus. This blurry background technique is called a bokeh effect.
A photo with a deep depth of field has everything in focus. The details in the foreground, background, and main subject are in focus. This is common in landscape photography.
How to Control Depth of Field
You can add bokeh effects in post-production using editing software like Adobe Photoshop or Luminar Neo. But the best way to control your depth of field is with your camera lens and aperture.
By changing the aperture, you can go from a sharp shot with everything in focus to an intimate portrait with a strong bokeh effect. You can also have everything in between.
If you want a large depth of field, you need a small aperture. If you want a shallow depth of field, you need a large aperture. That’s the general rule.
Using an aperture like f/1.4 or f/2 gives you a very shallow depth of field. This means only your subject is in focus, and anything in front or behind it will be out of focus.
It can be a powerful effect that emphasizes your subject in the frame.
But you must be careful, too. If your depth of field is too narrow, you can lose focus on parts of your subject. For instance, in a portrait, the person’s eye might be in focus while the tip of their nose is out of focus.
A smaller aperture gives you a sharper image. The area of focus is much greater, so there’s little risk that your subject is out of focus. A small aperture is helpful if you want the whole shot in focus or have two subjects at different distances.
One of the benefits of using a large aperture is that you can stick to a lower ISO. With a wide aperture, you’re getting lots of light. Keeping the ISO low gives you excellent image quality. But you have to balance this with a faster shutter speed.
For a greater depth of field, you need a narrow aperture like f/16 or f/22. The issue here is that the camera sensor is getting less light. You still want to keep the ISO low for maximum quality. So, a compromise has to be made on the shutter speed.
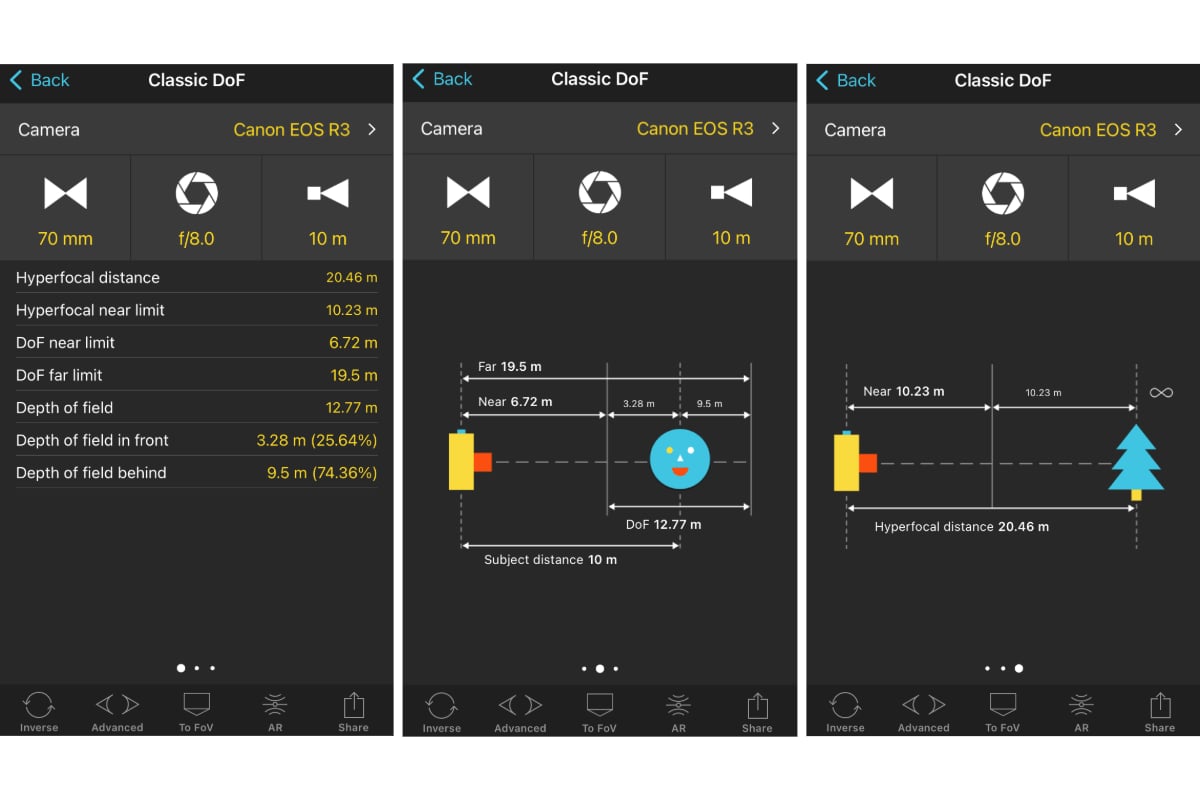
Getting it right can take some practice. But some tools can help, like the PhotoPills depth of field calculator. All you need to do is insert the relevant information, and the calculator gives you your depth of field.
Focal Length and Depth of Field
The focal length of a lens also affects the depth of field. Generally, a longer focal length gives you a shallower depth of field. In contrast, a short focal length gives you a deeper depth of field.
A 50mm camera lens naturally produces a greater depth of field, while a 200mm lens produces a narrower depth of field.
As we’ve seen above, lenses with larger focal lengths tend to have a smaller aperture range. While the maximum (largest) aperture of a 50mm lens might be f/1.4, a 200mm lens will have a maximum of f/4 or f/5.6.
A lens with a large focal length does have less aperture control, meaning you have less control over the depth of field. But the longer the focal length, the easier it is to achieve a shallow depth of field. You can still get the soft bokeh effect when using a longer lens.
Shot with a Sony a7 III. 28mm, f/2.8, 1/50 s, ISO 100. Moritz Lange (Unsplash)
Aperture and Photographic Styles
We’ve seen how using different apertures in photography yields different results. That’s why photographers in different areas favor some aperture sizes over others. So, we’ll look at some of the most popular fields of photography and see which apertures they use.
Portrait Photography
Apertures are very flexible in portrait photography. The choice of f-stop might change depending on whether you’re shooting in a studio or on location.
Bokeh is a popular portrait effect, so many photographers favor wide apertures. If they want a soft background blur, they might go for an f/1.4.
Not all portraits have a shallow depth of field. Other portrait photographers want much of the shot in focus, especially if they use sets and props. But, even so, they won’t venture too far down the f-stop scale. Portrait photographers usually go from wide to mid-range stops.
Shot with a Fujifilm X-H2S. 33mm, f/1.4, 1/240 s, ISO 160. Osama Madlom (Unsplash)
Landscape Photography
Landscape photography is all about capturing epic scenery and vast expanses. To achieve this, landscape photographers need a deep depth of field that captures the whole scene. For a greater depth of field, you need a narrow aperture.
Logic suggests you use the narrowest aperture you have when shooting landscape. But there are problems when we take this too far. And the main problem is diffraction.
Diffraction is lens distortion that occurs when using a narrow aperture. It happens because the lens directs the light through a very narrow hole, which causes the light beams to cross. This results in a loss of image quality and sharpness.
Diffraction occurs only at the extremes of the scale, like f/32. You may also see some at stops around f/22. But depending on the quality of your lens, anything wider than that should be okay.
Shot with a Canon EOS 6D Mark II. 140mm, f/10, 1/400 s, ISO 100. Bernd Dittrich (Unsplash)
Wildlife Photography
Wildlife photographers like to use telephoto lenses. They allow the photographer to get intimate shots of animals from long distances. But some telephotos are also limited in their range and don’t have some of the wider apertures.
Achieving a shallow depth of field isn’t a problem. Lenses with longer focal lengths naturally have a shallower depth of field. But the lack of wider apertures means increasing the ISO setting if lighting conditions aren’t perfect.
A fast shutter speed also benefits wildlife photography, as animals move fast. You want a clean animal shot with no motion blur. And with fewer apertures, you have to compensate with ISO.
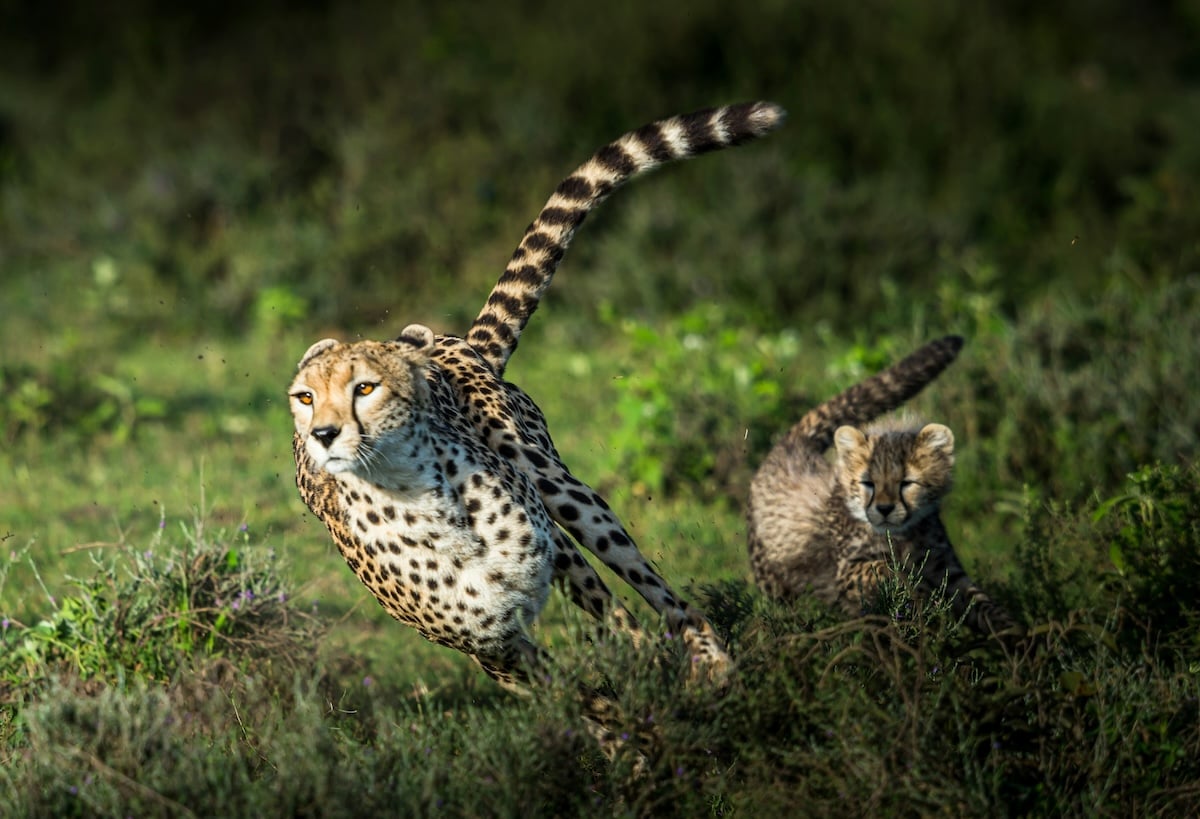
Shot with a Nikon D4S. 850mm, f/8.0, 1/1,000 s, ISO 500. Sammy Wong (Unsplash)
Sports Photography
Sports photography is like wildlife photography. You most often want a telephoto or super-telephoto lens. You’re often shooting fast-moving subjects in low-light conditions.
A fast shutter speed is a must in sports to avoid motion blur. A large lens might not have an aperture larger than f/5.6, but if you have a high-speed sports lens, you might have f/4.
Much depends on the lighting conditions of the event you’re shooting. But if you’re working at night, you must opt for a higher ISO.
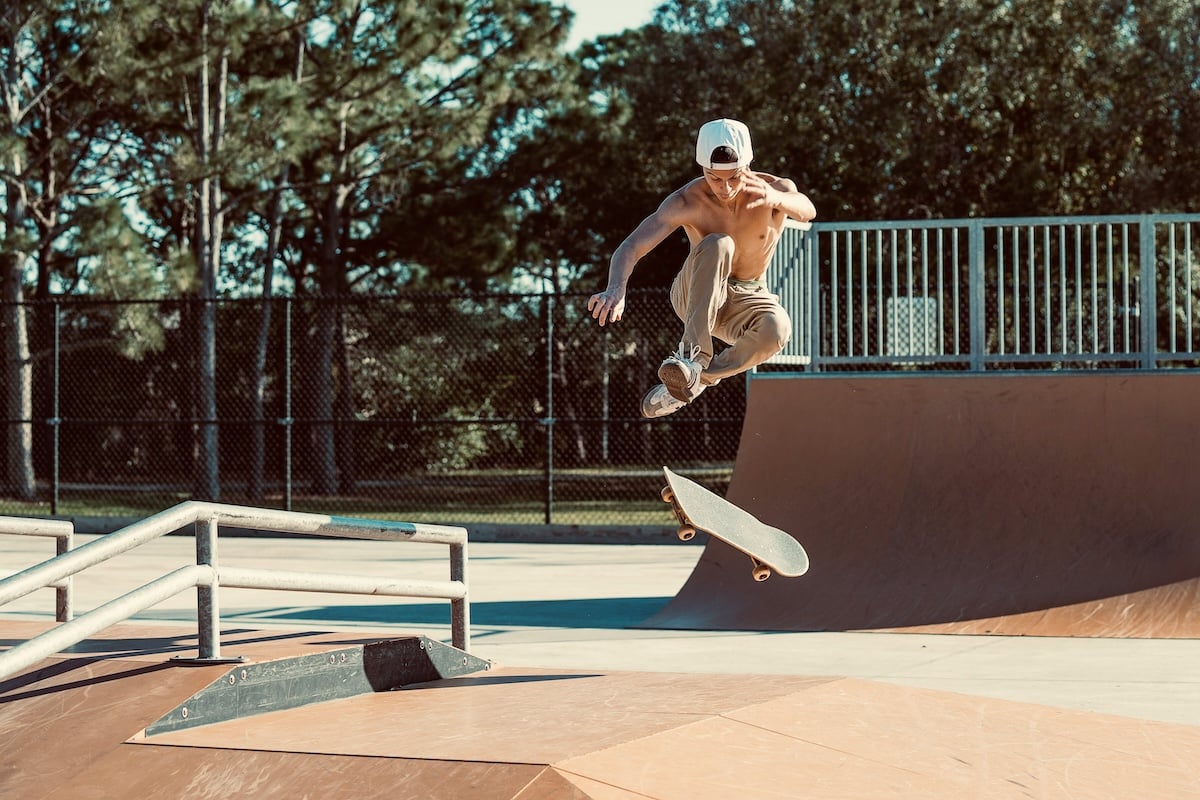
Shot with a Sony a7 IV. 70mm, f/4.0, 1/800 s, ISO 50. R.D. Smith (Unsplash)
Street Photography
Street photography gives you a lot of freedom when it comes to apertures. Street photographers like to use 35mm or 50mm lenses. Standard angle lenses like these have a good range of apertures. They might have a range from f/1.4 to f/22.
If light conditions are good, you can keep the ISO low. Then, you can play with aperture and shutter speed to get the street shots you want.
Shot with a Canon 5DSR. 15mm, f/6.3, 1/200 s, ISO 800. Quentin Sartorius (Unsplash)
Conclusion: What Is Aperture?
In photography, the aperture is the hole in the lens that leads light to the sensor. But it’s more than just a hole. It’s one of the three corners of the exposure triangle, and you must think about it every time you take a picture.
Different lenses have different aperture settings. All lenses use the same f-stop scale to calculate the aperture. But a 50mm prime lens has different apertures than a 200mm telephoto lens. And lenses can be fast or slow according to their aperture settings.
The aperture is essential for correct exposure. It also affects the mood and atmosphere of your photos and gives you control over the depth of field. A large aperture produces a shallow depth of field, while a narrow aperture produces a deeper depth of field.
Aperture is a must-know topic in photography, as it is one of the three corners of the exposure triangle. But that’s enough theory for now. It’s time to pick up your camera and put your new knowledge into practice!
Check out our Photography for Beginners course to master all three corners of the exposure triangle!
- Learn to effortlessly set up your camera for any situation.
- Master the art of selecting the perfect exposure every time.
- Discover 10 composition rules that elevate your photos instantly.


