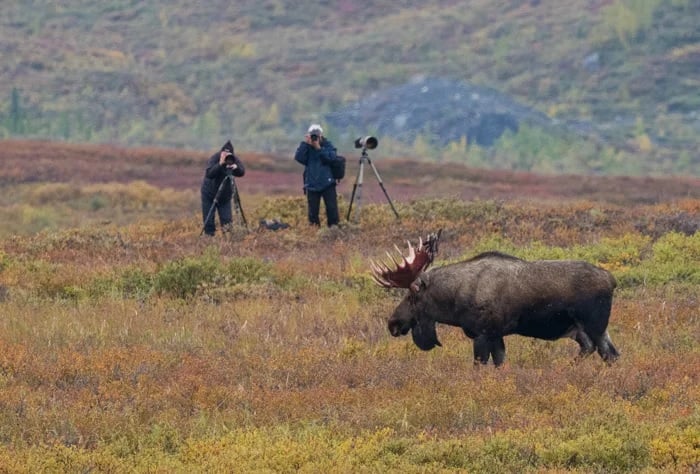
Wildlife photography is one of the most demanding disciplines in all of photography. It requires specialist skills and equipment. You might need to travel to exotic or dangerous locations. Wildlife photo shoots also take patience and dedication.
But wildlife photography is also one of the most rewarding types of photography. Whether it’s a magnificent beast or a creeping critter, there’s nothing like the magic of seeing an animal in the wild. And it’s not only a joyous experience for the photographer. All of their viewers get to see beautiful wildlife in a way that’s otherwise impossible for most people.
This article explores every aspect of wildlife photography, serving as a complete guide to the genre. We look at the best camera settings with tips for improving action shots. We also look at the best camera gear for shooting wildlife. And we have tons of inspiration from some of the best wildlife photographers in the industry.
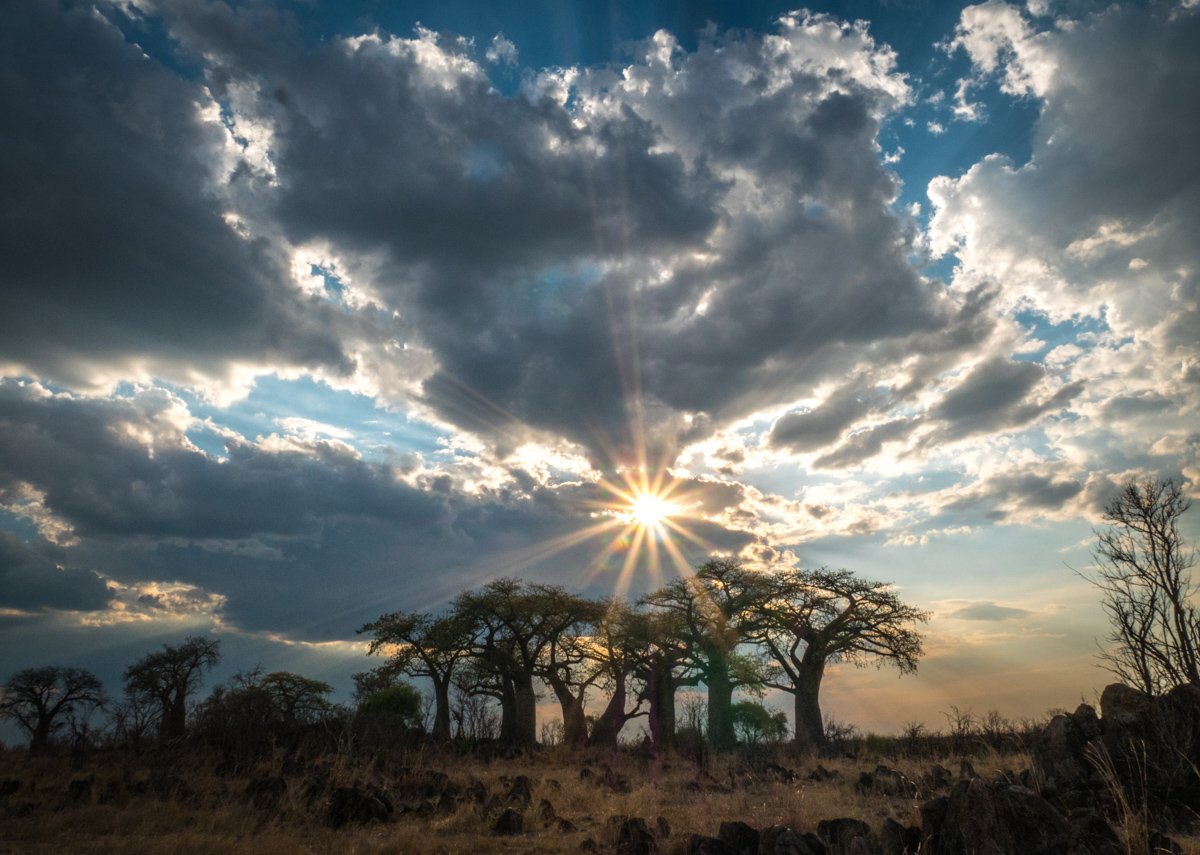
© Nick Dale
What Is Wildlife Photography?
Wildlife photography is the art of capturing images of animals in their natural habitat. A wildlife photographer’s job is to take stunning images of wild animals, allowing viewers to see the beauty of these animals.
Whether in the African plains or the Arctic tundra, wildlife photographers give us a glimpse of creatures we might not otherwise see. They allow us to see up-close images of exotic animals without leaving the comfort of our own homes.
A wildlife photographer shoots wild animals in a natural way—there’s no posing or choreography.
Photographers should have as minimal an impact on the animals as possible. This is because most wild animals will disappear when startled by humans. And secondly, because the point is to capture animals in a natural state of being.
Captive animals don’t hold the same sense of mystery and wonder. We also get a higher educational value from photographing animals in the wild and observing their natural behaviors and habits.
How to Shoot Wildlife Photography
Now, we’ll get started with the do’s and don’ts of wildlife photography, providing tips and ideas to help you master the art. Each section gives you insight into capturing stunning wildlife pictures, whether that’s composition techniques or camera settings.
Remember that each section in this article has a link to an in-depth post on that specific subject. Simply click the link to find out more.
Animal Photography Tips
Wildlife photography isn’t easy for beginners. That’s why we’ve come up with some simple yet helpful tips that ensure you hit the ground running.
When shooting animals, get down low for a more intimate perspective. Shooting at the animal’s eye level helps you connect with your subject. Focus on the eyes to draw in the viewer. If the eyes are blurry, the photo won’t have the same impact.
Use a long lens to isolate your subject and blur the background, making the animal stand out. You can also use wide angles to show an animal in its environment. Be patient and wait for interesting moments, like when an animal is preening, eating, or interacting with others. The best shots come to those who wait.
Wildlife photography is challenging but rewarding. And with practice and patience, you can capture amazing animal photos in the wild or in your own backyard.

Wildlife Composition
Getting a good picture of a wild animal can be difficult enough. But to get a great photo, you need to consider your composition. You might be worried that this is one extra thing to think about, but thinking about composition before you go out into the field will help you get the best shots.
Use a telephoto lens to get close-up shots of animals without scaring them. Keeping a safe distance helps you capture more naturalistic shots, allowing the animal to go about its business without having a camera in its face. It’s also safer for the photographer.
Using telephoto lenses also allows you to shoot portrait-style compositions. Capturing the animal’s eyes in focus helps the viewer connect with your photos. It draws them in and builds an emotional connection.
Look for interesting action shots like animals eating or playing. A bit of motion blur in the wings or feet can add a sense of movement.
Scan the background for distractions like manmade objects to create a cleaner composition. This will help your animal subjects stand out from their environment. Use manual focus if branches or other objects in the foreground confuse the autofocus.
Photograph in the soft, even light of early morning or late afternoon near golden hour. This is also when wildlife tends to be most active.
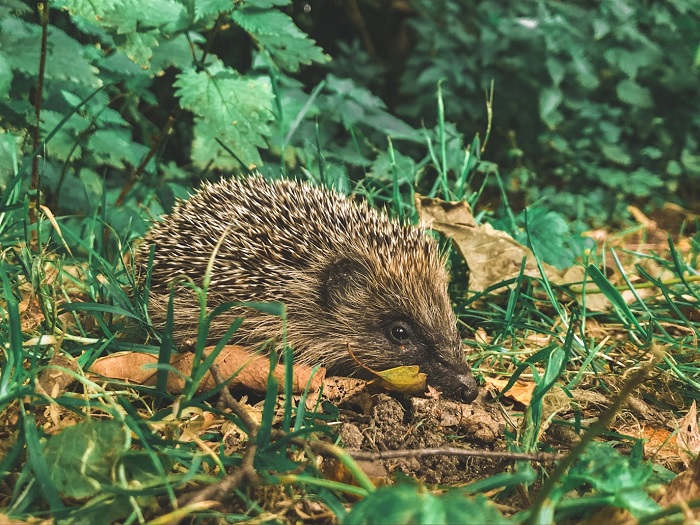
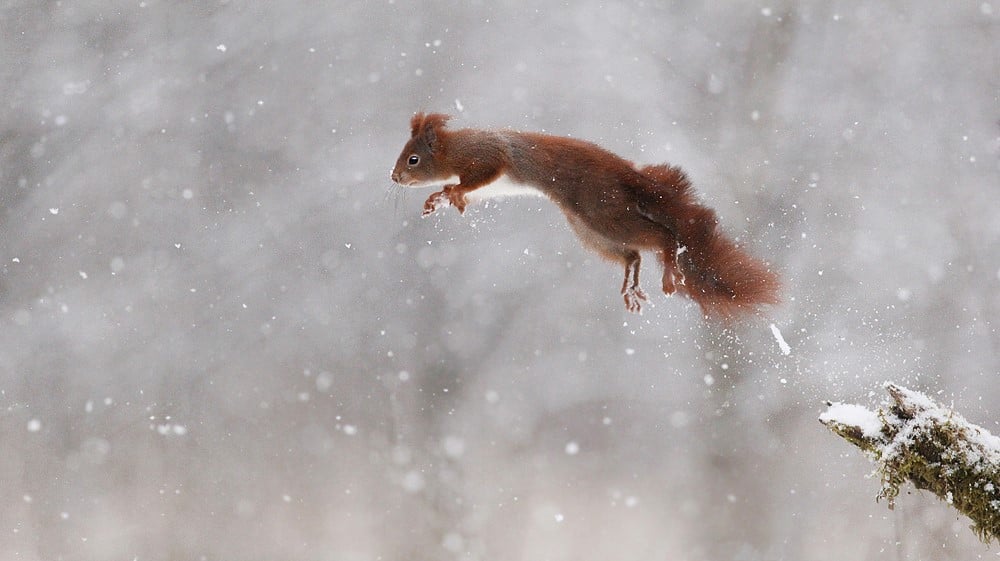
Practice your skills on local wildlife before traveling to photograph exotic animals. It’s worth experimenting with small animals like squirrels in your own garden. You’ll be able to hone your camera skills and try out different composition styles on real wild animals.
Capturing amazing wildlife photos takes time and practice, but the results are worth it when you get it right. To learn more, read our in-depth article on wildlife photography composition.
© Jenn Mishra
Improve Action Shots
Capturing wildlife in action requires the right camera settings. It’s best to use a fast shutter speed of at least 1/500 s to freeze the animal’s movements. And using a wide aperture like f/2.8 to f/5.6 will allow more light in and create a blurry background that isolates the subject.
You may need to increase the ISO to compensate for the lack of light due to the fast shutter speed. But modern cameras can shoot at reasonably high ISO settings without producing much digital noise.
Using Burst mode to take a series of shots is the best way to capture fast-moving animals. You can take a series of shots, then you simply select the best ones from the bunch.
If your lens has image stabilization, use it to reduce camera shake and improve clarity. You can also use Continuous AF mode to keep the focus on moving animals.
By choosing the right settings, you’ll be able to capture stunning wildlife action shots. Check out this in-depth guide to learn more about wildlife action photography.
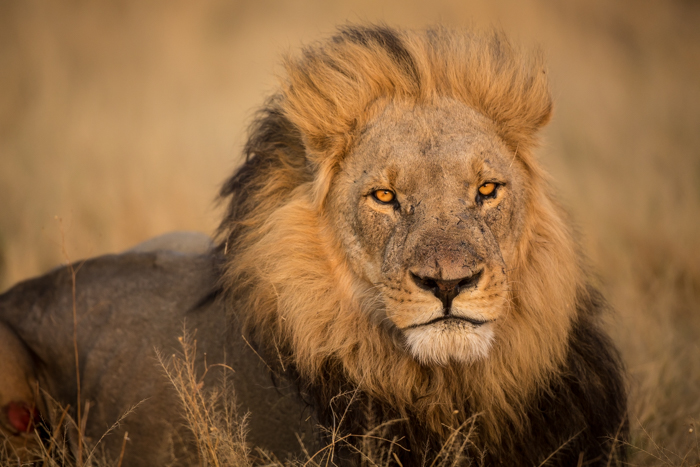
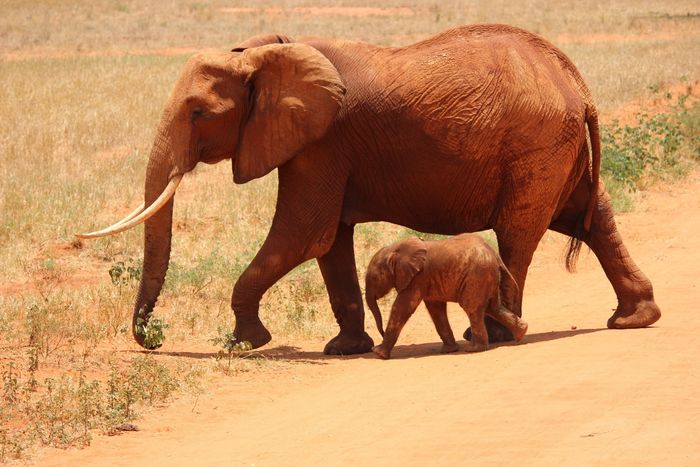
Safari Photography Tips
If you’re heading out on a wildlife photography safari, we have some tips to help you get the best results. Preparation is key with a trip like this, and these tips will help you get set up for a successful adventure.
Do your best to avoid changing lenses in dusty conditions. Dust can be a real problem in dry environments. Not only can it affect picture quality, but it can also cause .
The best light is during the first and last hours of the day, so get up early or stay out late for the best photo opportunities. Heat can also be a problem during midday hours, which is why many animals are more active in the morning or evening.
Look for unique compositions rather than going for shots you’ve seen before. The more common shots are usually easier to capture, but push yourself and capture something truly original. Finding your own photographic style will make the images more meaningful.
Safari photography is challenging but incredibly rewarding. By being prepared and seizing opportunities, you can create beautiful photos and lasting memories of your adventure. To learn more tips and techniques, read our guide to safari photography.
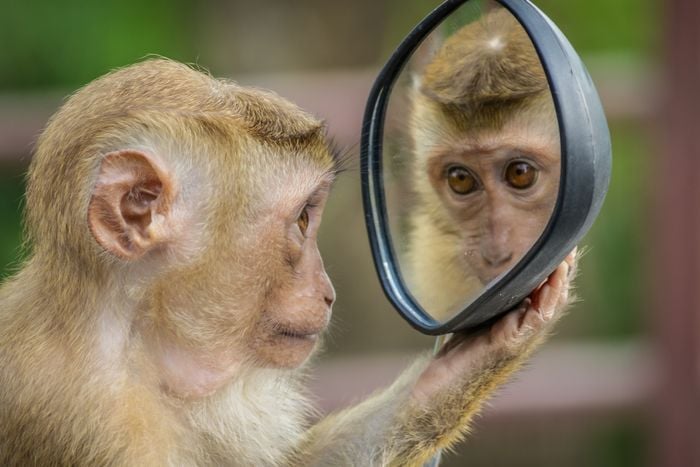
Zoo Photography Techniques
Zoo photography is a great way to practice photographing animals in a controlled environment. It can be a stepping stone into wildlife photography, but it’s also an exciting genre on its own. To take stunning zoo photos, choose a perspective that includes a natural-looking background.
Plan your shoot around the best lighting conditions and the zoo’s schedule to capture the animals when they’re most active. Be patient and flexible, as you have no control over the animals.
Focusing on their eyes creates lively images and tells a visual story that adds emotion to your photos.
With practice, you can become a master of zoo photography. Check out our article on zoo photography to improve your skills.
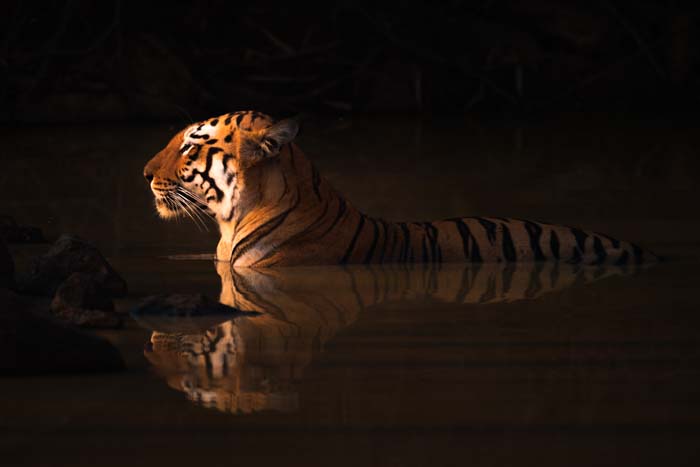
Low-Key and High-Key Wildlife Shots
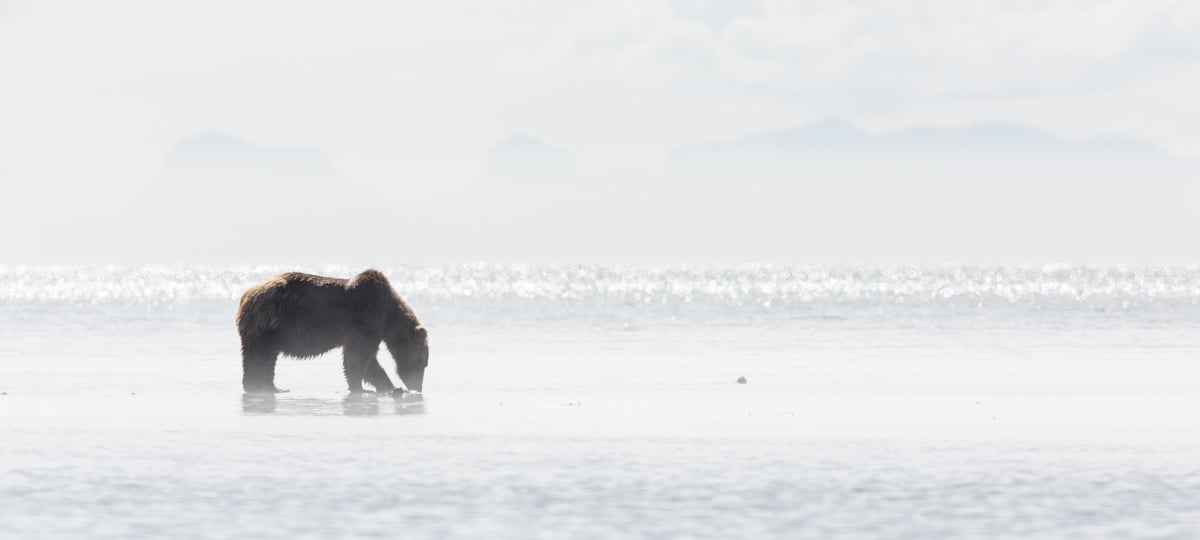
High-key wildlife photography involves making your photos as bright and airy as possible. This technique works best when the natural light is flat and bright, such as on overcast days or in snowy backdrops. By blowing out the background to white or bright grey, you can create a studio-like effect that draws attention to your subject.
To achieve high-key images, use controlled overexposure. Bring everything else in your frame into a perfect or slightly bright exposure while completely blowing out the sky or background. The exact camera settings will vary based on the conditions and your desired outcome. Experimenting with aperture or shutter priority and exposure compensation is key.
Unsurprisingly, low-key photography is the opposite of high-key photography. You’re looking for more muted colors and an overall darker tone. Dusk is the perfect time to capture low-key images. You’ll still have enough light to expose your photos, but colors will be darker and the mood more subdued.
High-key photography allows you to cope with challenging lighting and create unique images. Check out our article to learn more about high-key and low-key wildlife photography.
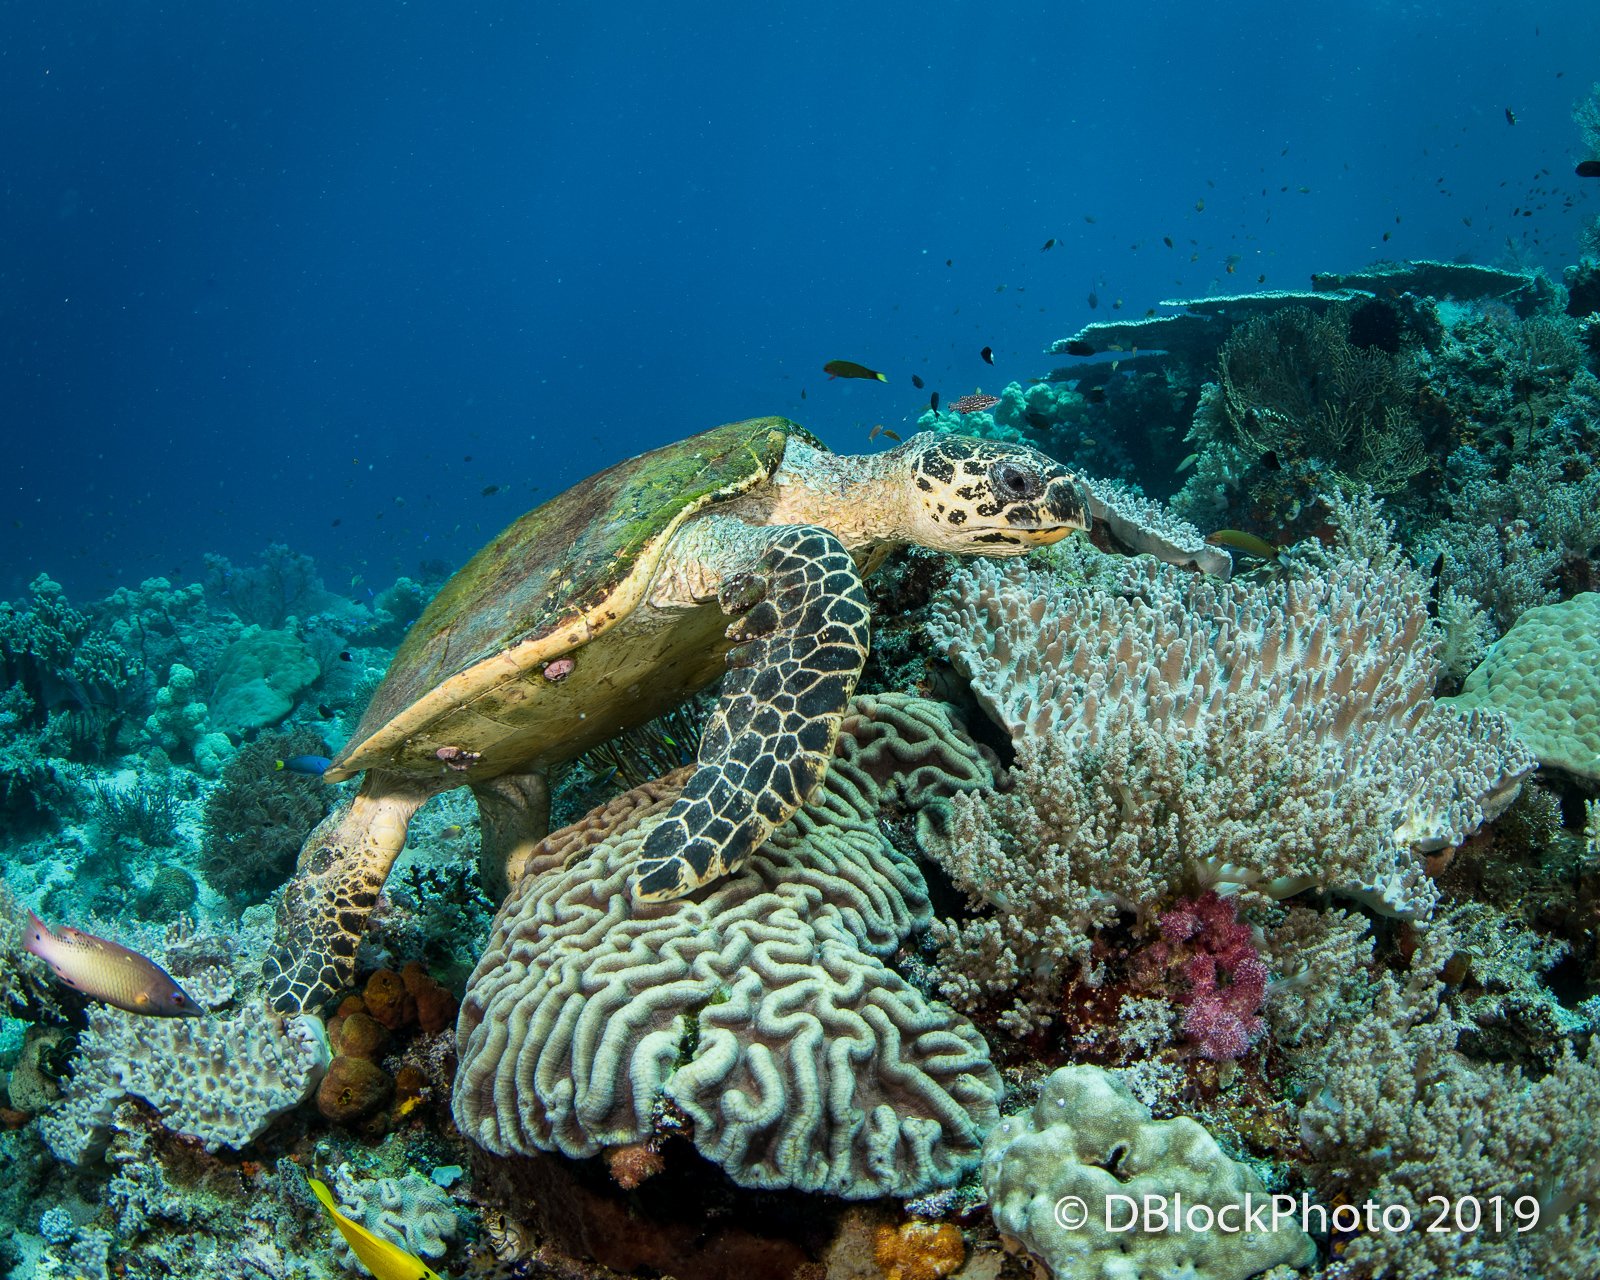
Capture Marine Life
Underwater photography can be a thrilling way to capture stunning marine life images. To get started, you’ll need a camera capable of shooting underwater or an for the camera you already own.
Patience is key when shooting marine life, as rushing may cause you to miss amazing shots. You also need to stay calm and move slowly underwater to allow the marine life to become accustomed to your presence.
Safety should always be a top priority during underwater photo shoots. Work with a designated spotter or safety diver and avoid taking unnecessary risks. Check with locals about potential dangers in new locations. Remember to be mindful of the underwater world and avoid disturbing wildlife or coral.
Using a can help you capture wider underwater environments. But keep in mind the closer you are to your subject, the clearer your images will be. That’s because shooting underwater reduces sharpness and color.
With practice and preparation, you can create breathtaking images that showcase the beauty of marine life. To dive deeper into marine life photography, explore our comprehensive guide.
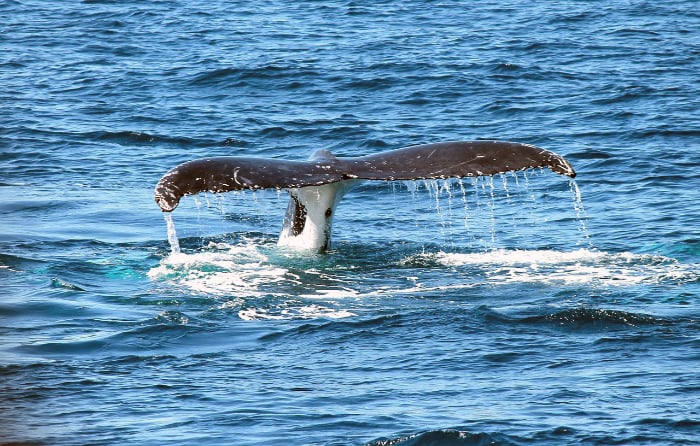
Whale Photography
Despite their enormous size, whales are notoriously hard to photograph. To capture these gentle giants, you’ll need a good camera and a lens with a long focal length and fast autofocus.
Bring a range of lenses, such as a 24-70mm and a 100-400mm, to handle unpredictable situations. Keep the shutter speed at 1/400 s or faster and set a wide aperture to keep a deep depth of field.
Pack spare batteries, extra memory cards, and a rain cover for smaller boats. With practice (and some luck!), you’ll get that awesome shot of a whale’s tail or water spraying from a blowhole. To learn more about whale photography, check out our in-depth guide.
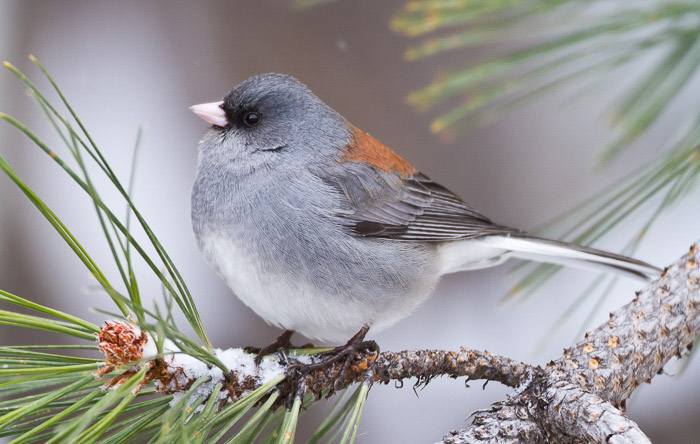
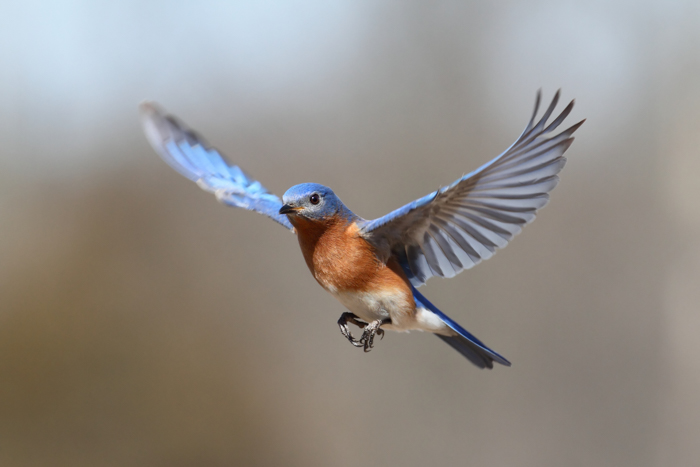
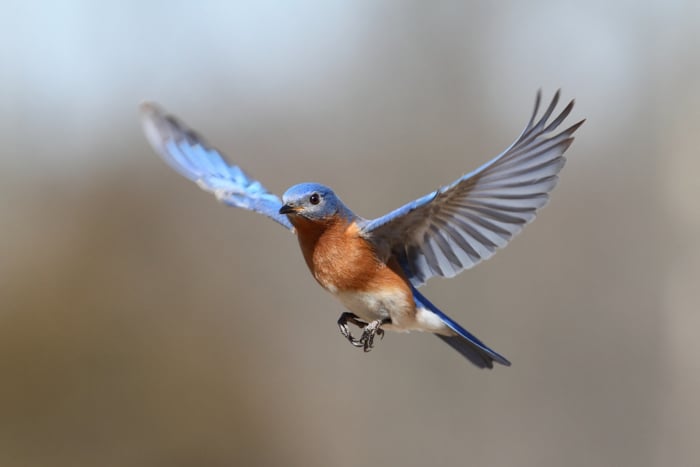
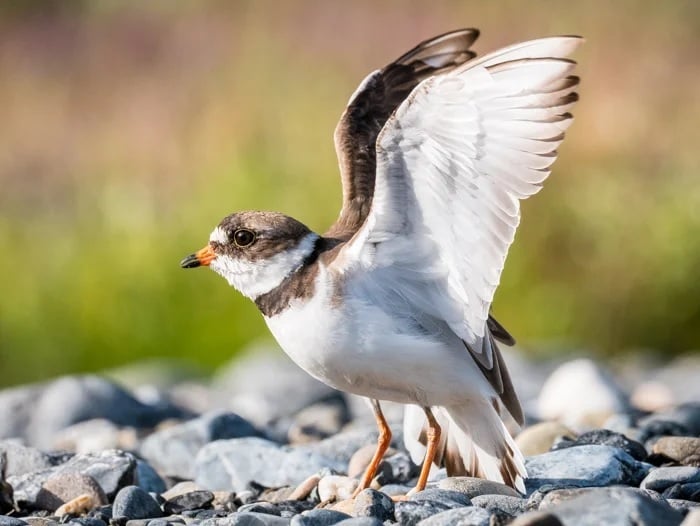
How to Shoot Bird Photography
Bird photography is one niche within the wider genre of wildlife photography. There is a great deal of overlap between wildlife and bird photography, but photographing birds deserves a closer look. The skill set is slightly different, and it’s worth investing in some specialist equipment if you’re a keen birder.
It doesn’t matter if you’re snapping toucans in the jungle or sparrows in the garden, these articles will give you the helping hand you need to capture birds on camera.
Bird Photography Basics
Bird photography can be challenging, but with the right knowledge and techniques, you can capture stunning images of our feathered friends.
One of the most important things to understand is bird behavior. Spend time observing birds in their natural habitat to learn their patterns and predict their movements.
When it comes to gear, a long lens is essential for getting close-up shots without disturbing the birds. Look for lenses with fast apertures to help isolate your subject from the background. A is also helpful for keeping your camera steady when using heavy lenses.
Try to capture portraits with the bird’s eye in sharp focus and the background blurred. For images that tell a story, show birds within their environment using a wider composition. And don’t forget about the excitement of birds in flight!
Use a fast shutter speed to freeze the action or experiment with slower speeds for artistic blurs. Adjust your camera settings to find out what works best for you and your subjects.
To dive deeper into bird photography, check out our comprehensive guide.

Camera Settings
When photographing birds, using the right camera settings is key to capturing stunning images. Start with a “home base” of settings like Aperture Priority mode set to f/5.6 and continuous autofocus. Adjust these based on the lighting conditions and your desired results.
For bird portraits, use a long lens (300-600mm) with a wide aperture (f/2.8-5.6) to blur the background and make the bird stand out. Focus on the eyes for a sharp, engaging image. When capturing birds in the context of their environment, use a shorter focal length (85-300mm) and a deeper depth of field (f/8-11) to show more of the surroundings.
Use Continuous AF mode and a fast shutter speed (1/1000 s or faster) to freeze the action. For creative blurs, try a slower shutter speed around 1/100 s in Shutter Priority mode.
Experiment with different settings to find what works best for you. If you’d like to learn more about camera settings for bird photography, our article will tell you everything you need to know.
Shutter Speed for Birds in Flight
Choosing the right shutter speed is key to capturing sharp photos of birds in flight. A shutter speed of at least 1/1000th of a second is recommended for a clear shot. But you can use slower shutter speeds to create a panning effect.
Set your camera to autofocus mode and activate continuous AF to track the moving bird. Use all AF points at the same time for the best results. An aperture of around f/8 will give you enough light in the daytime and a deep depth of field.
A telephoto lens with a focal length of at least 200mm is ideal for getting close-up shots from a distance. The golden hours around sunrise and sunset provide the best lighting conditions. But remember to position yourself with the sun at your back and the bird flying towards you for front lighting.
Mastering camera settings is the first step towards taking breathtaking images of birds in flight. To learn more about choosing the right shutter speed for birds in flight, check out our in-depth guide.
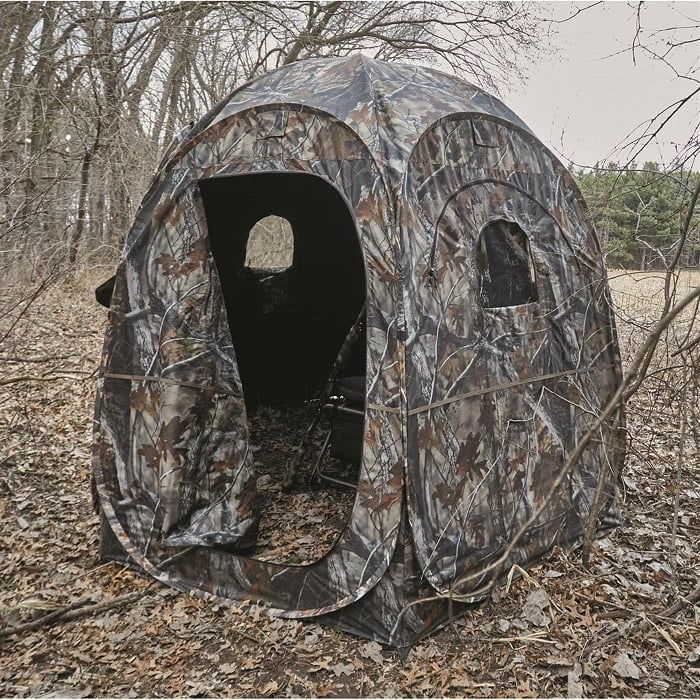
How to Use a Hide
Birds have incredible eyesight, which can be a problem for bird photographers. Birds can see for miles, and once they’ve spotted a human, they fly away, taking any hopes of snapping an image with them.
That’s why it’s important to use a wildlife hide when taking pictures of birds. Camouflage hides keep you hidden and allow you to capture bird shots from much closer than is otherwise possible.
Wearing camouflage clothing is another important part of staying hidden. If you wear bright-colored clothes, you’ll be spotted in no time, and the animals will be gone before you’ve even seen them.
Some nature reserves have hides and viewing stations anyone can use. But you can buy ready-made wildlife hides you can take anywhere with you, allowing you to venture further into the bush. They’re lightweight, collapsible, and affordable. You can also make your own temporary hide out of shrubs, branches, and other natural features in the environment.
Find out more about using wildlife hides for bird photography in our full article.
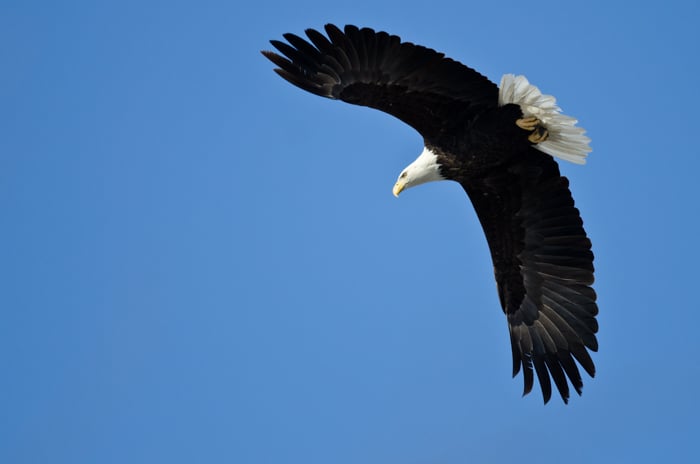
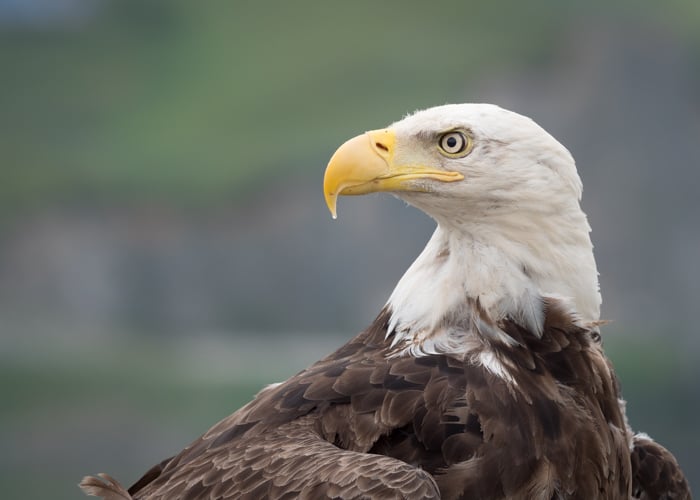
Eagle Photography
Eagle photography can be a thrilling experience. But to capture great shots of these majestic birds, you need the right equipment and techniques.
A long lens between 400-600mm is ideal, but having a second camera with a wider zoom like a can also be useful in some situations.
Exposure can be tricky with eagles, especially for species like the Bald Eagle, which has dark brown bodies and bright white heads. One solution is to underexpose the bird’s body by about a stop to avoid blowing out the white areas, though you will lose detail. Spot metering on the eagle’s head can help you nail the exposure.
When photographing eagles in flight, use a fast shutter speed of at least 1/1250th of a second to freeze the action. Focus on the bird’s eye and experiment with different compositions, leaving lead room for the eagle to fly into.
Eagle photography requires patience, skill, and knowledge of the bird’s behavior, but the results can be stunning.
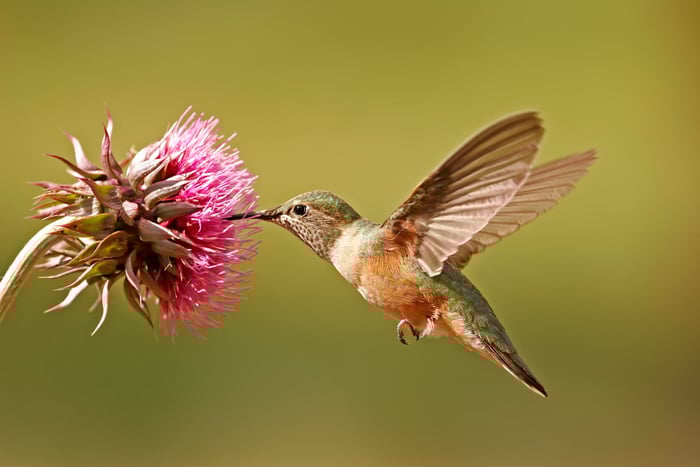
Hummingbird Photography
Hummingbirds are tiny, fast-moving birds that can be challenging to photograph. To capture stunning images of these beautiful creatures, you’ll need to know where to find them and how to attract them. Hummingbirds are most active around dawn and dusk, and they’re often found near flowers or feeders filled with a mixture of water and sugar.
When photographing hummingbirds, a camera with fast autofocus and a high frame rate is essential. Using a fast shutter speed of at least 1/2500 and a high ISO will help freeze the motion of their rapidly beating wings.
A telephoto or with a wide maximum aperture will help you get close-up shots while letting in plenty of light. Stabilizing your camera with a sturdy tripod is also important when using these long lenses.
In post-processing, you can bring out the colors and details of your hummingbird photos. It’s a good idea to shoot RAW to give you the most image data to make adjustments to shadows, sharpness, and saturation.
For more in-depth information on hummingbird photography, be sure to check out our comprehensive guide.
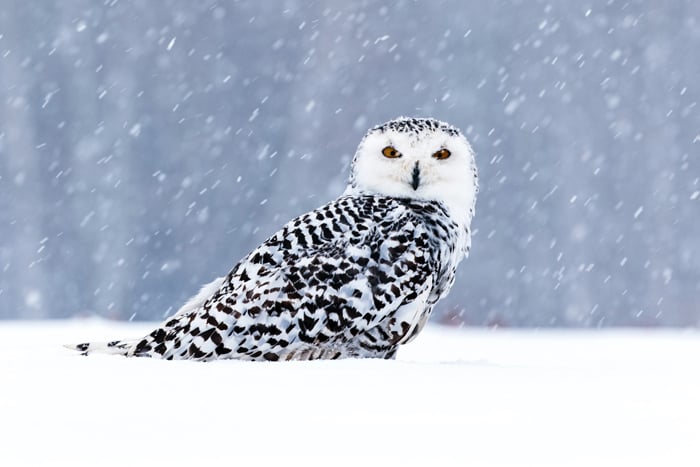
Owl Photography
To capture stunning owl photos, it’s important to know the different species and their behaviors. Be prepared to work outdoors in various environments, from dense forests to Arctic tundras.
When photographing owls, ensure they are relaxed and comfortable with your presence. Learn to recognize signs of stress, such as wide eyes, frequent blinking, or a concealment pose. Always give the owl enough space—typically between 20 and 100 yards—depending on their tolerance.
Avoid baiting the owls or using artificial light at night, as it can disturb their natural behavior. Move slowly, be silent, and respect private property when shooting at dusk or night.
If you’re interested in learning more about owl photography, our full article will help you capture breathtaking images of these majestic birds.
Wildlife Safety Tips
When photographing wildlife, safety should be your top priority. Always let someone know where you’re going and when you plan to return. Check the weather forecast and carry basic survival tools like a compass, map, water purification tablets, and a first aid kit.
Be prepared for unexpected animal encounters by researching the wildlife in the area. Dress appropriately for the climate with layered clothing, proper footwear, and sun or insect protection. You should also avoid noisy clothing that may alert animals to your presence.
Respect wildlife by giving them the space they need. Use long lenses or hides to get close without disturbing them. This is important for your safety and theirs.
Along with your own safety, you’ll want to protect your equipment from the elements with rain covers, weather-sealed gear, and UV filters. Allow your camera to acclimate to temperature changes to prevent condensation.
By following these wildlife safety tips, you can capture stunning images while ensuring the well-being of both yourself and the animals you photograph.
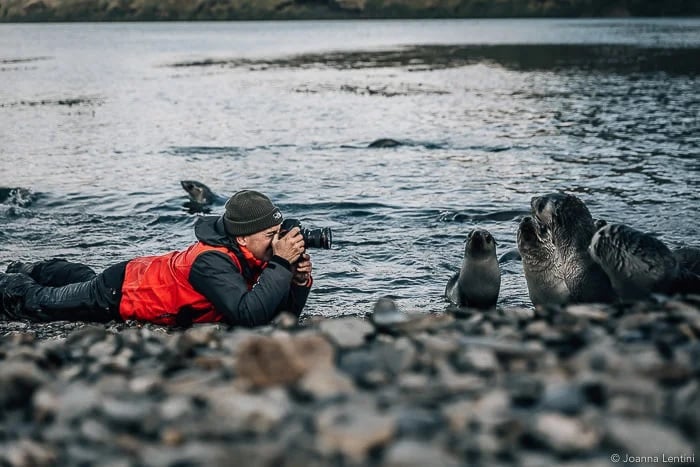
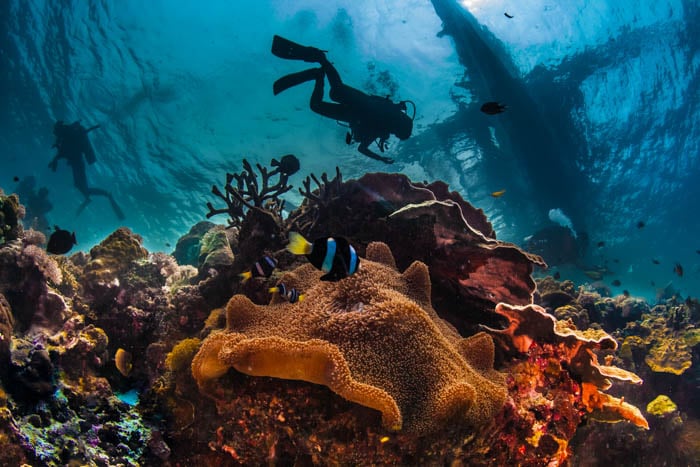
© Joanna Lentini
Wildlife Photography Ethics
When photographing wildlife, it’s important to remember that you are a guest in their habitat. As a photographer, you have an ethical responsibility to avoid disturbing or endangering the animals you photograph.
Put the animal’s welfare first and don’t cause harm. That’s the most important part of ethical wildlife photography.
Learn about the wildlife you plan to photograph. This knowledge will help you find them as well as avoid becoming a harmful intruder. Follow the local rules and regulations, and be part of the solution by advocating for conservation issues.
Watch for signs of distress in your subjects, such as aggressive behavior or agitation. If you see this, back off and give them some space.
Be aware of how your actions appear to non-photographers and politely speak up if you see others acting irresponsibly.
If you’d like to learn more about wildlife photography ethics, our full article is a great resource.
© David Shaw
Choosing the Best Wildlife Gear
When choosing wildlife photography gear, look for a camera that can focus quickly and shoot at least 10 frames per second in Burst mode. Low-light performance is also important since most wildlife is active at dusk and dawn.
Telephoto lenses are essential for getting close-up shots from a distance. Popular focal lengths are 70-200mm and 100-400mm, with a minimum of 100mm. Lenses with fast apertures like f/2.8 or f/4 perform well in low light but tend to be more expensive.
Tripods or monopods help stabilize heavy telephoto lenses. are sturdy yet lightweight. A gimbal head allows more flexibility than a standard ball head.
But choosing the right gear isn’t only about your camera. It’s also about you! Comfortable clothing, rain covers, and a headlamp are also important for long days in the field.
The full wildlife gear article also looks at binoculars and spotting scopes. These are use useful accessories to help you spot your subjects. You and your subject are often separated by great distances, so extra magnification is always helpful.
Check out our in-depth guide if you want to learn more about wildlife photography gear.
© Jenn Mishra
Cameras for Wildlife Photography
Every wildlife photographer needs a reliable camera they can take into the wild with them. It doesn’t have to be the most high-tech machine on the market. But you do want decent image quality and other features to help you get the best wildlife images.
Full frame cameras are the best for serious wildlife shooters. We also recommend mirrorless cameras over DSRLs because of the superior shutter speeds and burst functions that help you capture fast-moving animals.
However, APS-C cameras are still good options for beginners. And even though full frame cameras have a better selection of compatible lenses, they are a good place to start for novices or young photographers.
Our top recommendation is the Sony A9 II. Although it isn’t the latest model in the line, it still delivers the goods. The 24.2 MP sensor gives you fabulous image quality, and the larger sensor gives you even better dynamic range.
The Pentax K-70 is a good option if you’re a beginner. It’s a rugged and reliable DSLR that’s perfect for outdoor photography.
To learn more about the , check out our in-depth guide.
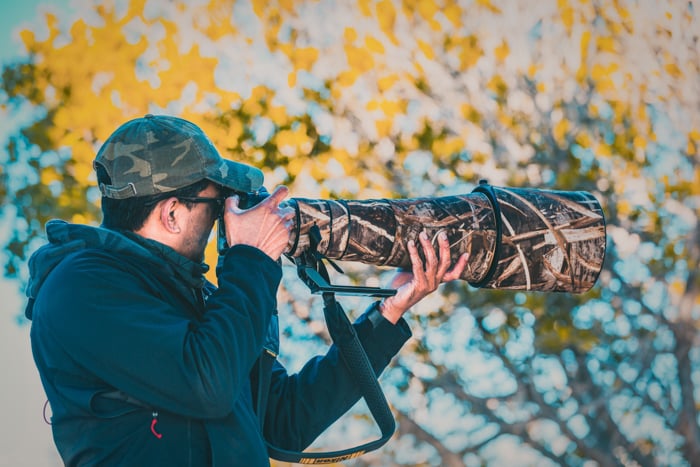
Lenses for Wildlife Photography
Bigger is usually better when it comes to lenses for wildlife photography. But we’re not talking about size and weight, we’re talking about focal length.
The bigger the focal length, the farther you can see. That means you can get close-up shots of animals without scaring them or putting yourself in harm’s way. This is why telephoto lenses are so important for wildlife photography.
Wildlife photographers use both prime and zoom lenses, depending on their preference. Zoom lenses give you better flexibility, allowing you to adjust the magnification and composition without moving. But prime lenses give you superior sharpness.
Something like the Sigma 150-600mm f/5-6.3 DG OS HSM is a great place to start. It has a wide zoom range with excellent magnification, and it’s surprisingly affordable for telephoto lens with such a large focal length. It’s also available for Nikon F and Canon EF cameras.
See more of the best lenses for wildlife photography by clicking this link. You can also see the best wildlife lens collections for the top brands like Canon, Nikon, and Sony. Follow the links to see all the best wildlife lenses for those brands.
Lenses for Bird Photography
As with standard wildlife photography, you will also need a telephoto lens for bird photography. And when you’re shooting out in the wild, you need a large focal length.
Wild birds are shy and trepidatious, fleeing at the first sight of anything they’re unsure of. That means you need a lens with a long reach to help you keep your distance while capturing sharp bird shots.
Professional bird photographers like to use lenses with focal lengths of at least 500mm or 600mm. Some even prefer longer focal length, but this kind of magnification comes at a price. Bird photography lenses are not cheap, at least not if you want the very best bird lenses.
But there are plenty of options for wannabe bird photographers. You don’t have to start with a multi-thousand-dollar 800mm telephoto prime lens. Smaller, more affordable options are available if you’re taking pictures of sparrows in the garden.
You’ll be able to find the perfect in this article. We also have brand-specific lists so Canon, Nikon, and Sony users can find the best bird photography lenses for their cameras.
© David Shaw
Accessories for Wildlife Photography
Using a few camera accessories can make a big difference to your wildlife photography. You might be worried that you don’t have the budget for even more gear, but none of these items are essential. They will, however, help you out in some common wildlife photography situations.
Wildlife photographers often use tripods to help keep their cameras sturdy. Not only does this improve sharpness, but it also gives you more control over your exposure settings. This is a godsend when shooting super-fast animals or in low light.
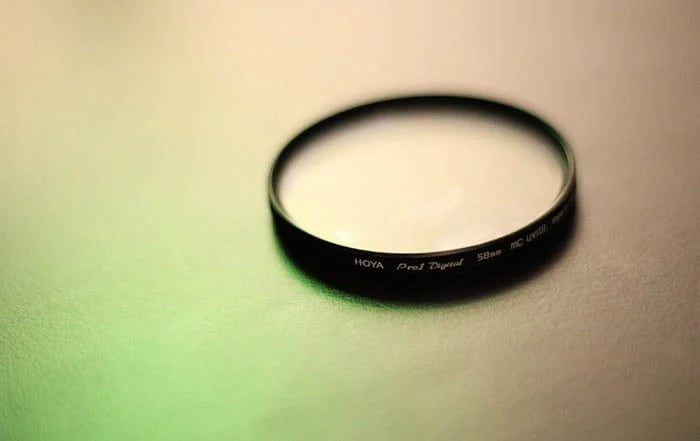
Ultraviolet (UV) filters are another handy accessory. They block unwanted UV light and reduce haziness for clearer images. Wildlife shooters also like to use polarizing filters for better detail. You can even use neutral density filters to reduce light transmission in bright environments.
A rain cover will protect your camera from rain and snow. It’s important to keep your gear safe from the elements. Filters for wildlife photography are very useful accessories that can greatly improve your images.
Here’s our in-depth article on the best accessories for wildlife photography.
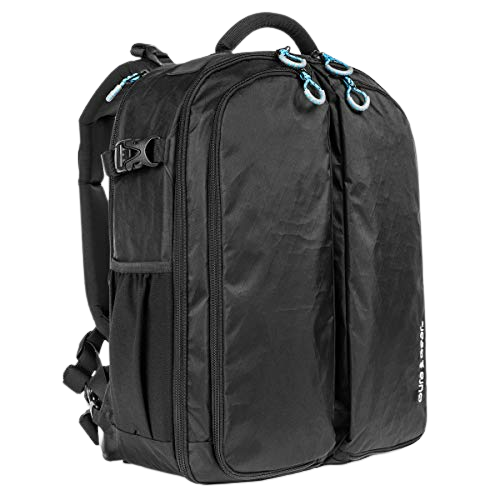
Best Wildlife Camera Backpacks
Every photographer needs a good camera backpack. And that’s especially true for wildlife photographers. They need a spacious backpack capable of carrying large lenses that also provides protection. Telephoto lenses are not cheap, so you need security when stowing them in your backpack.
Thankfully, we’ve reviewed several excellent camera backpacks that fit the bill. We also have a full article on waterproof backpacks for photographers heading out in bad weather.
The Gura Gear Kiboko V2.0 22L is our top recommendation for wildlife photographers.
It has a rugged, weather-sealed design that makes it great for outdoor adventures. You can fit a lot of camera gear in this 22-liter bag. The space is used well, so you can pack large telephoto lenses and several camera bodies. The shoulder straps, chest strap, and waist belt are all very comfortable, even when carrying heavy loads.
Read the full review of the Gura Gear Kiboko V2.0 right here.
Inspiration from the Best Wildlife Photographers
No matter which type of photography you’re interested in, seeing work from professionals is always inspiring. And when looking at wildlife photography, you can use the work of others to help you develop your own skills and style.
It’s especially useful if you want to explore particular animals or environments. You can find photographers working in that field and learn how they achieve the best results.
It’s also a joy just to see animals in their natural habitat, especially as so much of the environment is under threat. The work of wildlife photographers reminds us of what we have and why we should protect the natural world.
Going Pro
Becoming a wildlife photographer takes time and dedication. Choosing the right gear is a good starting point. But you also need to practice taking high-quality photos and improve your skills.
Most wildlife photographers are self-employed, so set your prices by researching the market. Begin photographing basic species in your local area before moving on to more exotic animals. Be patient and ready to capture the perfect moment when it arrives.
As a wildlife photographer, you’ll need to travel and spend time outdoors in wilderness conditions. Get to know the animals and their natural habitats to recognize the best poses and situations. Consider offering extra services like teaching wildlife photography courses or workshops to diversify your income. Most importantly, always respect the animals and their environment.
Read more about becoming a professional wildlife photographer to give your business a head start.
Famous Wildlife Photographers
To be the best photographer possible, we need to study the work of famous wildlife photographers. Franz Lanting is a giant among nature photographers. His vivid storytelling is definitely worth examining.
Marina Cano’s dreamy artistic works include a mix of low-saturation color and black and white. Marsel van Oosten’s images are rewarded, featured, and exhibited worldwide. He is also a regular contributor to National Geographic.
Suzi Eszterhas’ images of baby animals are compelling and show the most intimate moments of wild animals. Melissa Groo has won many wildlife photography awards. All her photos show some specific behavior or have an eye-grabbing characteristic.
Wildlife photographers can teach and inspire you to improve your own photos. Looking at the work of famous wildlife photographers is a great way to gain inspiration.
Influential Bird Photographers
Bird photography captures the beauty and wonder of our feathered friends. The best bird photographers have the patience, skill, and passion to get stunning shots. They use telephoto lenses and quick shutter speeds to freeze birds in flight.
These influential bird photographers share incredible images from around the world. Their portfolios feature colorful tropical species, majestic birds of prey, and delicate songbirds. Through their work, we get an intimate look at birds in their natural habitats.
Bird photography takes us places we can’t always go to see birds up close. These talented photographers inspire us with their art and dedication to documenting birdlife. To see more amazing bird photos, check out these bird photographers and their best work.
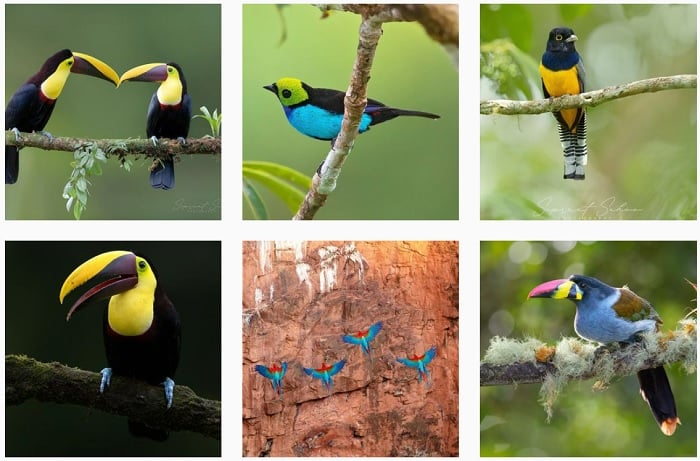
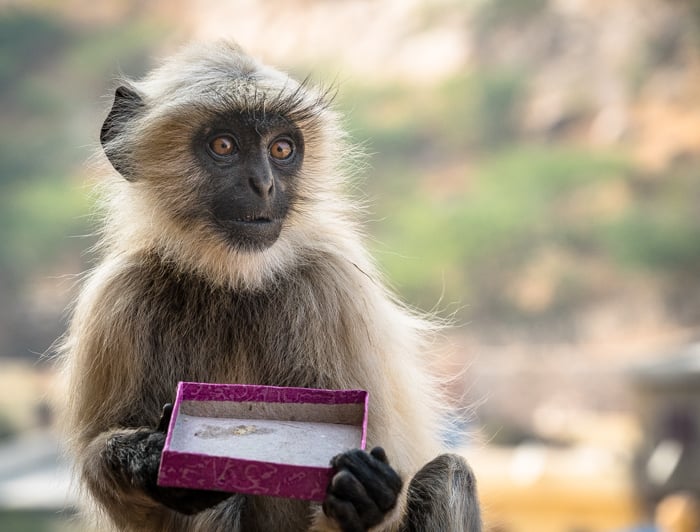
© Supreet Sahoo
Exciting Underwater Photographers
Underwater photography is a captivating art form that reveals the breathtaking beauty beneath the waves. From the deepest oceans to swimming pools, these images have a powerful effect on viewers.
Exploring this niche requires specialized equipment and knowledge of the underwater world. Despite the challenges, many talented photographers have made their mark in this field.
These influential underwater photographers capture unique aspects of life below the surface. Their stunning portfolios showcase marine wildlife, conservation efforts, and the mysteries of the deep. If you’d like to learn more about the work of famous underwater photographers, check out our inspirational list.
Conclusion: Wildlife Photography Guide
Wildlife photography is one of the most demanding yet rewarding disciplines. You need patience and skill, and the gear isn’t cheap. But if you’re dedicated and passionate, you can capture the most incredible images of animals in the wild.
You don’t have to set off on safari to snap animals in the wild. You can start in your back garden or local park, taking pictures of the animals you find there. As your skills develop and your passion grows, you can upgrade your gear and visit more exotic locations.
For many photographers, capturing wildlife on camera is a never-ending journey and a celebration of life on earth.