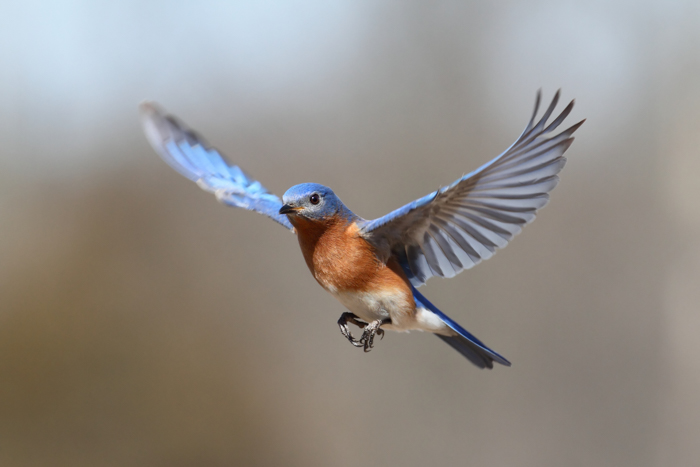
Bird photography is not easy. Birds are fast and high moving subjects, at the best of times. At other times they might hide away in trees.
The closer you get, the higher the chance of the bird disappearing. So how should you go about it? Find out in our article here.
Becoming a Bird Photographer: An Introduction to Bird Photography
My interest in bird photography is an affliction I've suffered since I was a kid. But don't feel bad for me, my addiction is a healthy one, and I'm not about to give it up.
For the past 25 years, I've pursued birds as an observer, scientist, and photographer. In photography, all the facets of my obsession come together.
Natural history, science, technology, and art converge. Each one is as important as the others.
Like any discipline, the more you understand about your subject, the better your images will be.
For the beginner bird photographer, all the different aspects can seem daunting. So here, I want to break the subject down to its fundamentals: a series of bird photography tips for the newbie.
This guide is aimed at those new to photographing birds. But experienced photographers should not dismiss it. You might pick up something new. Let's dive in.
Bird Photography Gear
Equipment can be one of the most fun and most heartbreaking aspects of bird photography.
A hefty telephoto lens or a spotting scope will allow you to make images that would be impossible with any other tool.
But the price tag of high-end glass, for both Nikon and Canon, will equal that of a reliable, used automobile.
Cameras
For starters, you’ll need to make sure you have the right camera for bird photography. Camera bodies can vary in price and quality as much as lenses. That said, the camera itself is less important than the lens.
Big, pro-level DSLRs can rival the cost of the most expensive glass. Entry-level digital cameras from major manufacturers such as Canon and Nikon are much cheaper, yet can still create beautiful images.
So which is the best camera for bird photography? For photographing birds, pick a camera that has a good frame rate. This is the number of photos possible in a second. Also, look for good autofocus. The lens also impacts focus speed and accuracy.
A 'crop sensor', such as APS-C or 4/3rds, will increase the apparent magnification of your telephoto. This gives you more magnification for your money.
If you are planning to spend big bucks, do your research. Even entry-level bird photography systems can leave your wallet smoking.
Read reviews, and consider renting equipment before you buy. Having a camera that helps you take better images is one of the best bird photography tips we can offer.
Lenses
Trying to get a bird from a far distance using a wide-angle lens is going to be impossible. You need different lenses or one versatile lens to cover most, if not all, possible distances.
Big, high-end glass made by companies like Nikon and Canon can exceed $10,000 (US). The prices are INSANE.
But there is a slew of moderately priced options on the market. Try and get telephoto lenses that are used, as it will cut down on your pricing.
Look at 3rd party glass from companies like Sigma and Tamron. Or check out lenses for the 4/3rds systems of Panasonic and Olympus. These are far more affordable.
Quality glass is more important than length. This is a great tip when it comes to how to photograph birds.
In other words, you are better off with a high-quality 200mm or 300mm lens than with a poor quality 600mm. Imperfections in glass and flaws in design get more pronounced at extreme telephotos.
- 70-200mm: This is on the wider side for bird and wildlife photography. But pro-level 70-200 f2.8 lenses are equivalent in cost to mid-range 150-600s (see below). Most manufacturers make a 70-200 so there are many choices. A good 70-200 f2.8 can handle a 1.4x or 2x teleconverter without a substantial loss in quality.
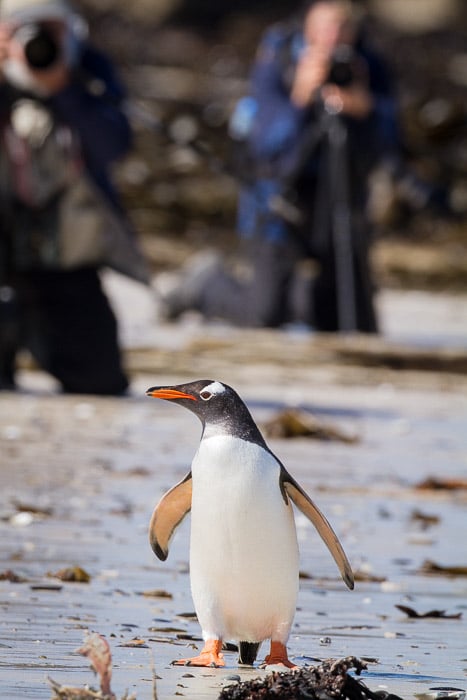
Don’t overlook shorter focal lengths. This image was made with a 70-200 f/2.8 with a 1.4 teleconverter (280mm total).
- 150-600mm: This zoom range is a new contribution to the telephoto zoom. And several different lenses, varying from USD $1,200 – $2,000, are now available. Manufacturers Sigma and Tamron dominate this focal length range.
- 100-400mm: Canon's 100-400 and Nikon's 80-400 are two very common lenses for bird photography. More compact and lighter, they are great options. Though not inexpensive, their price tag is a far cry from the big telephoto primes.
- 300mm: There are several very good 300mm lenses available. Fixed length lenses, in general, are sharper than zooms and 300mm f4, and f2.8s are usually very sharp indeed. When used on a 4/3rd or APS-C sensor these can provide adequate magnification for bird photography.
- 400mm, 500mm, or 600mm: Fast telephoto lenses at this range (usually f4) are expensive. And high quality. Canon and Nikon dominate this range. If you can afford them, they are the go-to tool for shooting wildlife and birds. When used with teleconverters, the range and quality are unmatched.
Tripod
If you are using long lenses, a good tripod is very useful. Big lenses need support to create sharp images, and to make them comfortable to use.
A poor tripod, with a cheap head, is more trouble than it is worth. Make sure your tripod is sturdy, with a head that is smooth and locks down tight.
Check, double-check, and triple-check, that the quick release tripod plate is bombproof.
The last thing you want is to see thousands of dollars of camera gear detached and tumbling onto the concrete floor. (I've been there, it sucks. Make sure it doesn't happen to you.)
If you are using a big, super-telephoto consider a gimbal head. This will make panning and movement of the lens much easier.
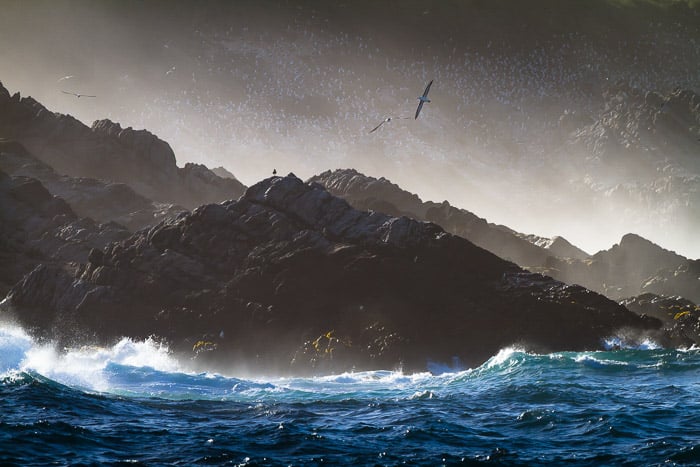
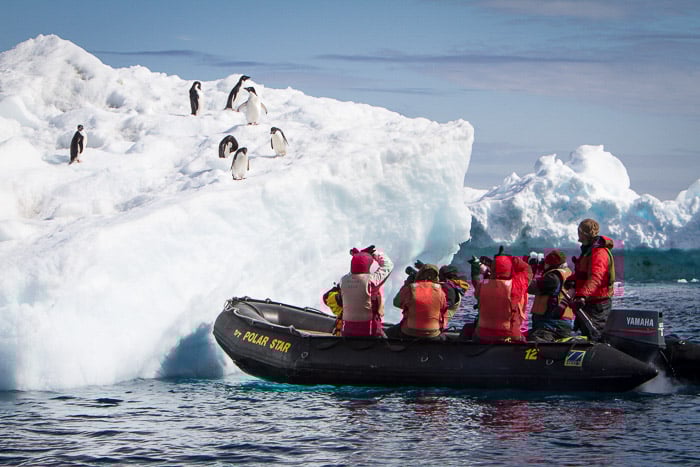
Shooting handheld from the deck of a moving ship required a lot of takes to get a good composition and a sharp image. (1/1250th sec at f/8, ISO 200, 500mm)
How Studying Birds Will Improve Your Photography
Now, I want you to forget about photo gear for a minute. Equipment matters. But having a solid understanding of birds and bird behaviour is even more important.
It doesn't matter if you have a lens as long as your leg if you don't know how and where to find your quarry.
If you are new to bird photography, you'll be content at first to shoot in your local area. Or even the birds in your back garden.
But regardless of where you plan to shoot, knowing a little about birds will help you pick the right place.
Habitat, the times of day birds are most active, and when birds are likely to be displaying interesting behaviour. These are all important areas to know about.
 As you venture further afield, the more you know about birds, the easier your job will be. If there are particular species you want to photograph, you need to know where they occur and when.
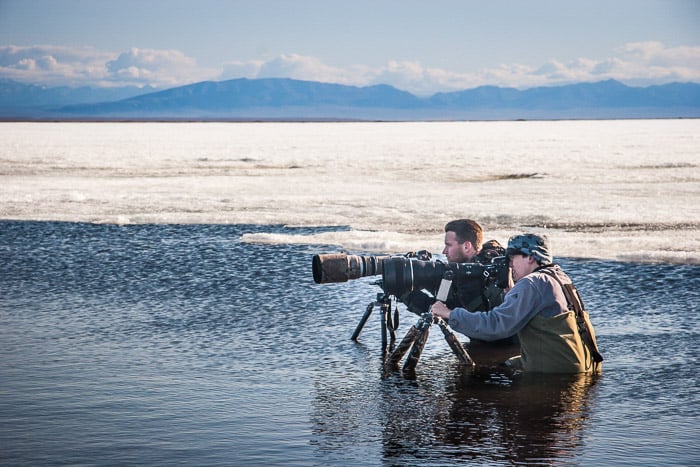
If there are certain locations, you need to know when the birds occur there. Want to photograph a migration of Sandhill Cranes in Alaska?
You'll be very disappointed if you show up in October a month after the birds have winged south.
You’ll Learn to Anticipate a Bird’s Behaviour
Spend enough time watching and studying birds, and you will start to predict things about them. When they are about to sing, call, or fly.
 You'll be able to predict what time of day a seabird is likely to return from a foraging run. Or when the first migrant songbirds of spring will arrive after a long winter. And when your local breeding birds will start building nests.
 Knowing some bird biology is very useful. It will help you find the best possible locations, times, and set-ups for successful photography.
Don't ever underestimate the power of knowledge when applied to photography. Some of the best wildlife photographers in the world are former research biologists.
Pick up a book, do some reading, and you can improve your bird photography from the comfort of your couch. Reading can provide some helpful tips for bird photography.
Enough said.
Technical Settings
The exposure settings you select on your camera vary by the type of image you are hoping to create. Also, they vary based on your shooting conditions.
It's almost impossible to guide you through each of those possible scenarios in an article like this. But it is important to know how each of the three tools of exposure will impact your final image.
<img alt=”'High Key' shots with a bright, white background, require setting your camera to overexpose the sky, to bring out detail in the bird. (1/640, f/8, ISO 400, 400mm)” class=”aligncenter wp-image-18089 size-full” height=”467″ src=”https://expertphotography.com/img/2017/03/AK-Pew-UNKRiver-Sep2014-775.jpg” width=”700″>
Aperture or F-stop
The aperture opens and closes to control the amount of light allowed into the camera. It's counterintuitive, but the smaller the number, the more light can contact your camera's sensor.
The aperture impacts your final image in two ways. First, an open aperture will create a shallow depth of field. Second, most lenses do not appear their sharpest when wide open.
Lenses tend to be sharpest approximately two stops closed from wide open. Thus, if you have an f/4 lens, your sharpest aperture is likely to be around f/11.
Shutter Speed
Most of the time in bird photography, you will be working to create sharp images. Long lenses are harder to hold steady than a wide-angle. This can mean very fast shutter speeds indeed.
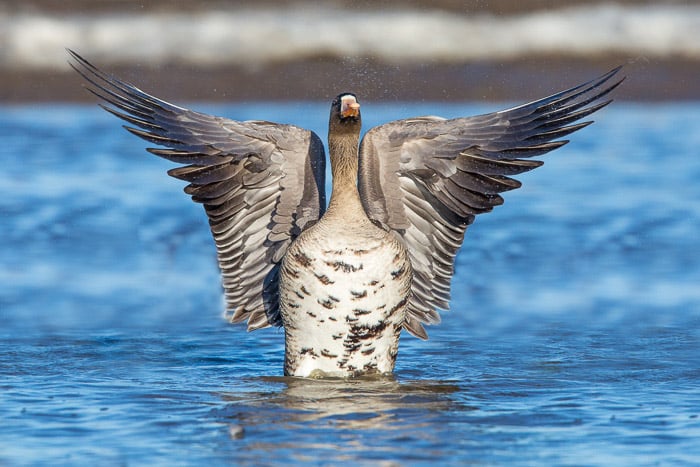
Even large, slow-flying birds require a faster shutter speed. (1/2500th, f/8, ISO 400, 400mm)
How do I take sharp pictures of birds? A general, but an imperfect rule, is that your shutter speed needs to be as fast as your lens is long. Thus if you are shooting with a 500mm lens, you'll want to use a shutter speed at least a 1/500th second.
Slower shutters will cause blur. This is either because the twitchy bird you are shooting moved, or you did. Sometimes blur can be a great artistic tool (see below), but it needs to be purposeful.
ISO
The ISO increases the apparent sensitivity of the camera's sensor to light. I say 'apparent' because changing the ISO doesn't actually impact the sensor itself.
It’s only about how the camera's algorithm interprets the data coming from the sensor.
All that techy stuff doesn't impact the nature photographer working in the field. In practice, higher ISOs mean you can use faster shutter speeds and higher apertures.
But, high ISO also introduces digital noise. You have to balance the noise level with the exposures you need to get sharp images.
Large amounts of digital grain aren’t going to give you the best bird photography.
Focus
Back Button Focus
Taking pictures of birds can be a challenge when it comes to focusing. If you are shooting with Canon or Nikon DSLRs, you can set your camera to focus not with the shutter button (the default), but using a button on the back of the camera.
It's called 'back-button focus', and it will change your life.
Check your camera's manual, or look it up online, and make the change (every model is different). Manual mode can be the best option if the bird isn’t moving.
Focus is then controlled with your thumb. This leaves your shutter button to do what shutter buttons should do – taking the picture.
Focus Modes
Capturing a bird on a branch is one thing, but how do you photograph a flying bird? I recommend using AI Servo, or continuous focus for most bird photography.
In this setting, your camera will continue to focus on your subject as it, or you, move around. As long as the focus button is pressed, it will continue to hold focus.
This is THE method for flying and moving birds, and I use it for everything.

Bird Photography Ethics
I want to take a moment to mention the ethics of bird photography. Here are a few general rules of the art:
-
- Your first priority is the well-being of the animals you photograph. If they move away from you, flush, or appear agitated, you are too close. Back off, and don't approach so close again. (The best way to get close, is to be patient, sit quietly, and wait. If you are non-threatening, the birds will draw close.)
- Don't manipulate animal behaviour. Avoid flushing birds for flight shots, or using unnecessary call-backs. Again, the well-being of animals is your top priority.
Don't interfere with others. If you are shooting around other bird photographers, be courteous. Don't block one another, and call out anyone showing harmful behaviour toward the birds. Around birders, be especially careful not to be aggressive or frighten the birds.
Field Techniques and Composition
This bird photography post is geared toward the beginner. I'll discuss using blinds, camouflage, and stalking techniques for a future article.
For many species, such methods are not necessary. At many popular bird photography locations, the birds are everywhere. Or they’re so used to people that staying hidden is not a priority.
There are many ways to portray birds in photographs. From close up bird portraits and images about behaviour to showing birds in their habitat.
One is not better than the others. But knowing what you want, what is possible, and what isn't, is an important part of capturing a great image.
By using aperture priority, you can set a wide aperture, and the other camera settings will change as they see fit.
Here are the three main types of bird images, and some guidelines for making them:
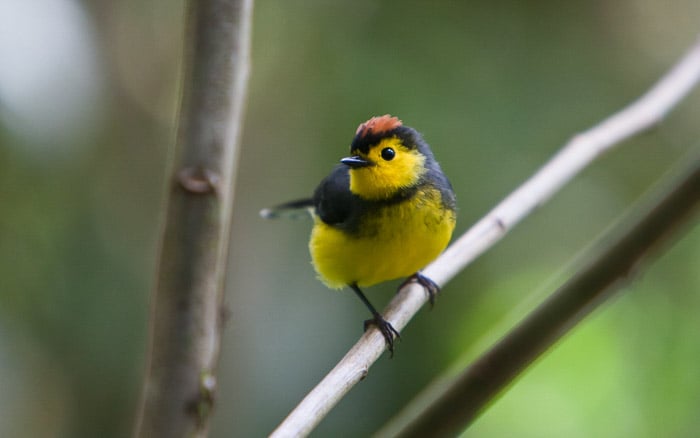
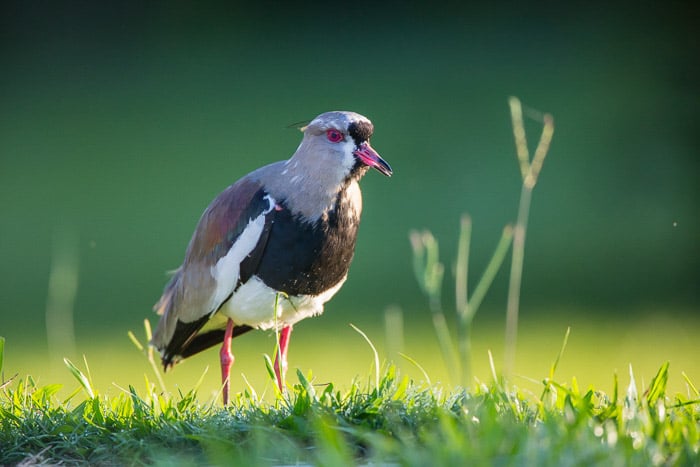
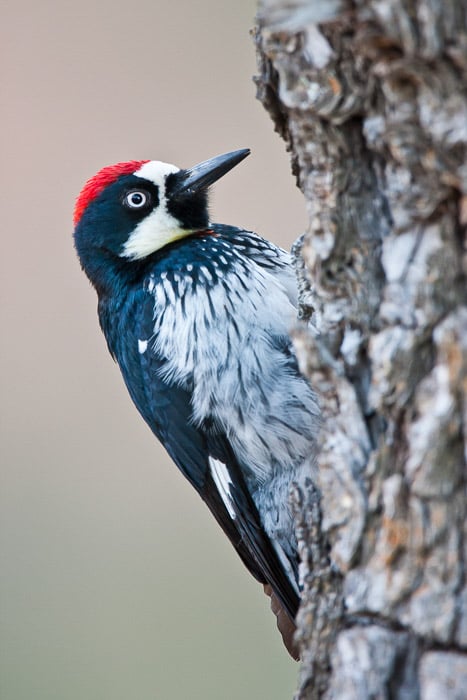
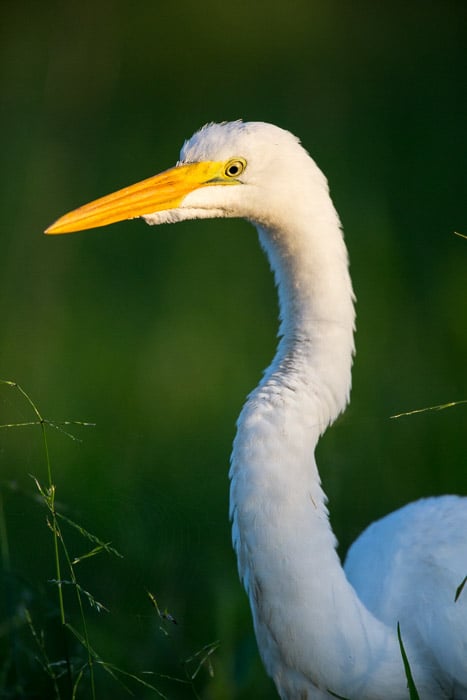
The Clean Portrait
 In some circles of photography, the clean bird portrait has become the standard for a 'good' photo of a bird. And indeed, a well-executed portrait can be a thing of beauty.
To capture a solid portrait, you'll need a long lens with a fast aperture. This will isolate your subject from its surroundings. It will also narrow your depth of field.
Once you are set with equipment, here are a few additional things to keep in mind. (Please note these are guidelines, not rules.
Put all these together, and your image will be good, but it isn't the only way to make a good photo. Experiment, see what works, don't follow these as a strict formula).
Lighting – Over the shoulder sunlight during the morning or evening hours is a lovely way to photograph birds. Front light is clean and sharp and limits dark shadows. Cloudy days can also be effective as the soft-light from above can make for lovely, if flat light.
Focus Point – Focus on the eye. If there is a 'rule' in bird photography to follow in almost every circumstance, it's this one. Make sure the eye is in focus.
-
- Depth of field – A very long lens will likely have a shallow depth of field, which is what you want. If you are using a mid-length lens, open up the aperture as wide as it will go to narrow your depth of field. This blurs the background and limits distractions.
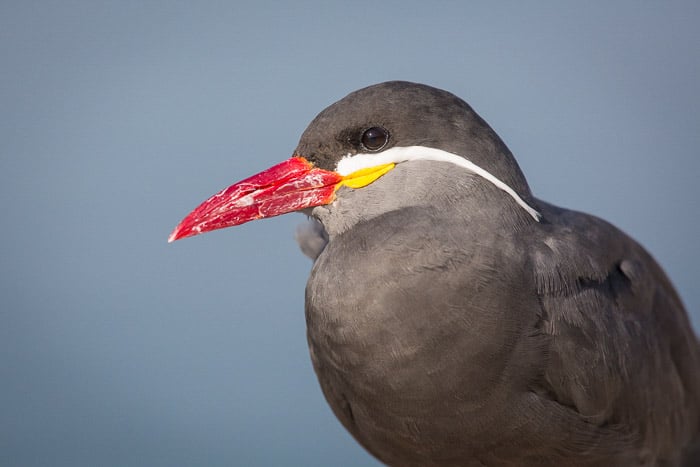
- Background – The background should be a pleasing, blurred mosaic of neutral color. This allows your subject to stand out.
- Placement – Compose with some dead space on the edges, don't get too close. Place the subject off-center, providing it with a place to go, to look, or provide a sense of direction.
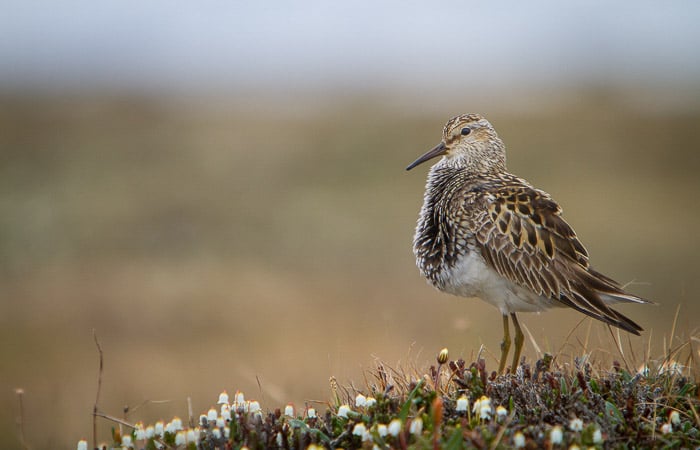
The Habitat Shot
My favourite images are those that show wildlife within their surroundings. The portraits above may be lovely and clean, but they don't tell much of a story.
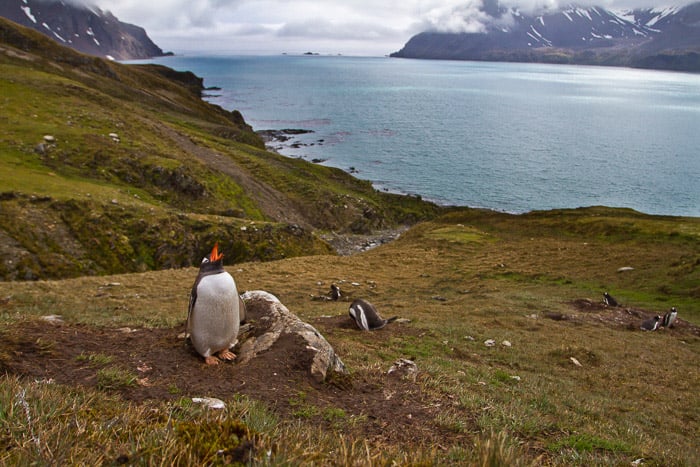 Animals in their environment tell us something about where the animals live. And what they do within it. By using a spot metering focus mode on them, you make them the most important element.
Think about these animal photography shots as landscapes, and compose them that way. Often your 'subject', the bird, is one more element in the frame. You want the animal to be notable, but it should not be front and center.
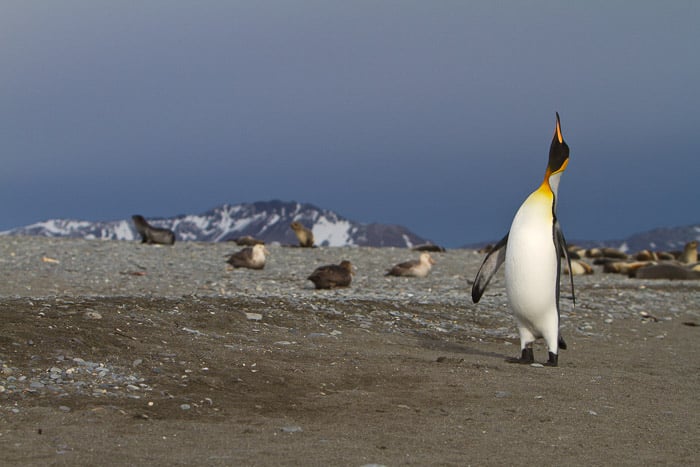
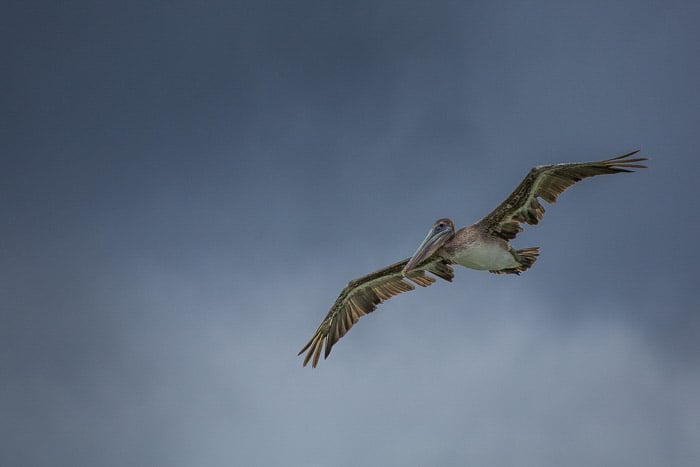
Birds in Flight
This is the most rewarding and frustrating aspect of bird photography. An entire article could be written about shooting birds in flight.
I'll break it down into two main types of flight shots: sharp and intentional blur.
Sharp Flight Shots
To have sharpness in a flight shot, you have to use very fast shutter speed.
Even relatively slow-flying birds like cranes and large waterfowl are still moving too fast for your camera. Set your camera to Shutter Priority and choose a speed of around 1/2000th of a second.
Adjust your ISO setting as necessary to get to those speeds. Set your focus to single-point. AI Servo will only pull focus from the point you have selected and then work to hold focus as the bird moves.
Use the high-speed shutter setting. That way you won’t need to take your finger off the shutter release to make multiple images.
1/1250th sec, f/5.6, ISO 400, 500mm
The best places for this are areas where many birds are flying in a predictable pattern.
Waterfowl moving from one nearby lake to another. Or geese and cranes coming and going from their nighttime roosting grounds are good places.
Direct your attention to where birds are coming from and pay attention.

1/800th sec, f/10, ISO400, 700mm
If you are using a very long lens, a gimbal head on a tripod is very useful, otherwise, you will need to handhold.
As a bird approaches, grab focus anywhere on it and then adjust to hold focus on the bird's head. A great tip for birds in flight.
Like as in the portraits noted earlier, the eye needs to be in focus in the final image. Follow the bird's flight and shoot bursts of images when the composition comes together.
Birds flying in silhouette against a bright sunrise. This not only makes a beautiful image but can also make shooting flying birds easier.
Cameras focus very well in high contrast situations. A dark bird against a bright backdrop is perfect. Expose for the background, and let the birds fade to black.
As the bird passes and begins flying away, put the camera down and start looking for your next subject. A bird flying away is less interesting than one coming toward you.
Being alert and ready is one of the best bird photography tips and techniques. You don’t want to miss that great bird shot from chimping too often.
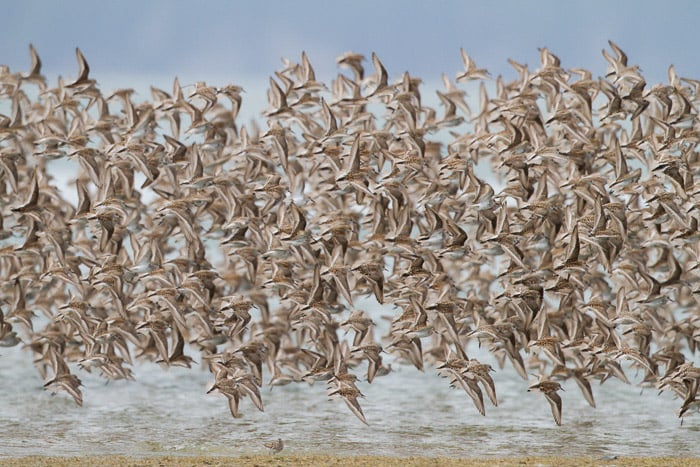
Intentional Flight Blurs
Some of my favourite bird shots I have ever created are intentional blurs. These are more artistic than sharp photos and provide a chance to experiment.
Here, we will apply most of the same guidelines I noted above but lengthen our shutter speed. I've made successful blurs anywhere from 1/2 second to 1/100th second.
The most important part of an intentional blur is to keep the camera in motion as you trigger the shutter.
When done right, the bird should stay in the same location in the frame while the background and wings blur. It provides a sense of motion and can create a very pleasing result..sometimes.
There is a lot of trial and error and many images will fail. That's fine, keep experimenting, adjusting shutter speed, and your own motion.
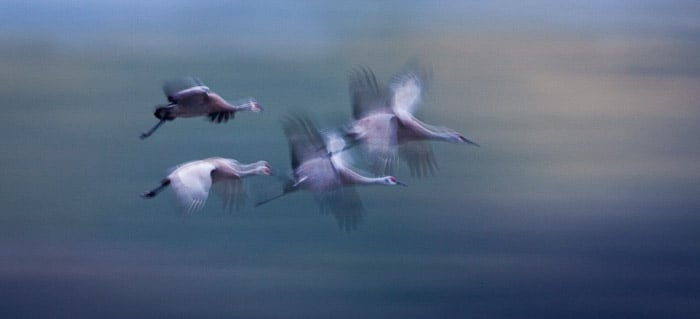
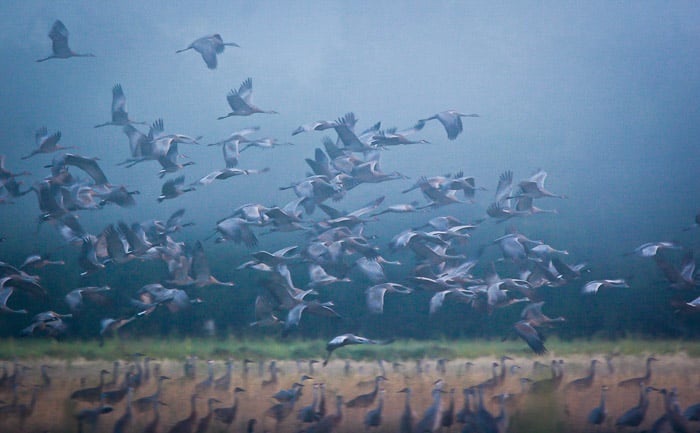
This blur required a 1/5th second, f/5.6, ISO 400, 700mm.
You can reverse this technique and hold the camera steady while the bird flies through with a very long shutter speed. Give it a try and see what you get.
Shooting birds in flight is not a time to conserve pixels. This is when you raise the camera to your eye and blast away. 'Spray and Pray' as they say.
There are a lot of throw-away images in any flight series, but with luck, a few will come out the way you hope. You’ll get used to pressing the delete key when you get home.
Conclusion
As I wrote this article, it occurred to me that about every section could make up an entire article.
So much of bird photography is up to split-second decisions by the photographer in the field. Trying to create a usable formula is an impossible task.
So let these be my final words of advice to you: The fastest way to get better is to go out and take photos.
Start with the basics I’ve presented here, then learn what works for you and what doesn't by experimenting.
Learn about birds, understand their ecology and life history. Then apply what you've learned to your photography.
Whilst you are outdoors, you can also capture some great landscape shots. Learn how, with our Simply Stunning Landscapes course.