High key photography is a popular style that involves making your photos as bright and airy as possible. This type of photography is often used for portraits, but it can also be used to great effect with wildlife shots. Here are four tips to help you get started with high key wildlife photography.
High Key Wildlife Photography
Situations
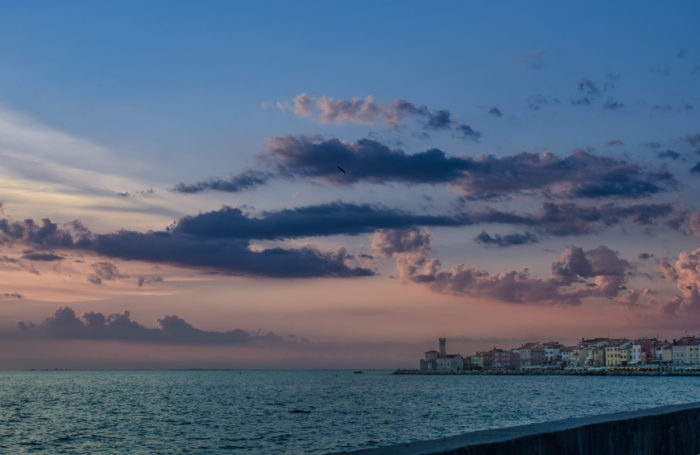
Like the owl above, high key images of wildlife are often best used when the natural light is flat bright. Often this means bright overcast, but sometimes it can be sunshine.
Creating clean high key photography on a sunny day is uncommon. This is because of shadows, and the fact that the sky, rather than appearing white or bright grey, is blue.
But, when there are clouds, or haze, or a snowy backdrop, and the shooting would otherwise be boring, applying high key techniques can really save the day.
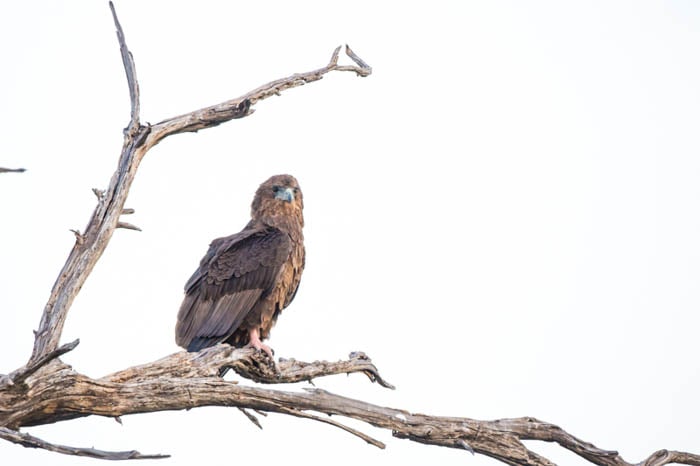
Brightly lit on a hazy day in Botswana, the only way to make this Bateleur Eagle look decent was to blow out the background and create a high key image.
Highlights naturally draw our eye, so it would seem that blowing out large parts of our frame to nothing but white, would be a huge distraction from our subject. And yet, it isn’t. The large white areas, instead of becoming distracting highlights, become a benign background.
As I was going through my image catalog selecting photos for this article, I was surprised by just how often I apply some kind of high key technique to my wildlife images.
In short, it's a technique you should know how to use.
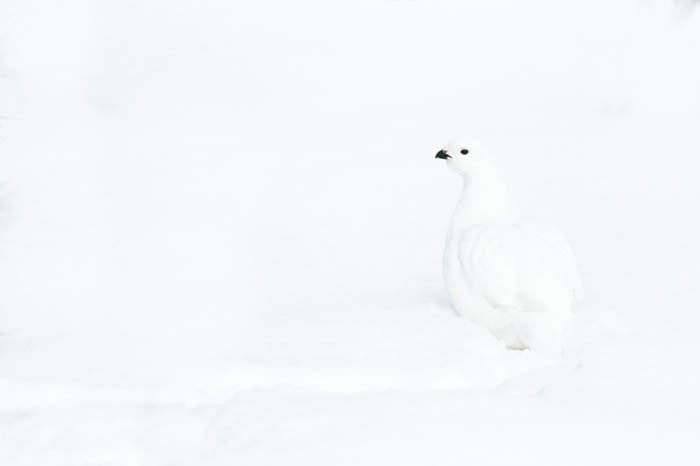
White on white. This Willow Ptarmigan on snow was perfect in high key.
Exposure and Camera Settings
High key is all about controlled over-exposure. Very frequently, in wildlife photography at least, you'll be taking a bright overcast sky and blowing it out to a studio-like white. What you'll really be doing, is bringing everything else in your frame into a perfect, or slightly bright, exposure.
Exact camera settings are impossible to provide because they will vary so much based on environmental conditions and your desired outcome for the image. But here is my strategy for creating high key images in general, and high key wildlife photos specifically.
Aperture or Shutter Priority
Which mode you choose will depend on what you are shooting and how you want the final image to appear.
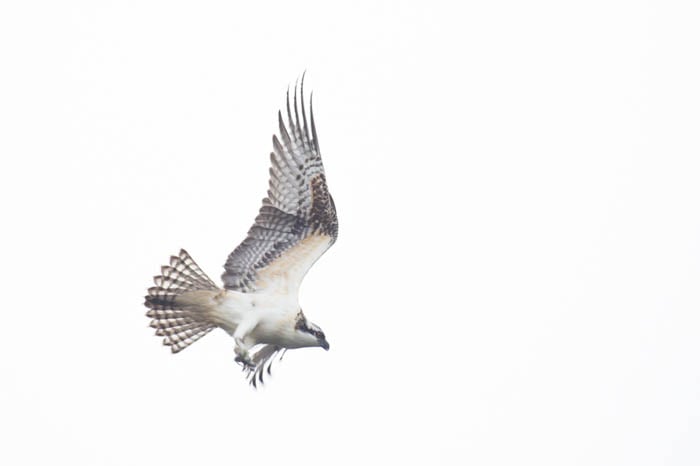
For flying birds, like the osprey taking off from the spruce tree, you may want to select shutter priority to make sure that you are getting fast enough shutter speeds to assure sharpness.
For static subjects, depth of field may be more important to control, so aperture priority should be selected.
(Yes, yes, I suppose you could do this all in manual, but in the fast-paced world of wildlife photography, leaving some of the decisions up to your camera will speed up your process.)
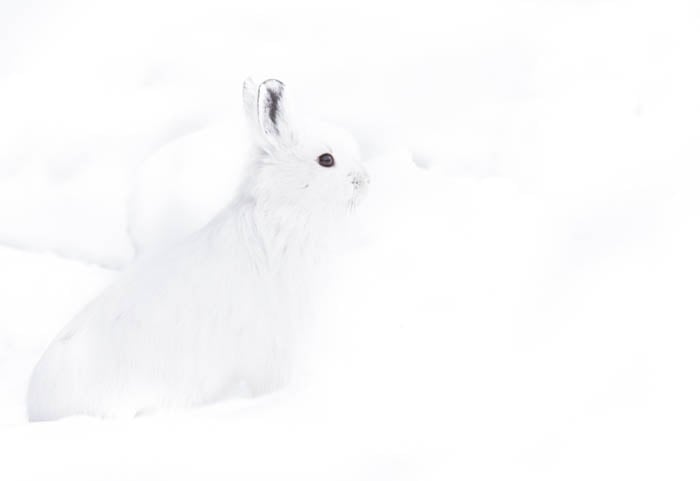
Like the Ptarmigan above, this white Snowshoe Hare was perfect as a high key shot.
Exposure Compensation
How much you will need to overexpose depends on how much of your image you are trying to take into the "high-key" range and from where you are drawing your metering.
If you are using spot metering on your subject, then you may not need to set your exposure compensation up too much at all, but if you have a lot of white in your frame, it may take, three, four, or even more stops added.
High key photography is all about experimentation and finding what works. It's a great way to create a light-box like effect in outdoor situations. When the opportunities to use high key exposure occur, you'll have a great way to cope with challenging lighting and create unique images.
Low Key Photography Lighting
I was photographing next to a rare water hole in the scrub desert of northern Botswana. It was evening and a pride of lions had just emerged from their daytime nap locations to wait patiently by the oasis for their prey to emerge.
The sun had just slipped below the horizon, and darkness was approaching quickly. I made a few images of the lions as they slipped from the shadows, but just as I was about to pack it in for the day, a herd of elephants emerged from the brush.
There were at least 15, but in the dusky light it was impossible to get an exact count. Thirsty, they headed for the water, carefully keeping a young calf protected by the aggressive mass of several large adults.
I began snapping photos, at first striving for sharpness, but eventually embracing the darkness and motion blur of the elephants as they moved about in the dim light.
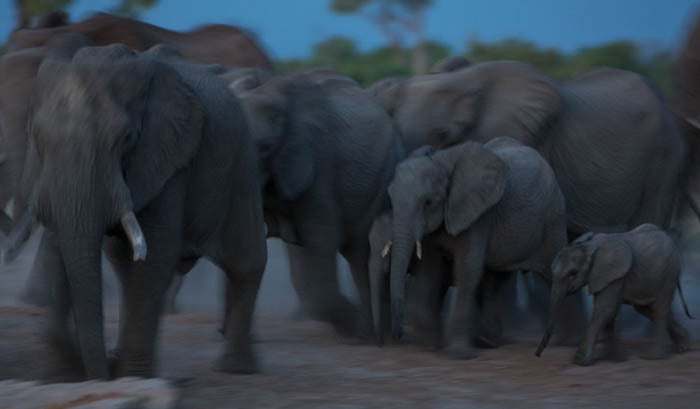
Next to the waterhole, I used the dark situation to my advantage, allowing a sense of mystery into the images I made.
Low key photography is the opposite of high key. These are purposeful (and sometimes necessary) under exposures. Rather than blowing highlights out to white as we do in high key, in low key photography we allow shadows to fade into black.
It makes our images appear dark, mysterious, and moody. And it can be extremely effective in wildlife photography.
Situations
As I described above, low key photography happens when the light is dim. Early mornings and late evenings are obvious times to try out low key exposures. But heavy overcast, storms, and even purposeful underexposures on bright days can work effectively as well.
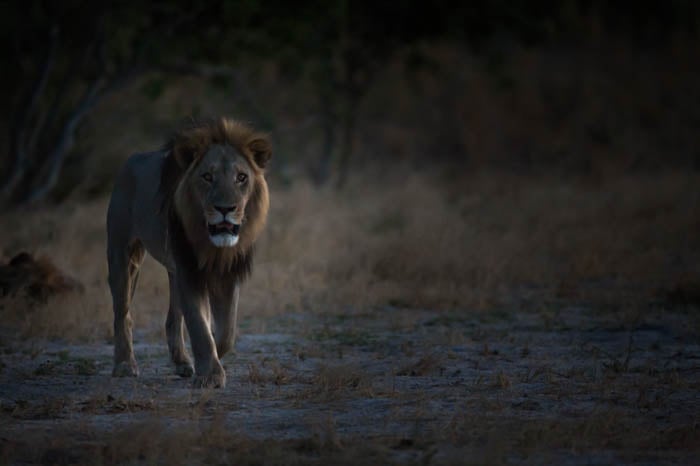
Contrast is an important part of low key photography. You've got to have something to draw the eye. Like my image of the male lion emerging from the brush, the highlights around the mane are what catches the eye.
Your brightest part of the frame will draw the attention of the viewer, so make sure that is where your subject and your action are.
While not a wildlife example, I was once photographing beside a lake in Gates of the Arctic National Park, Alaska. It was a perfectly calm, utterly bright day, and the reflections on the pond were a perfect mirror of the mountains.
The light was lousy though, bright and hot, and ugly. I almost didn't raise my camera, but then it occurred to me that I didn't have to make it look "real". I could underexpose, let the mountains fade to black, embrace the reflection and the bright sunlight as my subject.
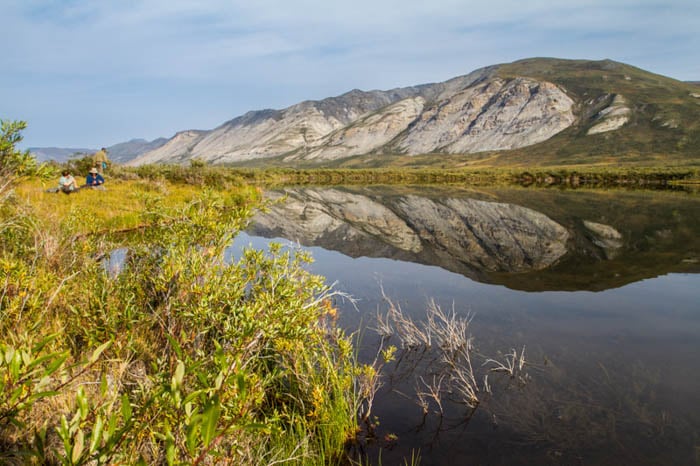
Bright daylight, lousy and flat. But dim the lights by reducing your exposure a few stops in camera and you can create something very different. See below.
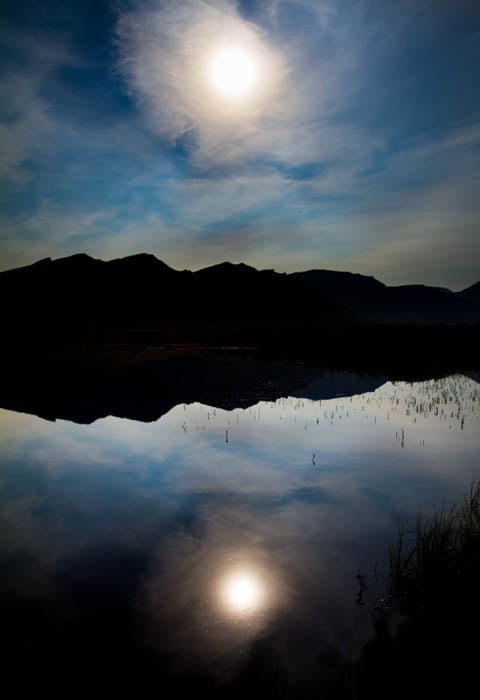
The final image, wildly underexposed, and just what I was going for.
And that's what I did. I set my camera to manual, made sure I had a deep depth of field, then slowly increased the shutter speed until all that was left of the photo was the black silhouette of the mountains, the deep blue of the sky and the sun.
The image worked, and allowed me to create interesting low key photography in a situation too bright and flat for a classic landscape.
Exposure and Camera Settings
Like my example above of shooting next to the lake in northern Alaska, low key photography is a process of experimentation. The exact appearance of your final photo is your decision.
As I did, I recommend you find the depth of field you want by adjusting your aperture, and then control the exposure with shutter speed. Manual settings work great. On bright days, you may want to adjust beyond what your exposure compensation will allow.
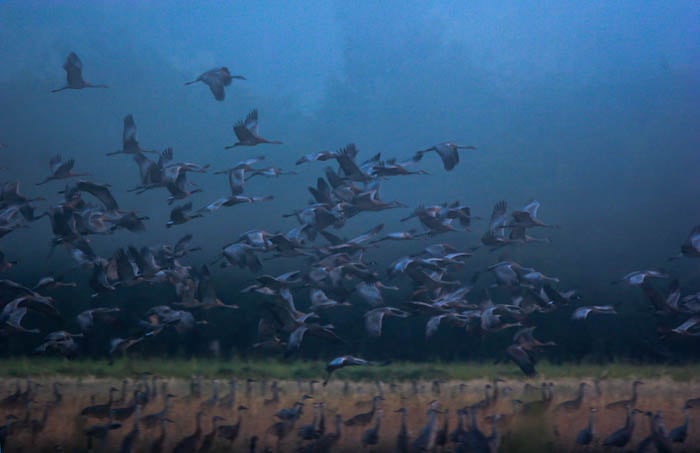
Early morning and foggy light were meant for low key when I photographed these Sandhill Cranes.
Conclusion
With high and low key photography you can embrace situations where classic rules of exposure are impossible to apply, or where you simply want to put your own spin on the way an image is exposed.
Like all photography, these techniques are a creative process, but considering them is a great way to break out of a photographic rut.
There is a lot of talk about what is the "right" way to expose an image. High and low key, take all those rights and wrongs and throw them to the curb.
Got a bright contrasty situation? Then throw even more light in there, and blow those highlights out until you're left with a studio, light box scene of nature. Too dark for a decent exposure? Who cares? Add some dark to those shadows, or turn a bright day to night!
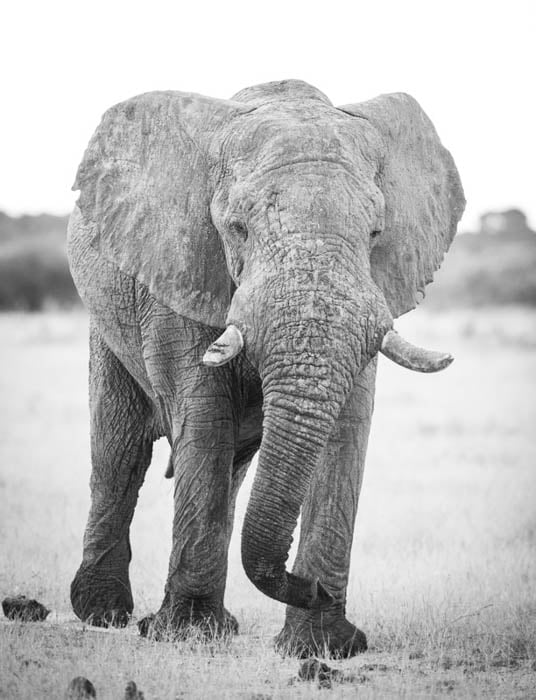
Black and white conversions often work well as high key images.
Our cameras are capable of seeing the world quite differently from our eyes. In photography, we can use that to our advantage, creating images that are impossible to see without the camera.
That is one of the greatest joys of our art: showing the world in a new way, a way we can't see without the aid of our cameras.
Give high and low key photography a try, and let me know how it works!
Check out our favourite shots from the comedy wildlife photography awards.