Wildlife photography blends my love of nature with my love of photography. But capturing those frisky critters in an image is a challenge.
Here are 12 tips for better wildlife photography composition. I'll talk about composition, how to prepare for a photo shoot, and what camera settings to use.
Whether you want to photograph hummingbirds or zebra, these composition and wildlife photography tips will help you make amazing wildlife photos.
12. Wildlife Photography Composition: Be Prepared With Pre-Program Camera Settings
The golden rule of wildlife photography is Be Ready!
That means being ready with your camera settings. There are some situations where you won't have time to fiddle with your camera, so let me start with a basic setup.
As a wildlife photographer, I have a pre-programmed mode for wildlife photography set up on my camera. This means I can change all my settings quickly.
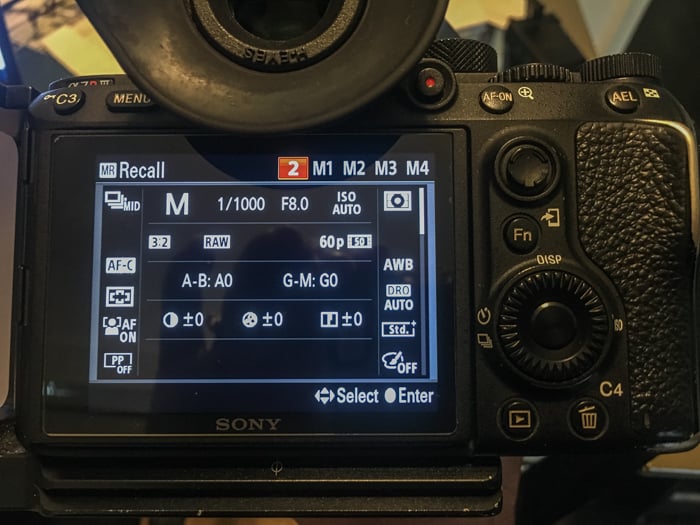
I shoot in Manual Mode. My default settings are f8.0, 1/1000 of a second shutter speed, and auto-ISO (with the maximum set at 5,000). From here, I can change settings depending on lighting conditions and how quickly the wildlife is moving.
For a shallower depth of field, I widen the aperture to f5.6 or f2.8. With slower moving animals, a shutter speed of 1/500 of a second might be fine, but quick birds may need a faster shutter speed (1/2000 of a second).
If my light is even, I can switch out of auto-ISO and if the conditions are dim, I can increase my maximum ISO to 8,000 or even 10,000 in a pinch.
I also shoot on silent mode (a feature available in some mirrorless cameras). I enable burst mode and continuous autofocus. I'll talk more about these settings later in the article.
I may only get one attempt at a photograph, so I don't turn off or let my camera go to sleep. I may have only a split second to react and my camera needs that second to start up and focus.
11. Get the Close-Up
Let's face it, we can't always get close to the animals we want to photograph (and sometimes, we wouldn't want to)!
They generally flee when they hear us coming. We sometimes catch only a fleeting glimpse or hear a rustle in the bushes. If we're able to photograph the animal, it's only from a distance.
The most impactful wildlife images show us wildlife close-up. It's a view that most people don't often experience except through photographs.
It's ok to leave a bit of space for the animal to visually move, but if there's too much space then the image becomes more of a landscape composition.
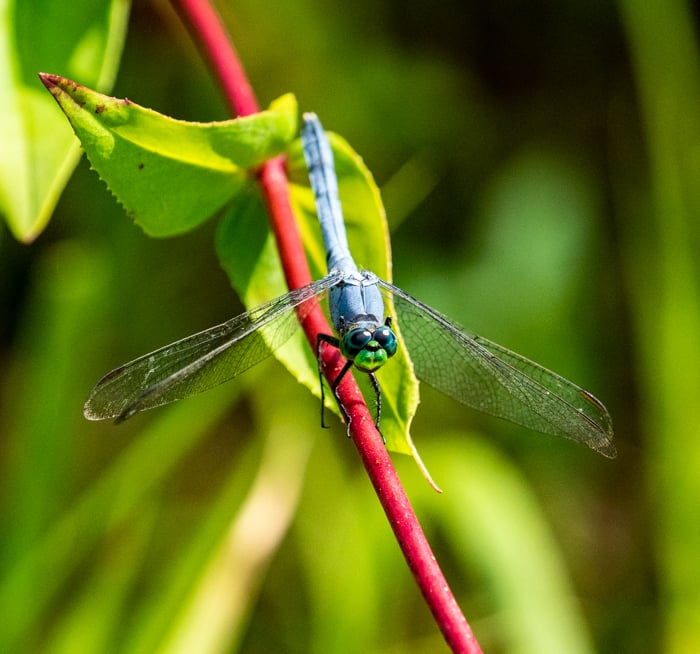
Blue dragonfly in Illinois conservation area.
Luckily, we have telephoto lenses to help us get photographically close even if we can't get physically close to the animals. Most wildlife photographers use very long lenses (e.g., 100-400 mm telephoto lenses or 600 mm prime lenses) to achieve perfect wildlife photography composition.
They use the lens to get closer without scaring the animal or putting themselves in danger.
The downside of long lenses is that they can be heavy. I use a monopod to stabilize my lens when I'm in the field.
When photographing wildlife, use the longest lens you have. In post-processing, crop freely. We want to see a little bit of the environment but make the wildlife the central feature of your photograph.
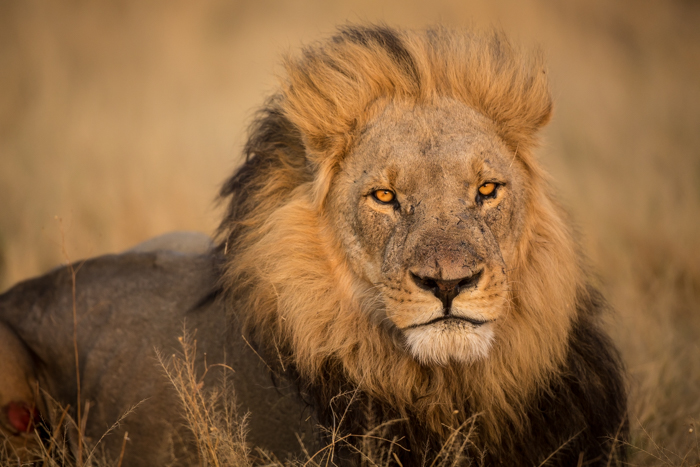
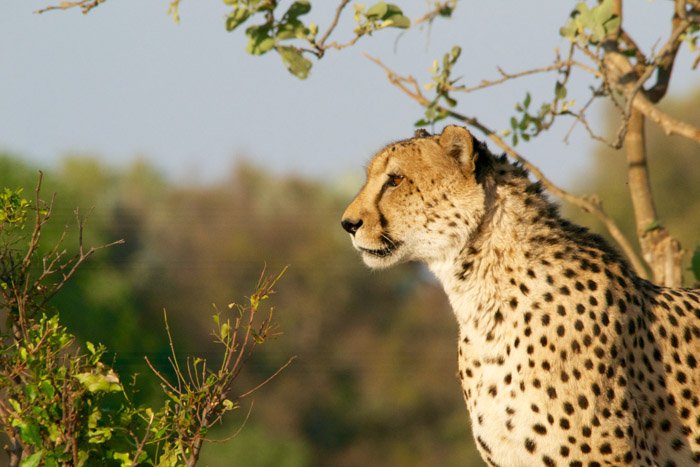
10. Make Eye Contact to Connect With the Viewer
We connect with both people and animals through the eyes.
Making eye contact with the animal you're photographing will draw the viewer into your image. Eye contact creates beautiful wildlife photography composition.
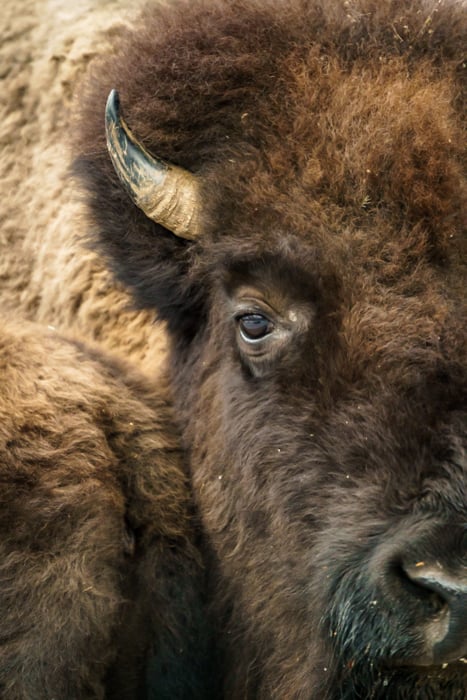
American bison in Lone Elk State Park in Missouri
I often have to wait a while until the animal looks towards me, but it's worth it.
Sometimes, it's not possible to get both eyes in focus. If I have time to choose, I focus on the eye nearest to me.
Sony has added animal photography eye focus to many of their cameras. The camera scans the scene and automatically focuses on eyes. This is a terrific feature for wildlife photography.
Find out what focus tracking settings your camera has and use them freely.
9. Position Yourself at Eye-Level
If possible, photograph wildlife in their natural space. This means being at their eye-level or even lower. Framing your shot from an eye-level or a lower vantage point will give the animal a sense of dramatic power.
Shooting from above will make the animal appear smaller and weaker.
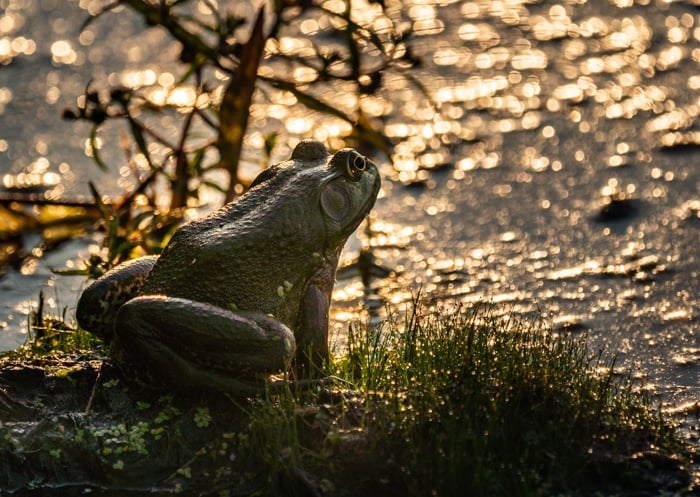
Green frog at Tower Grove Lake, Illinois
For birds or animals in trees, this is easy but for short animals on the ground, this is more challenging. Being at eye-level means getting low to or even on the ground for the best wildlife photography composition.
I often bring a pad to protect myself from muddy or wet ground conditions and to provide a little bit of comfort while I wait.
I can flare out the legs of my tripod and position it near the ground. I've also balanced my camera on my camera bag or a bean bag for stabilization.
My camera has a tilting LCD screen. I use it to place my camera low to the ground and save wear-and-tear on my knees.
8. Use Burst Mode for Perfect Wildlife Photography Composition
Burst mode may be one of the most underutilised settings on your camera. In burst mode, my camera fires off multiple shots each time I press the shutter button.
Animals often move through my frame, changing by the second. Burst mode ensures I'll capture every subtle motion (a slight tilt of the head, a look, a stance, a snarl).
Burst mode gives me the option of choosing the best photography composition later.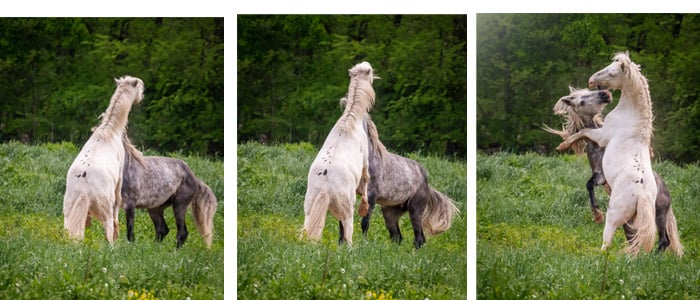
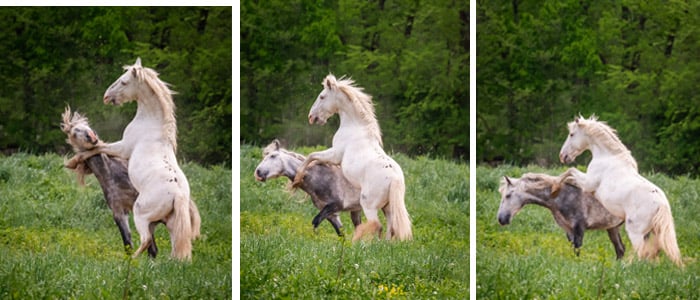
A series of photos of wild horses playing in the Missouri Ozarks. I ultimately chose the third photo (top right) as my final image.
The downside of burst mode is that I have a lot of pictures to cull through in post-processing.
While we're on the topic of burst mode, I should mention that I upgraded my SD cards when I started doing a lot of wildlife photography. I bought cards with fast write speeds.
I found that my buffer filled up and I had to wait to take my next shot. Faster cards let me be ready to take the next shot.
7. Look for Action
In wildlife photography composition, the first step is to capture a documentary image of an animal. This is a photograph of what the animal or bird looks like. The next step is to capture the wildlife in action. Action composition shots are more interesting.
There are some obvious action shots for instance birds in flight, animals eating. I do a bit of research to find out what sorts of action I can expect from the type of wildlife I'm photographing.
For instance, what does mating behavior look like for this animal and when is mating season?
When I photograph wild horses, their predominant activity is grazing. They seem to do this 90% of the time. I capture a lot of shots of this behavior. Then I look for more interesting action.
I wait, sometimes for quite a while, for the horses to do something else. These behaviors are less often seen so make for more interesting composition in photographs.
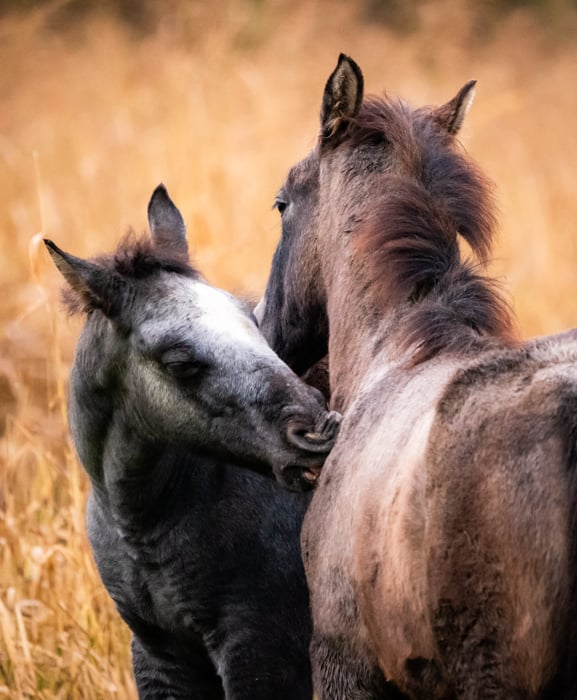
Wild horses in Missouri Ozarks grooming each other.
If the animals are moving through the frame, I try to capture the motion left to right. We "read" images like we read text.
Looking for behavior patterns helps me anticipate what the wildlife might do and be ready to make that once-in-a-lifetime photography composition.
6. Motion Blur Is OK
As long as the animal's eyes are in focus, everything else is optional. It is satisfying to freeze animals in motion, but a bit of motion blur in a bird's wings or in the running feet of a horse adds a sense of action.
To control motion blur, change your shutter speed to be a bit slower than needed to freeze the motion. If I have the opportunity, I explore different shutter speeds and then choose the photo I like best later.
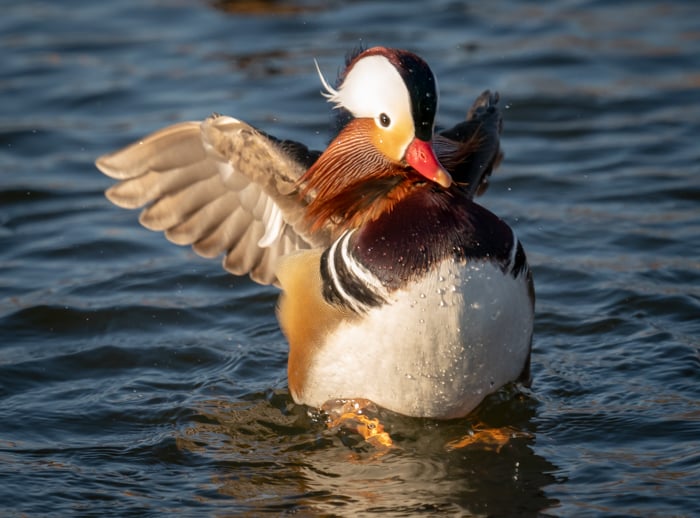
Mandarin duck in Florissant, Missouri. I captured a bit of motion blur in the duck's wings as he landed.
5. Scan Backgrounds
When we photograph wildlife, our attention is often completely on the animal. We might be so caught up that we miss the background.
An ideal background includes a little bit of the animal's environment but is not distracting. It's the background that makes the difference between a wildlife photograph and one taken at a local zoo.
Scan the background for things like sticks that might look like they are coming out of the animal's head.
Wildlife photographers use a shallow depth of field to blur a busy background. This is much easier with a fast lens (one with a wide aperture like f2.8). It's also easier if the animal is somewhat separated from the background.

White-tailed deer at Jefferson Barracks cemetery, Missouri. I included the headstones, but used a shallow depth-of-field to blur them out.
I also look for man-made objects or signs of humans in the background. Many nature competitions want shots that do not include any sign of human presence. This means structures, fences, or even mown grass.
If I'm not entering photos into one of these competitions, then I can choose to include anything I'd like in the background. But I'm always aware of what I'm including. Errant electrical wires or vehicles can mar otherwise good wildlife compositions.
When possible, I look for a background that shows a bit of context but won't compete with my subject.
4. Manual Focus Is My Friend
I mentioned earlier that I often use continuous auto-focus. That is my default setting, but this setting only works well if I have a clean shot. If I'm photographing birds or monkeys in trees, my camera may not be able to figure out what I want in focus.
Sometimes the camera will guess correctly, sometimes not.
I often use autofocus to get close and then switch into manual focus to fine-tune the details. I have a hot button set up on my camera that toggles back and forth between manual and autofocus. Some lenses have this feature as well.
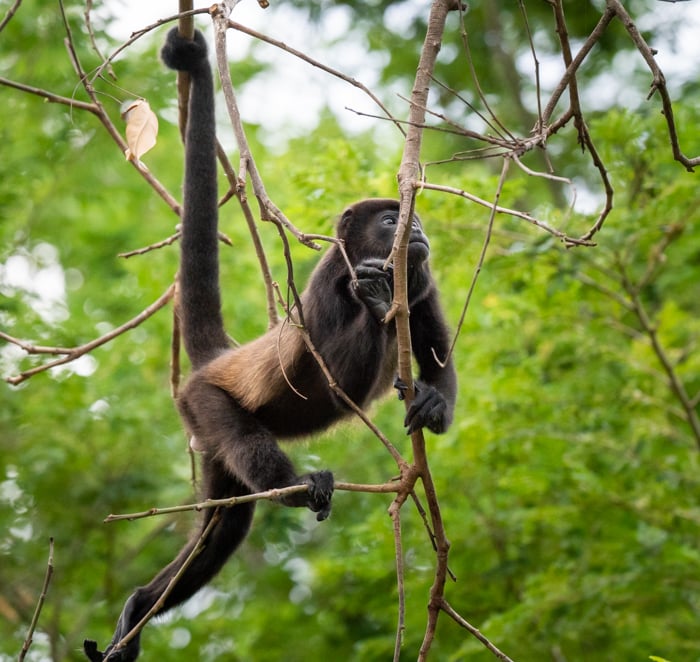
Howler monkey in the trees of Costa Rica. The branches confused my camera, so I manually focused on the monkey.
I'm using a mirrorless camera, so I turn on focus peaking for more help in fine-tuning my focus. Focus peaking highlights (with a color) which elements of the scene are in focus.
If you are new to manual focus, it might take some time to zero in on the focus. With practice, focusing manually becomes quicker.
3. Love the Light
All photography benefits from quality light. Luckily, when the light is best in the morning and towards dusk is also when most wildlife tends to be active. The oblique light at these times of day works to make wildlife compositions more dynamic.
For wildlife, I'm often looking for soft, even light which shows details and colors. Cloudy days can be your best friend. The sky becomes a large softbox, diffusing the light evenly across the scene.
Look for light on the animals, light that highlights details and provides catchlights in the eye.
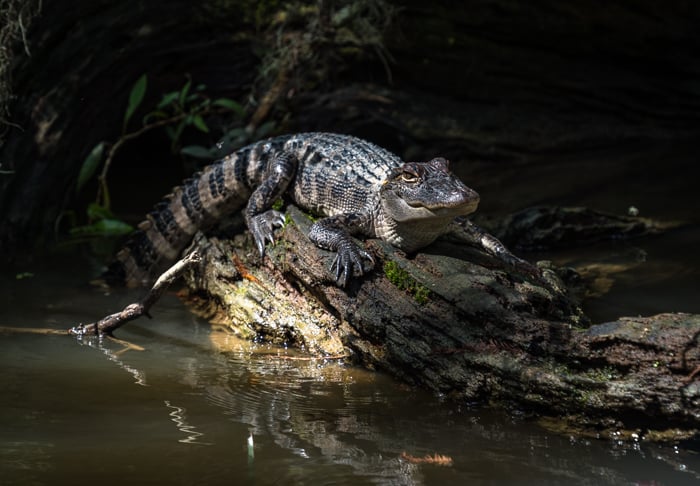
Bayou alligator in Louisiana swamp. I loved the dappled light highlighting the texture of his back.
Photographing into a bright sky, like with birds in flight, can create a silhouette. It's difficult to balance the exposure and get the bird in enough detail without blowing out the sky.
The rule is to expose for the brightest part of the image (the sky) and bring out the animal in post-processing.
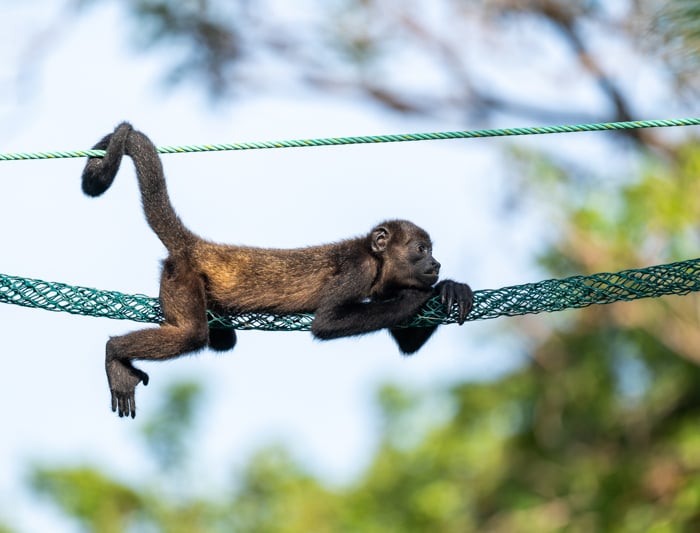
Baby Howler Monkey in Costa Rica resting on a monkey ladder against a bright sky.
2. Waiting Pays
Patience is key to getting good wildlife compositions.
The best photos don't come from chasing wildlife. Most of them can outrun you anyway! The best shots come from finding out where the wildlife will be and settling in to wait for the wildlife to come to you.
Many species repeat behavior patterns. They return to the same places again and again. Research habits and what times are the animals active. No sense in photographing when the animals are sleeping or hibernating.
Learning these patterns allows me to be at the right time and the right place for good photographs.
When wildlife shows up, I watch what they do. Sometimes I'll pick up on individual personalities or focus on the "cute-factor".
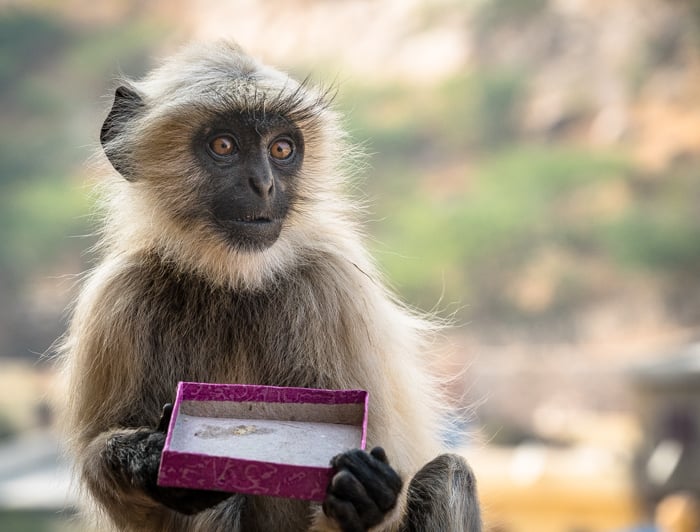
Cute Hanuman langur monkey in Jaipur, India eating a box of sweets.
My best wildlife photos generally don't happen at the beginning of a session, but after I've been in the field a while. I've become a part of the environment and formed a connection with the animals.
1. Practice Locally
You may want to photograph bears in Alaska or toucans in Costa Rica. Before you do, practice at a local pond or park.
The squirrels and ducks may not be as exotic. But photographing the local wildlife will sharpen your tracking skills and you will have time to practice the settings on your camera.
Find out what types of wildlife is in your area and where to locate them. Research their behaviors. Find out if there are migration patterns or times of year that the wildlife may be changing colors.
Local nature societies can be a wealth of knowledge.
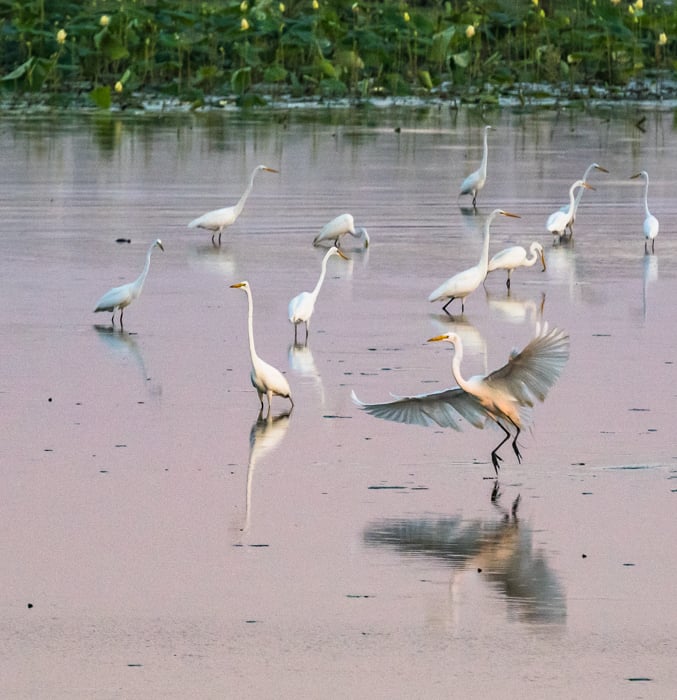
Egrets at a lake near my home (Horseshoe Lake, Illinois)
Final Thoughts
Capturing quality wildlife photographs with beautiful composition takes time and practice, but it is worth the effort.
Do a bit of research on the wildlife you might see in an environment. Be willing to wait for the photograph. Look for interesting light and focus on the eyes.
Finally, choose camera gear and settings that help you capture these fleeting and precious moments.