Cinemagraphs are mysterious and enticing. They make you double-take when you’re scrolling down a web page. They look surreal and as if they’re made by magic.
But you don’t need to be a magician to make cinemagraphs. In this article, we’ll draw back the wizard’s curtain to reveal the mysteries of the cinemagraph.
We’ll also look at a step-by-step guide on how to create a captivating cinemagraph.
What Is a Cinemagraph?
The cinemagraph was described by Osho Coco as “more than a photo, but not quite a video.”
A cinemagraph is a cross between a still photograph and a moving video. The majority of the frame is completely still, as with a photo. But there is one moving element within the frame. It’s a photo that moves.
Usually, the moving element will be something small. If there is too much movement in the frame, it will look like a video. The cinemagraph will lose its mystique.
To create an example, if you have a breakfast table scene with someone pouring coffee into a cup. You could have the pouring coffee in motion. And the rest of the scene could be still.
You may be thinking a cinemagraph is a fancy word for a GIF. But that’s not the case. A GIF is a low-quality animation that we often see on memes. They are similar, but a cinemagraph uses high-quality images and video.
Cinemagraphs are made by combining a short video with one still frame. They’re then combined in post-production using Adobe Photoshop or Flixel.
You can check out some excellent examples of cinemagraphs by our collaborating artists, Ashraful Arefin and Anya Anti. They are both photographers that use cinemagraphs to add mystery and magic to their work!
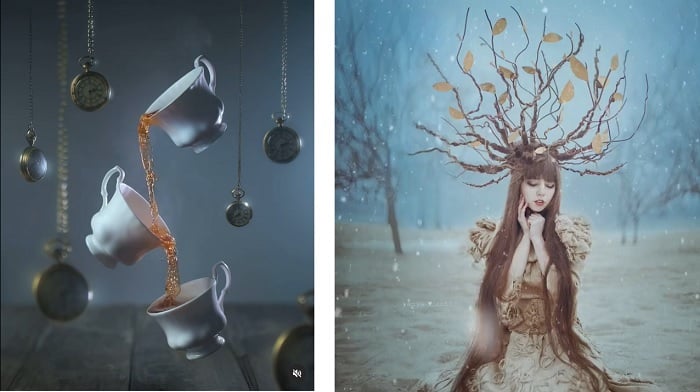
Left: Ashraful Arefin – Right: Anya Anti
History of Cinemagraphs
To witness the advent of cinemagraphs, we have to travel back to 2011. It was New York Fashion Week, and two visual artists were set on making a statement.
Fashion photographer Jamie Beck and motion graphics artist Kevin Burg came together to create something new. They wanted to tell more of a story with one image. Videos were too high-maintenance and less versatile. It was about maximising the potential of one image.
Beck and Burg used their skills to combine a still image with elements of movement. They brought their fashion photography to life. And the first cinemagraph was born.
Their cinemagraphs always start with a strong image. The image has to hold up as a strong photo in its own right. The introduction of movement brings it to life and enables them to tell more of a story.
Since 2011, cinemagraphs have continued to wow and entice viewers. And they’ve been a great way for photographers to enhance their portfolios.
Photoshop is the most common tool for making cinemagraphs. But now, you can get cinemagraph apps for your smartphone. For example, you have Cinemagraph Pro for iOs. And Zoetropic for Android. Other apps are available, but these two are great to get started with.

What Are Cinemagraphs Used For?
Beck and Burg used their cinemagraphs to bring their fashion photography to life. Fashion is an excellent place to start. Using the natural movement of clothes and hair is a great way to bring life into a still photo.
But they’re not limited to fashion. Cinemagraphs can be used in many different styles of photography. For example, you can make time stand still with street photography cinemagraphs.
Artists like Ashraful Arefin and Anya Anti use cinemagraphs to bring a mysterious quality to their fantasy photography. The elements of movement enhance the dream-like atmosphere in their work. They’re similar to something you might see in the Harry Potter movies.
Commercial photography has made a big effort with cinemagraphs. You’ll often see cinemagraphs used for online adverts. They’ve become a powerful marketing tool.
You can even upload cinemagraphs to your social media accounts. They’re a creative way to give your online content a boost.
How to Create Cinemagraphs
There are now apps specifically designed for creating cinemagraphs. There are options for Android and iOS phones, which are fun and easy to use.
But you don’t need any specific cinemagraph software to create one of your own. All you need is Adobe Photoshop and a camera that can record video. If you have those, you can follow our steps on how to create a cinemagraph with Photoshop.
Select Your Moving Subject
You need to think about how much movement you want in your picture. There needs to be a minor and repeated movement. Remember, you’re not making a video. You are only adding movement to a still photograph.
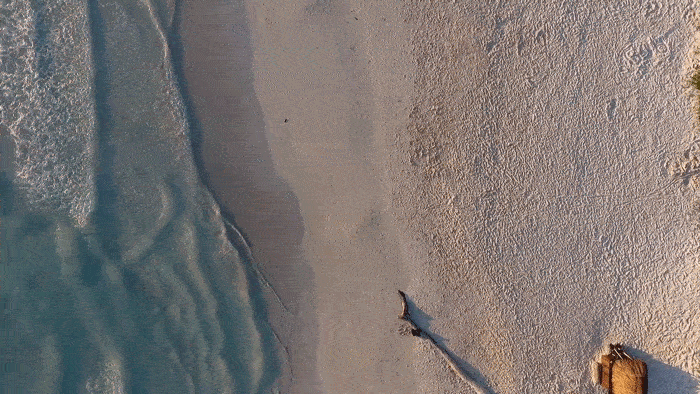
The animation has to be a perfect loop. The start and endpoints of the movement have to be the same. As with the example below, the runner enters the frame from one edge and exits on the opposite. The runner is not present at the beginning and end of the cycle.
Use a Tripod to Keep the Scene Steady
You need to keep the camera completely still when shooting the video footage. Any movement of the camera will destroy the illusion of a good cinemagraph.
The best way to keep your camera steady is with a tripod. Resting the camera on a flat surface could work if you don’t have one. But there is still a risk of jolting or shake.
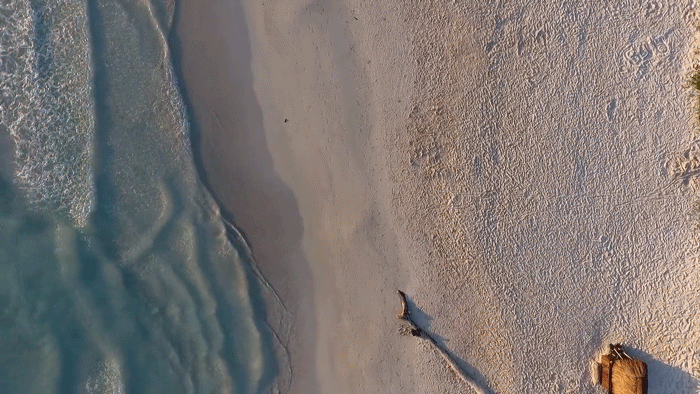
You can see our cinemagraph below. As you can see, the beach scene looks like a still photograph. But the runner moves from one side of the frame to the other.
Get your camera ready, and we’ll take you through, step-by-step, how to make your own cinemagraph in Photoshop.
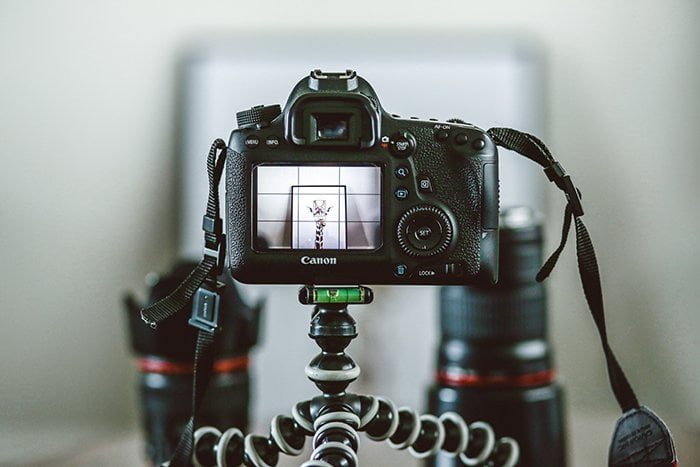
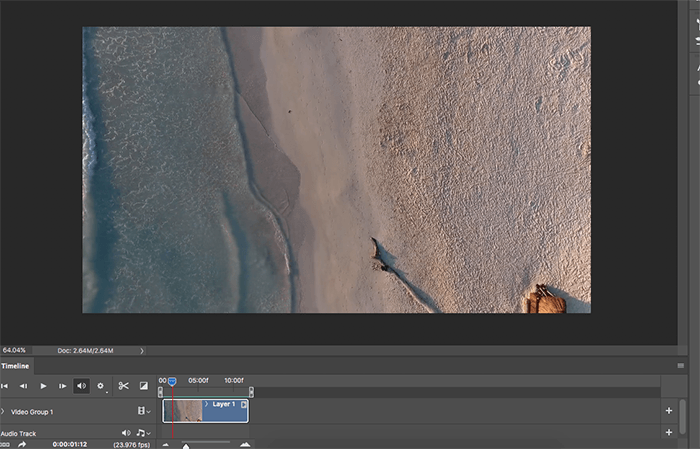
Step 1: Open the Video File in Photoshop
Once you have filmed your video, open the file in Photoshop. You can either drag the file into the program or go to File > Open. The video toolbar will open, and your screen will look like the shot below.
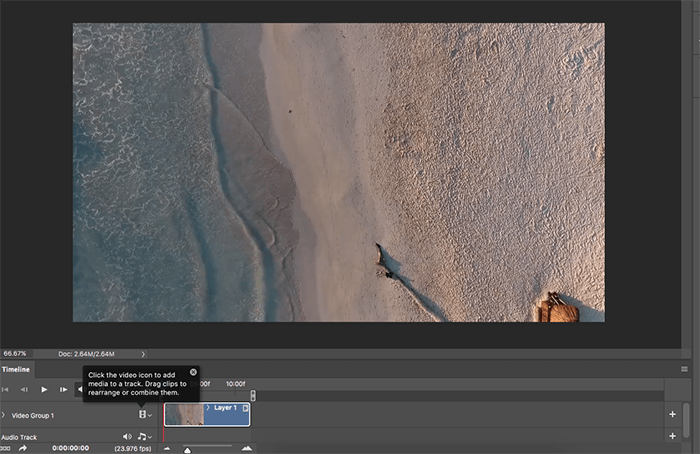
Step 2: Set the Start and End Points of Your Video
You need to change the start and endpoint of your video. Move the red line in the video toolbar to where you want your start and endpoints to be. By doing this, you are creating your loop.
Once you know where they are, drag the left and right sides to the red line. This will trim your video file.
Looking at the screenshots above and below, you can see we have moved the red line from its original starting point.
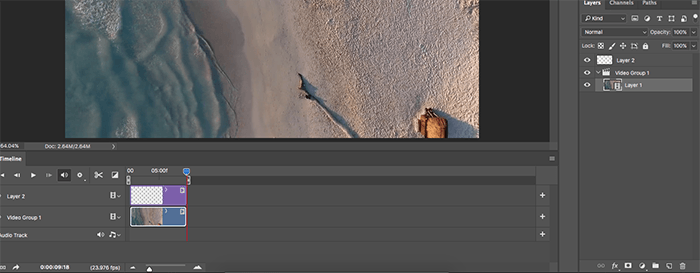
Step 3: Create a New Layer
You now need to create a new layer above the Video Group folder.
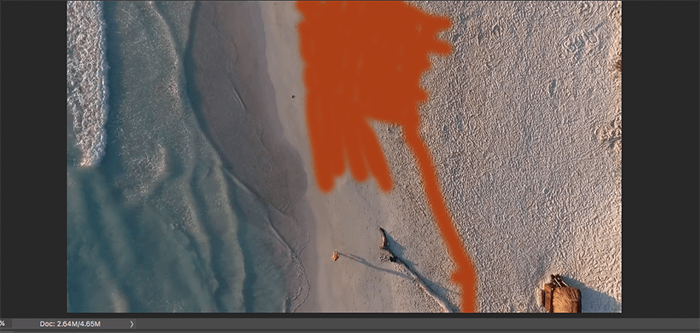
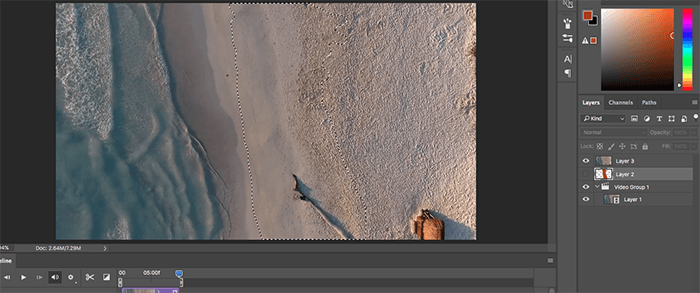
Step 4: Paint Over the Parts Where Your Subject Will Be
On your new layer, select a visible color and set your opacity to 100%. Then paint over any parts of your image that you’d like to see moving in your final product. You can see in the image below how we’ve painted over the path of our subject.
You don’t have to be too precious about this step. The paint won’t appear in your final cinemagraph.
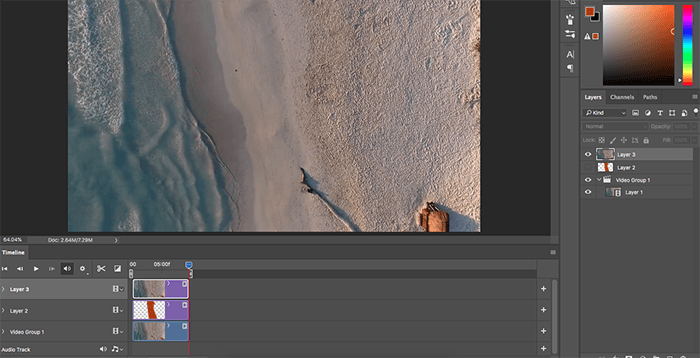
Step 5: Set the Still Parts of Your Cinemagraph
Make your paint layer invisible (click on the eye next to the layer), and press Shift + Option + Command to create a new layer. You must make your layer invisible before you create another layer.
Now you can decide how the “still” parts of your cinemagraph will look. Afterwards, press Shift + Option + Command + E to transform your new layer into a stamp visible layer.
This will basically take a screenshot of your photo, so make sure you’re happy with the result before you proceed to the next step.
Step 6: Select the Layer With the Painted Subject Path
Hold the Command button and click on your painted layer (which should still be invisible).
This will select the area that you painted over.
Step 7: Create a Layer Mask
Click on your stamp visible layer (the one with the still image), and create a new layer mask. Now, press play.
If your cinemagraph is doing the opposite of what you want it to do, you’re on the right track! (Don’t worry, this is not a prank.)
To get the results you want, click on that new layer mask (the box next to the stamp visible layer) and press Command + I.
This will reverse the effects and give you the results you want.

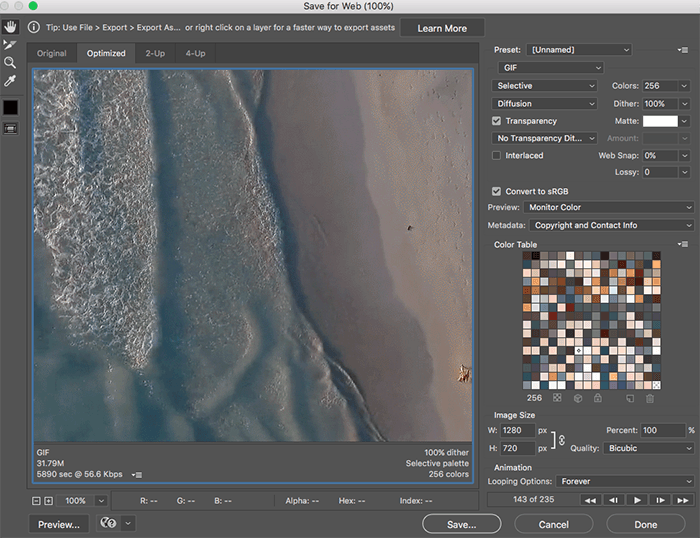
Step 8: Save and Export Your Cinemagraph
To avoid losing all of your work, save your progress before you export. Once the cinemagraph is ready, you can convert it into a GIF. Go to Export > Save for Web. Make sure you select GIF from the drop-down box that’s right under Preset.
If you don’t want your GIF to stop, select Forever next to Looping Option. You can also resize your GIF to make it easier to upload online.
Depending on your video file size, this process might take up a lot of time, so don’t be alarmed if it looks like Photoshop is about to crash. If you’ve saved your progress, this step won’t be that stressful.
And here is the finished result! Once you get used to the process, it will take you a maximum of 10 minutes to create stunning cinemagraphs.
Conclusion
Cinemagraphs are attention-grabbers. They’re still photographs that move. They’re not videos, and they’re not GIFs. They are something unique and special. They bring wonder and intrigue into your imagery. It’s as if they’re made by magic.
But cinemagraphs are more simple than you think. Since their inception in 2011, they have become easy and accessible to create.
They’re used for fashion and commercial photography. But you can make some for fun too. Whether for an advertising campaign or your social media, cinemagraphs are a great way to liven up your images.
Do you want to bolster your editing skills by mastering Lightroom? Then check out our Effortless Editing with Lightroom eBook.


