Cinematic photography looks like a screen grab from a movie.
It involves controlled lighting and composition, lens choice and model direction. And some post-processing know-how.
In this article, I will show you how to create portraits with a cinematic look and feel to them.
Cinematic Photography: Camera Orientation for Cinematic Portraits
The camera aspect must be horizontal to create a cinematic portrait. Movies have a wider aspect ratio than still cameras.
You need to keep this in mind when you are composing your portraits.
Leave enough space above or below your subject. Or you will not have room to crop it well.
And turn your camera or viewfinder’s grid display on. This will help you make your portraits fit the right dimensions.
© Kevin Landwer-Johan
Visual Story Telling
Movies are about storytelling. Cinematic portraits must tell a story as well.
They need to tell the viewer something about the character. But this does not always need to be obvious.
Creating a photographic story is about directing the model and composition.
© Kevin Landwer-Johan
You need to communicate well with your model so they understand what you want from them.
They need to know your vision and the idea you want to express through the portrait.
The photo below was one of the first I made during a two day session in Bangkok.
My model was nervous and it was showing. But I explained I want natural looking photos. The aim was to focus on her with the other three models in the background.
I talked her through it and she understood the intention. Then I suggested she use her phone as a prop.
She called a friend and chatted with her. And the result is a natural portrait.
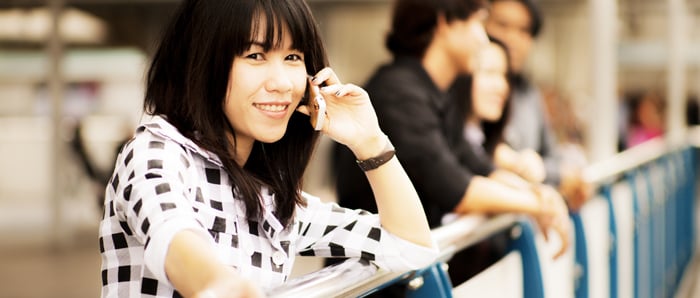
© Kevin Landwer-Johan
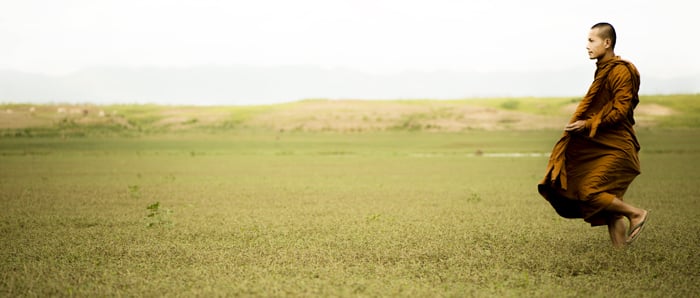
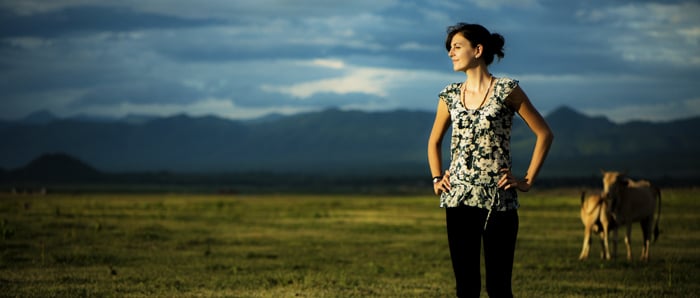
Everything around your model is important to story telling. If there are elements in your composition that do not support your story, remove them.
Or move your model until the unwanted elements are out of the frame.
In this photo of my friend, there was a truck to the left. It added nothing to the story, so I didn’t include it.
The cows do because they are part of the rural landscape.
© Kevin Landwer-Johan
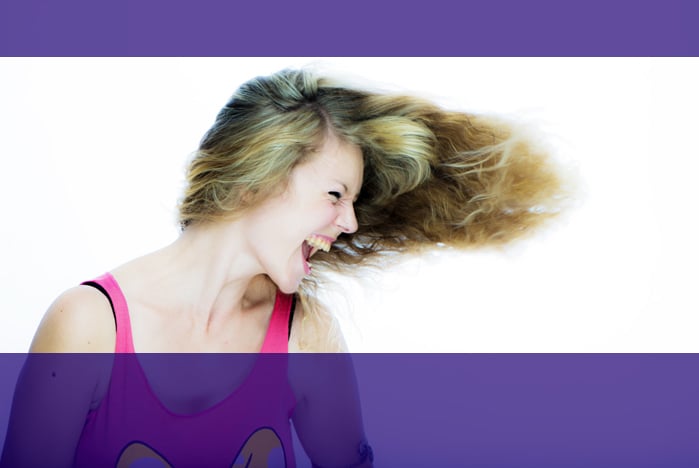
Sometimes you do not need the background. The character of your subject might be a strong enough story.
This works best if you have a very confident and expressive model.
How to Control Composition to Achieve a Cinematic Look
The way you compose cinematic portraits must support your story. Your choice of lens and aperture setting will have a big influence. The angle of view you choose is also significant.
Many cinematic photographers prefer to use telephoto lenses because they compress the scene. It’s often easier to achieve a creatively blurred background with a longer lens.
I like making cinematic portraits with my 35mm lens on a full frame body.
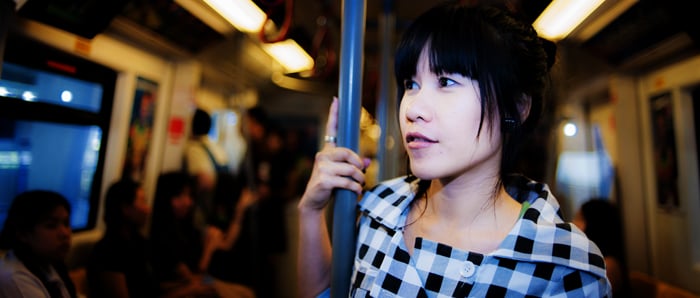
I made this photo on Bangkok’s Sky Train with my 35mm f1.4 lens. The location meant that I needed to be close to my model.
The 35mm was perfect to also include some of the environment.
© Kevin Landwer-Johan
Finding balance in the bokeh can be more effective than total blur. Many cinematic portraits contain no information to support the story. This does not always work well.
Softening the background too much can rob a portrait of meaning.
Control the background. Everything does not need to be sharp or a total blur. Instead, make it soft enough to still be recognisable but not distracting.
Movie scenes are often a combination of different angles featuring the same subject. A scene might start with a low angle, switch to an overhead view and then crop in tight to a close-up.
Look for different perspectives. Try more than the first angle you think of because that will be what most people will photograph.
Watch your favorite movies for inspiration. How does the director use the camera angle to create and support the tone of their story?
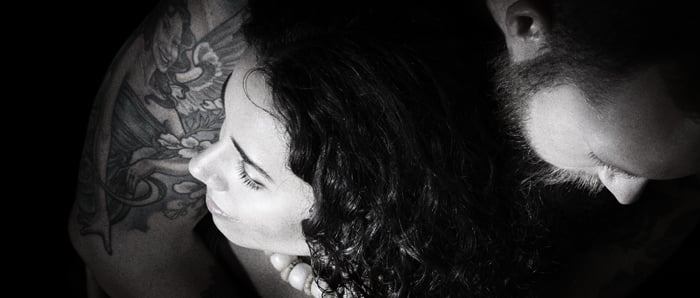
An overhead camera position adds drama to this photo. Positioning the couple how I wanted them so I had the right angle and light was difficult, but it paid off.
I controlled the lighting so her face was brightest yet still had enough light on his face and tattoo. The high viewpoint allowed me to have her face next to the tattoo and his face close in the frame also.
© Kevin Landwer-Johan
Why You Should Use a Variety of Compositions
Make close-up, medium and wide compositions. Movies often feature a combination of these three to build up the story.
Establishing the scene a director will use a wide angle. This gives the viewer a broad perspective of the scene and begins to build the story in their mind. You can place a person in the foreground or further back to make a wide cinematic portrait.
A medium view will show more detail and be more relational. This will help develop feeling and convey a sense of connection.
Close-ups will build emotion and intimacy. You can express more intense feeling coming in close, especially with a wide angle lens.
Displaying wide, medium and close up portraits as a series will complement your story. It will also look impressive on your Instagram feed and other social media.
© Kevin Landwer-Johan
How to Use Cinematic Lighting for Photography
Lighting in movies is always a major part of the production. When working with daylight, directors will wait for the right conditions.
Lighting style and technique vary. There are whole movies filmed only at certain times of day, or with the same lighting set up. This is to achieve the desired mood. Use these techniques when you are creating your series of cinematic portraits.
Control of the lighting is essential. It must look intentional. You cannot leave it to chance otherwise your portrait will not tell the story. The more purpose behind your use of lighting, the stronger the visual story you will tell.
Style depends on story. A high contrast film noir lighting style will support a high drama portrait. Soft light will produce a more romantic or contemplative feel.
Multiple lights will produce a different mood than a single light. Make sure your lighting style enhances the character of your story.
© Kevin Landwer-Johan
Post Processing Cinematic Photography
Some cameras come with preset options that you may like to experiment with to get a cinematic look.
Post processing a RAW image file is the best way to create the mood and feel for cinematic portraits. Some amount of desaturation is common to create the right look. This is part of the cinematic photography look.
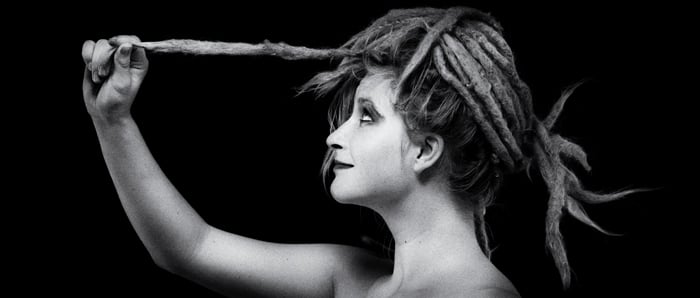
You can also try rendering portraits in black and white. Not by desaturating only, but by careful manipulation of tones.
The Silver Efex Pro 2 plug-in for Photoshop is a superb tool to convert color photos to black and white.
Keep in mind the story you are telling. Match your post processing to work with the character of your portrait. If you are expressing a romantic feeling, don’t use harsh processing, make it gentle.
When you want to enhance drama in a cinematic portrait add contrast to create edginess.
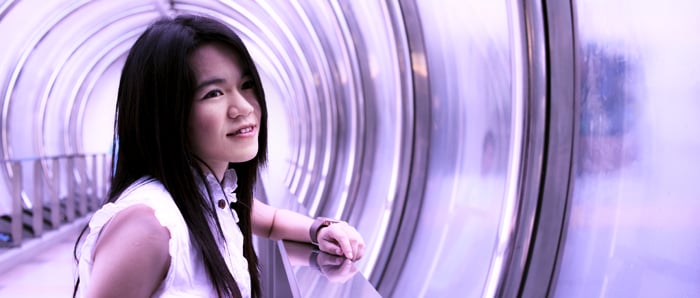
Movies have an aspect ratio which is wider than 35mm or cropped sensor still camera formats. The frame aspect is 2.35 to 1 whereas a 35mm frame aspect is 1.5 to 1.
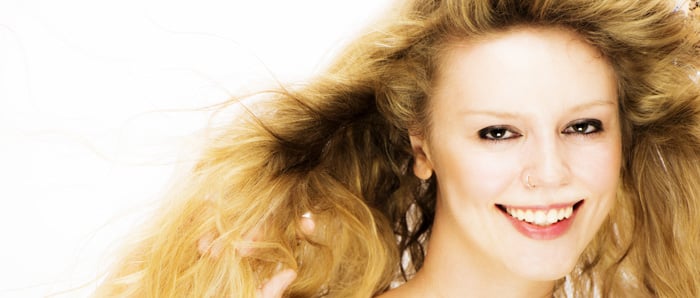
Crop a portrait to match the envelope shape we see when we watch a movie. This triggers a subconscious connection in a viewer’s mind. The photo immediately gives a sense of being cinematic because of the shape.
Making the choice to crop in tight the top of her head and take more off the bottom was easy. This creates the correct dimension ratio to match a movie screen.
To do this I created a new document in Photoshop with a 2.35 to I ratio. I made it 3840 wide and 1634 high. I then opened the photo and dragged it into the new document to make a crop of the correct dimensions.
© Kevin Landwer-Johan
Conclusion
Experiment with lighting, camera angle, composition and lens choice. Mimic these things from your favorite movie directors.
Practice different post processing methods. Try the same photo in black and white, desaturated. Then with added contrast or with less contrast. Compare the results and decide which you like better.
Remember to keep in mind your story. This is key to creating good cinematic portraits and developing a recognisable style. Seek balance in your subject, lighting, background and post processing.
Be consistent with these and your cinematic photography style will soon emerge.
If portraits are your main genre of photography, then you may have heard of PortraitPro 17, designed specifically for facial edits. Check out our our Portrait Pro review here.


