This article will show you how to make a GIF in Adobe Photoshop. Each step is easy. So let your imagination flow! A GIF is a picture with motion. It can be a short video clip or a series of still images that appear to move.
GIFs do not need to be complicated to be effective. Even simple motion is eye-catching. They are often used in marketing or to create a meme, often for a humorous effect or to make a statement.
How to Make a GIF in Photoshop
We will take you through two ways to make a GIF:
But first, let’s go over some basics. GIF stands for Graphics Interchange Format. There is some debate about how to pronounce the term. Some pronounce it with a hard “G,” as in “graphic.” Others pronounce it with a “J,” as in “jiffy.”
It is a file type like JPEG or PNG. But it holds many separate image frames and quickly shows them sequentially. This gives the illusion of motion. So it becomes an animated GIF.
How to Make Animated GIFs From Still Images
So GIFs give the illusion of movement by using two or more frames. And most of the elements in the image will stay the same. But at least one element changes between the frames. It may be an object or person moving.
An animated GIF does not need to be complicated. One frame may have a word or symbol, and the other does not.
You can use a series of still photos taken during a time-lapse. Or you can create the change yourself in post-processing. Many frames with small movements create a smoother GIF. And fewer frames with larger movements look like stop-motion.

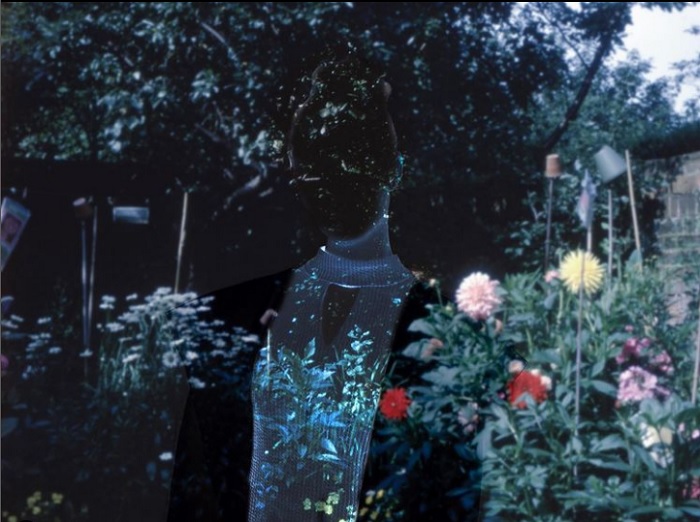
Two images—eyes open and eyes closed—make up this GIF.
Step 1: Select Images
Choose the images you want to use in the animated GIF. You need only two images to create the illusion of movement. And you can choose as many as 100. But with more than 100, your GIF may slowly load on a website.
Let’s create a GIF in Photoshop that shows a photo in different post-processing stages in a before-and-after comparison.
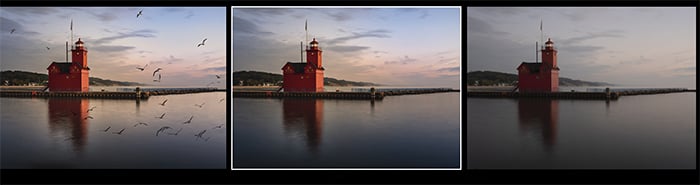
On the left is the finished image. On the right is the RAW file.
Step 2: Open Images as Layers in Photoshop
Load files as individual layers in one Photoshop file. From Lightroom, highlight the images and select the Photo drop-down menu. Select Photo > Edit In > Open as Layers in Photoshop.
If you open files directly into Photoshop, save your files in the same folder. Go to the File drop-down menu in Photoshop and select File > Scripts > Load Files into Stack.
Then click Browse and navigate to the images that make up your GIF. Click Open. And click OK.
You may wish to auto-align layers. With all layers selected, go to the Edit drop-down menu and select Edit > Auto Align Layers. You have several choices, but Auto usually does a good job.
You can duplicate a layer and add text or graphics. Then merge text with the duplicate layer by going to the Layer drop-down menu. Select Layer > Merge.
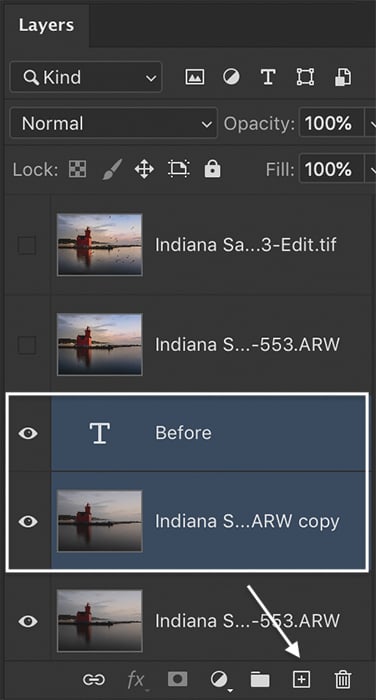
Add text to a duplicate layer. Merge layers when finished.
Step 3: Size Images for the Web
You can open RAW files or other file types in Photoshop. But to create a GIF, there is no need for all those extra pixels.
Large images slow down the animation, and the file becomes too large for easy viewing on the web. The ideal size for a GIF is 480 pixels on the long side. But you can make it as large as 720 pixels.
Go to the Image drop-down menu. Select Image > Image Size. In the Image Size window, enter the smaller pixels size. And click OK.
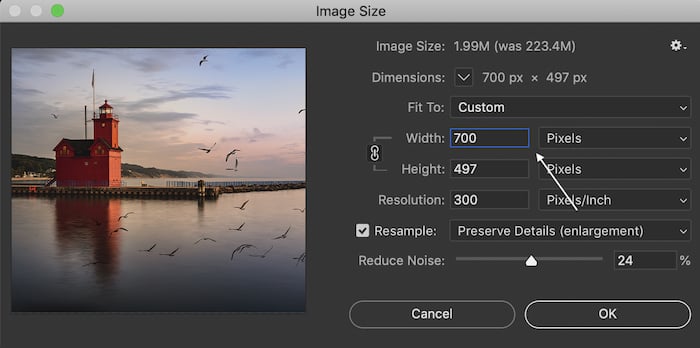
Enter the pixels in the Image Size window.
Step 4: Create Frame Animation
You need Photoshop’s Timeline window when working with video or animation. To open it, go to the Windows drop-down menu. Select Window > Timeline.
A new Timeline window appears at the bottom of your workspace. Click on the arrow in the drop-down menu. And select Create Frame Animation from the menu. And click on the image.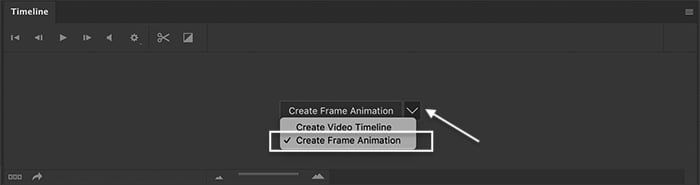
You will see the top layer appear in the Timeline window.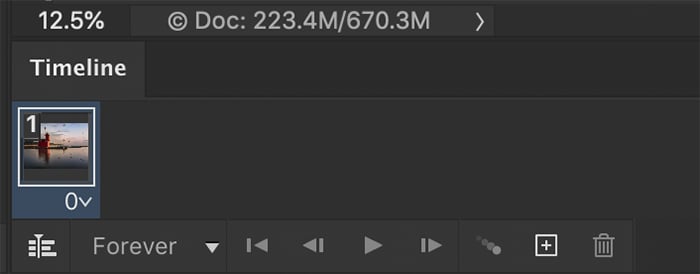
Step 5: Make Frames from Layers
To see all layers, click on the three lines in the top-right corner of the Timeline window (at the bottom). This opens a new menu. Select Make Frames From Layers.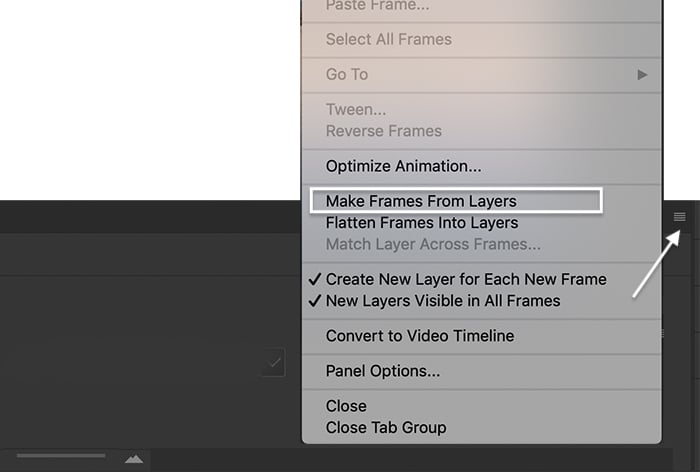
The layers appear as individual frames in the Timeline window. You should now see all the layers. Next, drag the frames to a different position to change the order.
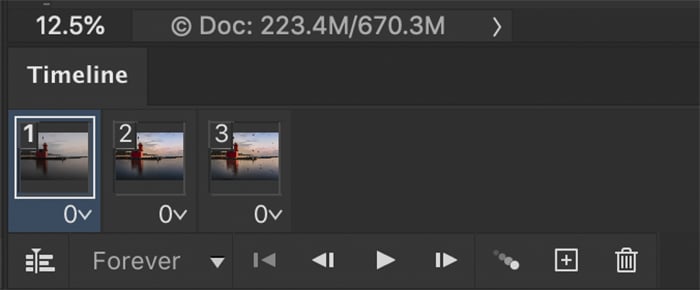
Each layer in the Timeline window with zero seconds.
Step 6: Set a Time for Each Frame
By default, the time will read zero seconds under each frame. Click the caret next to the time under each frame. You can change the time for individual frames or highlight and change all times at once.
Click the Play control to preview your GIF. Then try different time options.
If you have a lot of frames and want a smooth motion, choose short times. If you want a stop-start effect, select a longer time.
An excellent total time for a GIF is around six seconds, though the loop may be shorter. Many GIFs are just one gesture or motion lasting no more than a second.
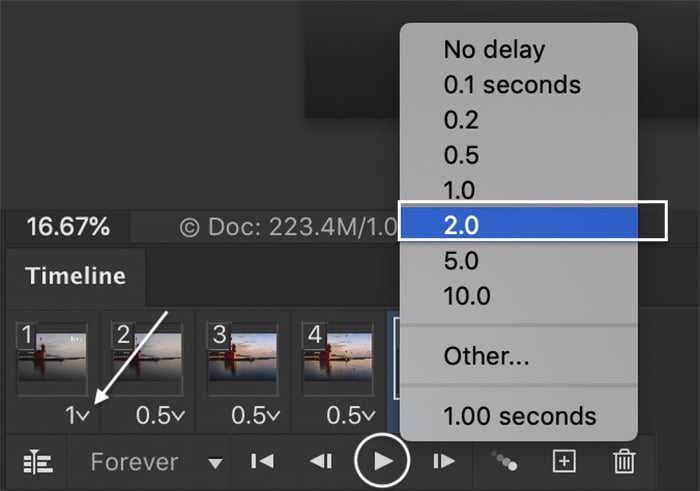
The caret next to the frame for changing the time. And the Play control to preview a GIF.
Step 7: Choose a Loop
By default, the GIF will play on a loop forever. To change this, open the Looping menu. You can play the GIF once, three times, or select another option.
Again, click the Play control to preview your GIF.

Open the loop menu to change how many times the GIF repeats. Click the play control to preview GIF.
Step 8: Save for the Web
Go to the File drop-down menu to save your animated GIF file for the web. Click File > Export > Save for Web (Legacy).
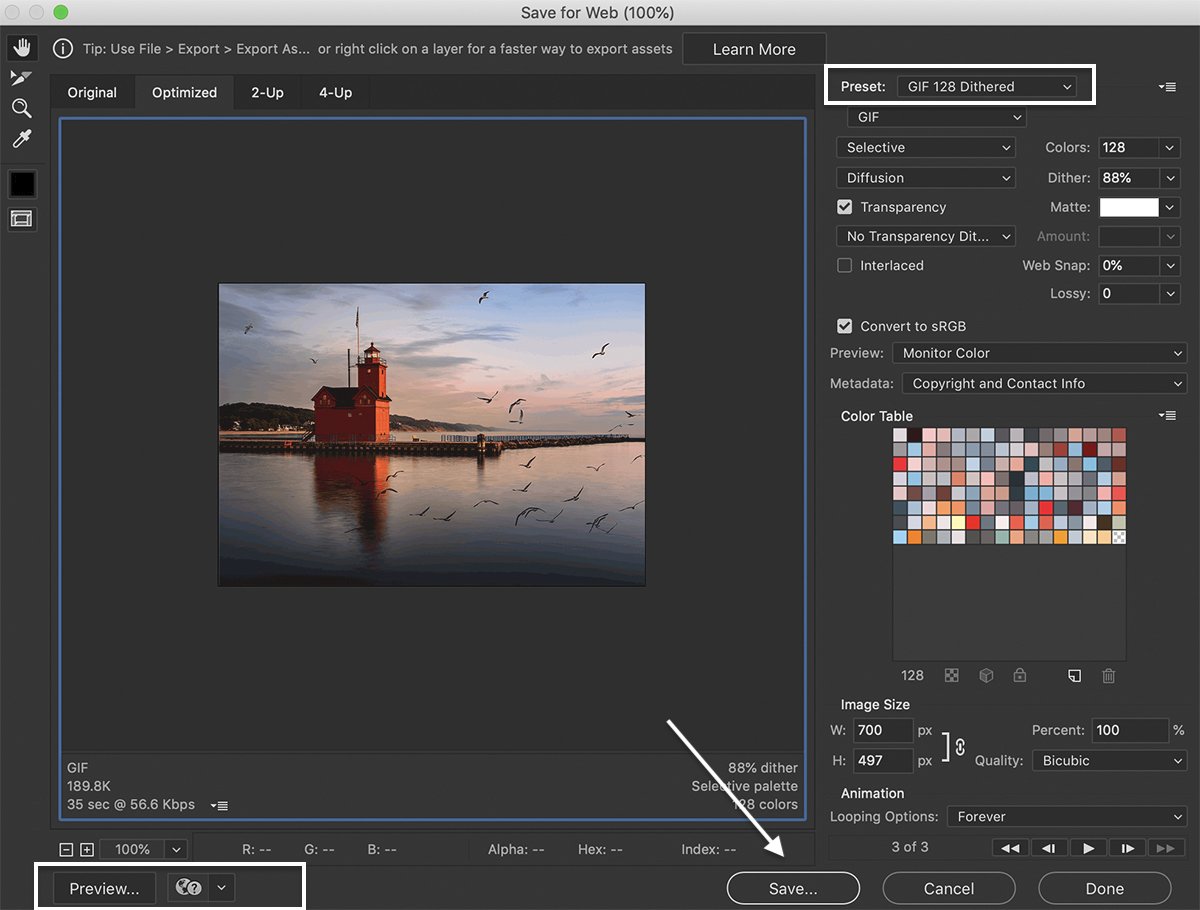
Choose a Preset, Save, and preview the GIF in a browser window.
In the Save for Web window, select the GIF 128 Dithered preset. This limits the number of colors in your image and makes the GIF faster to load. But it still preserves color gradients in your photo.
Clicking the Preview button will open your GIF in a browser window.
Click Save. Choose a location and click Save again.
Final GIF.
How to Make an Animated GIF From a Video
You can create an animated GIF in Photoshop by looping short video clips. You only need a second or two of video. The hardest part is deciding where to start and stop the loop.
Step 1: Open Video in Photoshop
You can either open the entire video in Photoshop. Or you can import select frames from the video.
Lightroom will import video clips. But you cannot send a video from Lightroom to Photoshop. Open the video directly in Photoshop by going to the File drop-down menu and selecting File > Open.
Navigate to the video file and click Open. The video will automatically open directly in the Timeline window.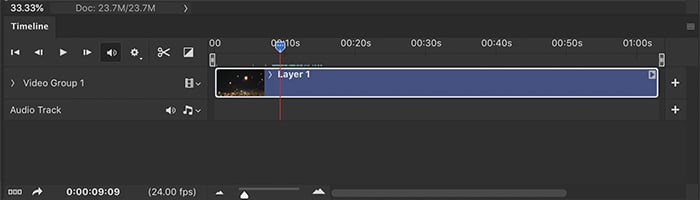
Instead, go to the File menu to import selected frames from a video. Choose File > Import > Video Frames to Layers. Then navigate to the video file and click Open.
In the Import Video to Layers window, move the beginning and end sliders at the bottom to choose the video section you want to import.
Most video files capture 30 frames per second (fps). But you do not need this many frames to create a GIF. So check the Limit To Every box and enter a number. Every four or five frames is good. Use the fewest number of frames to get the motion you want.
Check the box next to Make Frame Animation. And click OK. Each frame of the video then becomes a layer. Then follow the previous steps above to create a GIF from still images.
Otherwise, continue to Step 2 if you’re using a video.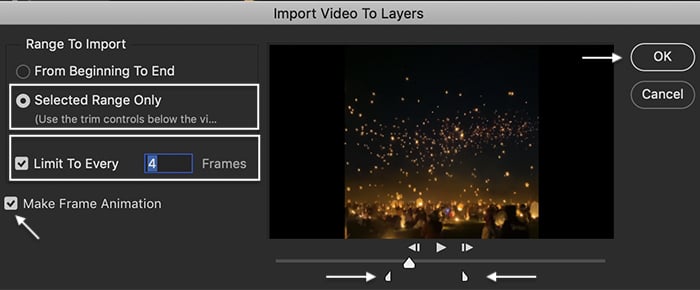
Step 2: Resize the Video for the Web
GIFs load faster when they are small video files. So resize your video for the web by going to the Image drop-down menu. Select Image > Image Size.
In the Image Size window, enter a size between 480 and 720 pixels on the long edge. (You can also change the size when you save your GIF for the web.)
Then click OK. You may get a warning that transforming a video layer requires converting it to a smart object layer. Click Convert.
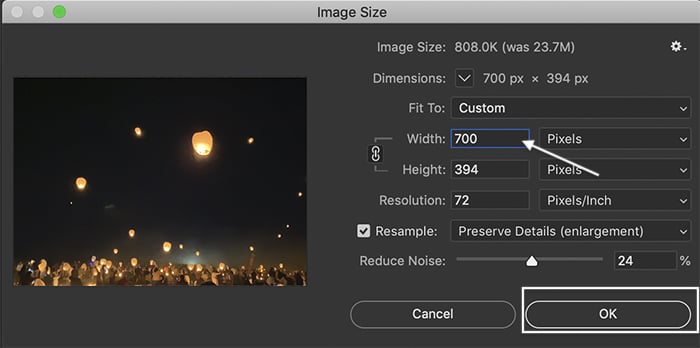
Selecting pixels and clicking OK.
Step 3: Select Frames for the GIF
Move the start and endpoints to bracket the video section you want to use as your GIF. Again, an excellent total time for a GIF is around six seconds, though the loop may be shorter.
Play the section on a loop a couple of times. When it loops back to the beginning, pay particular attention to how the video looks. Many GIFs abruptly restart. Slightly moving the start and end positions can minimize the jolt.
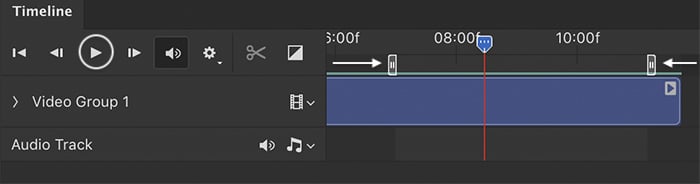
Setting the beginning and end position. And playing the section to test the loop.
Step 4: Save for the Web
Go to the File drop-down menu to save your animated GIF file for the web. Click File > Export > Save for Web (Legacy).
Clicking the Preview button will open your GIF in a browser window.
Click Save. Choose a location and click Save again. You now have a video loop!
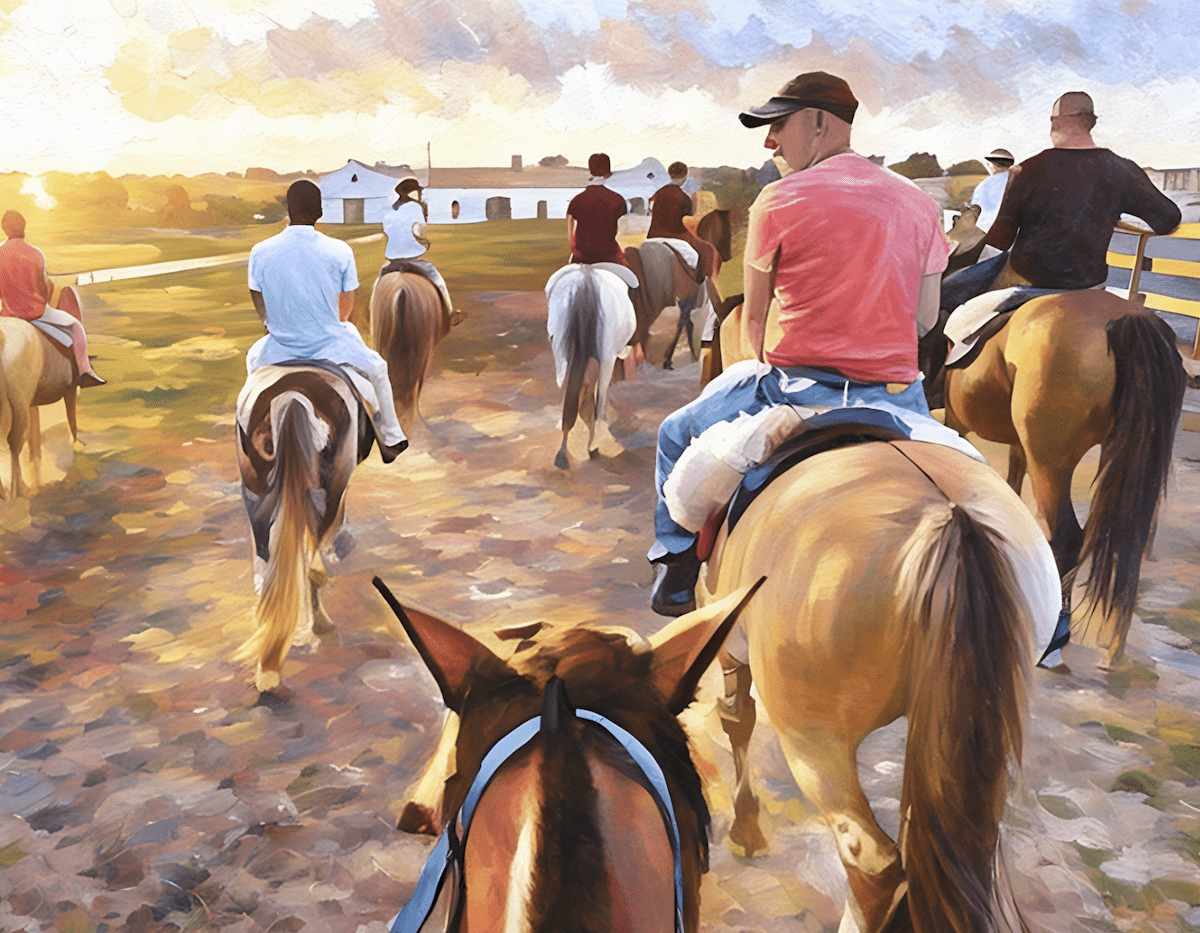
Final animated GIF from video loop.
Conclusion: How to Make A GIF in Photoshop
Animated GIFs are easy to make in Photoshop using a series of images or short video clips. Use the Create Frame Animation command in the Timeline window. Then export the GIF for the web.
Do not worry if your GIF is less than perfect. There is a tradition of animated GIFs having a handmade look to them. This is partly because the GIF format itself is limited. It has become an expected GIF look.
After you create your GIF in Photoshop, upload it to social media or your website. It should play seamlessly. You can add GIFs to an email. And they even play in Word documents!
We hope learning how to make a GIF in Photoshop has been easy. If you want to learn how to take stunning time-lapse movies, watch our Total Time-Lapse video course. You’ll learn how to effortlessly create them without a fancy camera or expensive training.