A focal point is the part of an image that your eye is instinctively drawn to. It could be a person in a portrait, a flower in a garden, or the sun setting over the horizon.
The key to good photography is to create images with a strong focal point. This draws the viewer’s eye into the picture and holds their attention. Here are our top tips for mastering focal point in photography.
[courses category="Composition"]
How to Use Focal Point in Photography Composition
There are a few things you’ll need to know to master focal points in your photos. Read on to learn everything you need to know.
Understanding the Role of Focal Point in Photography Composition
If you do a quick search, you will find the term “focus point” has more than one meaning. For the purposes of this article, I will focus on the one that refers to composition.
In this regard, focus points in art and photography are similar. It’s the part of an image that draws the eye of the viewer. It’s the center of attention in the image.
Choosing the right focus point is crucial. It has a big impact on how the viewer appreciates the image. It is what photographers use to tell the viewer, “Look here, this is what I want to show you!”
If you don’t choose the right focus point well, the viewer might get confused. They won’t get the message you want to convey.
There is a technical part related to the focus point. You need to know how to select a point with your camera and decide if you want to shoot in manual mode or autofocus mode.
Once you have the technical part clear, you will face the next big question. Of all the possible focus points in a scene, where should I place mine?
Using Depth of Field to Create Selective Focus
An effective way to set the focus point on your subject is using a narrow depth of field. You achieve this by focusing on the subject while the rest of the elements in the image are blurry.
This is based on the fact that the sharper part of the image attracts the viewer’s attention. You can get this effect by using a wide aperture. The wider the aperture (smaller f-number) you use, the stronger the effect will be.
You will need to readjust the shutter speed and/or the ISO to get the correct exposure. This technique works even better if your subject is farther away from the background. This creates a more pronounced contrast between the in-focus subject and the out-of-focus background.

The important thing here is to choose your subject well. It is easy to mislead the viewer to the wrong point of the scene. Before pressing the shutter release, it is worth stopping and thinking about where to place your focus point.
Focus Point Placement for Stronger Compositions
The position of your subject in the frame also plays a huge role in determining the focus point. To get stronger images, try to follow composition guidelines.
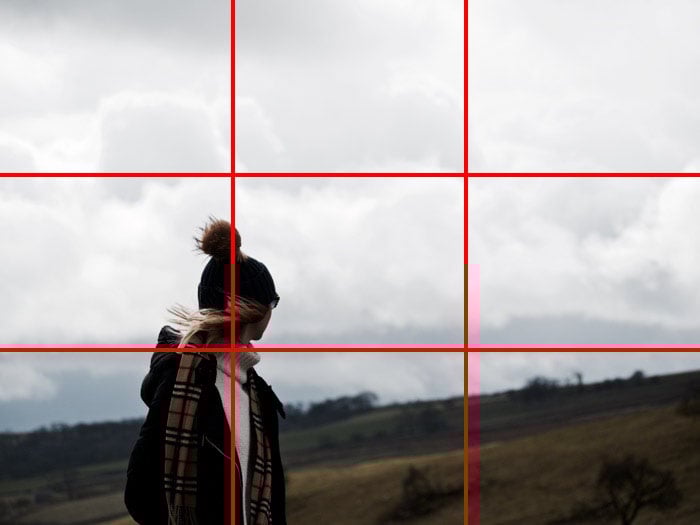
One can be the rule of thirds. When you use the rule of thirds, you don’t place the point of interest in the center of the frame. You place your subject on the four intersecting points of a 3 x 3 grid instead.
You can also use leading lines. Compose the image in a way that a line ends at the point of interest. The viewer will follow the line until it reaches the main subject of your image.
This requires a bit of observation of the environment and searching for lines. With time and practice, it gets easier. You can use the lines made by a street, a railway, or even a wall.
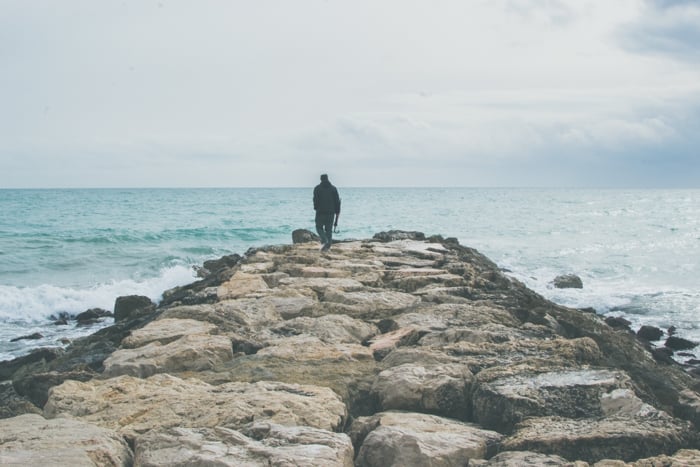
Sometimes the easiest way to draw attention to your subject is by simplifying the scene’s composition. Try to remove any distractions by creating negative space around the subject.
The most common way to capture negative space is by using an empty (or mostly empty) area. This area can be the sky, a wall, grass, or a water surface, among other things.
Your subject will look defined and will stand out!

Use Light Contrast to Highlight the Focus Point
Our eyes are drawn to bright things. Placing the focus point in the brighter zones ensures the viewer will see it as the most important part of the scene.
When taking the photo, look for areas with strong light contrast and place your subject there. This type of contrast is easier to find when the light is harsh.
In terms of natural light, this happens when the sun is high in the sky (late morning and midday). In terms of artificial light, this happens when you use a directed artificial light (such as a light post at night).
You can use strong light contrast to emphasize your focus point. It can also hide distracting elements by keeping them in the dark areas of the scene.
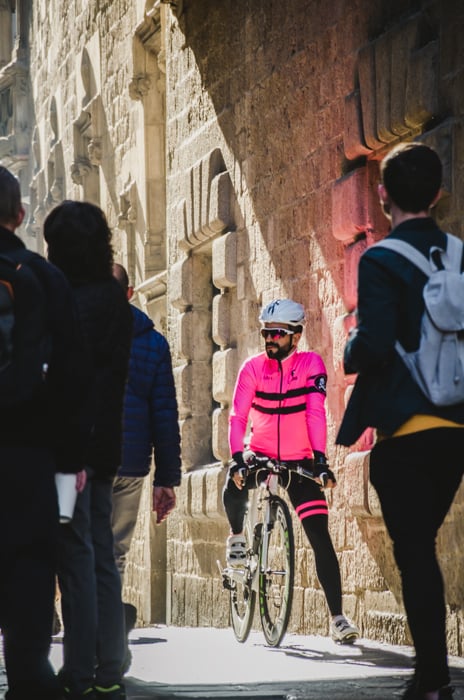
The light helps drive our attention to the biker instead of to the people around him.
Use Color Contrast to Emphasize Your Focal Point
Color plays a huge role, not just in setting the mood of an image but also in setting the focus point of the scene.
Color contrast might be a bit more subtle than light contrast. Don’t get frustrated if it doesn’t come easy.
With some practice, you will get used to searching for color combinations. It’s good to practice in an easier situation where the scene has just two colors. One acts as background and the other as your focus point.
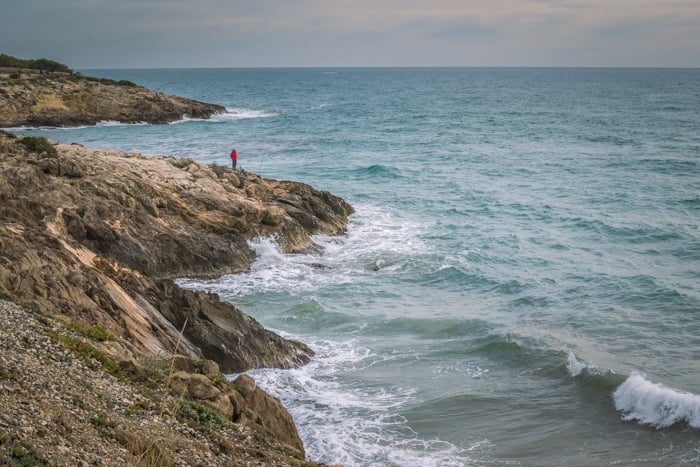
This man stands out thanks to the contrast of his red jacket with the blues and browns of the landscape.
An easy way to practice this at home is with fruits. Place a red apple in between a lot of yellow ones or a strawberry in between kiwis.
In these examples, the red fruits stand out against the background and act as a focus point.
Once you get used to 2 color combinations, you can experiment with more. A single warm color will be the focus point among cold colors and vice versa.
Choose Elements With High Visual Weight as Your Focus Point
Some elements in your image will have a heavier visual weight than others. It is important to keep this in mind when composing an image.
Points with a heavier visual weight attract the viewer’s attention much more than other elements in the scene. That’s why they make great focus points.
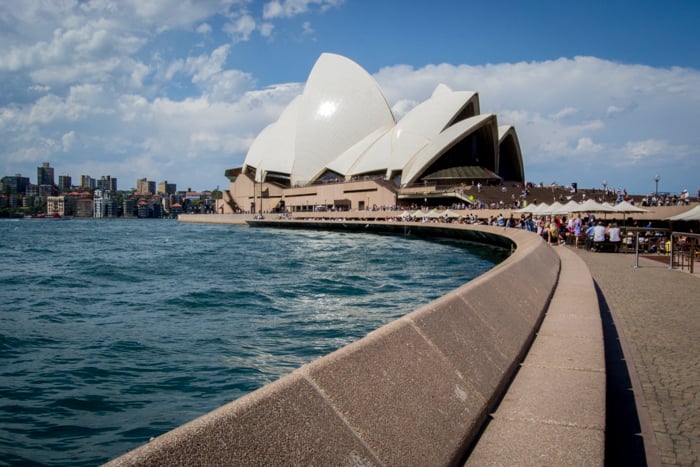
One of these elements is human figures. We tend to look first at a human rather than a tree, a house, or even an animal. Our eyes are also attracted by large elements or objects with text on them. Knowing this is useful both for using these elements as focal points and for avoiding them if they are not!

In this image, I wanted to highlight the harbor. So I framed the scene to make the ship look bigger than the opera building.
If you are taking a portrait, you might tell your model to wear clothes without writing. This will keep the clothes from becoming the focus point instead of the person.
Texture also adds visual weight. Smooth areas will be lighter than the ones with a lot of texture. Even orientation has a role in composition. Diagonal lines tend to have more visual weight than straight lines.
You can use diagonal lines to emphasize your subject. But remember that they can be distracting if they’re not the main subject. If you look at an image with a tilted horizon, you will see how this takes all your attention.
Set the Eyes as Your Focus Point for Stronger Portraits
Eyes are so expressive that we naturally look at them in every person we meet. And because eyes are such strong focus points, the same happens in a portrait.
Try to keep them as sharp as possible. The viewer can get frustrated looking at a portrait with out-of-focus eyes.
But there’s an exception when you want to emphasize other parts of the body. Then you have to make this other focus point really stand out. In this case, your photo may even benefit from cropping the eyes out of the image.

Focus on the eyes also when you take animal portraits.
When you have a group portrait, eyes don’t play such a crucial role. They are usually a small part of the frame. The most important thing when shooting group photos is making sure everybody is sharp.
If somebody appears blurry, the viewer will perceive them as less important. You don’t want anybody to get offended! Use narrow apertures, such as f/11, to keep everybody in focus.
Widen the Focus Area to Get Sharp Landscapes
Landscape photographers don’t use wide apertures to compose their images. That’s because wide apertures create a shallow depth of field, meaning only part of the photo is in focus. They use narrow apertures because they want the whole scene sharp.
They use small apertures (larger f-numbers) and what is called hyperfocal distance. This distance establishes the specific point to place the focus to get the greatest depth of field.
There is a formula to calculate it every time you want to shoot. Luckily we don’t need to do any math anymore or check complicated charts. There are online resources and apps that do the work for us, such as DOFMaster.
Using the hyperfocal distance as your focus point creates images with a sharp foreground and background. This distance depends on many factors, such as the focal length, the aperture, and even your camera sensor size.
Compose a Strong Image With Multiple Focal Points by Establishing a Hierarchy
What if you have more than one focus point in a scene? There are a lot of cases where you will find more than one interesting subject in your image.
This is quite common in street photography when you have a lot of elements in a frame. It is possible to compose a strong image with multiple focus points. In this case, you need to define your main focus point and establish a hierarchy of interesting elements.
Use one of the techniques in this article—light contrast, color, or position in the frame—to give more visual weight to the main point than to the others.
This will be the main point that attracts the viewer’s eye first. The other focus points will guide your viewer through the rest of the image.
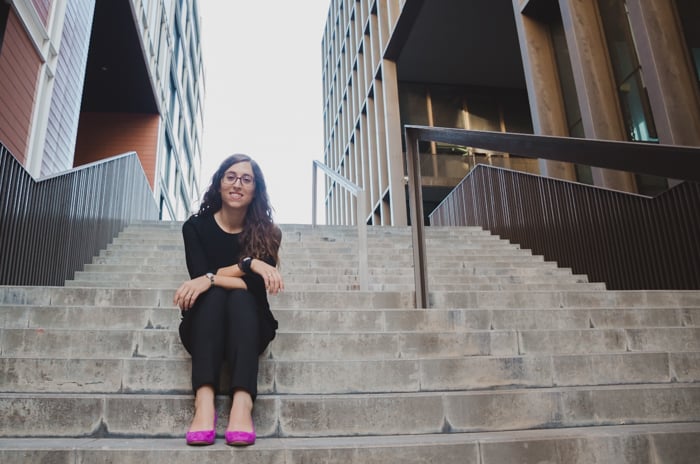
The first thing we see in this image is the model and then her pink shoes.
Conclusion—How to Choose the Right Focal Point in Photography
Selecting the right focus point to enhance the composition of the image will strengthen the message you want to convey. How well you do this will affect any and every shot you take.
At first, it might take you some time to consider the position of the focus point in the frame, the light or color contrast, or the visual weight. After some practice, you will get used to these principles, and you will improve the quality of your work.
[courses category="Composition"]


