When it comes to choosing between soft light and hard light photography, the decision can be a little daunting. But don’t worry, we’re here to help. In this post, we’ll explore the differences between hard and soft light, and show you how to choose the right type of light for your photography needs.
What is Hard Light Photography?
When looking at hard light and soft light, the shadows are key. Hard light has an abrupt transition between the light and the shadows.
There's an easily discernible line between the brightest portions of the image and the shadows.
Hard light is high contrast lighting. There's often bright highlights and dark shadows in the same image.
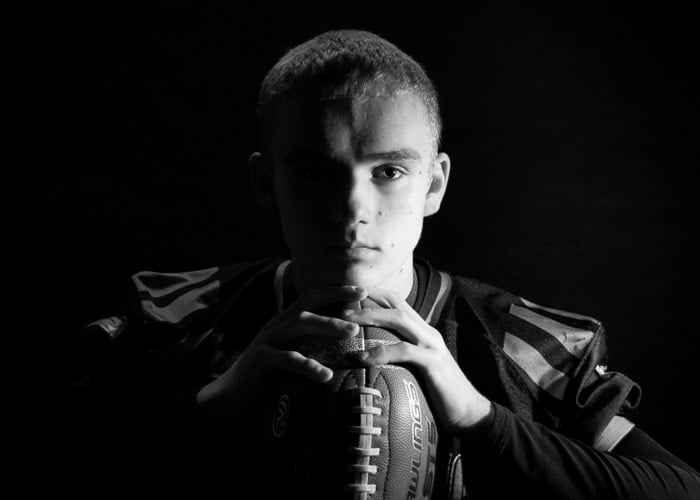
This type of light is known for being edgy and dramatic. Hard light is often used for portraits of men and athletes, but not exclusively.
You can use it for portraits of women too when the desired result is drama and contrast.
In street photography and landscape, hard light creates a contrast that stands out. It often works well in black and white.
Of course, hard light has its downfalls too. The abrupt transition between light and dark tends to highlight skin imperfections in portraits.
It exaggerates skin texture, wrinkles and any acne. While soft light is more universally flattering, hard light is not.
Hard light also tends to create hot spots, or small highlights that are overexposed. In a portrait, a hot spot can look like white or shiny skin.
With hard light, the placement of the lights is essential. Otherwise you may create raccoon eyes or obliterate essential details in the shadows.
What Is Soft Light?
Soft light is the opposite of hard light. With soft light, the transition from dark to light is gradual.
Instead of an easily identifiable line where the shadows start, there's a gradual gradient where the light areas transition to the shadows. It’s less abrupt and often universally flattering.
Photographs with soft light can still have contrast. There are still both light and shadows, it's the space between them that's different from hard light.
With a less abrupt transition between the highlights and the shadows, images with soft light are less dramatic.
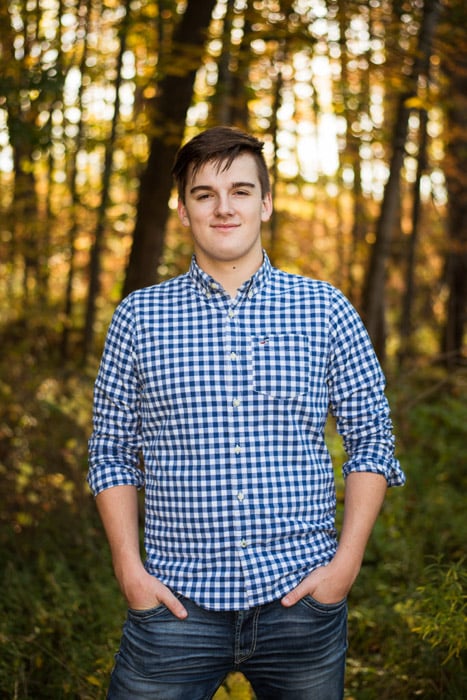
That doesn't make them any less beautiful. Think of those golden hour portraits you've undoubtedly seen. That's soft light.
Hard light will exaggerate wrinkles and skin imperfections by filling them with shadows. Soft light tends to be more forgiving, leaving less retouching work.
Soft light is easier to create flattering images with. However, soft light doesn't have the drama that hard light creates.
What Makes Light Hard or Soft?
Now that you know what hard and soft light looks like, what makes a light source hard or soft?
The size of the light source, the distance between the light and the subject, and the intensity of the light help determine whether light is hard or soft.
The smaller the light source, the harder the light source. The larger the light source, the softer the light.
A flash is a small light source. Used without any modifiers, flash creates hard light with harsh shadows.
Put a flash behind a white diffusion umbrella, however, and the light is instantly softer. That umbrella acts both as a diffuser to soften the light intensity and increases the size of the light. It spreads out the light, creating softness.
The closer the light source, the softer the light. The farther the light source, the harder the light.
The closer the light source is to the subject, the more gradual those transitions will be.
If an off-camera flash is too hard, moving the flash closer to the subject is a simple adjustment.
The more intense the light source, the harder the light.
Adjusting the intensity of the light can affect the quality of your light too.
To create hard light, use a flash with high power. To create soft light, turn down flash power to a much lower setting.
Using a mix of size, distance, and intensity, photographers can create the type of light that works best for their shot.
How to Create (or Find) Hard Light
An unmodified on-camera flash typically creates hard light. This means it's not too complicated to create hard light.
Controlling that hard light to get the right look, however, is challenging.
On-camera flash creates a paparazzi-like look. The look is sometimes favored for a specific high-fashion look. Leave the flash unmodified for hard light.
TTL mode is often overly bright and creates hard light as is. But manual mode is there for even more control of the light output.
Moving the flash off-camera, it's possible to mix lighting patterns with hard light.
Split lighting, for example, is a type of light that lights only half the face. The pattern often works well with hard light. You can create it by placing the light 90 degrees to one side.
Like on-camera flash, leave the light unmodified. Or use a grid for a more narrow light source.
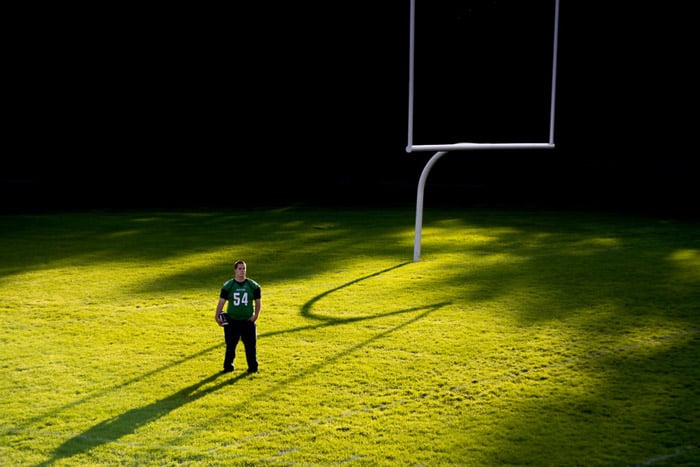
Finding hard light is as easy as going outside on a sunny day (excluding just after sunrise and just before sunset). The sun may be a large light source. But it's so far away that the sun actually creates hard light.
The tricky part? Getting the hard light to fall just right. Avoiding noon, careful subject placement and reflectors can help create artistic hard light.
Window light can also be hard if the sun is positioned directly outside the window.
Ultimately, you may need a flash or strobe to perfectly control hard light. But you can easily find hard light to work with outdoors.
How to Create (or Find) Soft Light
Soft light requires more modifiers than hard light. Remember, larger light sources are softer light sources. This makes diffusers that also increase the surface area of the light a great way to create soft light.
Using an umbrella or softbox over an off-camera flash or studio strobe will increase the surface area of that small light. This will create a softer light source.
While trickier, you can also soften an on-camera flash. It's too difficult to shoot with a two foot umbrella on top of your camera. So look for a diffuser that will increase the surface area of the flash without being too bulky.
Small flash softboxes are inexpensive. But options like the MagMod diffuser are easier to adjust using a magnet attachment system.
Another way to soften an on-camera flash? Bounce it. If you bounce a flash off a white wall or ceiling, that light spreads over a much larger surface area, creating a soft light.
When working with soft light, you'll likely need to use a lower power setting on the flash as well. Go a bit higher for bounced flash.
While a sunny day creates hard light, clouds act as a natural diffuser. An overcast day creates soft light anywhere outdoors. Or you can also shoot in full shade on a sunny day for softer light.
Waiting until about an hour before sunset (or the first hour or two after sunrise) also offers softer light than the sun at full noon.
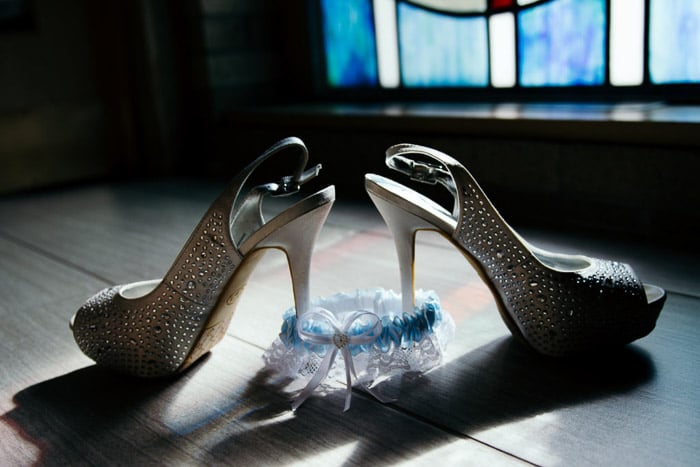
Window light is also soft light, as long as the sun isn't directly out the window. For example, if the sun is currently in the east, north, south and west facing windows will offer soft light.
Photographers can also soften window light using sheer white curtains or fabric.
What’s Better, Hard Light or Soft Light?
Hard light and soft light are both very different. There's no right or wrong answer as to which type of light is best for any particular shot.
Certain subjects tend to favor one type over the other. But using one type or the other exclusively is creatively limiting.
Instead, photographers should understand what effect each light has on the image. Use that information to turn the vision in your head into reality.
Hard light is more dramatic and also tends to have more contrast (though soft light can create contrast too). It is often tougher to work with. But when placed just right can create some amazing images.
Portrait photographers tend to use hard light more often on men. But this lighting style can also add drama to couples portraits and strength to a woman's portrait.
Soft light is more universally flattering and easier to work with. Because wrinkles and skin imperfections aren't filled in with shadows, this type of light tends to work well on many types of portraits.
Contrast is more difficult to create with soft light, though not impossible. Soft light only refers to the gradual transition between light and dark. There can still be dark areas.
Hard light and soft light work in conjunction with lighting patterns, or the placement of the light. Used together, you can create powerful images by harnessing the different types of light.


