Portrait photographers have come up with many different light settings. They use light and shadow on a model’s face to achieve certain looks and moods.
In this article, we are going to show you a basic lightning setup that adds drama to any portrait. This is called split lighting.
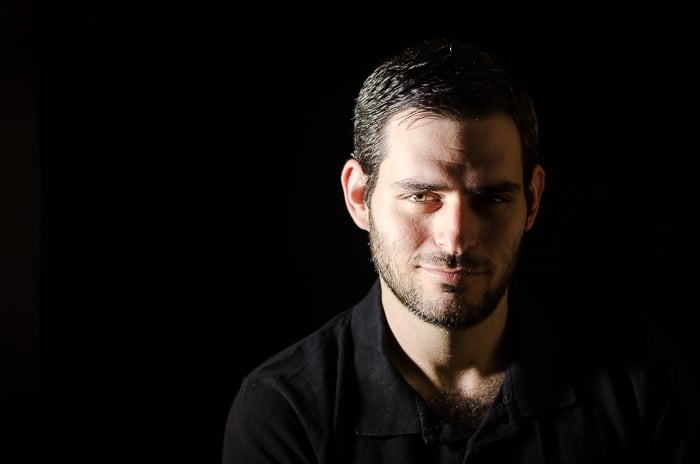
What Is Split Lighting?
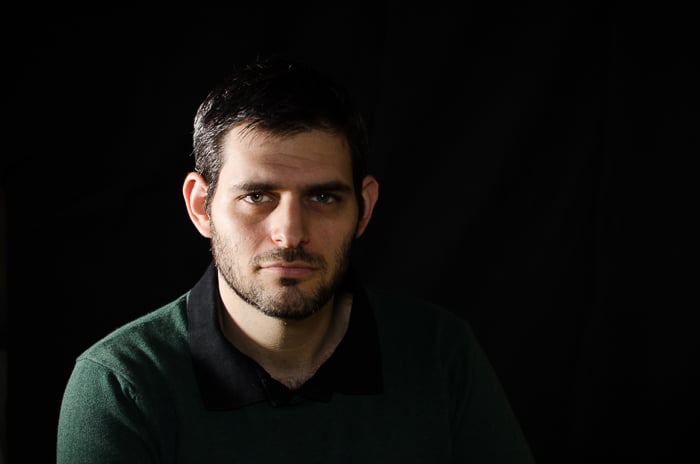
Split lighting is a photography lighting technique. The light source that illuminates the subject is perpendicular to the model.
This setup lights up half of the face while keeping the other half shadowed. You "split" the lighting on your subject's face.
The strong side lighting emphasizes the texture of the skin and the details of the face. The contrast and texture in split lighting portraits often make them very intense. It gives photos a sense of power, assertiveness or conviction.
You can also use split lighting to emphasize glamour.
How to Create Split Lighting?
Split lighting is a classic portrait lighting pattern. It is also quite easy to achieve.
Place your light to the side of your subject so that it shines directly at his/her face. You want the light to be at a 90-degree angle to the direction your camera is facing. This can be either to the left or to the right of your model.
If you can, it is better if the light source is slightly behind the model’s head.
Check how the light falls on the face. Move the light or your model until you manage to have exactly half face in the light and half in the shadows.
Use a Natural Light Source for a Softer Effect
You can start practicing this split lighting scheme without investing anything in extra gear. You can use natural light. It is especially easy indoors because you can place your subject with a window next to his or her side.
To make the effect more dramatic, turn off any other light you might have. The window will be the only light source.
You can also achieve split lighting in photography outdoors, using the sun as a light source. Split lighting is easier when the sun is close to the horizon, during sunrise or sunset for example.
This might be a bit challenging and you will need to move your subject until you find the perfect position.
Use an Artificial Light Source for Full Control
You can use any light you have at hand, such as lamps or flashlights. But you should keep in mind that they might add an unwanted color cast to your image.
They are also not always the easiest to move around. Especially if you need to have them plugged somewhere.
To have more flexibility and avoid color casts, you can get some lighting gear. I recommend you to start with an LED light with a stand.
They are quite affordable, small and they operate on batteries. You can move them around easily to place them in the right spot to get the split light in your model´s face.
Capture Catchlights for a Lively Portrait
Catchlights are the reflection of the light source in the subject's eye. They are usually small glints at the top of your model's eyes.
It’s a small detail in the photo. But it gives the subject a vital and lively look. Without it, the eyes might look dull. The catchlight's shape, size, and location in the eye depend on the light source, its characteristics, and its proximity.
Before taking your photo, check that there are catchlights at least in the eye closer to the light source. If not, move the light source forward and back until you get this nice eye reflection.
If the shadowed face side is not too dark, you can even see the catchlight in the other eye too.
Vary the Light Intensity for Different Portrait Moods
You can add diversity to your photos with some variations of this lighting photography scheme. First of all, you can play with the light intensity.
Placing the light source closer to your model will make it more intense (harder). This will emphasize textures. The contrast is also high because the shadowed part of the face will be much darker than the lit part that is next to it.
Because of this lighting for photography, the portrait will be more powerful and dramatic.
If you prefer a softer effect, you can decrease the light intensity. Place it farther away from your model or use a softbox to diffuse the light.
Use Color for More Creative Portraits
The light’s temperature is also a factor that contributes to the mood of the portrait. You can try working with a white light to get a neutral effect.
You can also warm your split lightning portrait using a yellow-orange light. Or you can be even more creative and use colorful effects like red or magenta.
You can either use a semitransparent color paper to cover your light source or invest in some filters.

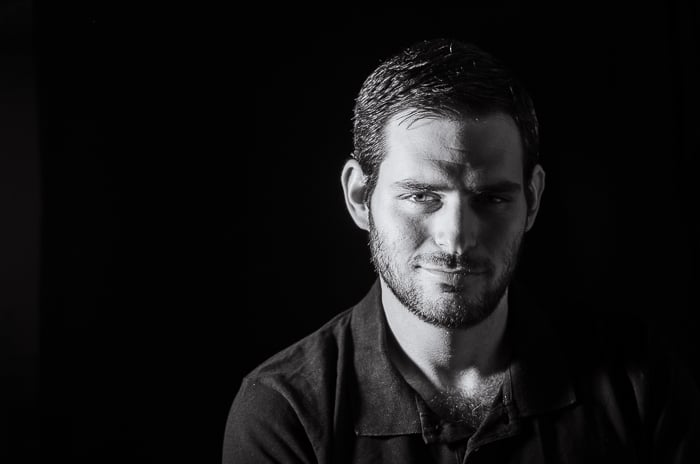
Convert Your Portrait to B&W to Add More Drama
The simplicity of B&W images helps to add even more drama to split lightning portraits. It is easy to convert your color images into B&W using Lightroom.
First, do all the basic adjustments you need in the Basic panel of the Develop module. These include adjusting the exposure, contrast, clarity or changing the Tone curve.
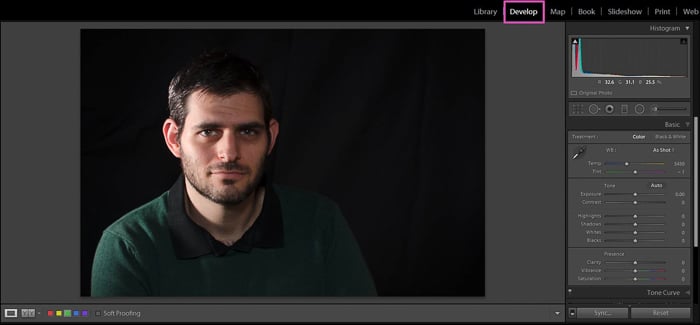
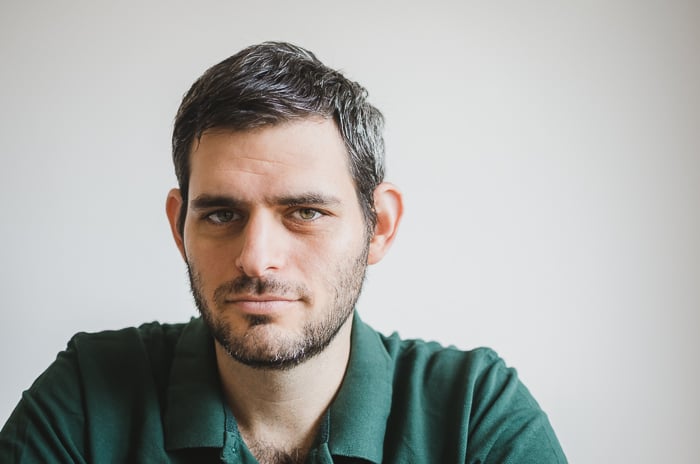
This is the original photo straight from the camera
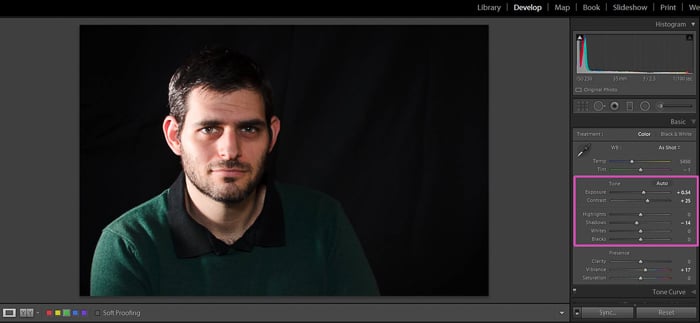
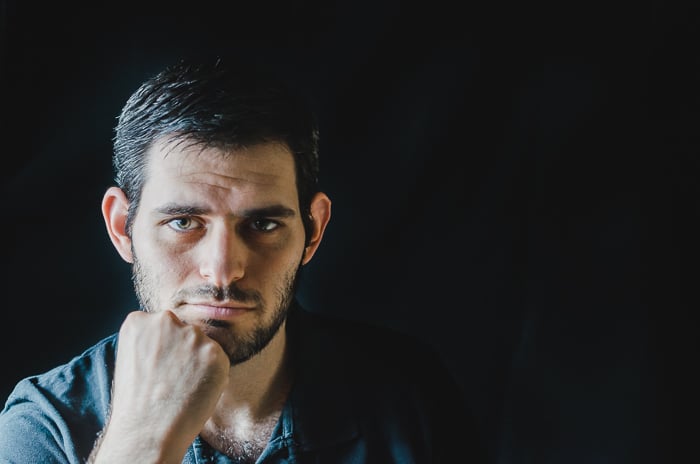
In this case, I increased the exposure and the contrast and I decreased the shadows.
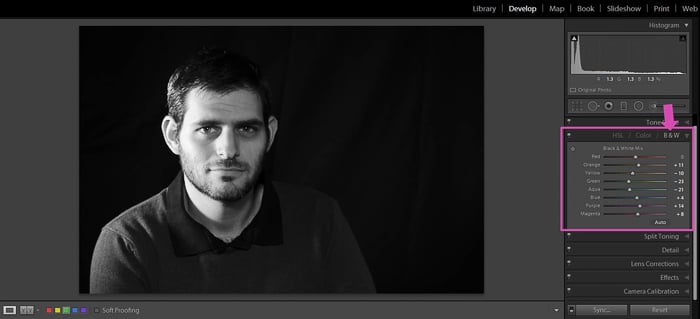
Once you have done so, click on the Black and White option in the Basic panel of the Develop module.
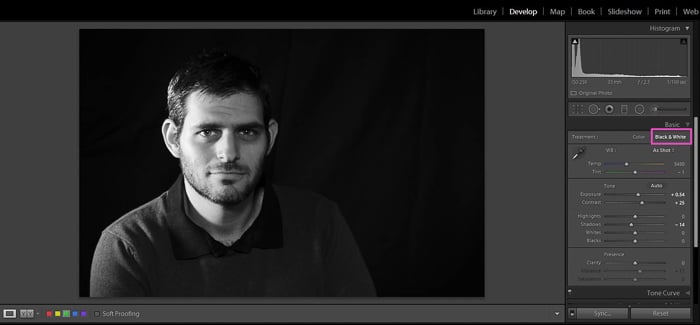 Finally, in the HSL/Color/B&W panel, chose the B&W option. There you can darken or lighten any of the original colors in your image.
These adjustments have a big impact on the final photo. Take your time with them.
Conclusion
Split lighting is one of the basic settings you can apply to your portraits. It’s perfect to start experimenting with pohtography lighting.
You don’t need much for a split lighting setup, just a willing model, your camera and a light source, that can be both natural and artificial.
Place your model so they are perpendicular to the light source. Make sure that the face is split between half light and half shadow.
This split lighting scheme is great to add some drama to your portraits. Remember that it won’t fit everybody or in all occasions.
Now you’ve mastered the split lighting technique, we have great posts on how to use butterfly lighting, Rembrandt lighting on a key light next!


