A catchlight is one of the most important elements of a good portrait. It's the little sparkle in your subject's eyes that makes them look alive and vibrant. Without it, your portraits will look dull and lifeless. Here’s how you use a catchlight in photography.
Catchlight in Photography: What is It?
Once you delve into portrait photography, you'll encounter the term catchlight a lot. That's why it's essential to know what it is and what you can do with it.
In simple terms, a catchlight is a light reflection in the eyes of your subject. That means you'll find it in your photos no matter what.
More experienced photographers know how to use catchlights strategically to light up their subject's eyes.
In the next sections, we'll teach you how to manipulate your catchlights to make your model's eyes sparkle. Don't worry, it doesn't take a lot of technical know-how to do effectively.
Light Sources for Catchlights

There are two main types of lighting you can use to produce catchlight. The most common one is natural light which comes mostly from the sun.
Then there's artificial light which comes from all sorts of electric light sources.
Natural lighting is perfect for beginners since it doesn't need an on and off switch. All you have to do is shoot in the daytime and you got yourself a catchlight thanks to the sun.
The only issue is that the sun moves throughout the day. Since it's not static, you'll have to chase the light while your taking photos.
Next, we have artificial lighting. It has many variations from regular light bulbs to professional flash strobes.
The technical skills required to use artificial lights depend on which type you choose.
As a beginner, you can start with regular light bulbs since they produce a steady stream of light much like the sun.
But as you get better, you can also experiment with strobes to help you improve the quality of your catchlights.
Capturing Catchlights Outdoors
When you're outdoors, your main source of light is going to be the sun. As mentioned before, this is the easiest method you can use for creating a catchlight.
When shooting outside, the secret is to figure out where to position your subject to get the catchlight you want.
Have your model face the sun so it reflects in their eyes. But you can also have them turn away from the light source as long as there's a reflective surface (such as windows or mirrors) in front of them.
To create the best catchlight, you need to look for elements that would create a "frame" within the eyes. It could be anything from buildings to mountains on the horizon.
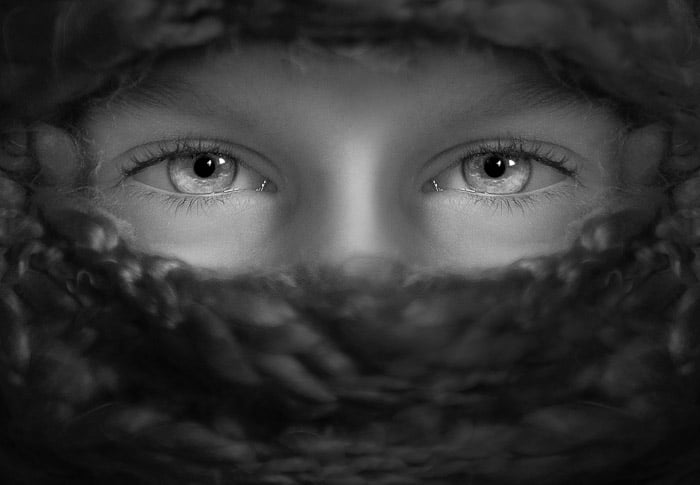
You can even use the clouds to diffuse the sun and create soft orbs around the eyes.
In most cases, it's best to shoot during the golden hour when the sun is low on the horizon. That way, you can capture the silhouettes in the eyes of your subject as well.
Of course, you can still photograph catchlight photography even when it's not sunrise or sunset. As long as you find structures you can use as a frame, you'll end up with beautiful results.
Creating Catchlight Photography Indoors With Natural Light
If the sun outside looks too harsh for photos, you can always try shooting indoors. Thankfully, you can still get beautiful catchlights by using windows or small openings that let light in.
The reason why windows create stunning lighting is that they diffuse the light from the sun. As a result, you don't have to worry about your subject squinting while you’re taking pictures.
Windows also control the light spilling into the room. It creates small specks of light in the eyes that look good in pictures.
When shooting indoors, try positioning your model about 45 degrees from the window. You also need to ensure that your catchlight appears in either 10 or 2 o' clock position in the eyes.
Why? Because these are the areas where the light looks the most natural and the most appealing.
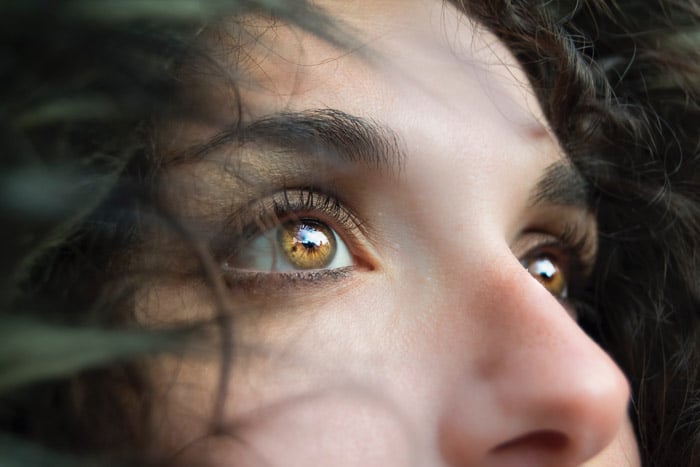
But you can also ask your subject to face the windows directly. You may not see the catchlight as prominently as compared to the 45-degree position. But doing so will light up the irides and reveal the beautiful patterns in the eyes.
Creating Catchlights Indoors With Artificial Light
Shooting with artificial lights can be intimidating for most photographers. But once you become familiar with them you'll realize that they're easier to use than natural light.
The reason is that you have more control over artificial lights than natural light. You can make it brighter or darker with a flick of a switch or a turn of a knob.
In this section, we will show you how to use different types of light sources as catchlights.
Household Lamps
To create a catchlight with artificial light, you can start with regular light bulbs first. You can try using a lamp and place it about 45 degrees from your subject.
Position the lamp close to your model if you want to create a big catchlight. Or place it far away if you want the specular highlight to look small.
Continuous Lighting
Shooting with household lamps may be easy, but they're not meant for photography. When you work with these types of lights, you'll see that they flicker and create inconsistent exposures.
To avoid this issue, you'll need to invest in continuous lighting. It's any type of lighting (whether light bulbs or LEDs) designed for photography.
It works just like household lamps, but they don’t flicker and ruin your exposure (hence the term continuous).
Off-Camera Flash
Once you have enough practice with the lamps, you can start trying off-camera flashes. The concept with these devices remains the same.
The only challenge with off-camera flash is that you don't see any light until you trigger it. So you'll need to imagine where the beam will hit your subject.
And you may have to take test shots and readjust is position until you get the angle right.
Off-camera flash may seem too technical at first, but it's not that difficult to learn. All you have to do is attach your transmitter on your camera's hot shoe. Then attach the receiver to your flash unit.
Once you turn everything on, the strobe should fire whenever you press the button.
You have plenty of modes to choose from when it comes to off-camera flash. But when starting, you can set your camera to TTL (Through The Lens).
This setting lets your device choose the exposure so you don’t have to worry about making adjustments.
Shooting Tips for Capturing Catchlights
In most cases, you don't need to use any special settings for taking pictures of eyes. But there are a few tips you can apply to make sure your catchlights look perfect.
Wear a Dark Shirt
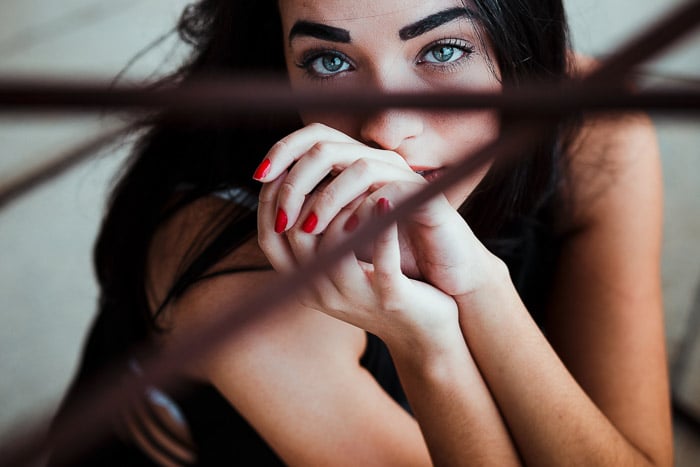
This tip may not be related to taking pictures at all, but it's crucial, nonetheless. Remember that when you wear bright outfits, you'll end up as a reflection in the eyes as well.
If you're shooting portraits, try to wear black, instead.
Focus on the Eyes
This may seem obvious, but a common problem among beginners is failing to ensure their subject's eyes are sharp.
It's essential to make sure the eyes are in focus because that's where people looking at your photos gravitate first.
If the eyes don't look sharp, your photos will fail to grab people's attention because they couldn't connect with your subject.
Whenever you're shooting portraits, make sure your focus point is on at least one of your model's eyes.
Use a Wide Aperture
To help emphasize the eyes, try setting your aperture around f/1.8 or f/1.4. Doing so creates a shallow depth of field.
In other words, it blurs out the background so much that it would make the eyes look sharper and more prominent.
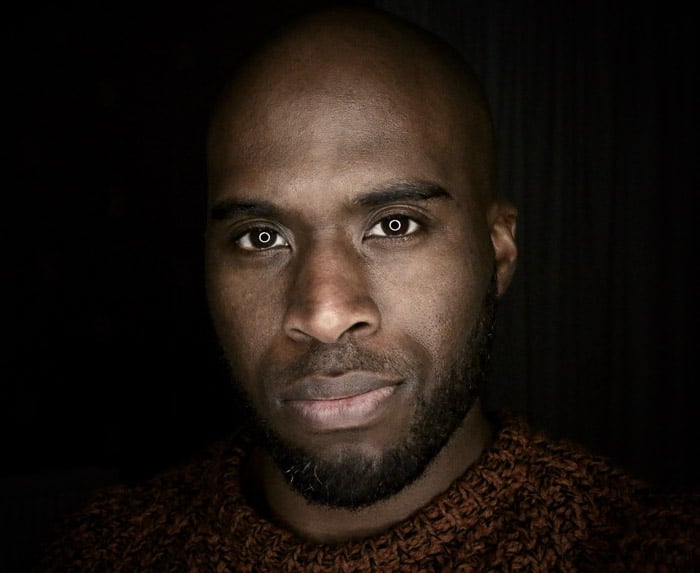
Choose a Circular Catchlight
Catchlights come in different shapes and sizes depending on the light source. Sometimes they're square as is the case when using windows or softboxes.
Other times they look round when you're shooting with ring lights, octoboxes, or sunlight.
Any shape works as a catchlight. But if you want specular highlights that look natural, try to stick to circular light sources. Since they're round, they complement the shape of the iris really well.
Edit to Bring Out the Catchlights

It's okay to have several catchlights in your photos. But to make your portraits look natural, consider editing out other specular highlights until you only have one or two per eye.
You can remove catchlights by using simple tools from your favorite editing suite. The easiest one to use is the healing tool.
All you have to do is select the specular highlight you want to remove and the editing program removes it for you.
Another tool you can use is the patch tool. First, drag it around the catchlight you want to remove to create a marquee. Once you have your selection, drag it once more to the area you want to copy.
Once you let go, your photo editor will replace the specular highlight with the spot you selected.
For difficult areas, you can also try using the clone tool. Simply press Alt to select a clean area in the iris and start painting out the specular highlight.
Conclusion:
You can find catchlight anywhere whenever you're taking photos. Just pay attention to the surroundings and always look at the reflections in your subject's eyes.
To keep it simple, always orient your subject and your camera adjacent to the light source. That way you don't waste your time finding the proper angles.


