One of the challenges of product photography is taking pictures of reflective surfaces. We have a tried-and-tested way to photograph shiny glass and metal that need only bounce cards. Let’s find out how to use them to get professional-quality shots.
The Law of Reflection on a Reflective Surface
Before you start photographing shiny objects, you must understand the law of reflection. This concept states that the angle of reflection is equal to the angle of incidence.
Okay. So what does this all mean?
Incident light is the beam coming from the light source. Once that ray bounces off a surface such as glass or metal, it becomes a reflected light.
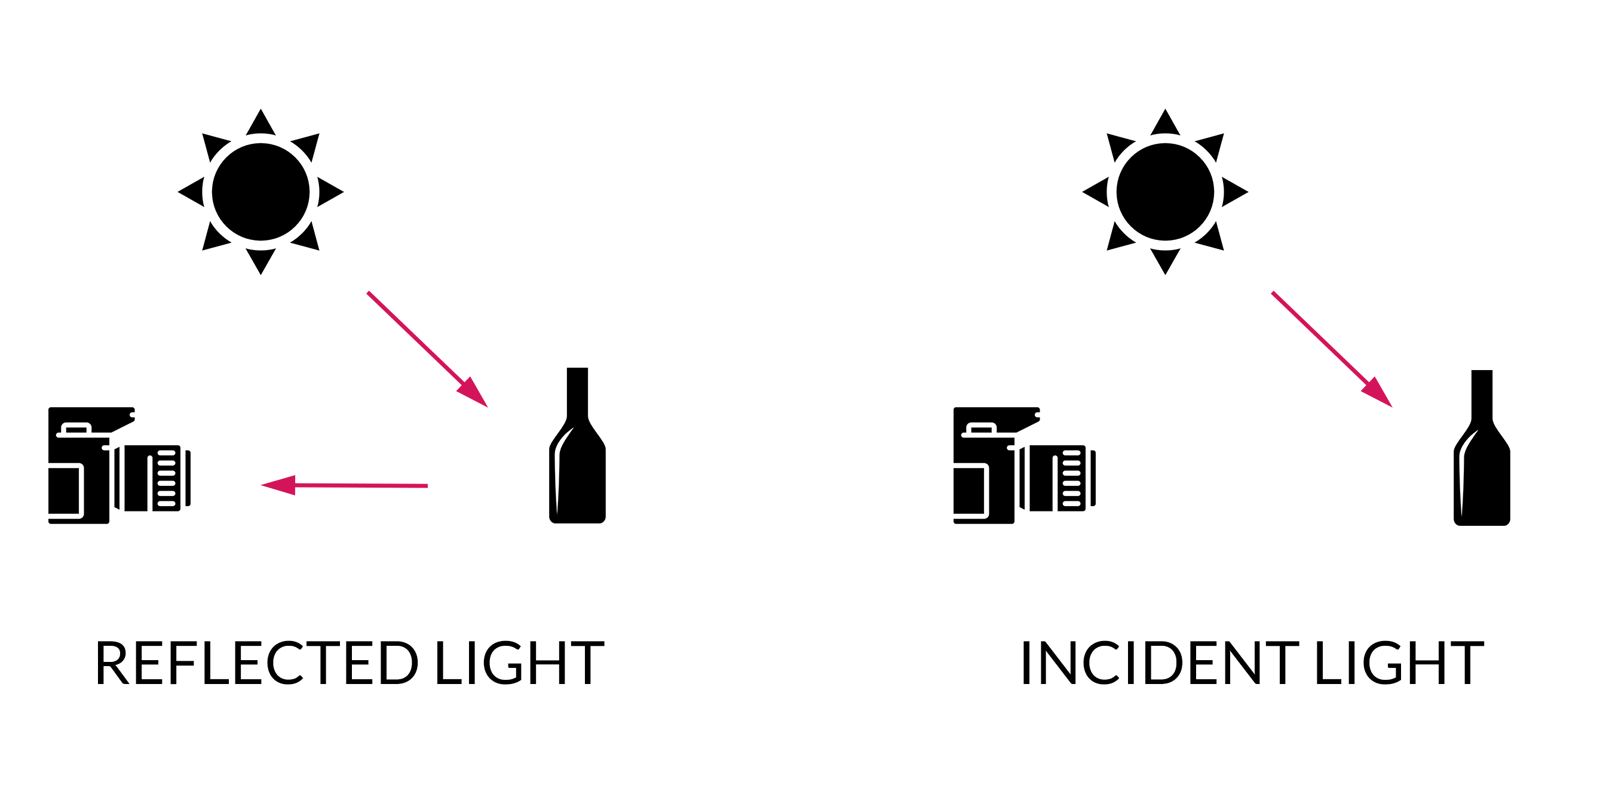
With this concept in mind, we can say that both the light source and the camera cannot be on the same plane. Why? Because the rays from the light source will hit the camera lens and cause glare.
To avoid reflections, place the light source beside or behind the subject. Then light the object using bounce cards.
You can think of bounce cards as mirrors that ‘bounce’ light on to the subject. Although they sound technical, they are simple white or silver pieces of cardboard.
You can use bounce cards to direct light rays to certain areas of an object. They help you control the light to prevent bad reflections in product photography.
Now let’s test what we have learned with a few reflective objects.
How to Photograph Shiny Metal
Taking photos of shiny metal is like photographing mirrors. It reflects everything around it, including you and your camera.
We will use a cheese grater as a great example for reflective photography. It has plenty of reflective surfaces, which makes it challenging to shoot.
If you take a photo of the cheese grater without planning your shot, you will end up with the image below.
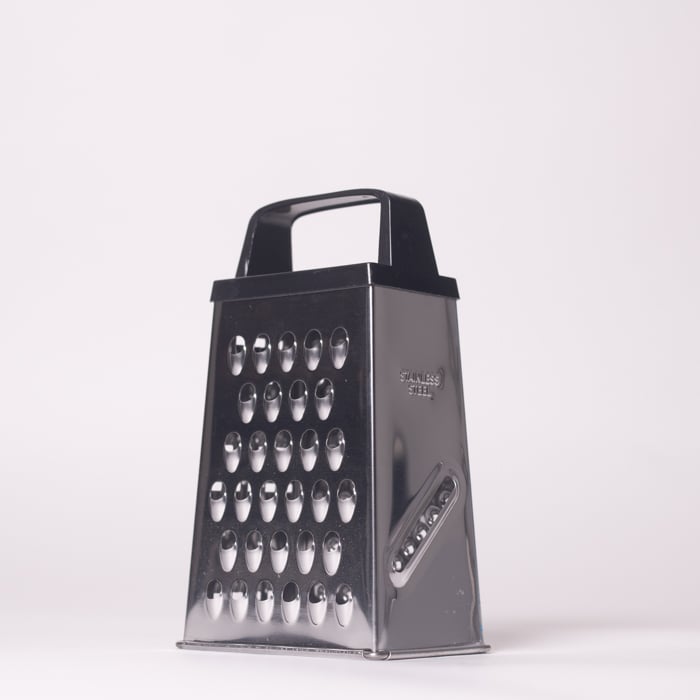
Photograph of a cheese grater with no planning
In this instance, the bottom of the object reflects the white surface of the table. Meanwhile, the top part is dark because it’s reflecting the room which does not have any light.
So how do you make the cheese grater’s reflective surfaces look silver and shiny?
Now you might be thinking that direct light on the subject will solve the issue. But as we mentioned, doing so will only create glares and unappealing reflections.
For this project, we are using softboxes because we can control the light. But in theory, you can use natural light as well. Yet, since sunlight changes intensity often, you might end up with inconsistent results. You should always reach for soft and even diffused light conditions.
No matter which light source you use, you must illuminate your subject without its direct contact. And that is where bounce cards come in.
Since the cheese grater’s surface is silver, I placed a silver bounce card on the left side and another to the right. As a result, I eliminated the dark spots on the metal.
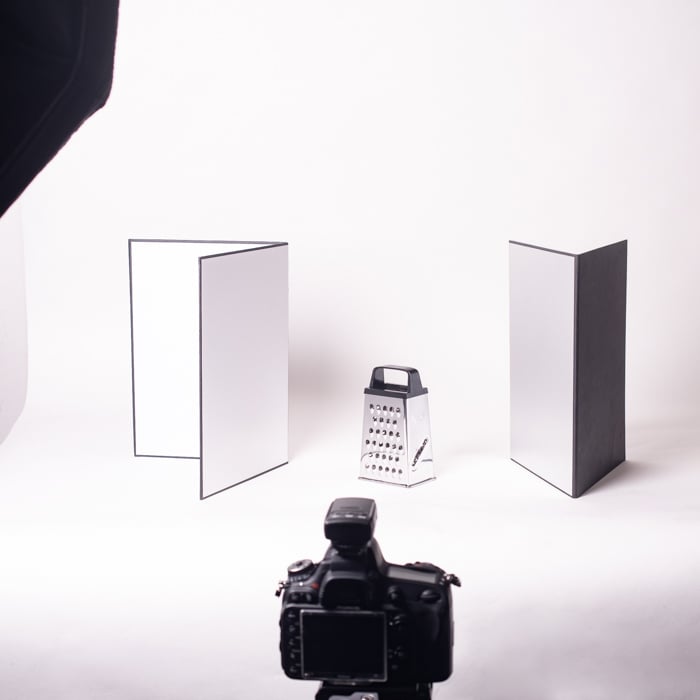
Cheese grater between two silver bounces cards
Now, how did I know exactly where to put my bounce cards?
First, I placed the cards exactly where I found bad reflections. Both the left and the right sides were dark so I placed the cards in those areas.
Then, I adjusted their positions following the law of reflection. I did not have to do complicated calculations to figure out my angles. All I had to do was to make sure that the bounce cards were within the line of sight of the light source.
I also observed how the bounce cards were affecting the cheese grater. If the surface was still dark, I kept changing their angles until they looked white. As the law of reflection states, the bounce cards also need to have a direct line of sight of the object to be effective.
Below is the resulting image after a few minutes of tweaking the bounce cards.
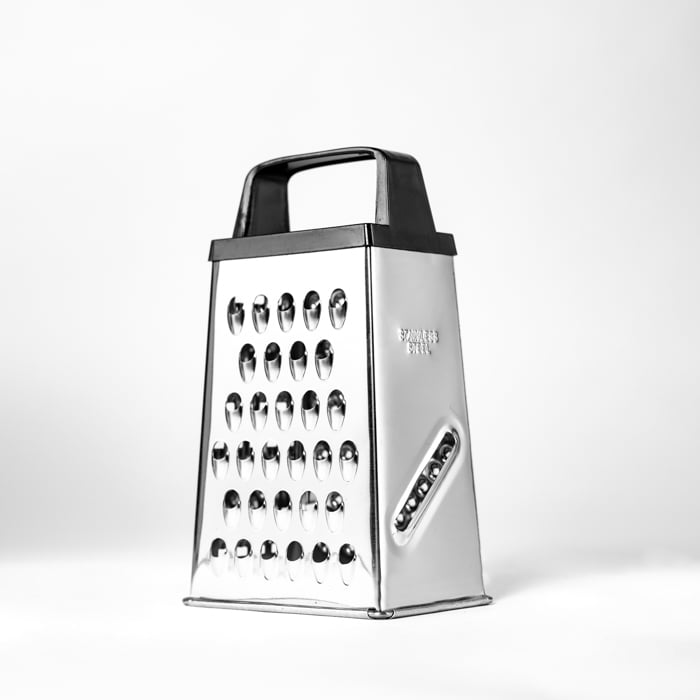
The resulting image of cheese grater photographed between bounce cards
How to Photograph Shiny Cosmetic Products
When you get into product photography, you will encounter lots of metallic-looking products. They are especially prevalent in cosmetic items such as lipstick and salves.
If you look at cosmetic products, you will see that most of them have shiny caps and translucent tubes. So how do you photograph two types of materials at the same time?
The secret to preventing reflective lighting is to position the light in a strategic way.
Lighting for cosmetics varies from one product to another. Photographers also differ in how they approach pictures of reflections.
I like lighting my product from above and behind. For this specific lighting setup, a straight-on angle is preferable. If you choose another perspective, you will have to readjust the lights.
The light source from above lights up the body of the product. The backlight creates a white background. It also illuminates the object if it has a translucent body.
The light above is the key light and gives out the brightest output. The backlight should only be bright enough to create a seamless white background. If you bump up its power, you may end up with an overexposed image.
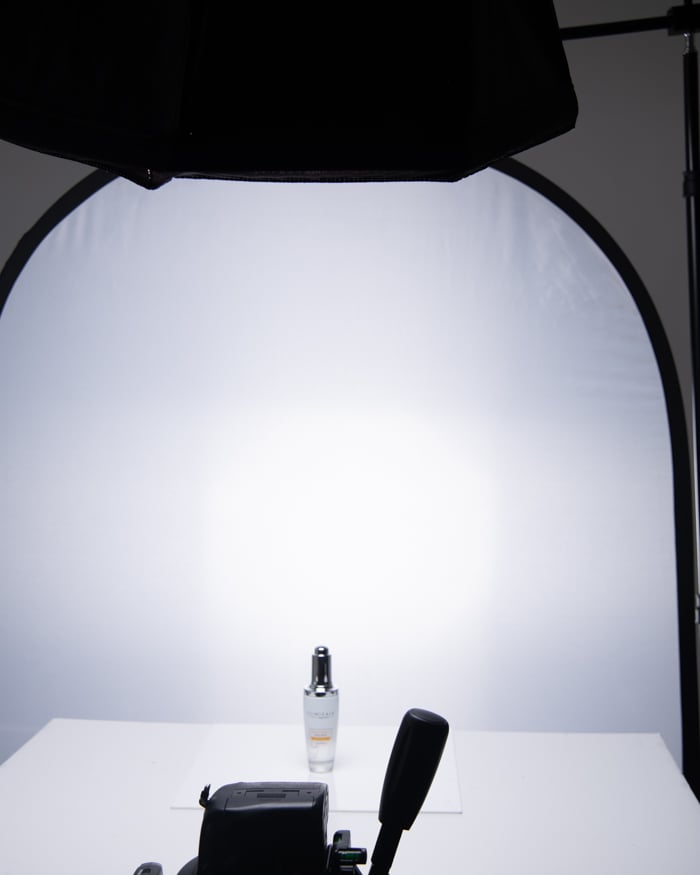
Perfume bottle set with key and backlighting
Once my lights are in position, I place two bounce cards on each side of the product. They reflect the rays coming from the backlight and bounce it back to the reflective cap. As a result, you get clean white lines on either side of the shiny surface.
I placed an acrylic panel under the product so that it reflects the product as well as the two lights. That way, I can guarantee that even the base of my image is pure white.
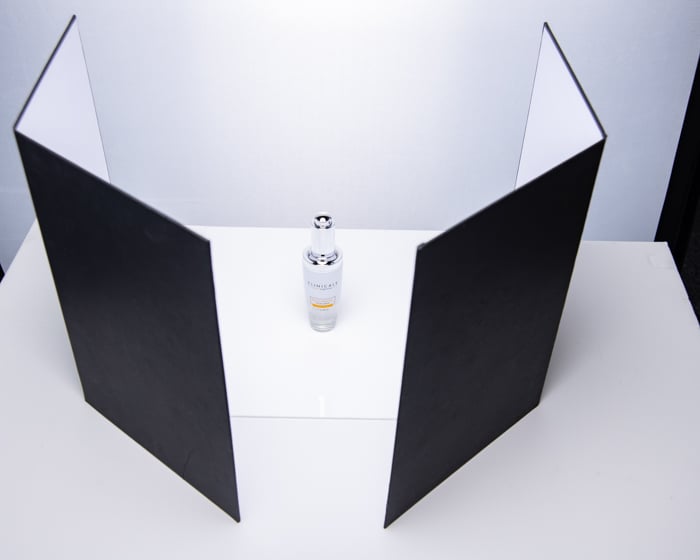
Perfume bottle set between bounce boxes with an acrylic base panel
Since the bounce cards do not cover the front of the lid, you get a black line in the middle. This is because there is no light bouncing off that area. It is a simple and elegant way to prevent the camera from showing on the product’s surface.
The result from this technique creates a pure black stripe in the middle. You do not have to edit out the camera at all because it will not appear on the product’s surface, anyway.

The resulting image of a cosmetic bottle without reflection
How to Photograph Glass and Metal
Now that you know the basics, let’s take on a bigger challenge. So how about shooting a teapot made of both glass and metal?
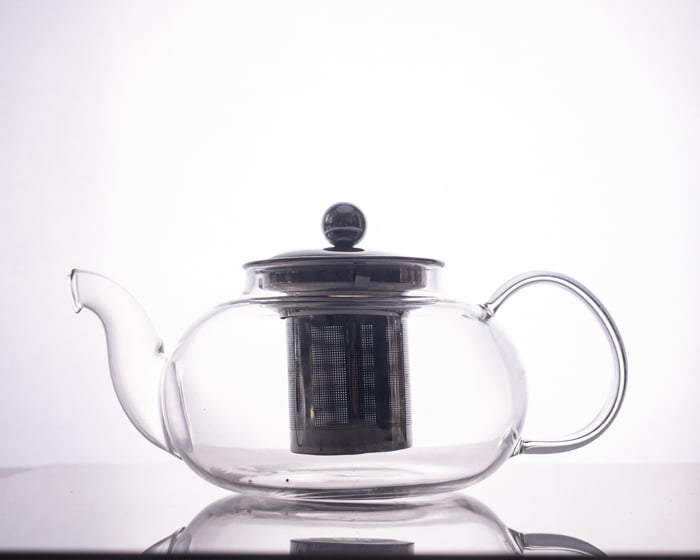
Photographing glass may seem easy, but it’s not. Although it’s not as glossy and as reflective as metal, it still creates ugly reflections. And with the wrong lighting, it can also look dull and opaque like what you see in the image below.
Teapot with glass and metal reflective surfaces
The secret to making the teapot look like glass in other photos is lighting the subject from behind. Since glass is see-through, you will only see the outlines of the object when you illuminate it. I also used the same acrylic panel from the last shoot to ensure I achieve that pure white background.
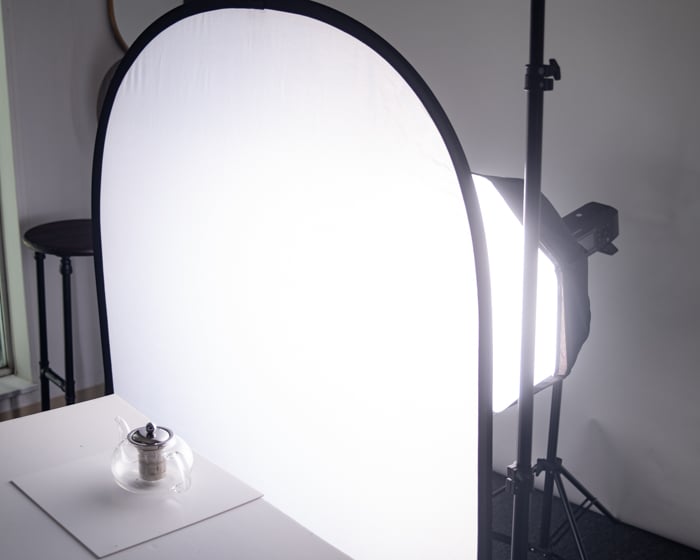
Teapot set on acrylic panel with backlight
The backlighting method looks elegant and showcases the shape of your subject. And the cool thing is that this technique does not only apply to teapots but also other glass products.
But, we now also have the problem lighting the reflective strainer inside the teapot.
The metal strainer inside the teapot remains dark
So how do you solve this issue? Now it’s time to apply the technique you learned in photographing metallic surfaces.
Like the cheese grater and the cosmetic product, all you have to do is use bounce cards once again.
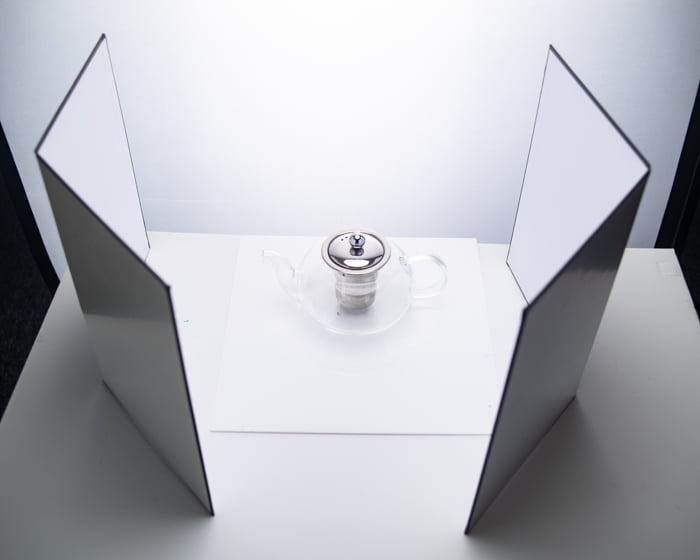
Teapot set between two bounce cards
In a way, the strainer inside the teapot is much like the cap of the facial cream we photographed earlier. All we have to do is place bounce cards on each side of the teapot. Doing so allows us to reflect the light from the backlight to the metal surface.
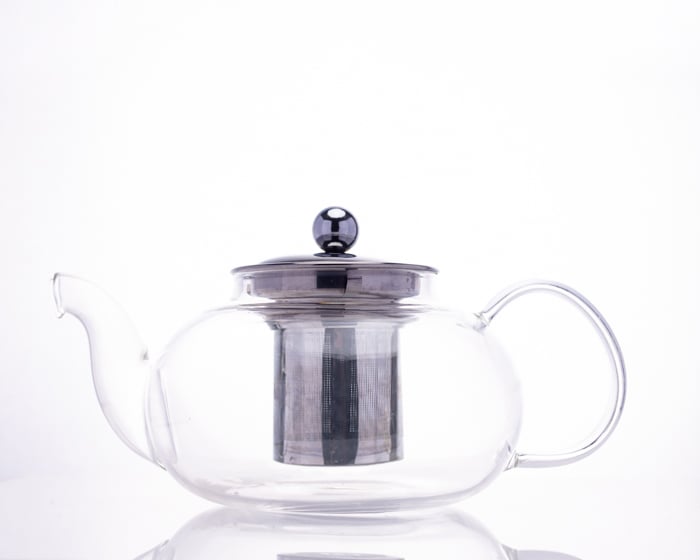
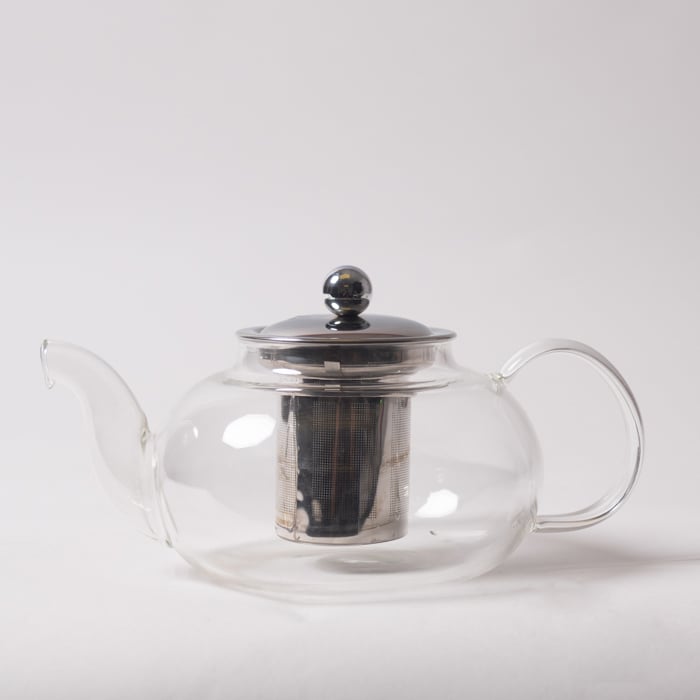
The resulting photograph of glass and metal teapot
Conclusion
Remember, no two reflective objects are alike. Each will have unique challenges. What we taught in this article may not apply to other products. But the crucial lesson is to learn how to use the law of reflection.
Your first few attempts with photographing reflections will be frustrating. But this is one of those techniques where practice makes all the difference. So grab yourself a reflective object now and start testing this new skill. Once you know how to photograph any reflective surface, everything else will be easy.
Learn more photography tips with our Quick Capture Cheat Sheets for that fastest way to master photography on the go.