Glassware is one of the hardest subjects you can work with. Photographing reflective items is already tricky enough. Add transparent glass, and you’ve got trouble.
Here we're going to cover the basics of glass photography and share eight tricks to improve your creative glass photos.

1. Using Backlight to Combat Reflections in Glass Photography
The biggest problem with photographing glass objects are reflections. Not all reflections are bad, mind you. Like shadows, we use them to show the form of our subject.
But in glass photography, we like to avoid reflections.
And just like front light kills most of the shadows, backlight kills most of the reflections. The difference being that backlight is gorgeous.
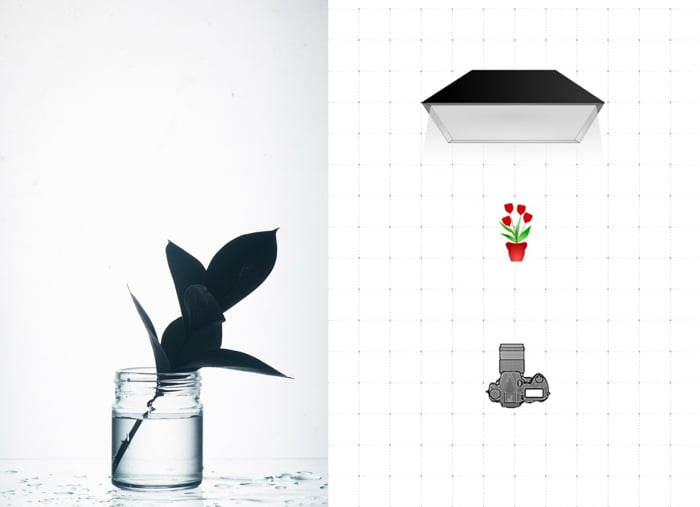
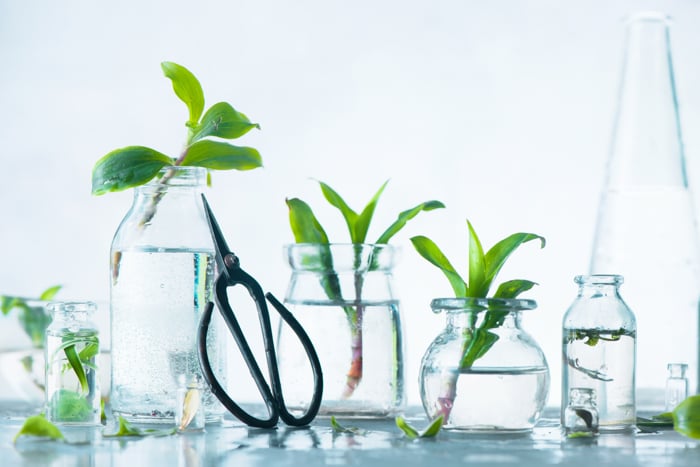
I used one speedlight behind a diffuser to light this jar
If you’re not sure where you’d like to go with a particular glass photo, start with setting a backlight.
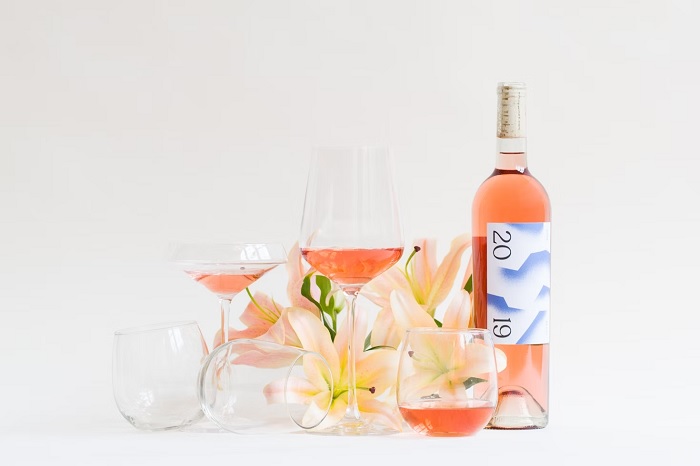
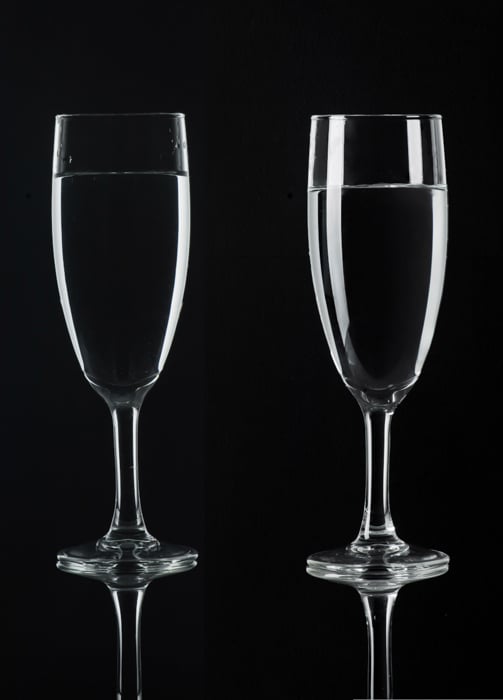
It looks great. Especially if you’re photographing wine glasses or perfume bottles. Backlight will make the liquid shine.
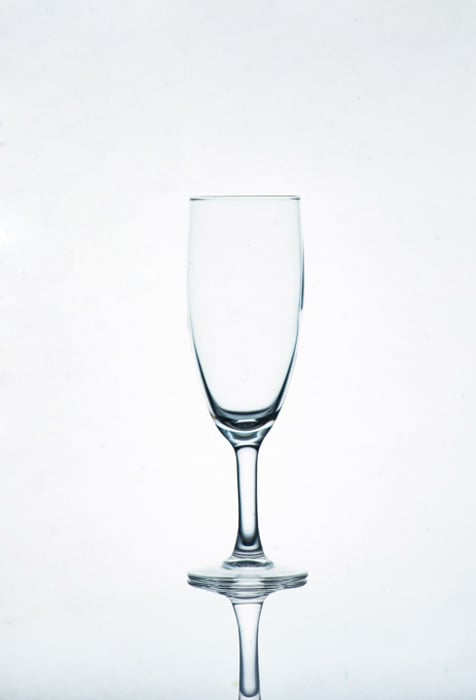
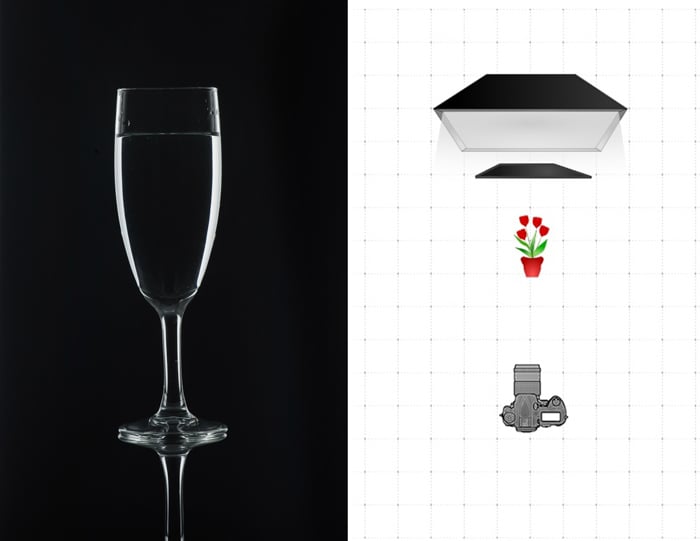
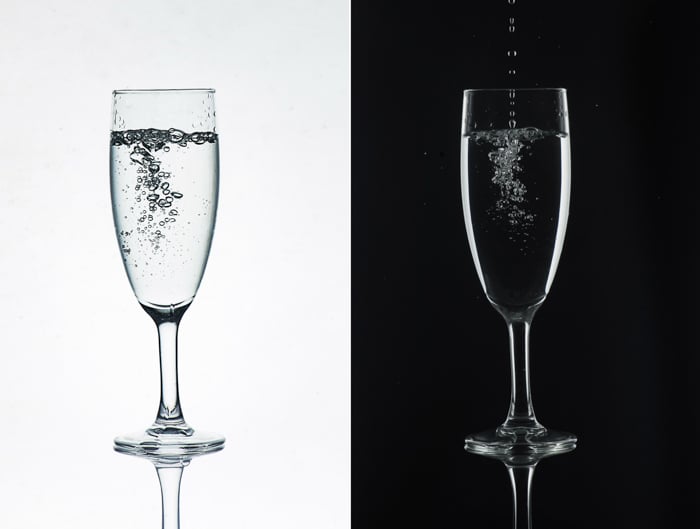
And that’s how the same setup looks with a champagne glass
2. Create Backlight Without Fancy Equipment
To create backlight, you can use different methods. Not all of them require fancy photography equipment. In fact, you can get away with a rather simple lighting setup and simple techniques.
You can take a large sheet of white plastic (or even white paper) and light it with two speedlights.
In that case, your object would be lit not with the speedlights themselves, but with reflected light from a background.
If you have a softbox, use it as a white background. This is very common in product photography.
I used a large diffuser with a speedlight behind it. The farther the speedlight is from the diffuser, the softer the light.
If you see a round spot of light and would like to have a more even light on the background, place your light source farther from a diffuser.
Or add one more layer of diffusing material. This can be a special white cloth or even a sheet of vellum paper.
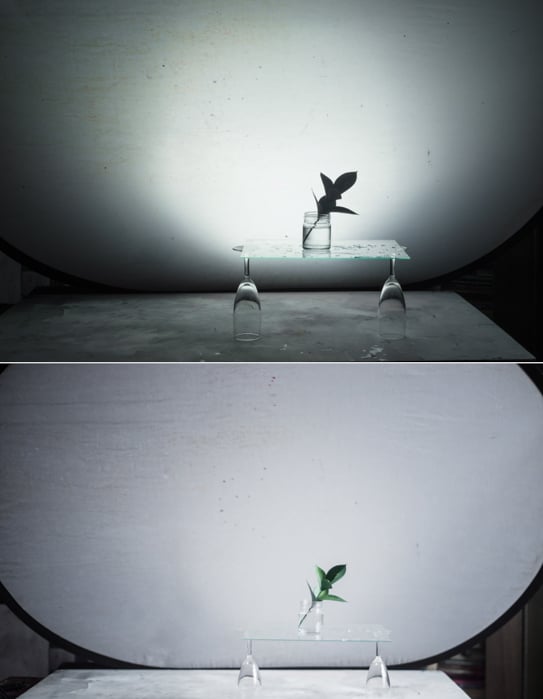
This is how my setup looks like with the speedlight on and off
3. Create Fake Reflections to Avoid Extra Work
Do you want a traditional symmetrical glassware shot with a reflection below? You can place your glass on a sheet of plastic and photograph a real reflection. But that adds one more surface to worry about.
You need to be careful about particles of dust on that surface. And you need to watch for unwanted reflections that surface can bring to a picture.
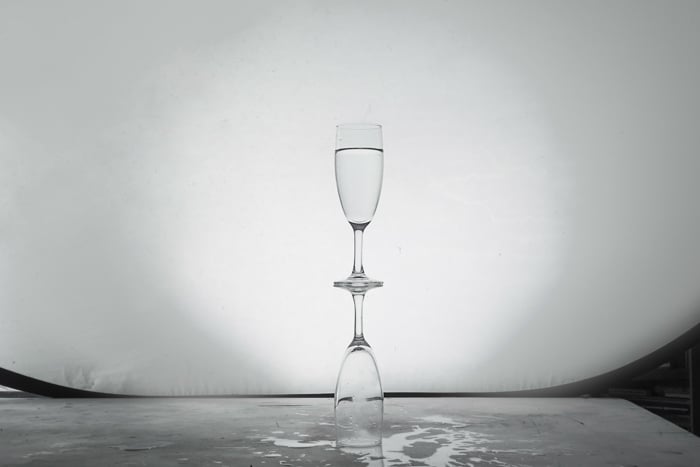
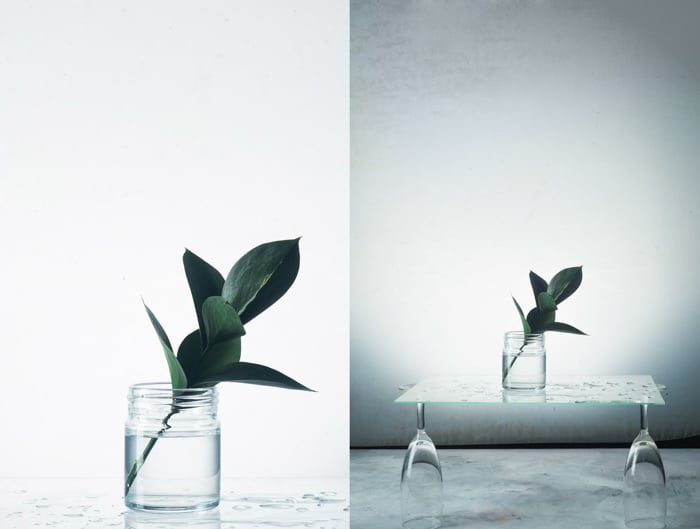
Instead, you can try a different approach. Namely, stacking glasses upside down to fake reflections.
Get two identical glasses, and simply place one on top of another. Voila!
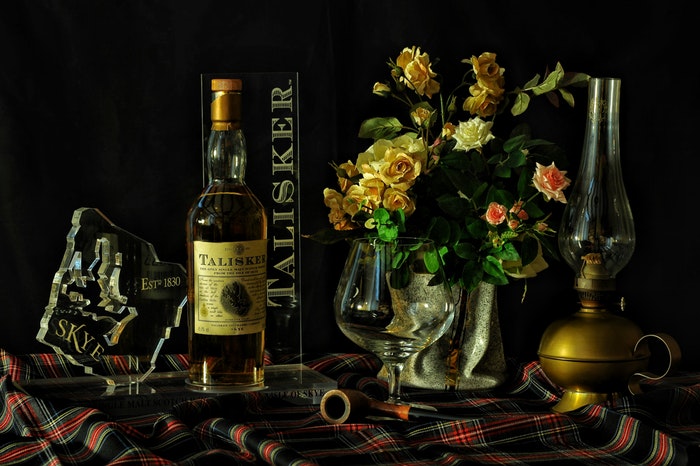
4. Photograph Glass on a Black Background to Add Drama
To get the same shot, but on a black background, add a sheet of black paper right behind the glass.
The sheet should be wide enough to cover the area right behind the glass. But also narrow enough to keep the edges of your light source visible.
This creates a white glowing outline that looks really beautiful!
I used the two connected sheets of A4 paper as a black background. I could have glued them to cardboard to make them stand on their own. But I only attached them to my diffusor with tape.
Two sheets of black paper are enough for a black background. The softbox here creates a reflection you can see further away.
5. Use Two Light Sources to Add Depth
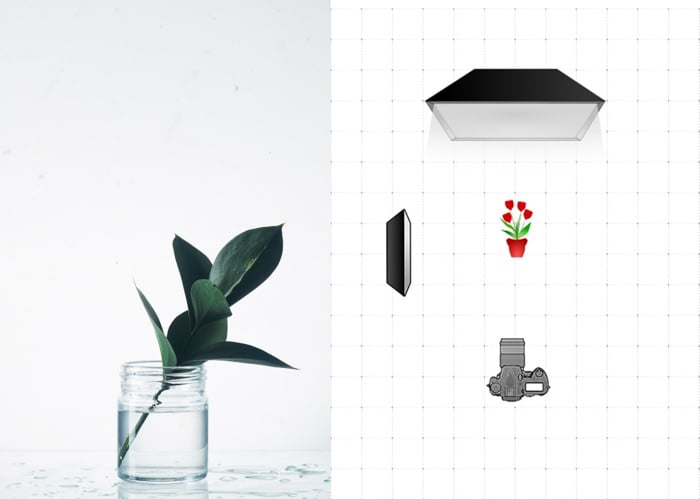
The image with only one backlight looks clear and minimalist, but it may lack depth. Especially if you have a non-transparent object in the frame as well. In that case, place one more light source on the side of your object.
In my case, it's a strip box with another speedlight. But a reflector works as well.
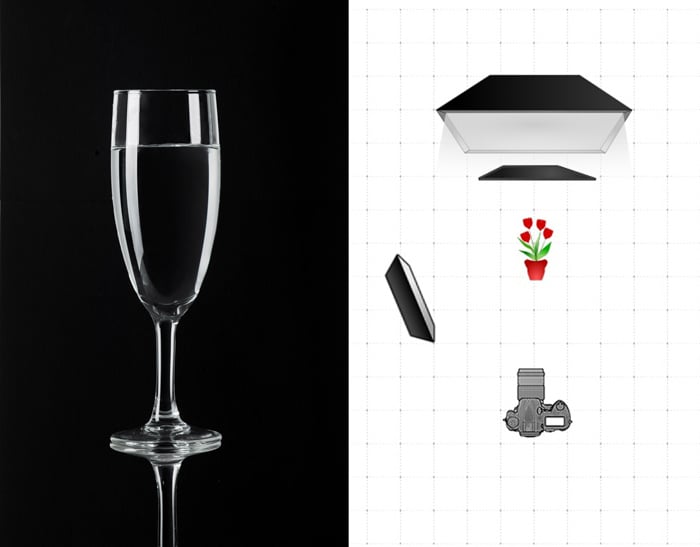
Champagne glass with an additional reflection
Compare the first setup (with on backlight) and the setup with a second strip-box
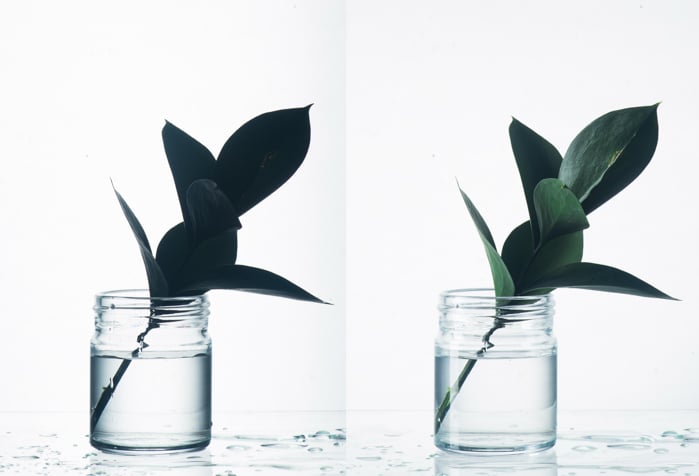
You can see how this strip-box adds a vertical reflection on the jar and lights the shadows of a plant inside it. The glass on the black background gets an additional reflection that complements its shape.
In an ideal case, there should be another strip-box on the right side, to make it look symmetrical.
An additional strip-box helps to reveal the texture and shape of a non-transparent plant
In my case, the additional strip-box was useful to make a plant look not like a flat silhouette, but like a normal object. But that’s only one example.
An additional light source also helps when you're shooting, say, a wine bottle with a label on the front.
Photos with and without another light source
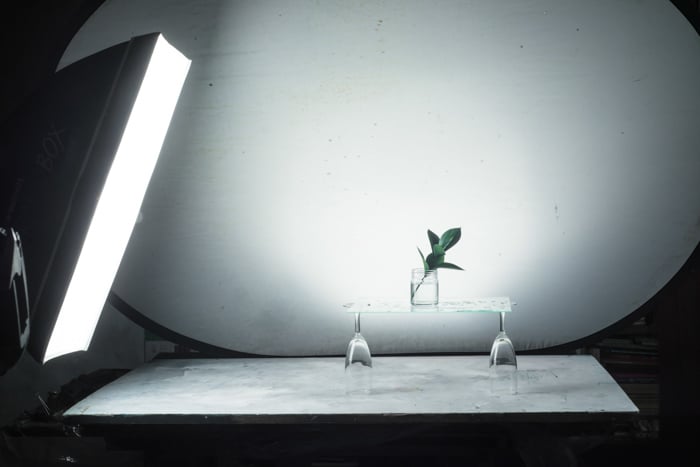
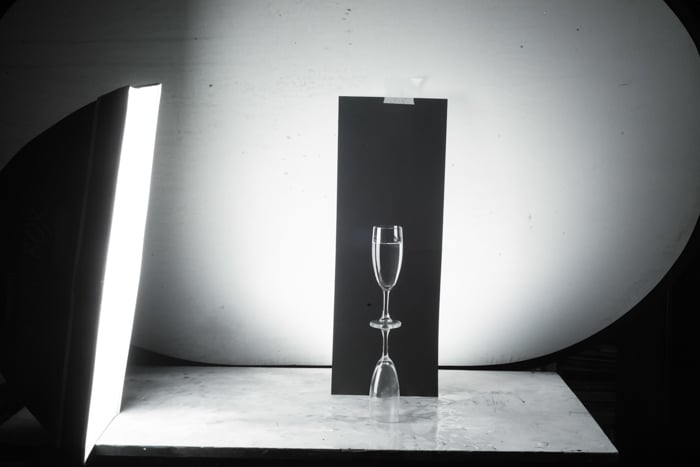
Setup from the scheme above in real life
Use this lighting scheme for clear and light pictures like this one
6. Use a Long Focal Length to Make Shooting Easier
For this shot, I used 105 mm lenses. A focal length like this has two advantages. First, you can get further from the scene. That minimises the chance of getting your own reflection on the glass.
Second, you can use a smaller background. Lenses with long focal lengths compress the space in a way that the camera sees less space behind the subject.
For example, these two shots below were taken with 50 mm and 105 mm lenses, respectively. Nothing else changed. Check out the difference for yourself.
7. Clean the Glass to Avoid Smudges and Smears
That must go without saying but clean every glass surface very well. Any dirt and fingerprints on the glass will be visible in the image.
This may seem trivial, but holding the glass to the light and checking if it's clean saves ages of post-processing.
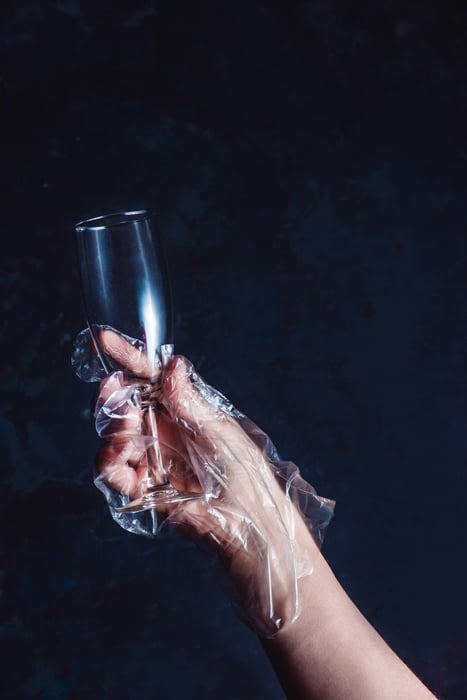
A quick note about using gloves. Some photographers recommend them, others say that gloves leave more dust particles.
I don't like the feeling of the glove on my hand, so I'm willing to sacrifice tidiness for the sake of utility and comfort.
But if you prefer working with gloves, pay attention to their quality. Make sure they leave no fiber and other unwanted particles.
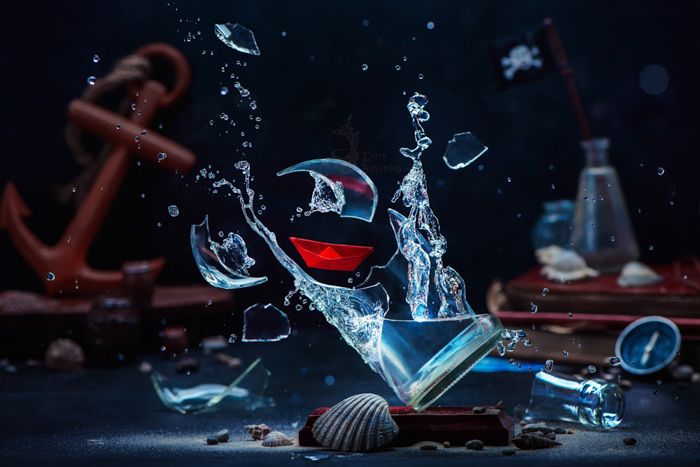
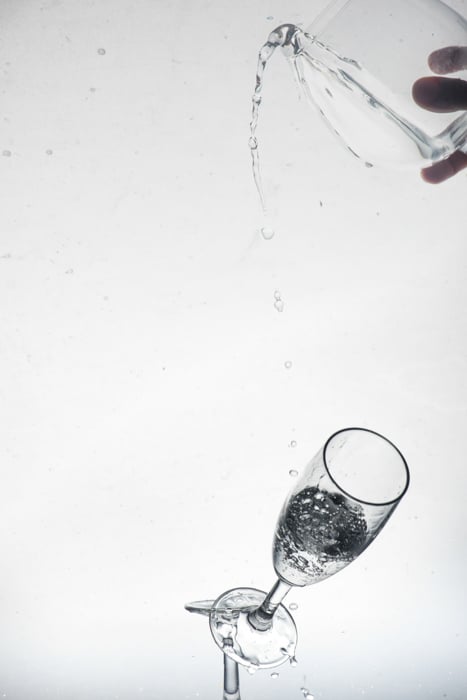
8. Add Some Action for More Dramatic Photos
If you have your perfect product photo, but still feel it looks a bit boring, try to add some dynamic to it. Pouring water, bubbles and splashes look fantastic with transparent glass.
Get ready for an action shot!
Action shot in progress
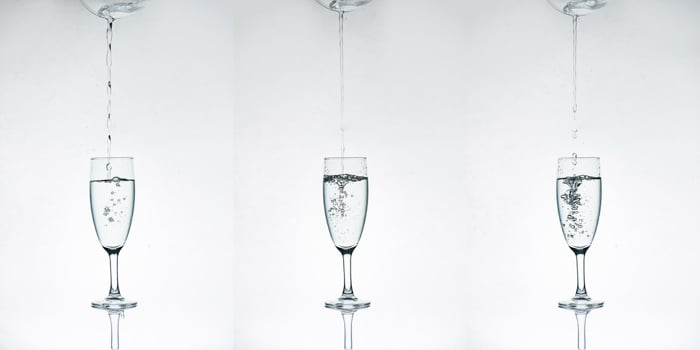
Set your two lights on low power. That provides a very short speed duration. The scene will be lit only for 1/4000th of a second or less.
This will freeze the liquid in action, not the shutter speed. Pour some water into the glass and take a sequence of shots.
Note how different, but equally beautiful bubbles look on black and white backgrounds.
 Be very careful with your ‘models’. The glass is very light and fragile, so you can accidentally move it even when pouring small amounts of water.
Make sure to fix everything in place, so you won't break any precious props.
It seems I wasn’t careful enough
But if you happen to break a wine glass or a good-looking transparent bottle, here's an idea. Why not make it the center of a conceptual still life with splashes and a simple, but strong narrative?
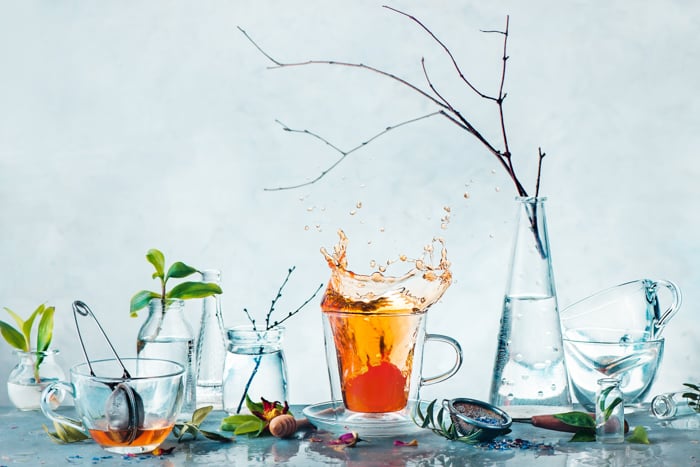
Another example of action bringing life to your composition
Conclusion
Glass photography needs some practice and creativity. Unwanted reflections or a messy background can ruin your photos. And glass can look pretty boring if you don’t set up the right lighting.
Try our tricks and show us your incredible glass photography.
For all the secret recipes to incredible still life shots, check out our Creative Photography Cookbook!