If you’re looking for a way to improve your photography skills, consider building a DIY softbox. A softbox is a great way to soften the light that hits your subject, resulting in clearer and more flattering photos.
Building a softbox is not as difficult as you might think. It can be done with just a few simple materials you probably already have in your home. Follow these easy steps, and you’ll have a brand-new softbox ready to use!
What You Need to Build a DIY Softbox
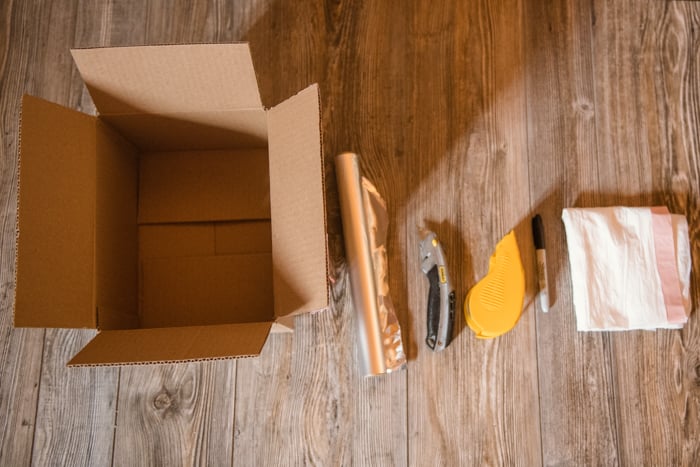
- A Box: The larger the box, the softer the light is. But the more awkward it will be to use. For our tutorial, I used a shipping box about shoebox size. This size works well for an on-camera flash. If you plan to use an off-camera flash, you can use a larger box for even softer light.
- White Garbage Bag (or Diffuse Material): A white garbage bag acts as the diffusion panel at the front of the box to soften the light. Use any white material that lets light pass through, like an old sheet. The material should be at least a few inches larger on each side of the box.
- Box Cutters and Scissors: You’ll do some cutting for this project. Box cutters or an X-Acto knife are the easiest way to cut up cardboard boxes. It’s also best to have a pair of scissors to cut the diffusion material.
- Tape: You can use any large tape for this project. Plain, invisible tape is too thin. But duct, painter’s, or packing tape is wide and sticky enough to complete the job.
- Sharpie Marker: You’ll need a marker to draw the correct size opening for your camera flash.
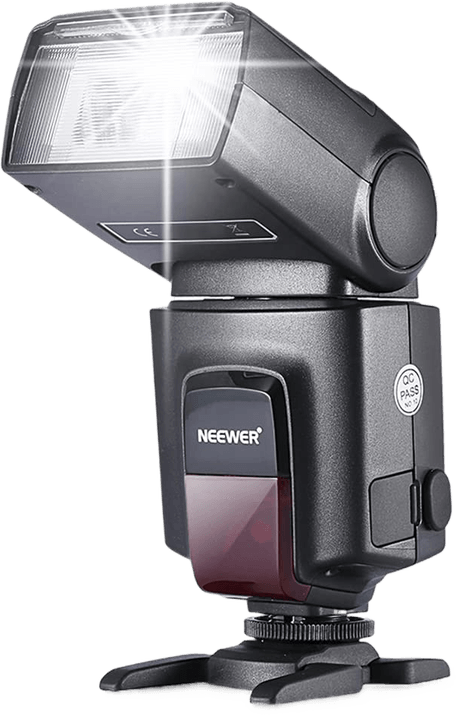
- Hot-Shoe Flash: This tutorial is for a DIY softbox for a hot shoe flash. You can adjust the instructions for a larger flashlight. To follow this step-by-step exactly, you need a hot shoe flash with a tilting head that can point straight up.
IMPORTANT: Do not use this softbox on any light that runs hot to the touch. Placing cardboard on a hot object could create a fire hazard. Most hot shoe flashes run cool to the touch.
How to Make a DIY Softbox for a Hot-Shoe Flash
Here are six easy steps to make a DIY softbox. It should only take you about 20 minutes.
1. Remove the Box’s Top Flaps
First, get rid of those pesky top flaps on the box. Using the box cutters, slice off the top flaps to have a box with one end open. This end of the box will house the diffusion panel and face toward the subject. Recycle or discard the cut-offs.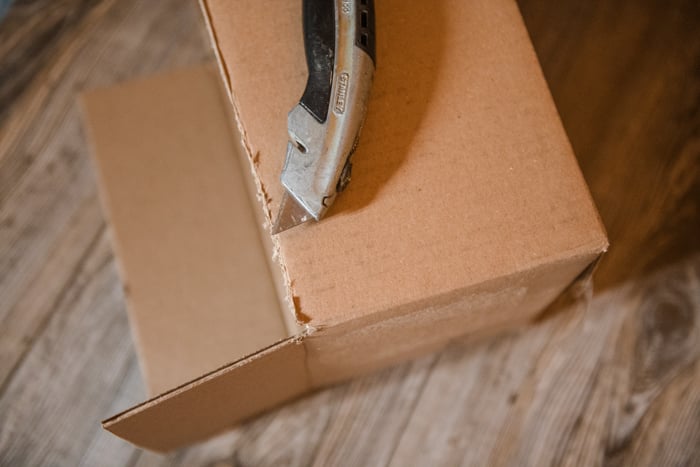
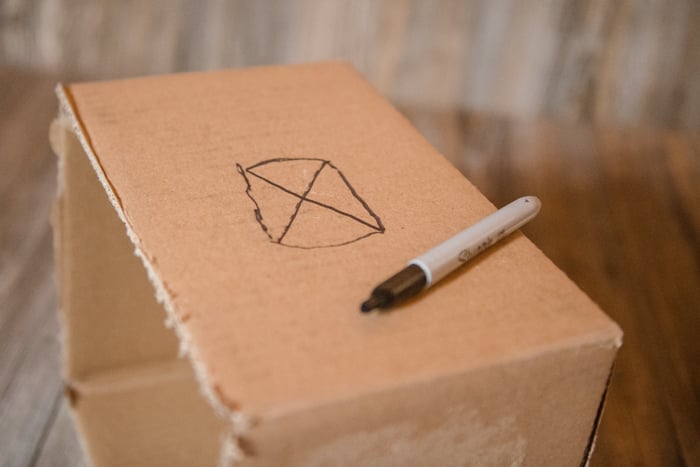
2. Trace the Opening for the Flash
The open end is now the front of the DIY softbox. You’ll place the flash at the bottom edge of the softbox instead of the back. This lets you bounce the light inside the box for an even softer light. It also makes the process easier.
Choose which side to use based on the orientation you’d like your softbox to be. I placed the flash opening on one of the two longer sides of the box. That way, my DIY softbox would have a horizontal rectangle shape. If you want a vertical shape, choose one of the shorter sides of the box instead.
With the side selected, tilt your flash head straight up. (The flash head is the part of the flash where the light comes out.) Then, place the flash head roughly in the center of that side. Use a marker to trace the flash head.

3. Create Flaps to Hold the Flash in Place
Draw an “X” inside the rectangle that you traced earlier.
Using the box cutters, cut along the lines of the “X.” Do not cut along the lines of the rectangle you created when you traced the flash head.
You want to create a snug slot for the flash to fit through, with four triangle slots cut into the box, not a large hole. Err on the side of “too small” as you cut. You can always cut them a bit bigger if the flash doesn’t fit.
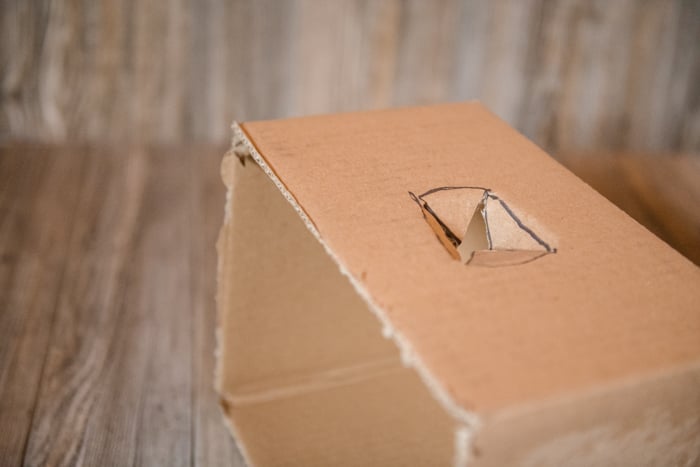
Once the flaps are cut, tuck your flash head in the opening to check the fit. You want the flash head snug, so you don’t need to tape the softbox onto the flash.
If you can’t fit the flash in the hole, make the “X” a little bigger. Do this a bit at a time until you have a good fit. After you know the flash fits, remove it before the next step.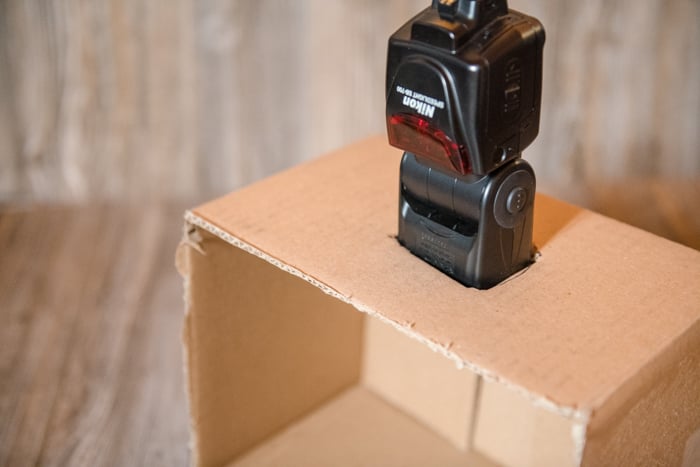
4. Line the Inside of the DIY Softbox With Aluminum Foil
Next, line the entire interior of the softbox with tin foil. Cut a hole that matches the flash opening in the foil so the foil isn’t blocking the opening. Secure it with tape as needed.
The aluminum foil will bounce the light inside the box. Even when your flash head points up, the light will still be directed out the front of the softbox toward the subject.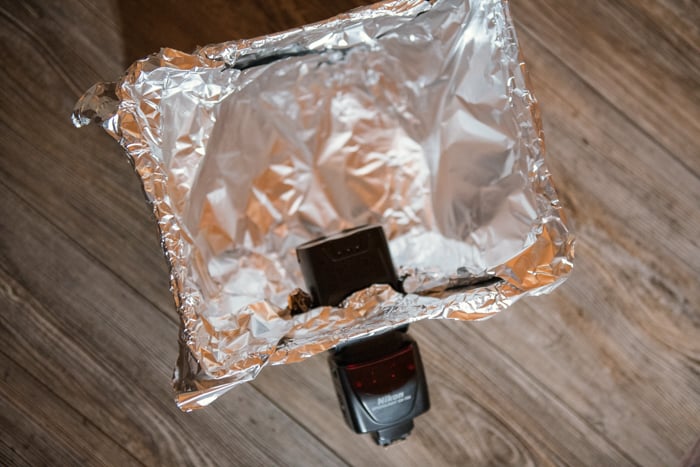
5. Create the Diffusion Panel
Finally, cover the front of the softbox with the white diffusion material. I used a white garbage bag, but you can also use white fabric from an old T-shirt, sheet, or curtain. Whatever you have lying around.
If you use a garbage bag, you can use one side of the bag and tear open the seam so that you only use one layer. Leave the bag’s seams intact and use two layers of the garbage bag for an even softer light. I chose to use two layers.
Cut the material the size of the front of the softbox, plus an inch or two so that the material wraps around the front sides of the box. Place the material over the box and secure it with tape. Use one long piece of tape on each side to completely attach the material without any gaps.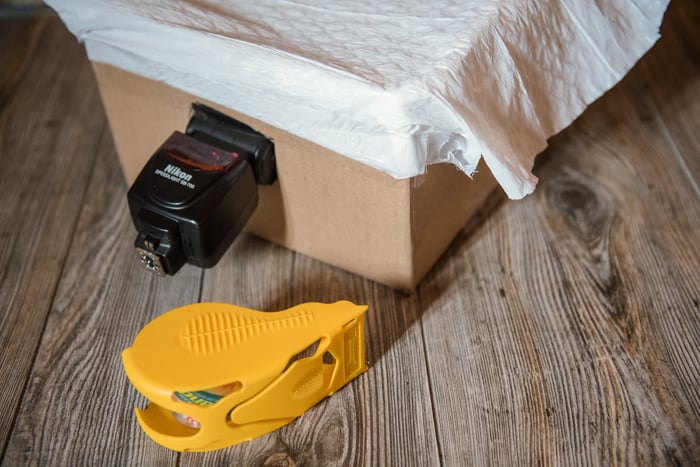
6. Insert Your Flash and Start Shooting
Your softbox is constructed. Now, you just need to add your camera flash. Point the flash head straight up, then slide the flash through the opening. Leave the flash pointing straight up toward the ceiling. All the tinfoil inside will help bounce that light to the opening for beautiful, soft light.
Leave some room between the flash head and the top of the softbox. Don’t push the light so far up that it’s touching the tin foil.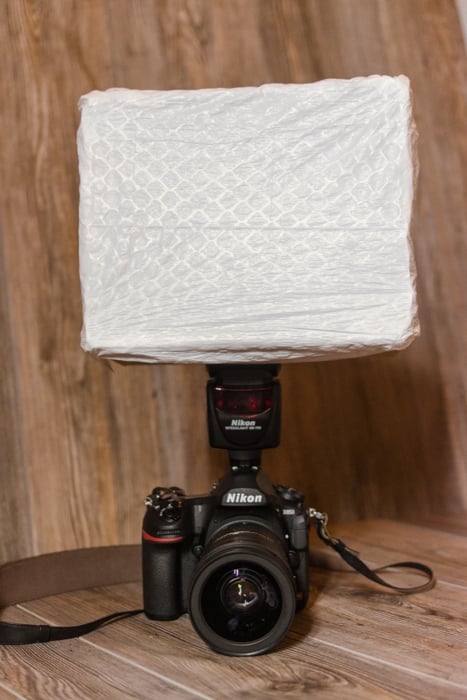
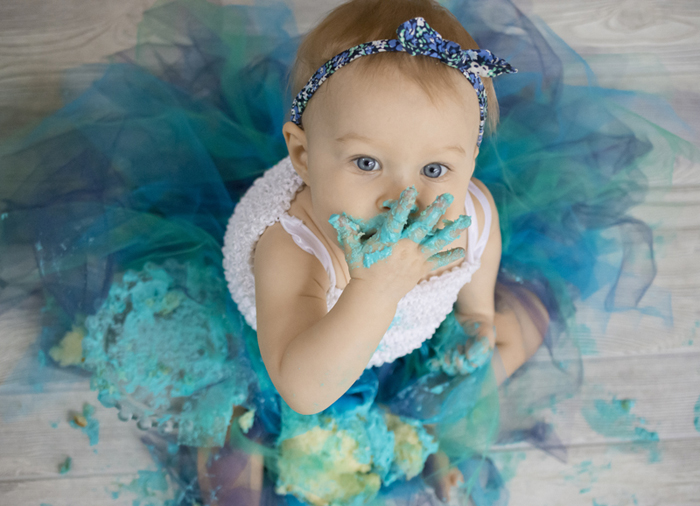
Here is a comparison between my photos with a bare flash and my DIY softbox.
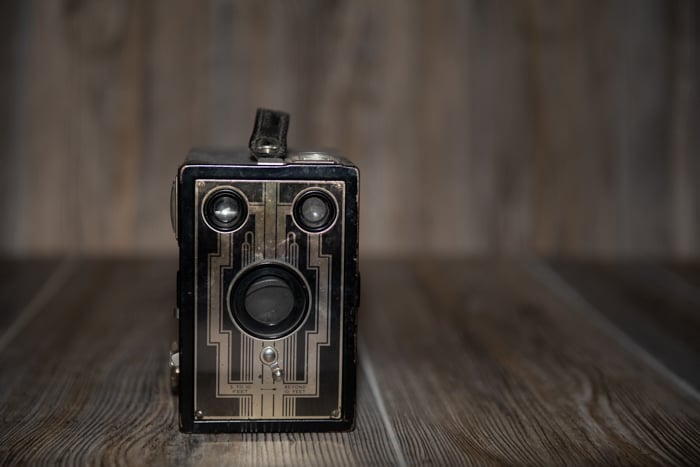
Shot with a bare flash
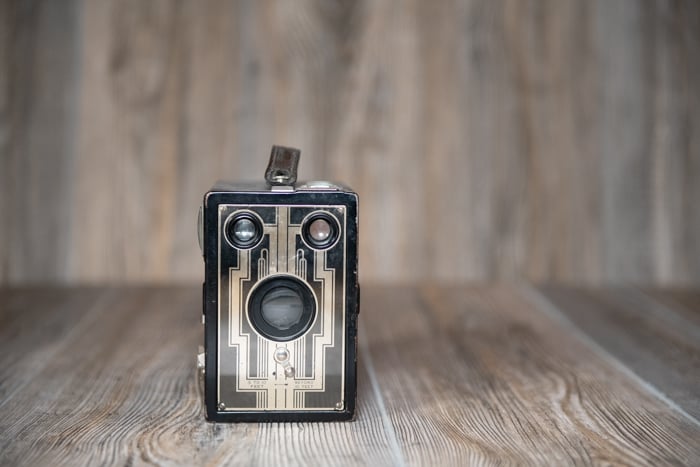
Shot with my DIY softbox
The photo using the DIY softbox created a much softer light that’s less harsh on the subject. Looking closely to the right of the vintage camera, you can see a shadow cast by some window light. The bare flash is so powerful it eliminates that shadow, which gives the image less depth.
You can use a DIY softbox much like any softbox. Remember, using a manual flash gives you further control over the light. This DIY hot shoe softbox can also be used off-camera with a transmitter and receiver.
Softbox Lighting FAQs
These are the most frequently asked questions we get about softboxes. We hope our answers help you as you create your DIY softbox.
What Is a Softbox in Photography?
A softbox is, quite literally, a box placed over a light to create a softer, more flattering light. They come in several different sizes. Larger-sized ones offer softer light but are harder to wield.
They also come in several shapes, like square, rectangle, and octagon. A softbox can help your still life and product photography.
What Material Is a Softbox Made of?
A softbox you would buy from a photography store is made of different fabrics. They are black on the sides to prevent light from spilling out and have a white diffusion panel to soften the light on the front. Most are made from materials such as nylon and polyester or a blend.
Which Is Better, a Softbox or Umbrella?
It depends on what kind of light effect you want. Both softboxes and umbrellas create a pleasant, soft light that’s great for portraits and other photos. The main difference between softboxes and umbrellas is their shape and light spill.
Umbrellas come in one circular shape, while softboxes come in squares, rectangles, and octagons. The light modifier‘s shape determines the catchlight‘s shape in the subject’s eyes. Umbrellas have more light spills, which means softboxes are easier to control and lose less light.
Conclusion: Building a DIY Softbox
A softbox creates great, flattering light. You don’t need to invest much cash or time to add one to your arsenal of photo gear. You can build a DIY softbox in 20 minutes and a few items in your kitchen and garage.
A DIY softbox won’t look as nice or portable as the one you buy. But it will still help you shoot quality photos without breaking the bank. It’s the result that matters!