Direct flash is harsh and unflattering. And off-camera flash can be expensive and difficult to set up. But, there is a way to get some of the look of an off-camera flash without actually taking the flash off-camera: bounce flash.
Instead of taking the flash off the top of the camera, bounce flash re-directs the light to bounce off an object and back to the subject. The result is soft, dimensional light without the complexity of taking the flash off camera.
And unlike direct flash, no horrible harsh shadows either.
Bounce flash is a great technique for those just starting to use flash but there are a few essentials to understand before trying bounce flash.
Here are seven bounce flash tips for beginners, whether you’re a wedding photographer photographing wedding receptions or doing portrait photography.
7. What Type of Flash Can You Use for the Bounce Technique with Bounce Flash?
Pop-up flashes can't be used for the bounce technique (excluding some bounce cards) because those built-in flashes are fixed to digital cameras.
To use bounce flash, you'll need a hot shoe flash with an adjustable head. Most hot shoe flashes allow you to move the head to redirect the light. Some will have a wider range of motion than others.
Make sure the flash in your kit has an adjustable head.
6. Look for a Large, Neutral Colored Surface
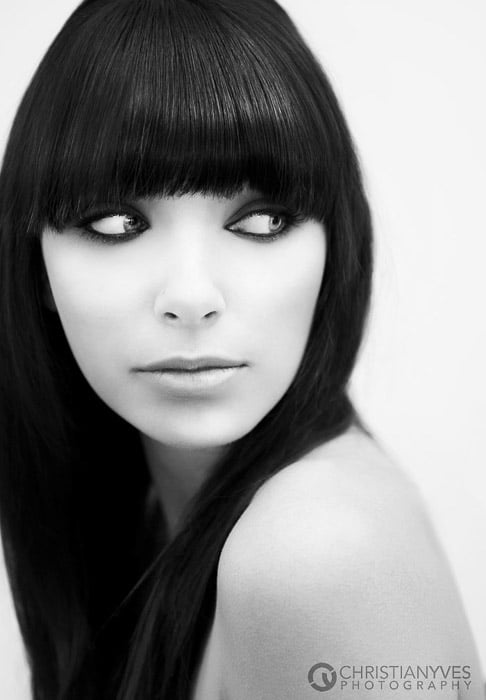
Off-camera flash bounced off a ceiling, by Christian Y Ocampo
Bounce flash requires something to bounce the flash off of. Usually, this surface already exists. A wall or ceiling bounce surface work great. You don't have to bring any extra gear with you. Look for a surface that's large to create a nice, soft light.
Flash photography is harsh because the size of the flash head is small. By directing that light into a large wall or ceiling, you easily increase the surface size of that light. This creates softer, more flattering light.
Just turn the flash head until the light is pointing directly at that surface.
The bounce flash will appear to be coming from the direction of the object that you bounce the light off of. You can't pick up that wall and move it. But you can often adjust the placement of the subject to get the light falling in a way that flatters them.
For a portrait, for example, try bouncing the light at a 90-degree angle or a 45-degree angle from the side of the subject.
There's more to a great bounce surface than just size, however. The color of the bounce surface will leave a color cast on the subject. If you bounce the flash off a red wall, the light will have a pink tint to it.
Unless you want that colored tint, look for a neutral colored wall or ceiling, like white or beige.
5. Experiment With Distance to Increase the Strength of Your Flash
While bounce flash creates great, soft light, the technique significantly reduces the power of your flash.
If the bounced light isn't strong enough in the image, try moving either the flash or the subject closer to the bounce surface (or both).
The closer the light or the subject is, the less power the flash will lose on the bounce.
4. Try Manual Flash

Image by Russell Harrison Photography
Another way to perfect the art of bounce flash? Use manual flash photography. On TTL, your camera is automatically calculating the distance to the subject. All you have to do is set your camera settings, no flash settings.
If the flash is pointed somewhere else, that's not the correct distance. Using manual flash will allow you to control just how much light the flash emits.
Unlike the meter on your camera, your flash doesn't have a built-in meter to guide you. But thanks the ability to instantly preview a digital photo, it's easy to take a test shot and adjust the flash based on the results.
A 1/1 flash is at full power, the brightest that your flash can get, while a 1/2 is half power, a 1/4 is a quarter power and so on.
With bounce flash, you'll likely use camera settings that are higher than manual flash photography on-camera or using an off-camera flash system.
Try starting with 1/4 and adjust up or down as needed.
Terrified of manual flash? Ease your way with using flash compensation. This allows you to turn up or down your flash power just like you'd use exposure compensation to lighten or darken an image.
3. No Bounce Surface Handy? Use a Reflector
Lit using an off-camera flash with a bounce card, by Rodger Evans
Sometimes, the scene just doesn't have a great bounce surface. Maybe the ceilings are too high, the walls are painted a bold color or you're outside.
But that doesn't eliminate the possibility of bounce flash photography entirely.
Instead, point your flash into a large reflector. Reflectors are photography accessories designed specifically to bounce light back into the scene, whether that's sunlight or a bounce flash.
Unlike bouncing the flash off a wall, you can change the position of the reflector to get the right angle of light on the subject.
While reflectors are a great option for flash photography, you'll need an extra person or a stand to hold the reflector in place. This is why using a wall or ceiling is often the easier option.
2. Try a Bounce Card for Soft Lighting Anywhere
A reflector isn't the only tool that will allow you to use the bounce flash technique anywhere. A flash bounce card, such as the Rogue FlashBender, attaches to the back of your flash and bounces the light back into the frame.
Usually, the flash is pointing up with the bounce card strapped to the back of the flash. Some flashes have a bounce card built-in. This is the solid-colored piece that slides out at the top of your flash.
Larger bounce flash accessories can create softer light or allow for more control.
Unlike bouncing the flash off a wall, this won't create directional lighting because the bounce card is so close to the flash. However, this technique does create nice soft lighting, eliminating that harsh direct flash look.
Bounce cards also aren't limited to where you are and what's around you, but you also don't have to struggle with a large reflector either.
1. Balance the Bounce Flash With Your Shutter Speed
In flash photography, the shutter speed determines how much ambient light is in the image. Set the shutter speed too high, and you'll block out all the ambient light. This will leave the background dark and only lighting with the flash.
Sometimes, however, you want to use only your flash as your light source. Mixing the flash and the ambient light can leave your photo with two different color temperatures.
Or, maybe the ambient lighting is really bad and you only want to light with the flash. Whatever the case is, the answer is shutter speed.
If you're seeing too much of the existing light in the shot, use a higher shutter speed (just don't go above your flash sync speed, which is often 1/200 or 1/250).
If you're seeing too little of the existing light in the photo, lower the shutter speed.
Conclusion
A bounce flash can create impressive, directional lighting effects and all you have to do is turn the flash head towards a large, neutral colored surface. Because of that, bounce flash is a great technique for photographers who are new to flash.
While off-camera flash offers the most flexibility, bounce flash offers creative lighting effects, simply, while keeping gear and accessories at a minimum.
To get the best results with bounce flash, just make sure you understand a few essentials, like finding a neutral-colored surface to bounce off of and adjusting the shutter speed for the best results.
For all you need to know about external flash, check out our How to Take Better Photos Indoors with an External Flash (Updated 2018) article.


