When it comes to photography, the key light is one of the most important elements in any photo shoot. It's the main light source, and as such, it determines the overall look and feel of your photos. Here are some tips on key light photography.
Key Light Photography: What Is It?
Photography lighting often has more than one light source. Usually one of the lights is predominant. This is the key light. When you are working with only one light this is not usually referred to as key light photography.
Key lighting is not a style in itself. You can have high key photography and low key photography styles. Your key lighting setup determines the style of photographs you will take.
How the other light sources balance with the key light shapes the way the key light makes the photo look.
In high key photography, the key light is very strong. These photos contain little or no shadow. The ratio between the key light and other light sources is minimised. Extra lights affect the shadows in your composition. But the key light remains prominent in the effect created.
With low key photography, the key light is brighter than other light sources. This creates a strong contrast. The ratio between the key light and other lights is maximised.
The key light does not refer to a specific type of light source or lighting equipment. It can be from the sun, a flash, reflector or another light source.
Balancing the light ratios establishes the style of photographs you make. Knowing how to place your key light well and scale its output impacts the mood of your photographs.
© Kevin Landwer-Johan
The Sun as a Key Light
The sun is the most common light source used in photographs. Often it is the only light affecting your photos. On its own, the sun is not usually referred to as a key light. Incorporating extra light sources makes the sun your key light.
Reflected light or light from an electric source affects the shadows. But the sun remains the brightest light on your subject. Managing the ratio of other light sources allows you to control the feel of your photographs.
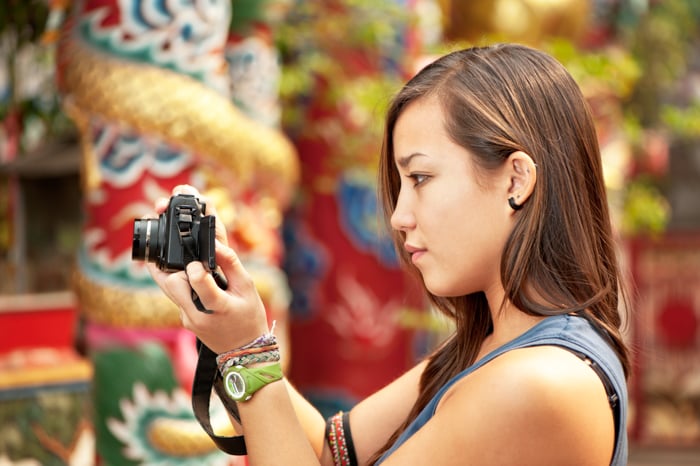
For this photo, I placed my model in front of a meditation tunnel entrance at a Buddhist temple. The sun is lighting her and is soft because it was a cloudy day.
The secondary light in the background is reflecting off the walls of the tunnel. It is much lower, creating separation between my subject and the background.

© Kevin Landwer-Johan
Flash as a Key Light
You can use your flash as a single light source or as a key light. Balancing the output of your flash with the ambient light, or other light sources, determines whether it is the key light or not.
When the output of the flash affecting your subject is brighter than the other light, it is the key light. How much brighter this light is will create higher or lower contrast. There will be darker or lighter shadows on your subject.
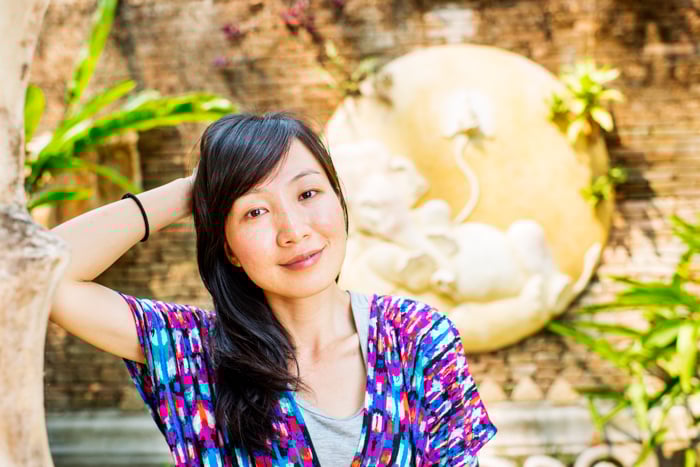
Here I have used a flash as my key light. The ratio between my flash output and the sunlight was very close so the shadows as minimal. I used a small softbox with the flash to help keep the light soft.
© Kevin Landwer-Johan
Use a Reflector as a Key Light For Better Natural Light Portraits
Using a large reflector as a key light when working with natural light might be easier than a flash or strobes. Being able to see the effect of the light reflecting onto your subject allows you to make choices about the light ratios.
Controlling the angle of the reflector and its position in relation to the sun, you decide how much light falls on your subject.
You might use a reflector as a secondary light source. Next time you are out taking photos, why not try using your reflector as your key light? Placing your subject in the shade and bouncing light onto them makes this easier to achieve.
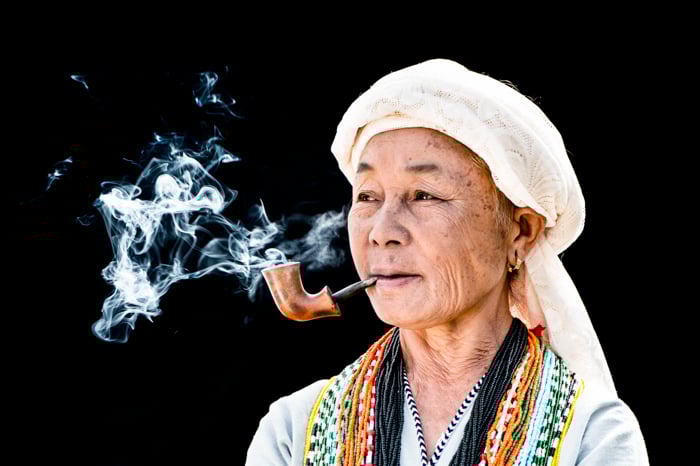
With this portrait of a Karen woman smoking I had her stand in the shade. But she was still quite close to the edge of the shaded area. I used a large fold-out reflector to bounce more light onto her face than was naturally occurring.
Because the sun was behind her and shielded by the background, it has illuminated the smoke well. It remained lower in intensity than the reflected light.
© Kevin Landwer-Johan
Use Studio Strobes as a Key Light for More Control Over Portraits
With studio lighting, you have more control over the output and position of your lights. You can regulate how much or how little light emits from your key light and extra lights. This means you can control the mood very precisely.
You can manipulate the amount of shadow on your subject. You can also have more precise control of the ratio of light falling on the background.
The position and distance of your artificial lights in relation to your subject affect the final look of your images.
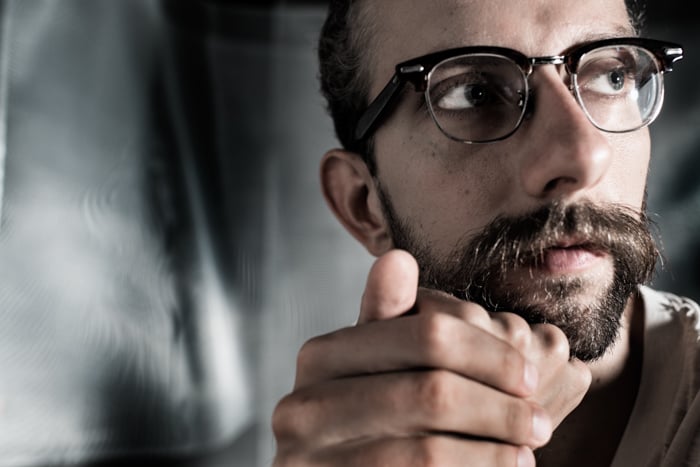
In this photograph, I have my key light off to my right. A reflector is bouncing light from the left so the shadow on my model's face is not too dark. I have another strobe at a lower output than the key light on the background.
© Kevin Landwer-Johan
How Key Light Position Affects the Final Look of Your Images
Where the key light is in relation to your subject is important to consider. This determines where the shadows will fall. When the ratio between the key light and other lights is greater the effect is more pronounced.
A keylight placed above a person when you are making a portrait will cast shadows around their eyes, under their nose and chin. Placing a reflector or other light source opposite your key light helps reduce these shadows.
Placing your key light off to the side of your subject can create a more sculpted effect. You can control the amount of this by how much extra light you include.
Key lighting from behind your subject is unusual, but can you can use it for interesting effects. In this photo of a pizza, my key light is a softbox placed behind it. In front of and above the camera, I had another light to fill in the shadows.

© Kevin Landwer-Johan
Conclusion
Mastering key lighting will help you improve your photography. Learn to balance the ratio of lights and reflectors based on your key light to get the look you want.
Light can provide so much of the mood in photos if you control it well. You need to be aware of how the light is affecting your subject.
If you are working with flash or other electric lighting you have more control. Working with the sun as a key light can be more challenging. Practicing adding light with a reflector or flash impacts the dynamic of your photos.
If you're used to only taking photos with the sun as your main light try practicing making it your key lights. Reflect some light onto your subject or introduce some flash.
The first time you attempt this is may seem too difficult. Press on. Try it every day for a week. You will start to see the benefits and appreciate how much more interesting you can make your photos using key lighting.


