When I first started out in my photography career nine years ago, I labeled myself as an outdoor natural light photographer.
I started my photography business in September. The weather outside is just perfect and a lot of people are looking for outdoor family photos. This also meant low to minimal overhead.
Most outdoor locations like parks, forest preserves, and even outdoor urban locations have natural light. There was no need to invest in any photography studio equipment at first. I didn’t need external lights, flashes, light stands or even backdrops.
This meant that my photography business flourished for the first 3 to 4 months with no extra costs. But I live in Chicago. Being in the mid-west and restricting myself to a 'natural light outdoor only' type photographer meant limiting myself to the mercy of Mother Nature.
Clients don't want to be outside when it is cold. The weather changes quite dramatically in winter. Natural light from a photography standpoint is almost non-existent when it comes to winter weather and dark gloomy days.
 I needed to come up with a solution to photograph clients year round. And I needed to learn to photograph in any weather if I wanted to make it as a photographer – a profitable one at that.
So I began researching for photography studios and photography studio setups to either rent, own or even buy. That way I could have my own home photography studio setup.
I began putting together a photography studio equipment list. I needed to get a simple little photography studio off the ground to shoot some editorial work as well as some fashion and commercial work.
The good news is that with the number of options available getting a studio setup can be as inexpensive or as expensive as you like it to be.
I would recommend looking at what your short-term and long-term photography goals are. You can figure out a photography studio solution that will fit your needs and budget.
Regardless of whether you look for a space outside or try to set up your studio at home, here are a few things you could potentially need for your photography studio setup. You’ll find these suggestions work for many genres.
From Boudoir sessions to newborn babies, you’ll find the guidance you need in our list of the best photography studio equipment.
What Photography Studio Equipment Do You Need to Determine How Much Studio Space is Required?
This will depend on the type of clients and photography work you want to do. A huge chunk of my clients are still outdoor, natural light loving people.
While a studio is great to have, I did not find the need to either convert a room in my house to a studio space or rent commercial space to convert into a studio.
I have a camera store close to home. They have a full, commercial studio that is inexpensive to rent.
Should the need arise for a full-blown commercial shoot, I can rent it out by the hour or even by the day.
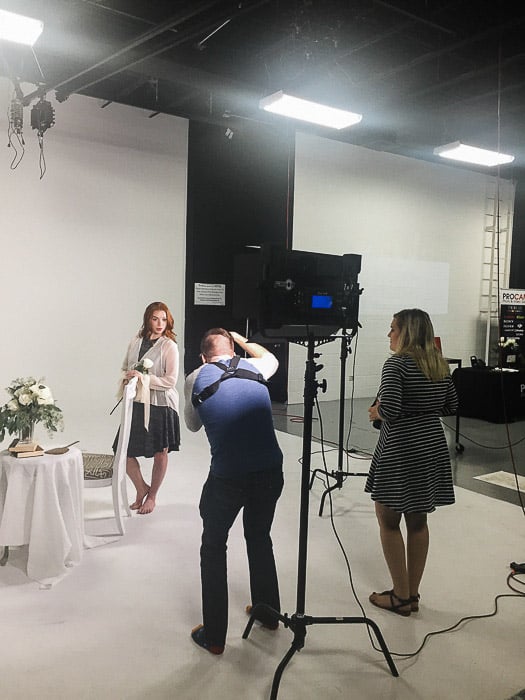
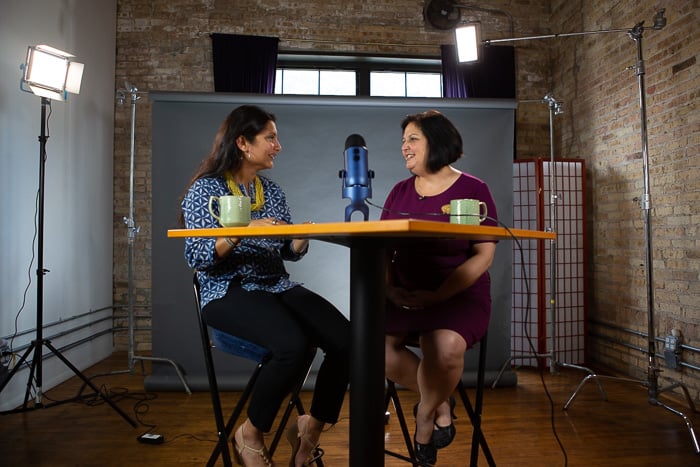
iPhone photo of a professional studio I rent out when I teach photography classes in a local camera store. They have the full studio setup with all the lights, backdrops etc that I ever need.
Keeping that in mind, I chose to have a mobile studio. I can set this up with ease anywhere in my house, in my basement or even outdoors.
My house has a good amount of windows that provide natural light. There’s also a space with skylights that provide overhead light. If the shoot calls for natural light, I can set up in a pinch.
I also have a darker unfinished part of my basement that acts as a mobile studio. I used it when I am looking for a more moodier, darker setup for my photos.
This is when I have food editorials or even personal photography assignments. I am photographing just for myself and looking to experiment with different lighting and editing techniques.
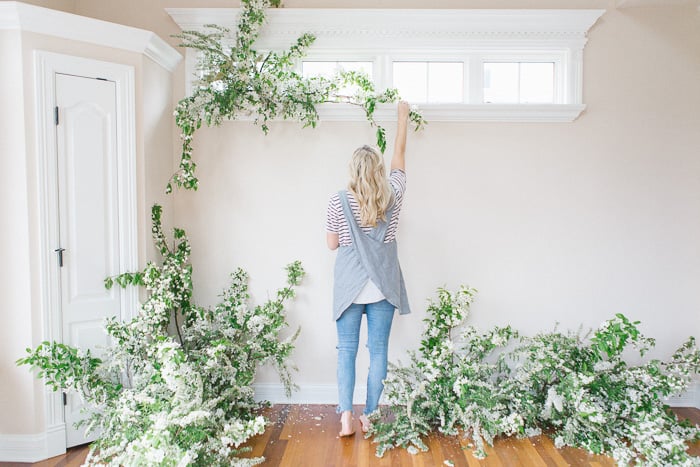
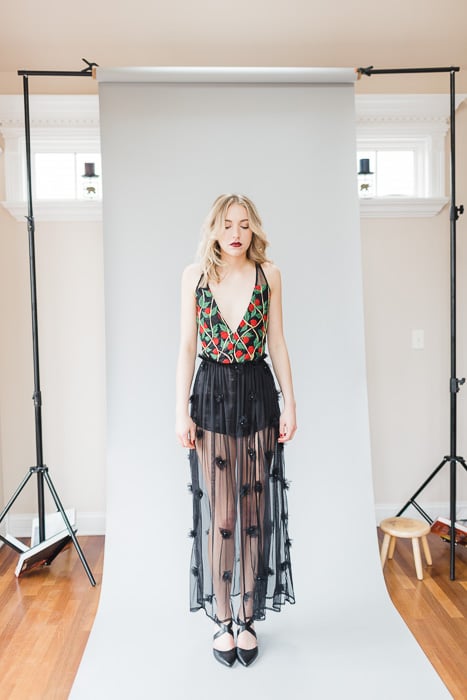
This is my go-to photography studio space in my house. I move out the furniture and play with props, camera gear and sometimes even have models come in for headshots.
Sometimes none of this matters. And all you really need is a small light source and a small clean small space to get creative with your photography.
This works for floral photos, macro photography and sometimes even headshots in a pinch.
Backdrops
Backdrops are essentially backgrounds that often create a clean and consistent look for images.
It pays to think hard about this one. Getting a collection of backdrops for your photography studio can take up quite a chunk of your budget. So you’ll be relieved to know that our top pick, that won’t break the bank is a simple solution from Neewer.
Think of all the photography scenarios that you will be doing in your studio and what color will suit the results you need.
There's a few options when it comes to the type of backdrop you can purchase:
- Muslin
- Canvas
- Seamless Paper
- Cotton and sometimes even old bedsheet will do in a pinch
Muslin
Muslin is a very versatile, lightweight photography backdrop. This is used for portrait photography.
It does not wrinkle as easily as other types of photography backdrops. It is easy to store in your photography studio or even transporting when you are outside your studio.
Muslin can come in a wide range of sizes like most other backdrops and costs also vary based on size. If you are just starting to invest in a studio or looking to build up your backdrop collection, I recommend buying some of the standard colors. Try black and brown or even off-white in a mid-range size.
The good thing is that these muslin backdrops last if taken care of. They will serve you in your photography studio for years to come.
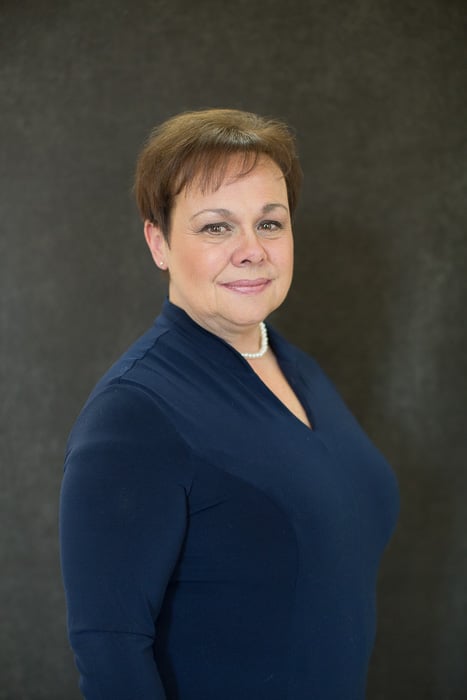
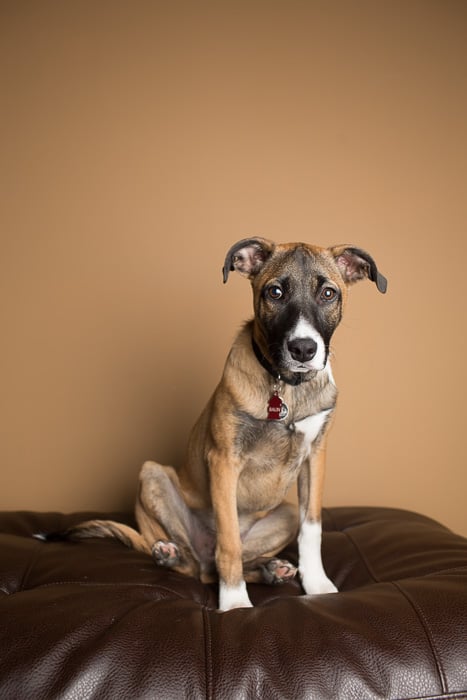
A standard muslin photography backdrop in textured black is perfect for the formal corporate headshots.
Canvas
Canvas backdrops are durable and high-quality and often offer fantastic details. They are what painters use when they are painting rooms in a house and want to protect the floor and/or furniture.
But canvases tend to be a lot more expensive than muslin. This is why it’s not the first choice for photographers. If you are the DIY kind, you can purchase inexpensive plain canvas material from any hardware store, some paint and make your own.
The good thing about DIY is that you can customize this for your brand and your style of photography. You’ll get a one of a kind product and backdrop.
Seamless Paper
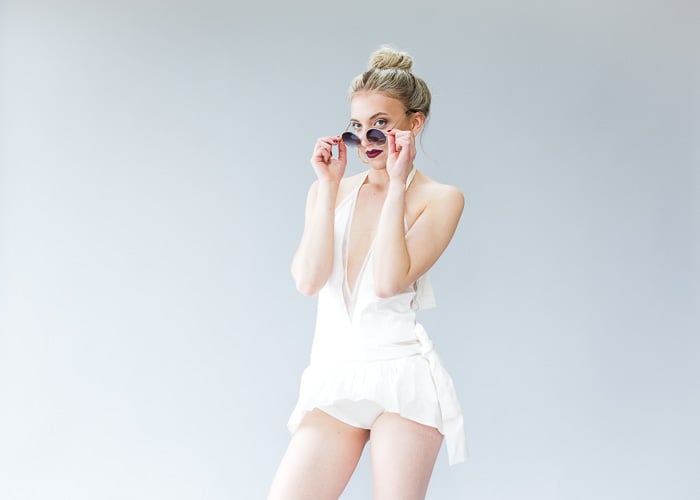
This is my favorite type of backdrop to use. As my photography style has evolved, I gravitate towards a more cleaner look and feel in my photos.
I like to keep things simple and not have to do excessive edits in post. It offers a crisp, flat color profile for the background. There are lesser chances of wrinkling or creasing as compared to muslin or canvas.
With muslin and even with canvas, I found that sometimes the crease or even the texture would look great to the eye. But it would look off in the actual picture.
This would mean hours of editing to smooth out wrinkles or even clone out the textures.
Seamless paper gives a very clean look in photos. It’s a valuable and inexpensive asset to any home photography studio.
With seamless paper in my photography studio, I have a clean looking background that is also versatile. Plus I was able to get seamless paper for my brand colors.
The images have an instant branding element added to them right off the bat.
Seamless photography backdrops are also affordable and come in a few different sizes. The one caveat with using seamless paper as a photography backdrop is that it must be treated with care.
Remember it is still paper, and paper can be torn and punctured if not looked after correctly.
Seamless paper does not make a good backdrop if you plan on working with a portable studio.
It is best to keep it at home.
I have seamless paper rolls in all my branding colors for my photography home studio. Sometimes I will also invest in others based on client needs, especially for long term contracts.
Another thing with a seamless paper backdrop is that it comes in a roll of paper. Depending on the size and length you would need to find a place to store it.
Keep it either standing up or laying flat. It can crease easily and hence proper storage is needed.
Other Options
There are plenty of other options when it comes to which photography backdrop you can use. It depends on the type of photography you specialize in.
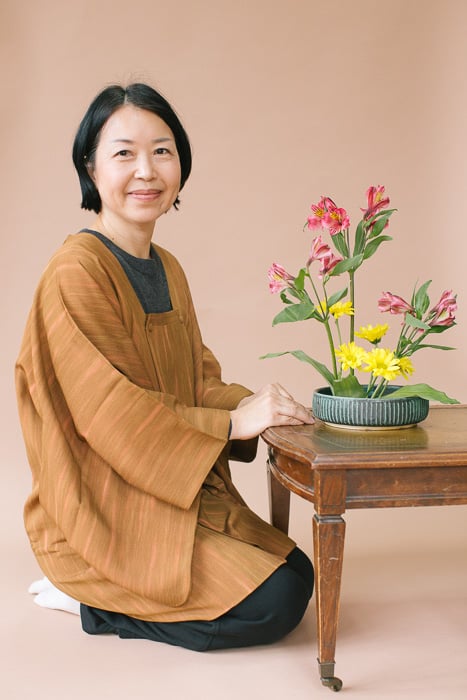
For food photographers, cotton, vinyl or even just plain old wooded planks are great backdrops. Also inexpensive to source or purchase.
Sometimes an old tabletop also works great. For headshots or even indoor family photos, even just a plain sheet works. It depends on the look, feel and color you’re after.
When you are looking to invest in backdrops for your photography studio, pay attention to the dimensions of the backdrop before purchasing.
What kind of photography do you expect to do in your studio? Is it portrait shoulders and above? You could do this with a 6ft x 4ft backdrop.
If it's the whole body then a 10ft x 4ft is probably the minimum you would want.
Backdrop Stands and Backdrop Support Systems
If you are using an external backdrop (not a permantant structure like a wall or side of a building), you are going to need some sort of support system.
This will hold up your backdrop and prevent it from sagging, drooping or even falling down. These support systems can range from clamps to backdrop stands to ceiling mounted rails. This Emart set has stands, weights, and clamps to cover most needs.
I have even used pushpins and duck tape in a pinch – although I don't recommed that. Imagine how your client will feel if you leave holes and duck tape marks on their walls!
You can see the backdrop stands I use. Items like books work great in a pinch to hold things down. I also have clamps that hold the roll in place.
Backdrop support systems can range from several hundred dollars to more entry level and basic, cheap, portable, lightweight options that get the job done.
When you are using wooden boards, old tabletops, etc., for food or flat lay type photos, strong clamps do the job well.
They hold up the boards steady so that there is no falling or sagging.
Lighting Equipment
Have you ever seen a full professional photography studio setup? There are more lights than there are people sometimes.
There are so many options for artificial light sources for a photography studio. It’s very easy to get overwhelmed.
Anything from overhead lights, to umbrella lights, to rim lights to light disks. Think hard about what type of photography you want to focus on and invest in the lights. The good news is there are plenty to choose from. Although it’s not cheap, the Godox AD200 Pro is a good choice. If your budget is tighter, then we like the Neewer 700W professional lighting kit.
You can always rent lights as the need arises if you have a camera or photography store close by. Some shops even rent gear online.
That way you can have the equipment sent to the location ahead of time. You don't have to carry any of the gear yourself.
A professional studio with a backdrop, overhead lights and all the bells and whistles.
Lighting setups for photography studios can be segregated in terms of the following characteristics
- Color of output light – is it tungsten light or florescent light?
- Direction of light needed – is it overhead, under, side light or even circular/all around?
- Quality of light – is it a continuous light source or an external flash type setup that works off a trigger?
- Quantity of light required – how many light sources are need to get the job done?
Here are a few different types of lighting setups that are most commonly used in photography studios.
Softbox
Softbox lights modify the main light source to provide a softer and more even light to fall on the subject. These are very useful in any photography studio. They provide more directional control over the light. You can point the light towards the subject and transmit it through a diffuser panel. This is what creates the diluted soft effect of the light.
You might need to practice with this light source before beginning to use it for paid shoots. You need to understand how directional light can impact an image. Where the shadows fall and how that affects the image.
Softboxes can be attached to either an external flash and set to fire using an off-camera flash system or can be connected to a continuous light source. For conventional speedlite flashguns we recommend the Triopo KS55 portable softbox. Most studio flash/strobe units will come package with one or more softboxes. We like the Neewer 700W professional lighting kit, which comes complete with softboxes.
If you are using a continuous light source pick one that has a way to control the intensity of light so you can achieve the look you want.
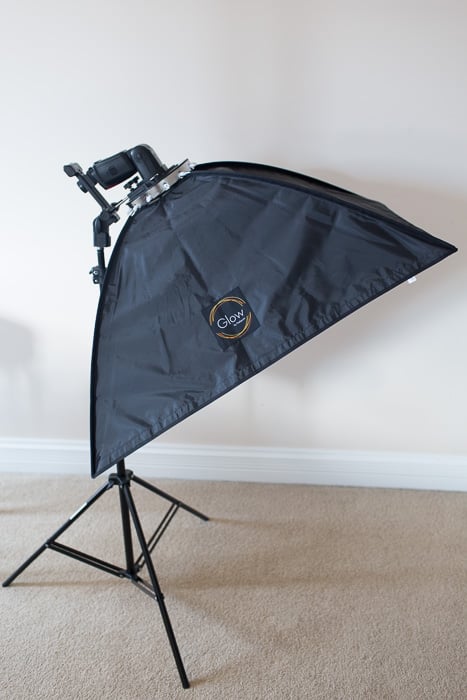
A basic portable softbox with just an external flash trigged from off-camera setup.
Umbrella Lights
Umbrella lights are perhaps the most popular choice for studio photography lighting. They are easy to set up, quite easy to port around and easy to use.
This makes them a great choice for someone looking to dabble in setting up their first photography studio and looking for the type of equipment to invest in.
If you're brand new to lighting then using an umbrella lighting setup is a smart option to go with.
There are two types of umbrella lighting setups
- Shoot through umbrellas
- Reflective umbrella lighting
Shoot Through Umbrellas
These are similar to softboxes. You point the light in the direction of your subject. The light is transmitted through a diffuser which spreads the light.
They provide less directional control of the light compared to softboxes. The light is spread over a much larger area a.ka. the umbrella.
These are easier to control compared to the reflective umbrella lights. They produce very broad and soft lighting.
Shoot through umbrellas are cheaper than softboxes. They also often come with stands, lights and all the tools needed to setup. If you need to add them to your kit, we suggest the NEEWER Studio Umbrella as a great value option.
You can see the catchlights using umbrella lighting here.
Reflective Umbrella Lighting
Reflective umbrellas shoot the light into a reflective material. This is then bounced back in the direction of your subject.
These are associated with less light loss and can be a little more difficult to control for beginners. The main advantage for these is when it is used to photograph a large group of people or photograph in a large space.
In this scenario, you wouldn't be able to get a shoot through umbrella close enough to provide enough lighting. A reflective umbrella, on the other hand, would be able to provide the lighting. This pair of LimoStudio umbrellas fits the bill perfectly.
An umbrella lighting setup in the basement with a willing model is sometimes the perfect setup needed for a photography studio!
When buying umbrella lighting, they tend to come with light bulbs that are essentially a continuous light source.
You can also purchase umbrellas separately and add them to either an off-camera flash or a separate light source.
That depends on the budget and type of lighting preference.
Conclusion
If you are buying everything from scratch and don’t to invest a whole lot of money, it might be a better option to get everything in one kit.
There are many different photography kits available for various price points. These kits often have a standard backdrop color, lights, umbrellas, stands, and clamps. These fit neatly in a bag.
The disadvantage is that you might get something that you are not interested in or ready for. The first time I opened my lighting setup, I remember being so overwhelmed. It took me a while to muster up the courage to set everything up and use it.
My advice would be to invest in a couple of backdrops using standard colors (or your branding colors). Add a simple external light source with an easy to install lightbox or umbrella.
If you have the ability to rent or test out the photography studio lighting gear beforehand, do this first. Then you can invest in exactly what you want and need when the time is right.