You can use foreground, middleground, and background to add depth and dimension to the image. These are often used in landscape photography. But they are also useful in other genres of photography.
Adding depth and dimension to any image adds more interest in the eyes of the viewer. It makes them pause to take in different elements and how they work within the context of the frame. Here’s how to use foreground, middleground, and background for better images.
What Are Foreground, Middleground, and Background?
In simple terms, the foreground is the part of the image that is closest to the camera. The background is the part of the image that is further away from the camera. By default, the middleground is what’s in the middle of the foreground and the background.
This might seem simple when it comes to scenes in real life, which are often 3-dimensional. It gets a little tricky when you think about a photograph. Photos essentially compress all these elements into a flat 2-dimensional image.
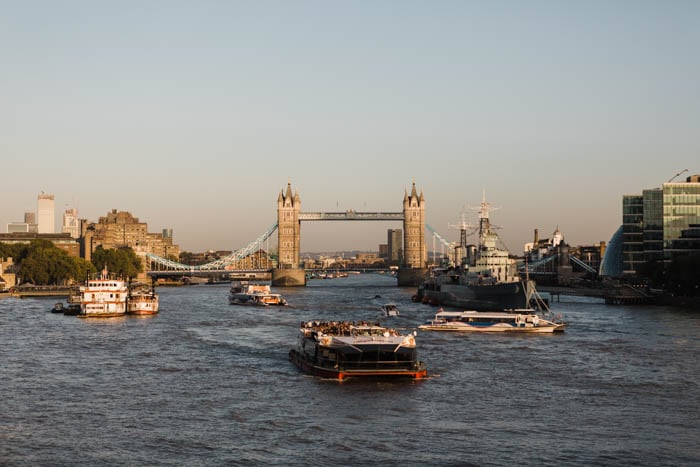
In the above image, the boat closest to the front of the frame is considered the foreground. The boats behind this one are considered the middleground. The London Bridge and the buildings behind it would be the background.
Another way to think about the three elements of foreground, middleground, and background is to imagine image layers. Peel off each layer to see what remains. The background is the last layer, then comes the middleground, and finally, the foreground.
You can try putting the main subject in the middleground area and adding elements or objects in the frame to act as the foreground and background. This can make an image more compelling and eye-catching.
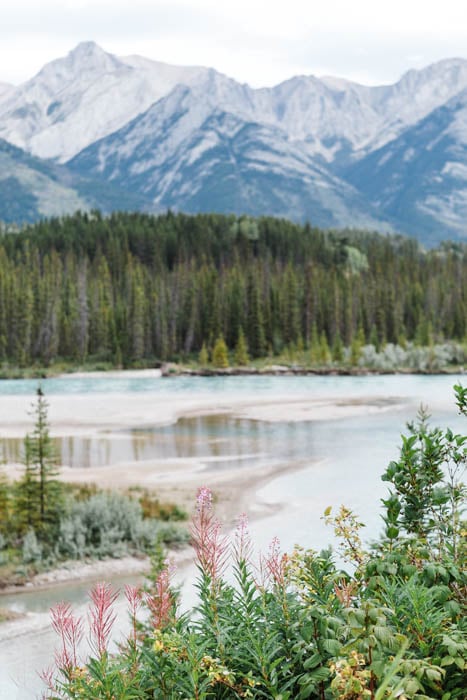
In the above image, the pink flowers closest to the viewer are considered foreground. Can you almost imagine peeling off this layer to see what is behind it?
The water and the trees behind the stream are considered middleground. Peel those back, and you can see the foothills of the mountains in the background.
Peel back each layer of the mountains to see the entire range of hills. On the other hand, you can imagine how adding each element to a blank canvas builds up layers. Think of how it adds depth to the whole image by way of background, middleground, and foreground elements.
How to Use Foreground, Middle Ground, and Background in an Image
In an ideal situation, the frame would have something eye-catching in all three areas. This is not always possible. Especially when you are out and about photographing in the field or even in landscape photos.
You might find two out of the three elements easily. More often than not, we find images that have a strong background and foreground or background and middleground.
You might feel that these two elements are strong enough to carry the image. You can use this technique with other photography rules, too. Here’s how to use them to improve your photography composition.
1. Use This Technique With the Rule of Thirds
The rule of thirds works by dividing the frame into nine equal sections by a set of two vertical and two horizontal lines across the image. It says you should place the most important part of your image—the subject—on one of the intersecting spots.
The rule of thirds adds an element of interest by ensuring that the subject is not always in the center of the frame. By combining the rule of thirds with the concept of a distinct foreground, middleground, and background, you can further strengthen the composition of the image.
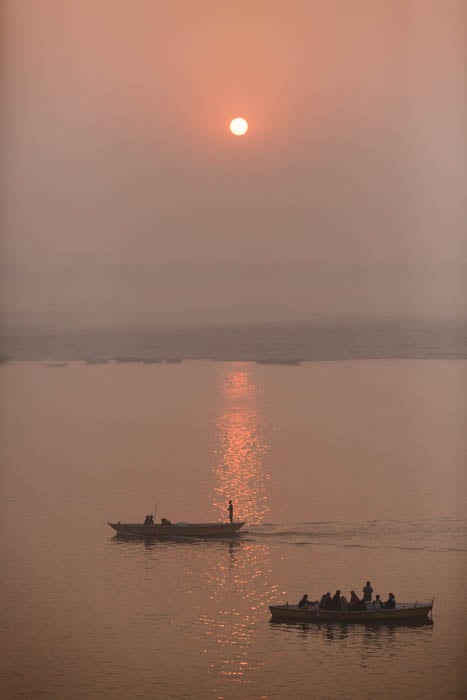
This is one of my favorite images of all time. Early morning sunrise over the ghats of Varanasi and the boats and well as the sun both use the rule of thirds. But here, the boats are the foreground element, and the sun is the background element.
2. Use This Technique With Leading Lines
The goal of using leading lines in an image is to help the viewer by drawing the focus to the main subject.
Sometimes, photographers use leading lines like roads, poles, or even buildings. These direct the eyes of the viewer to the main subject.
In other instances, the leading lines are more figurative, such as road signs or building signs. It could be a secondary subject that is used to draw the viewer towards the main subject in the frame.
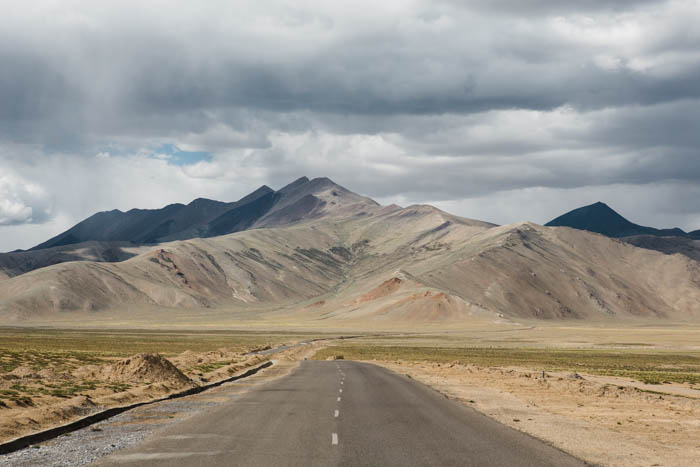
Leading lines can naturally draw the eye to the main subject in the middleground. Here the middleground and the background are the same (i.e. the layers of the mountains).
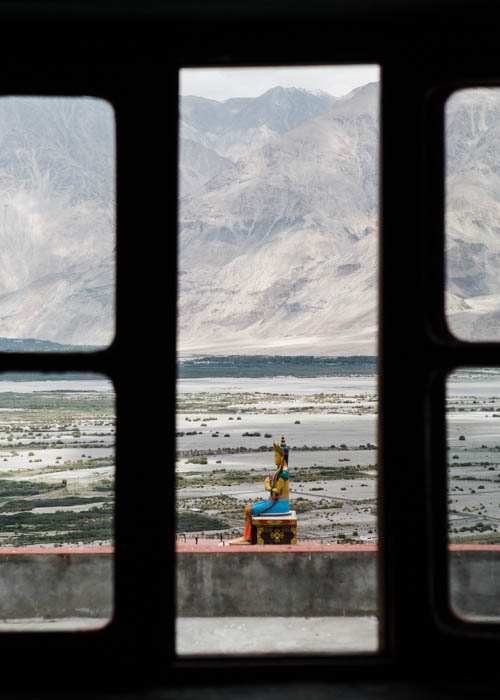
3. Use This Technique With Creative Framing
Creative framing is a simple photographic technique. It helps you define the subject and elevate its relative importance in the image.
Frames serve to close the frame by preventing the viewer’s gaze from exiting the image. Framing elements are all around us. All it takes is a little careful observation and use of perspective.
Using architectural elements, nature, color, textures, light and shadows, reflections, people, and objects is a great way to add depth and layers to your images. They can bring out a clear separation of the three different regions within the image.
Settings for Foreground, Background, and Middleground
Most landscape photographers photograph at narrow apertures of at least f/8 and beyond. A narrow aperture is a large f-stop number (greater than f/5.0, for example). A wide aperture is a small f-stop value (smaller than f/5.0, for example).
Using a narrow aperture allows for all elements in the frame to be in focus and sharp. The distinct layers can be seen.
But rules are meant to be broken. Sometimes, it is okay to shoot landscapes with a wide aperture. You can still get an image that has distinct layers, but they will have a slightly blurred background. The wider the aperture, the shallower the depth of field.
The bokeh effect of the background and foreground with an in-focus middleground has its own charm. And it still achieves the effect of distinct layers in an image.
The image on the left was created with a wide aperture. The foreground flowers are in focus, but the rest of the image is blurry. The image on the right uses a narrow aperture. The middleground and background are in focus, and the foreground (the flowers) is blurry.

How to Achieve a Layered Look in Post-Production
Sometimes, the technical and creative ways of achieving the layered look of a foreground, middleground, and background don’t always work out as you had hoped. One instance might be if you are photographing in mixed lighting situations like harsh light and shadows or even in low-light situations.
You can still achieve a distinct foreground, middleground, and background effect in your images. You’ll need to take individual photos and combine them in post-production via a process called bracketing.
I am a big proponent of getting images correct straight out of the camera. But sometimes things are not under your control. Bracketing is a good way to achieve a distinct foreground, middleground, and background in your images.
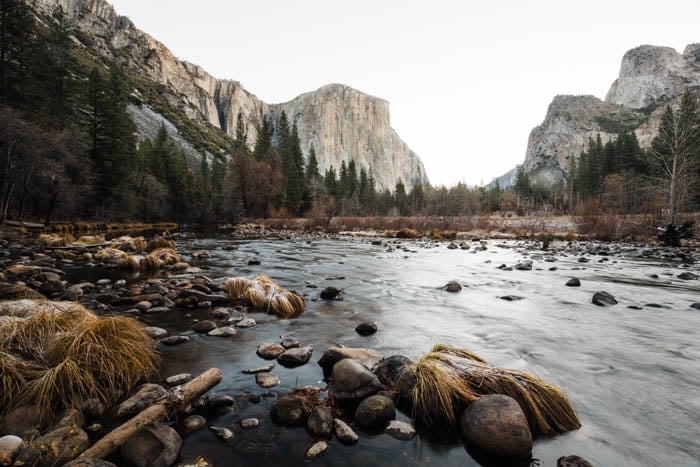
The image above is a merged image of the famous Half Dome in Yosemite National Park at sunrise. Because it was close to sunrise, it was really dark. I was not able to get both the foreground and the background in focus in camera.
I photographed different images (bracketing the exposure) with the foreground in focus and brightly lit. Then, I photographed the background in focus and merged them in Lightroom. Merging or stacking images can be done in Lightroom or Photoshop.
Here are the steps to do it in Lightroom.
- Select all the images that you would like to merge.
- Choose the menu option Photo > Photo Merge > HDR.
- Depending on how many images you have, it might take a few minutes.
- In the HDR Merge Preview dialog, you can choose to apply Auto Align and Auto Settings on the images.
Conclusion: Foreground, Middleground, and Background in Photography
Understanding the difference between foreground, middleground, and background elements in photography is a great way to add interest to your images.
Look at images from some of your favorite photographers or even artists like painters. Note how they use layers in their imagery to create depth and interest.
This is a great way to train your creative eye to know what to look for in a scene, even before you take a single shot. And we all know that images that have depth are much more interesting. And they’ll hold the attention of the viewer longer.
Check out our Intuitive Composition eBook to perfectly compose your images every time!


