In this article, I will teach you how you can make stronger compositions in your mountain photography.
How do you take pictures of mountains? You can approach mountain photography in two ways. You shoot long, or you shoot wide. The first tips focus on wide-angle mountain shots that include a foreground. After that, we’ll look at using a telephoto lens to zoom way in on mountain peaks for a very different approach.
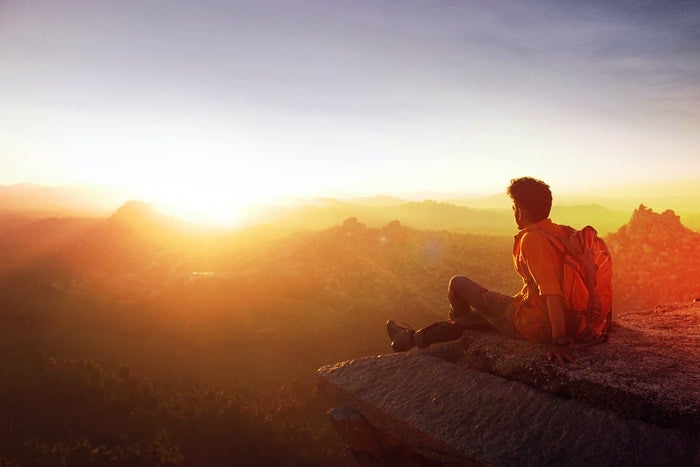
Photo by Abhiram Prakash (Pexels.com)
1. Forget About Climbing
Great photos don't have to involve climbing gear. Nor do you need years of experience. Today, mountain trails will take you to all but the highest places in the world. You can reach just under 7000 meters by hiking alone on the Aconcagua in Argentina, for example.
Hiking such trails isn't easy at all. It requires extensive training and a lot of willpower to summit the most demanding slopes. But rest assured. For mountain landscape photography, we don't need to venture to the top of the world.
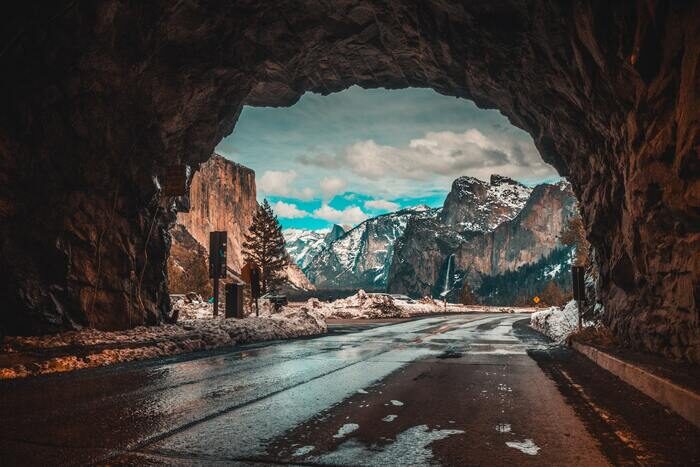
A lot of great mountain photographs are actually shot from sea level. In this way, you can easily emphasize the monumental aspects of the landscape. We recommend you use a longer focal length to highlight all the details of the peak.
Sunset among the peaks of Iceland’s rugged Snæfellsnes peninsula. This one was shot from the side of the road, nearly at sea level.
2. Where to Find Photogenic Mountains
Your destination and photo are determined by the rock, age, and shape of the mountains in a specific mountain range.
I'll share my top European locations before we get into wide-angle photography.
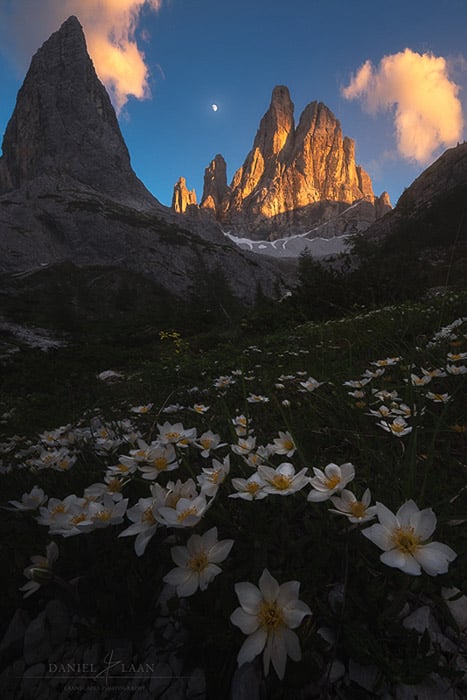
The Dolomites
The Italian Dolomites are among the most jagged mountains in the world. It's a two-hour flight from London to Venice, followed by a two to three-hour drive, depending on where you stay. These factors make the Dolomites among my favorite photography destinations.
The Dolomites are a UNESCO World Heritage Site for their scenic beauty and extensive flora and fauna. It's also a large area that spans more than Northern Italy. In fact, most people don't know that the Dolomites continue for a while into Slovenia.
The most easterly tip that bears the name is Polhograjski Dolomiti. Although it barely resembles the Mordor-esque qualities of the summits in Italy.
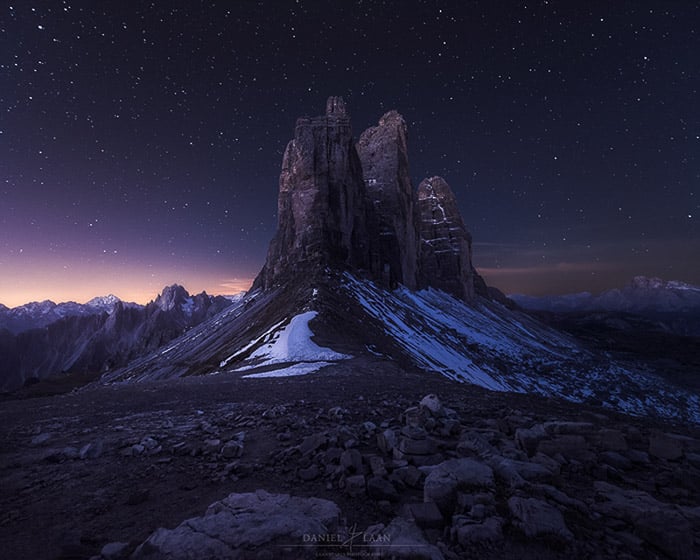
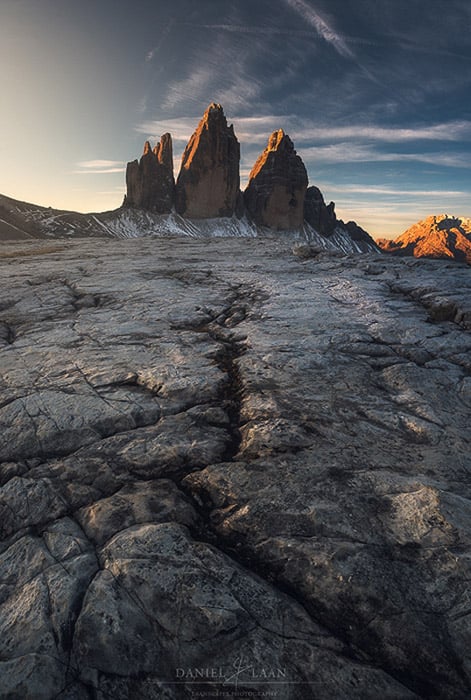
Tre Cime looks wonderful under a veil of stars, and this well-photographed place isn’t that busy at night.
Scottish Highlands
If there's one place of endless mountain photography inspiration, it’s the Scottish Highlands. From the rounded domes in the Cairngorms to the spiny Black Cuillin on Skye, these diverse mountains offer amazing views.
Norway
This enormous mountain range on the Scandinavian peninsula is about 1800 km from north to south.
Jotunheimen, in the west, hosts the highest mountains. But the archipelago north of the Arctic Circle, the Lofoten, is truly the jewel in Norway's crown. Azure waters surround snow-capped peaks. Perfect for snowy mountain photography in the heart of winter.
3. The Wide-Angle Viewpoint
To bring more variety to your portfolio, it's a good idea to mix up viewpoints and perspectives.
From down below, the base of the mountain will look more massive than its peak. This will make the mountain appear to be looming overhead.
The valleys are the places you'll want to visit when thinking of wide-angle mountainscapes.
Make your foregrounds large by getting really close. And point the wide-angle lens down to allow the lens distortion to stretch the mountains.
First, look for foregrounds. The less you're focused on the magnitude of the mountains, the more you can pay attention to the small stuff that matters in your compositions. And keep the camera in hand for now. You don’t need a tripod just yet.
Using Lens Distortion to Your Advantage
A wide-angle distortion is exactly what you want in mountain photography. It enhances the apparent height of the mountains. That holds especially true for vertical compositions, where you can create dramatic results.
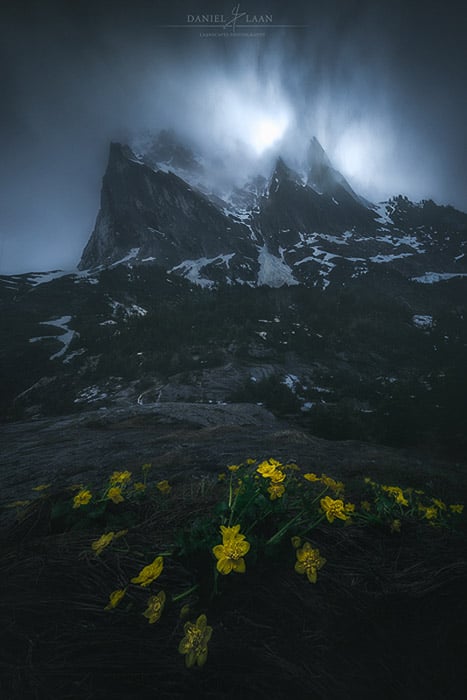
Create Clean, Sweeping Foregrounds
The idea behind these types of shots is that you have a large, sweeping foreground that connects to the mountains in the background. Think of flowers, a quirky shape in the snow, or a dead tree branch. Just about any foreground subject will do. Meandering rivers or waterfalls also work well.
Look for something that's unique to this location to tell a story about this place. But be aware of anything that is not your foreground subject.
Wildflowers tend to grow among the grass. If the grass has lost its color because it's later in the season, the dead blades will distract from the image. Carefully remove any dead grass before you press the shutter button.
The same holds true for brightly colored rocks. Get those out of the shot too. And be especially careful with a crisp cover of snow. One misstep, and you will kick snow all over your virgin foregrounds.
4. Get Closer Than You Think
Now it's time to get that tripod in place.
There's a rule of thumb to help you decide what to do with your tripod height. The smaller the foreground subject, the lower you need to go.
Yellow flowers in the foreground work well against a blue background because of the complementary color contrast. This dreary morning in the Swiss Alps is a great example of how the land interacts with the sky.
Make clear what your image is about by filling the entire bottom of the composition with the foreground. A waterfall might be fairly straightforward to shoot, but with wildflowers, you end up at a minimum focus distance in the best case.
5. Learn to Focus Stack for Better Compositions
Small subjects that appear huge in the frame are technically demanding because you can’t focus everywhere at once.
At minimum focus distance, the difference in sharpness between your foreground and the mountains might be noticeable, even at f/22.
Focus stacking is your answer to capture both a sharp background and foreground. Think of this technique as HDR, but instead of different exposures, it's the focus distance that changes throughout multiple shots.
How to Focus Stack by Hand
For the best results, every setting on the camera should be exactly the same: white balance, shutter speed, ISO, and aperture. But most importantly, the camera needs to be mounted on a tripod to maintain the same vantage point.
With focus stacking, you'll need to fix everything in place throughout multiple exposures. Make sure you're using a solid tripod and shoot with a cable release. This takes care of the physical movement of the camera.
Start by adjusting focus to the closest object in the scene and wait for the wind to die down for a bit. Hit the cable release and adjust to focus a little further into the scene. Repeat this process until you've reached infinity.
These grounds used to be truly alive at one point in time. The very rock on which this was captured used to be some predecessor of coral. And yes, this was all underwater.
Note that you need more exposures at shorter distance intervals when you use a larger aperture like f/4 and less at smaller apertures like f/14.
My advice is to start with fewer images to make it easier to work with in post-processing.
Why Should You Focus Stack Your Mountain Photography?
So what about using f/22 instead? Closing up the aperture that much has some nasty side effects. For starters, you will let less light in. At the same ISO, this will lengthen the exposure time (shutter speed).
Even with the slightest breeze, delicate foreground elements will sway in the wind and make the foreground look less sharp than, say f/7.1. Also, at minimum focus distance, f/22 will never encompass the entire depth of field all the way to the mountains at infinity. Focus stacking will be very useful at your lens' sweet spot. Even the cheapest lens will appear to shoot sharp images at f/7.1.
Lastly, diffraction is a physical property attributed to the way the light hits the sensor. Even the sharpest lenses out there will not be as sharp when you close the aperture all the way.
6. Which Season Has the Best Light for Mountain Photography?
That's a tough question to answer. It's largely dependent on the mountain and its surroundings.
Above the Arctic Circle, your best bet is to visit during the Northern Lights season, which can be seen throughout winter.
However, the aurora statistically peaks around the 21st of September as well as the 21st of March. This is due to a strange magnetic interaction between the Sun and the Earth that we do not fully understand.
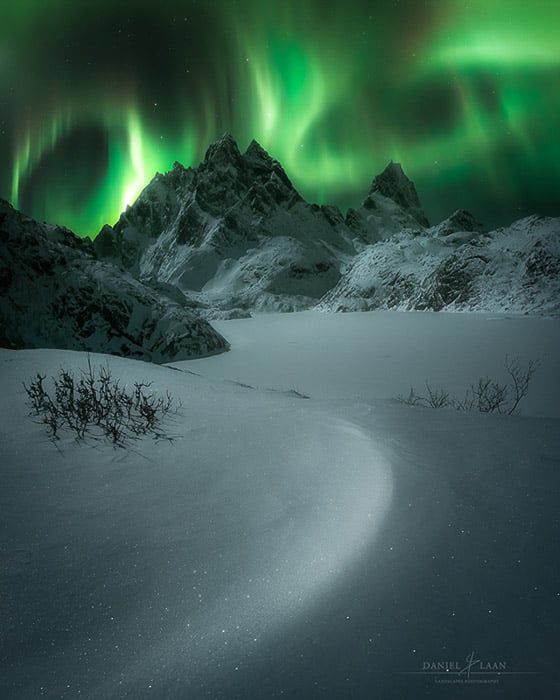
The Aurora above a more remote area in the Lofoten. Be very careful not to mess up the snow in the foreground while attempting to use the virgin snow as a foreground.
The end of September is my favorite time for mountain photography. The Alps are often veiled in mists in autumn. And with the sun not that high in the sky anymore, the light is much softer too.
The best tip I can give you here is to plan ahead. Use Google Earth, Photo Pills, or Sun Surveyor to locate your mountain and see if any other mountain will block the light hitting it.
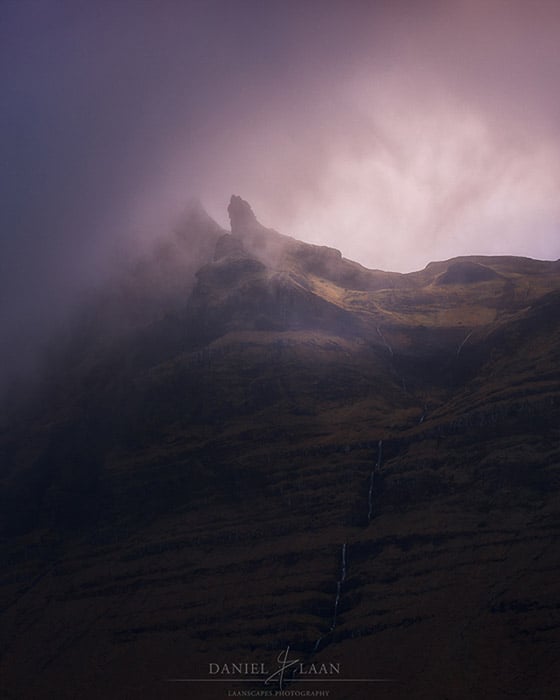
It had been raining all day. Then some lone peak in the Swiss Alps was revealed by the swirling clouds. Moody shots like this can best be photographed in September or March when the temperatures change a lot.
Mountains are among the most remote places on the planet. This is why it is worth the effort to consider mountain photography at night. Hardly any artificial light reaches the peaks, so the night sky is pure and dotted with stars.
Start with a 14mm lens and camera settings like f/2.8, 25 seconds, and ISO 6400 for spectacular results on a clear, moonless night. If it's too bright, lower the ISO first.
7. Arrive and Scout the Location Early
Nothing is as frustrating as having to hurry to your location in the fading light while having to find an interesting foreground.
Scout ahead during the day whenever you can. Harsh daylight isn't good for photos, but it is for seeing which foregrounds work and which do not.
Even if you don't have time to actually see the place before you plant your tripod, it's important that you take your time before shooting. This is why I really like sunsets in the mountains. In accessible regions, you can hike in after an early dinner and have all the time to select the best composition.
A long lens can make it look like this was shot in some remote part of the world, not on the side of the road in the Lofoten.
If you really want unique photos though, camping in the wilderness is the way to go. It can really help you find the needle in the haystack. That special foreground shows an intimate relationship with the mountains. Plus, you end up with mountain photography that most people haven't seen before on social media.
8. Lens Choices for Telephoto Mountain Photography
A very different niche of mountain photography is images that focus on the summits. These photos often involve a telephoto lens. Some of the best examples I've seen are shot in the 300-600mm range.
Most of those photos are shot with prime lenses. But having a telephoto zoom opens up lots of shooting options. And the versatile focal lengths mean you have to carry fewer lenses on your hike to your shooting location.
Looking down with a long lens can mix things up a bit.
Hauling a telescope like a 500mm prime up a mountain is admirable but very uncomfortable. Instead, consider using a teleconverter to extend the range on the longest lens you already have. A 70-200mm lens will transform into a 340mm lens with just a 1.7x teleconverter.
Alternatively, there are a couple of 150-600mm zoom lenses out there that yield spectacularly sharp results for the range they offer.
9. The Telephoto Viewpoint
If you can increase your altitude relative to the mountain you're shooting, the summits will appear more prominent. What's more, is that interesting details will appear that are hidden from the valleys.
Increasing your altitude isn't without danger or effort. But in some cases (especially in the Alps), you can hitch a ride to the top with a cable car.
Once you're on location, it's mainly a waiting game for the light to be just right. Pick a mountain and stick to it. Keep your tripod locked on the mountain and watch how the light and weather interact with it over time.
Even when there aren't any clouds on the mountain, they can develop in the crevices and on the leeward side due to changing temperatures.
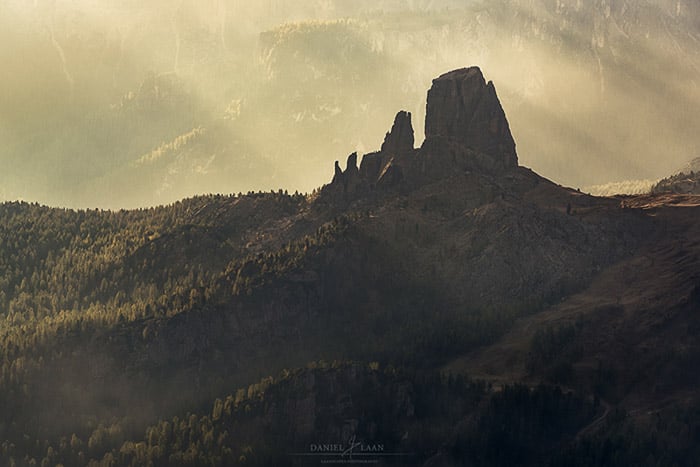
The area near Cinque Torri in the Italian Dolomites is kissed by a misty sunrise. Captured from a freezing mountain peak to the north and from high up, this is a shot I haven’t seen before. Long lenses like the 150-600mm that was used here can create unique shots in almost every location.
10. Ideal Mountain Photography Weather
Low clouds will strengthen the connection between the mountains and the sky. The ideal mountain photography weather for those long lenses is a dreary early morning. Imagine swirling clouds among jagged pinnacles that are straight from The Lord of the Rings.
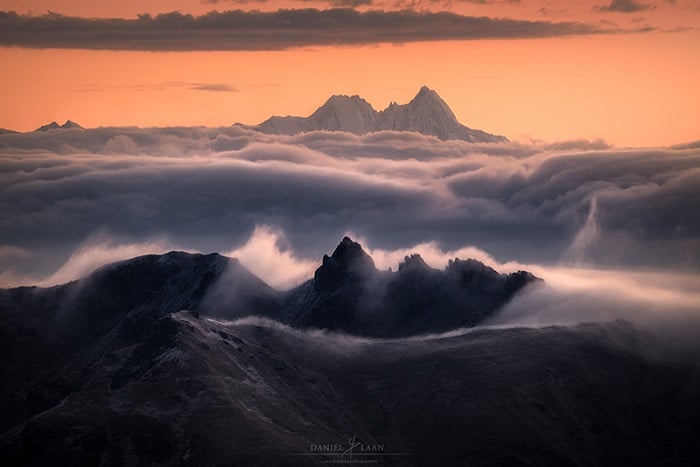
The reddening of the sky over a sea of clouds in the majestic Dolomites.
11. Add Emotion to Mountain Photography
An often overlooked aspect of photography is how your art affects your audience. We tend to shoot the scene and move on to the next one.
Slow down and observe how the clouds interact with the mountains. You might just see a glimmer of sunshine burst through to make the image more meaningful.
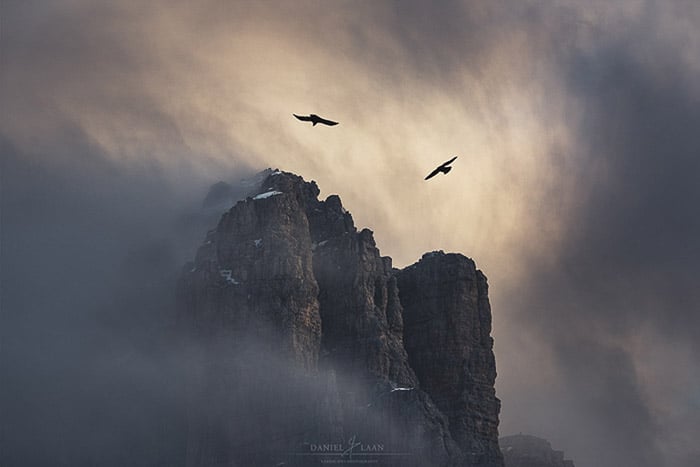
Two Alpine choughs caught twirling in the mists above Lagazuoi in the Dolomites.
If you find it difficult to understand how to convey emotion in your mountain photography, there are a couple of guidelines that will help.
Start by changing the position of the horizon. A low angle or high horizon will make a strong, dramatic, or even menacing impression. Placing the horizon below the center of the frame will make your landscape feel a lot more airy, lonely, or fresh.
Left and right also have a deeper meaning. A subject to the right tells of something more in the future. A subject that hugs the left of the frame makes for more pressing matters.
Be aware that subject placement and the psychological effects largely depend on the target audience. We read from left to right, but in parts of the world, it's the other way around. Because of cultural differences like this, your image can invoke different emotions in different cultures.
The important part to take home is to know that your choices have an impact. The next step is to ask yourself what you feel as the creator of your work.
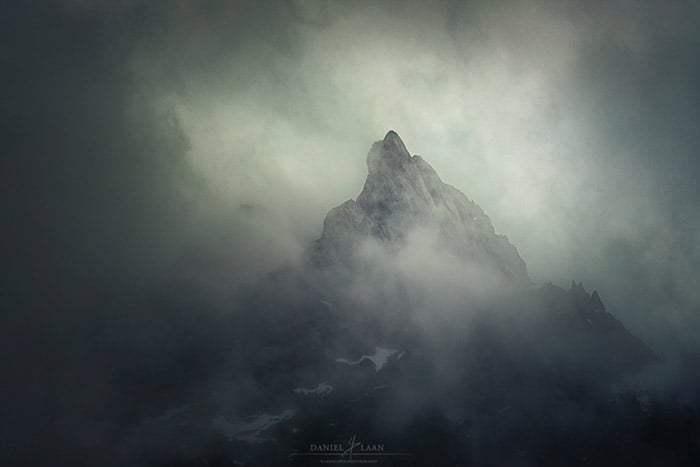
12. Simple Compositions Go a Long Way
If you leave an area of your image blank, everything outside of that area will command twice the attention. Use this for an intimate shot of a beautiful mountain shrouded in mist.
A graduated filter can help simplify the top part of the image, but I like to do this in post-processing. I just drag a graduated filter from top to bottom in Lightroom and adjust its settings.
Be aware that darkening a part of the image will also increase contrast and, therefore, saturation. If you want your sky to be simple, decrease contrast and saturation.
We call those empty spaces in art negative space. Negative space contains no detail or subject that adds to the composition. It can be either really dark or extremely bright, as long as this area doesn’t draw attention.
A clear blue sky is an excellent example of an area that's without detail, but so is a misty grey area. The more negative space there is in an image, the more your subject will stand out.
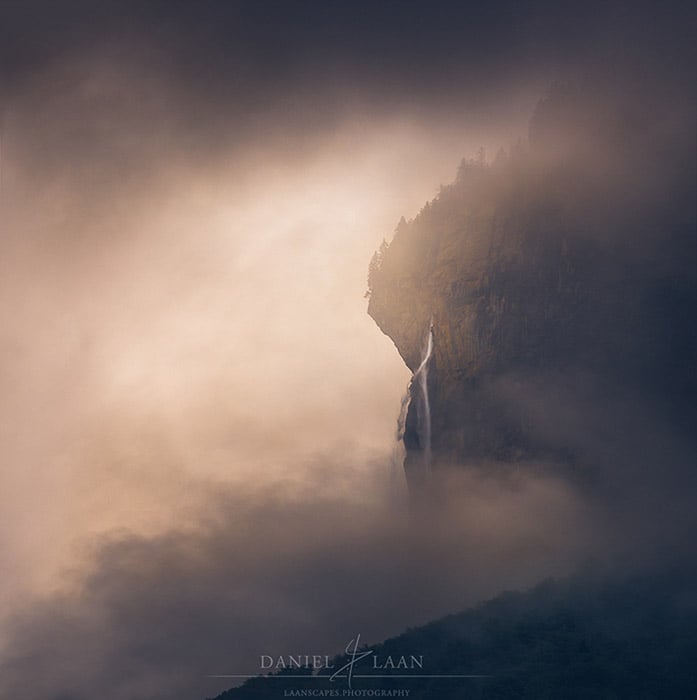
Detail of the Lauterbrunnen valley in Switzerland. Wedged between thick clouds, the Spissbachfall on the right.
Conclusion—Best Mountain Photography Tips
Mountain photography can provide some of the most majestic images you’ll ever see. But getting images that amazing takes some work.
If you use the tips above, you’ll be getting incredible mountain photography shots in no time. And you’ll get to see some incredible scenes along your photography journey!
Learn how to perfect your skills with our Simply Stunning Landscapes course!