If you want to learn how to merge photos in Lightroom, you have come to the right place. Lightroom lets us merge photos inside the application for advanced edits. We can easily produce high-quality HDRs and panoramas thanks to the Photo Merge tool.
Today, we take you through the photo merge process in Lightroom and explore its flexibility. You will understand the power of Photo Merge in Adobe Lightroom, so you can consider these options when you next shoot on location!
The Photo Merge tool in Lightroom performs the automatic photo stitching to merge photos. You can produce a panorama or even an HDR (High Dynamic Range) panorama. Adobe Lightroom lets you perform these photo merge abilities easily inside the app.
A separate dialog box gives you various customization options. These options let you fine-tune your photo merge action and produce the best image possible. Your new image is then saved directly into your Lightroom library.
Photo merging was initially only possible in Adobe Photoshop or specialized software. But photo merging tools are now available in all good photo editing software.

Both Lightroom versions have the same photo merge abilities but different customization interfaces. Lightroom CC provides a slightly more user-friendly interface. It uses helpful thumbnails to visualize the type or merging approach in creating panoramas.
The interface is much larger in Lightroom CC. We can preview our merged photograph in a much larger format than Lightroom Classic.
Both Lightroom versions are extremely easy to work through while producing great results. So you can be confident that either Lightroom version will achieve the highest quality merge.
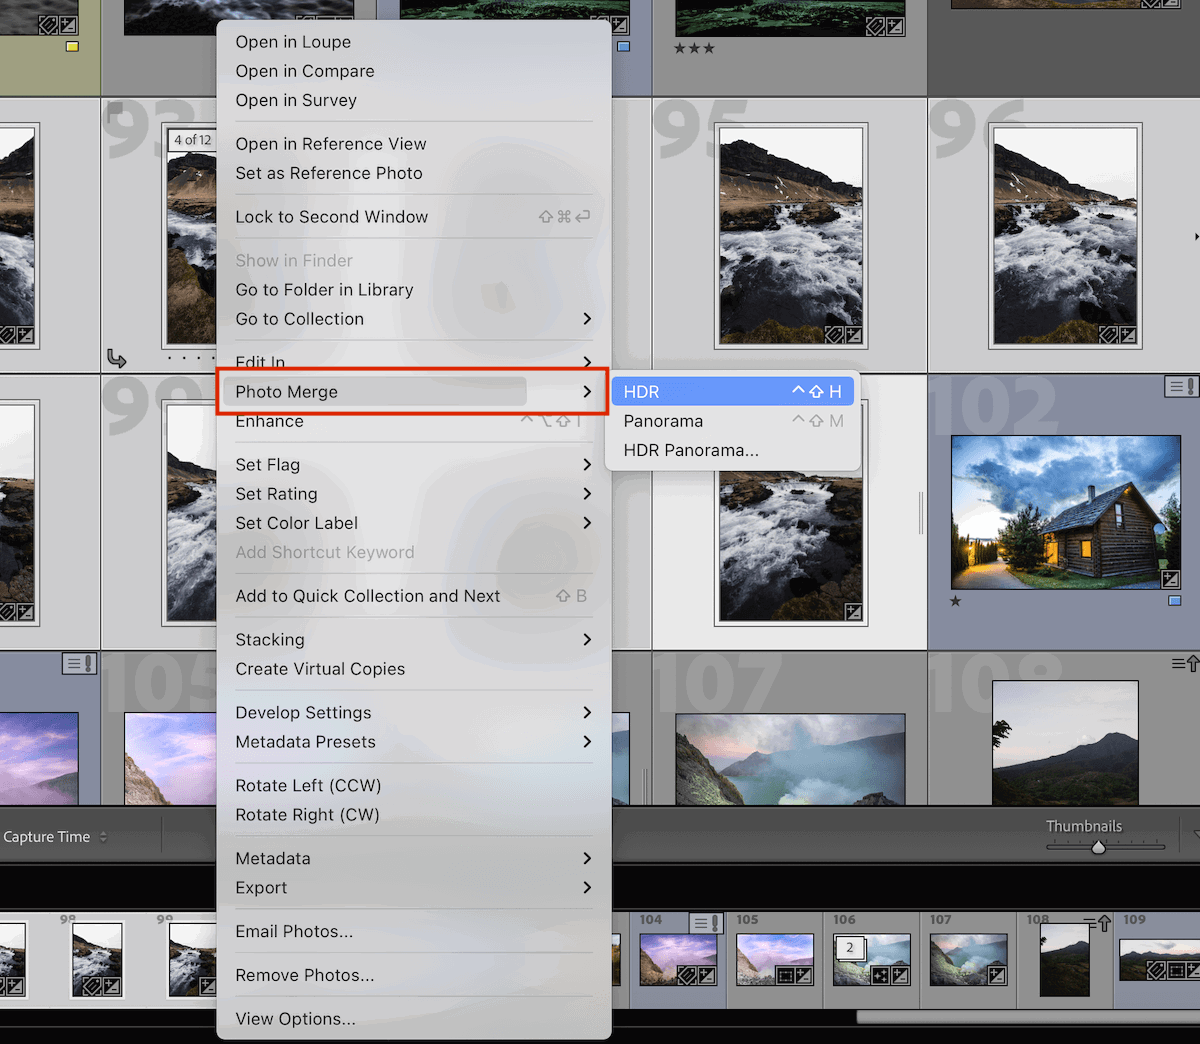
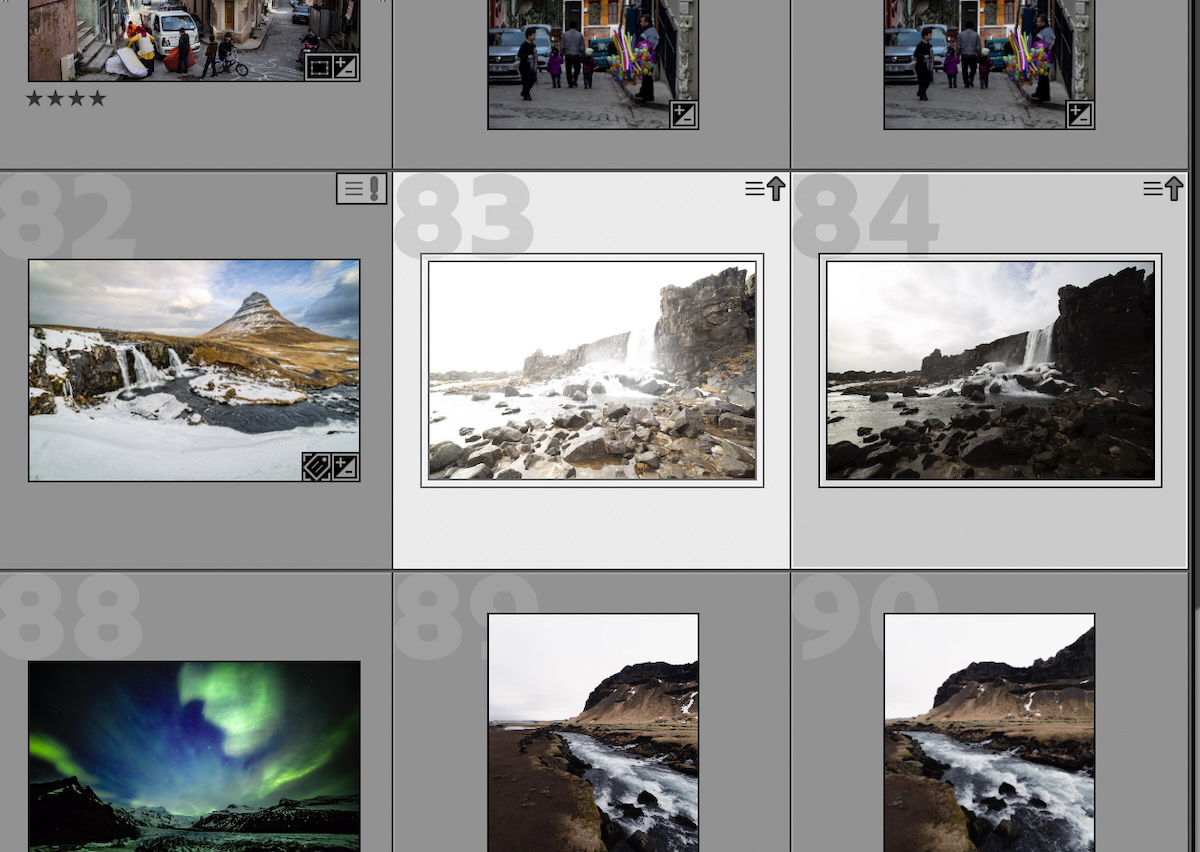
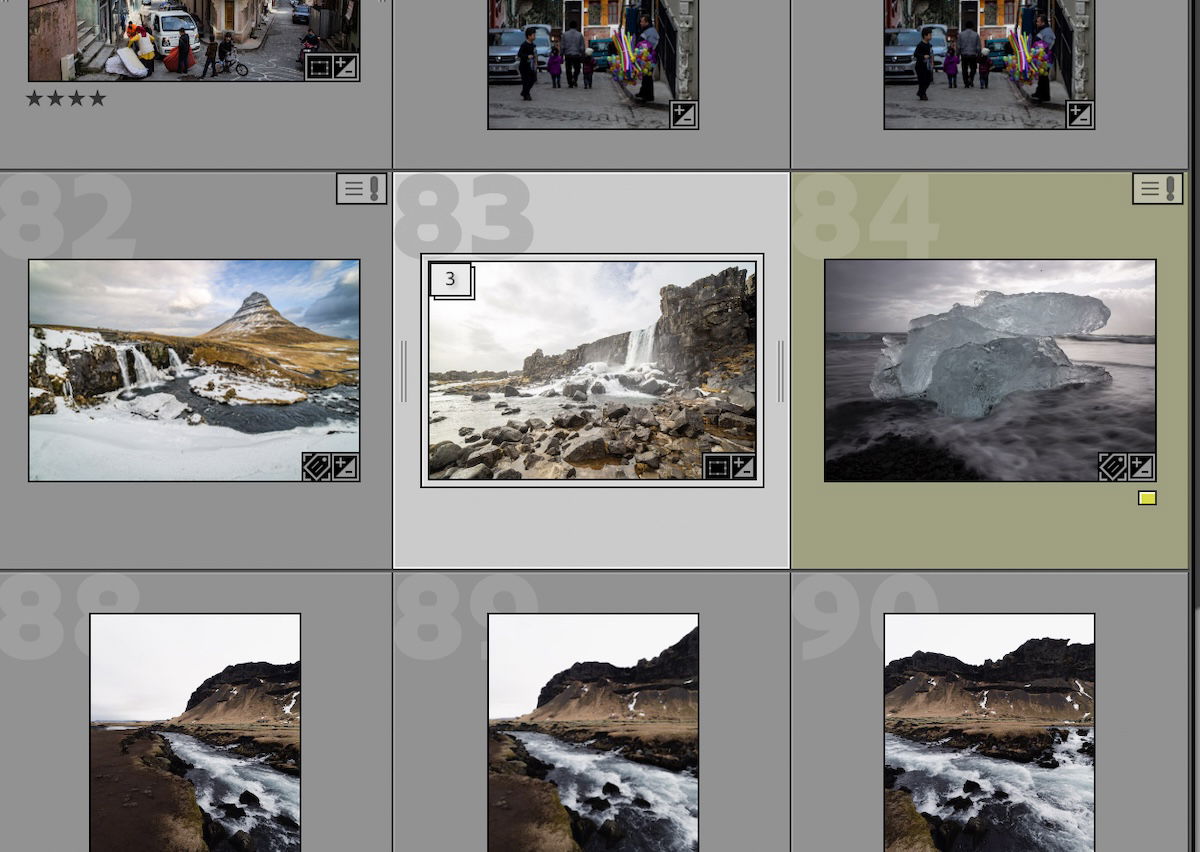
To find the Photo Merge options, highlight all the images you want to merge and right-click. Then, find the Photo Merge tool. This opens up to HDR, Panorama, or HDR Panorama.
You can also go to Photo > Photo Merge along the top toolbar in both Lightroom versions.
We now explore Lightroom’s three Photo Merge options and all its customization options. Read on to learn more about each photo merge technique.
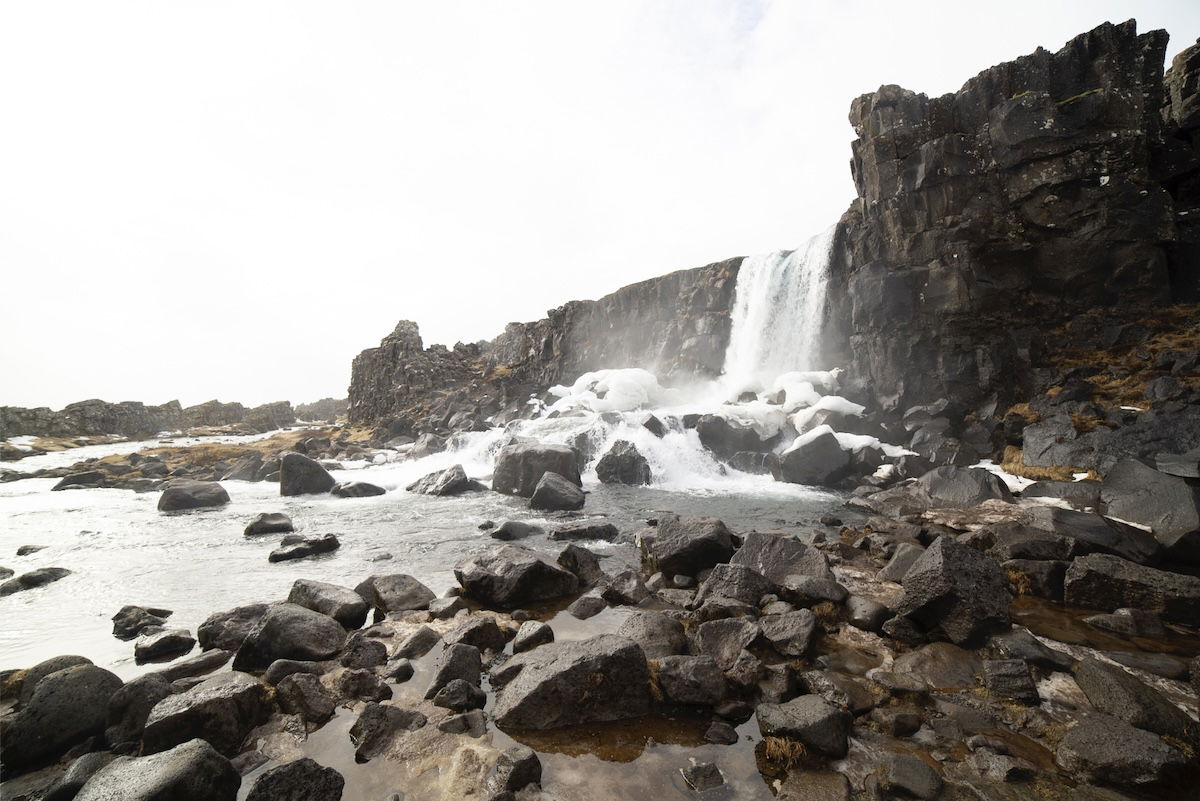
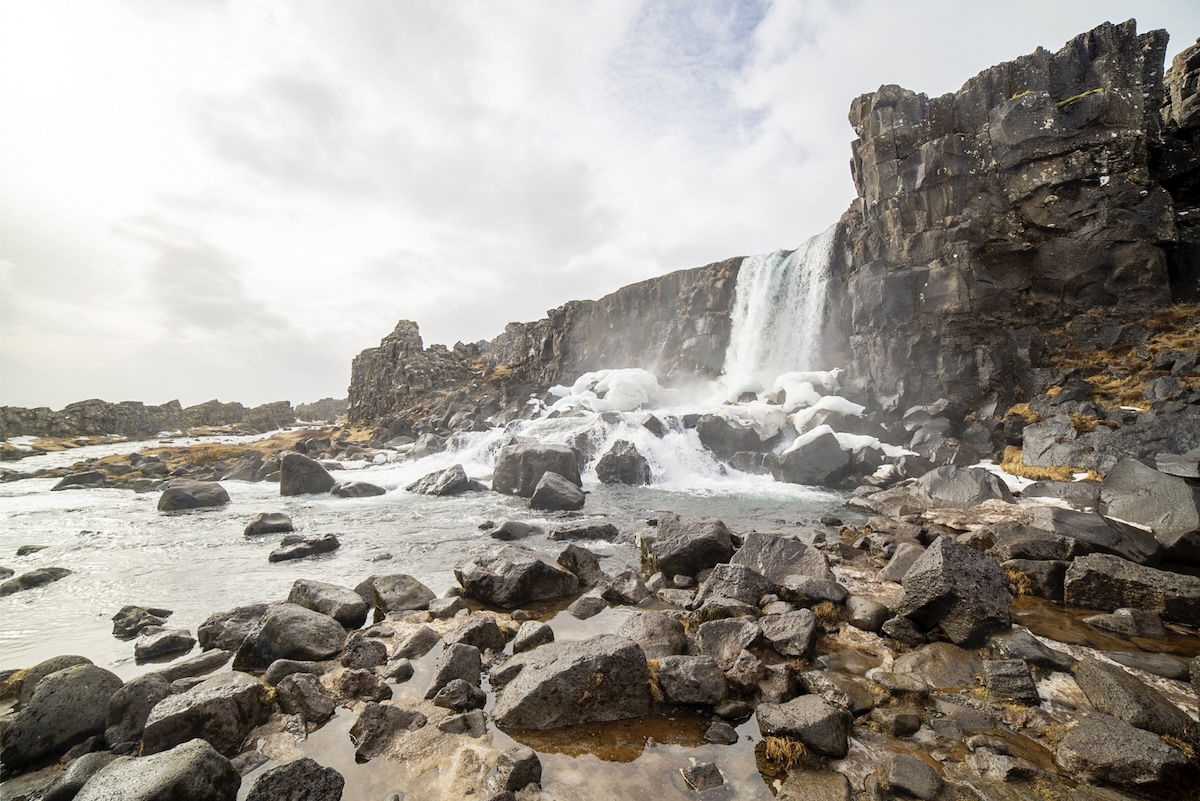
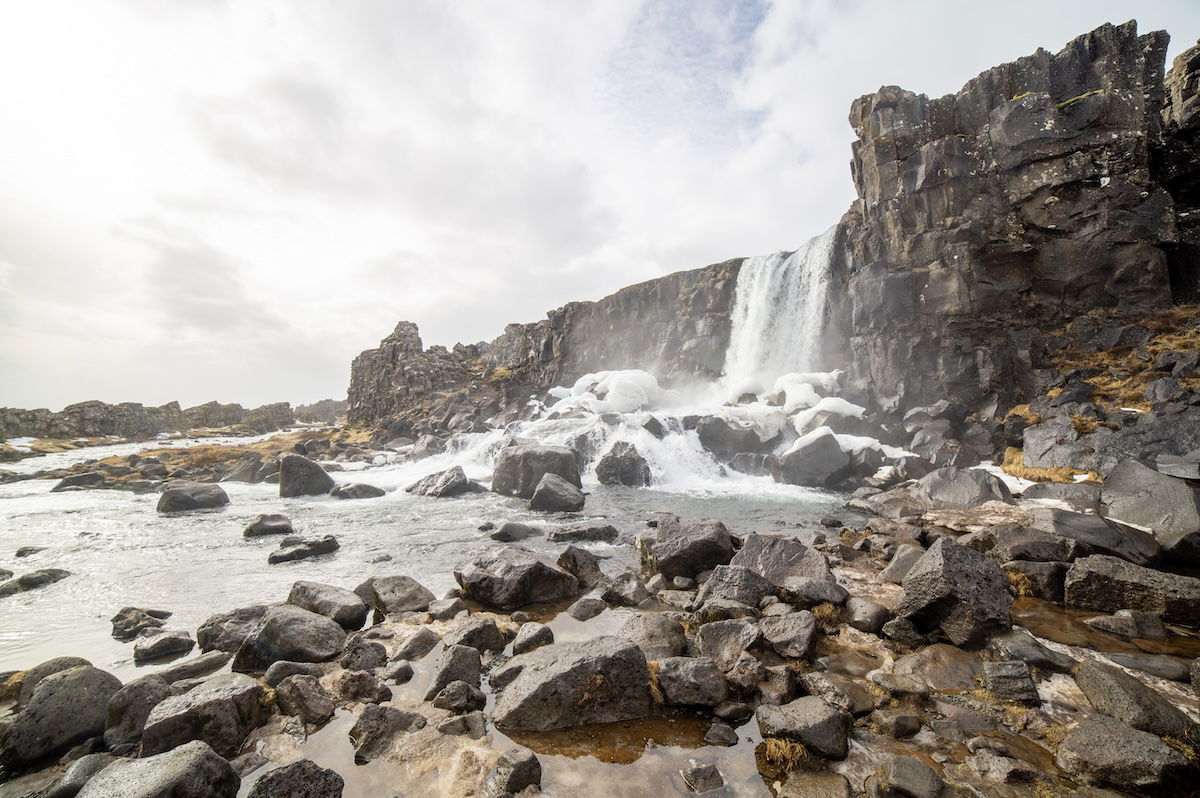
HDR is a photographic technique that joins photos with the same composition but different exposures. High Dynamic Range (HDR) photography lets you get an even exposure across your photo when the tonal range is far too wide for one exposure.
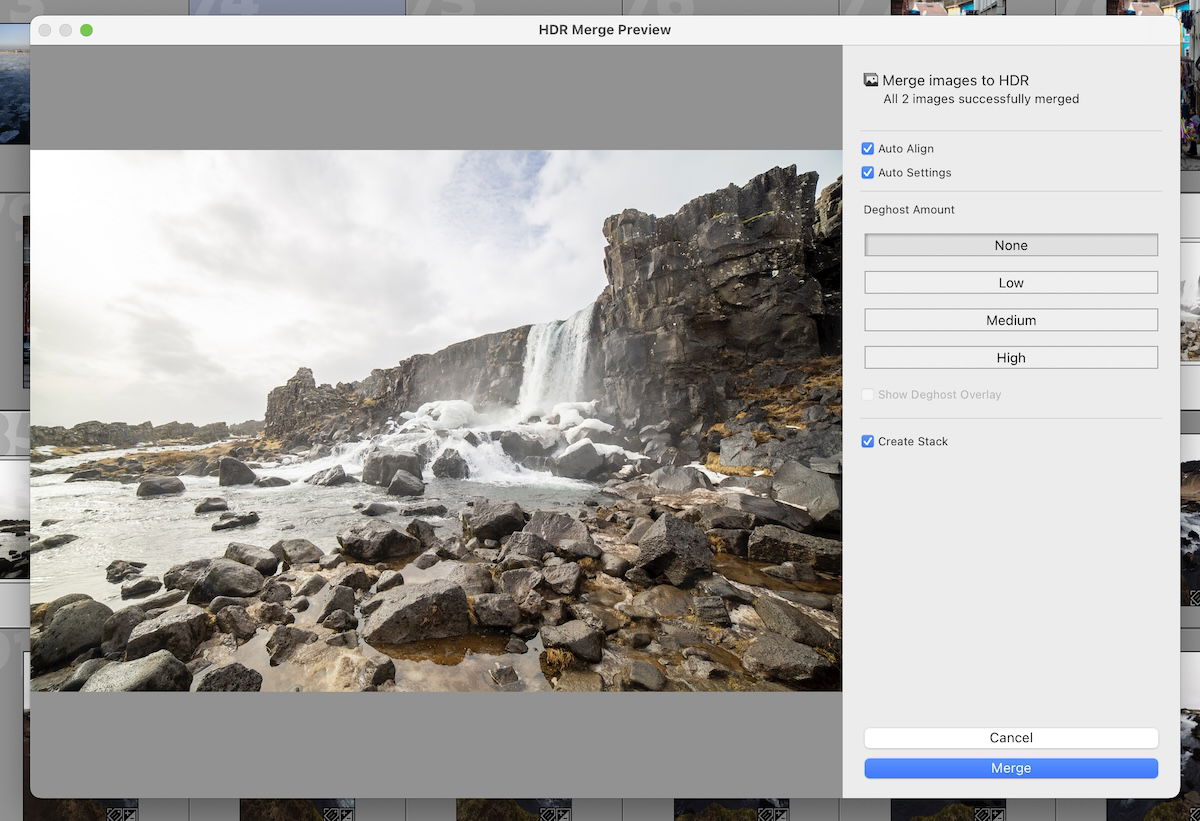
After you have opened your images to be blended into an HDR, open up the Photo Merge HDR page. You will see a range of customization options.
Auto Align ensures your images of the same composition match perfectly. This is helpful if you cannot or didn’t use a tripod. But you get much better results using a tripod when creating HDRs.

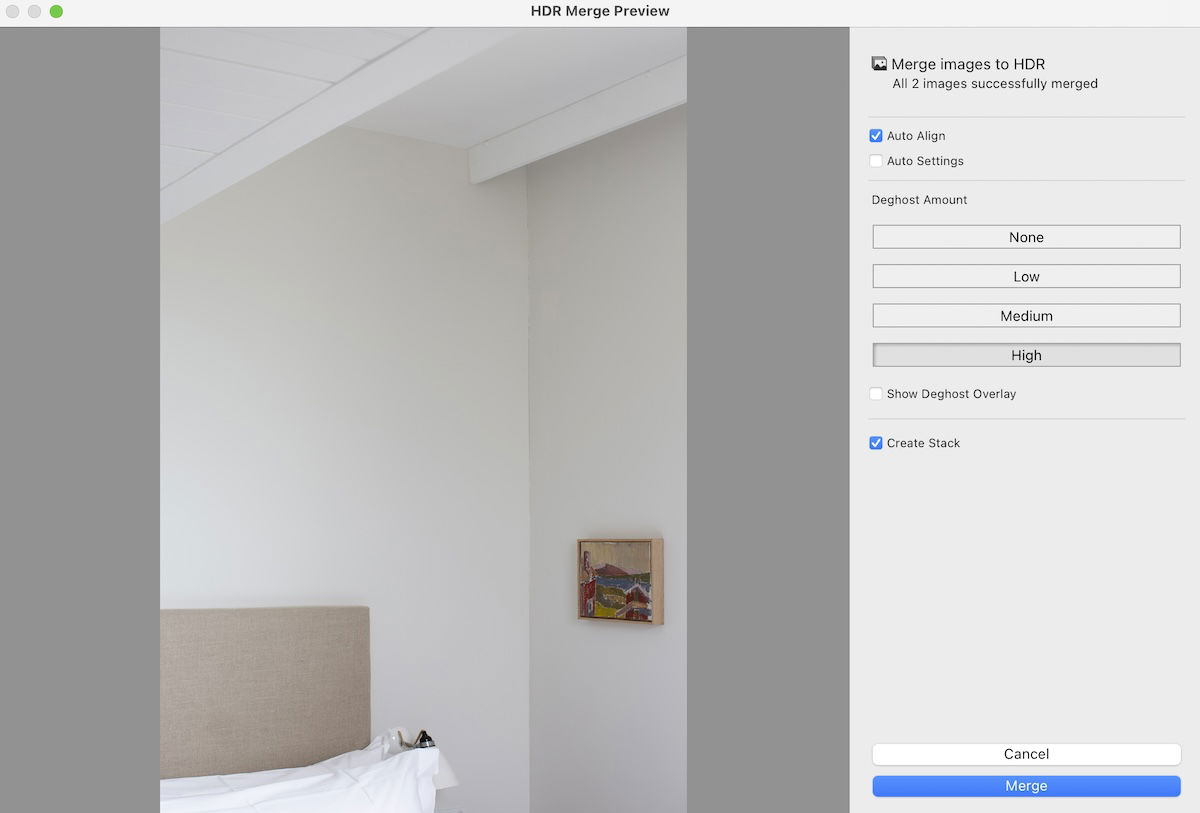
Auto Settings helps provide a good starting point for the tones in your HDR. After the merge, you can edit this further in the Develop section (or Edit section in Lightroom CC). This feature is helpful if you have bad exposure settings for your HDR.
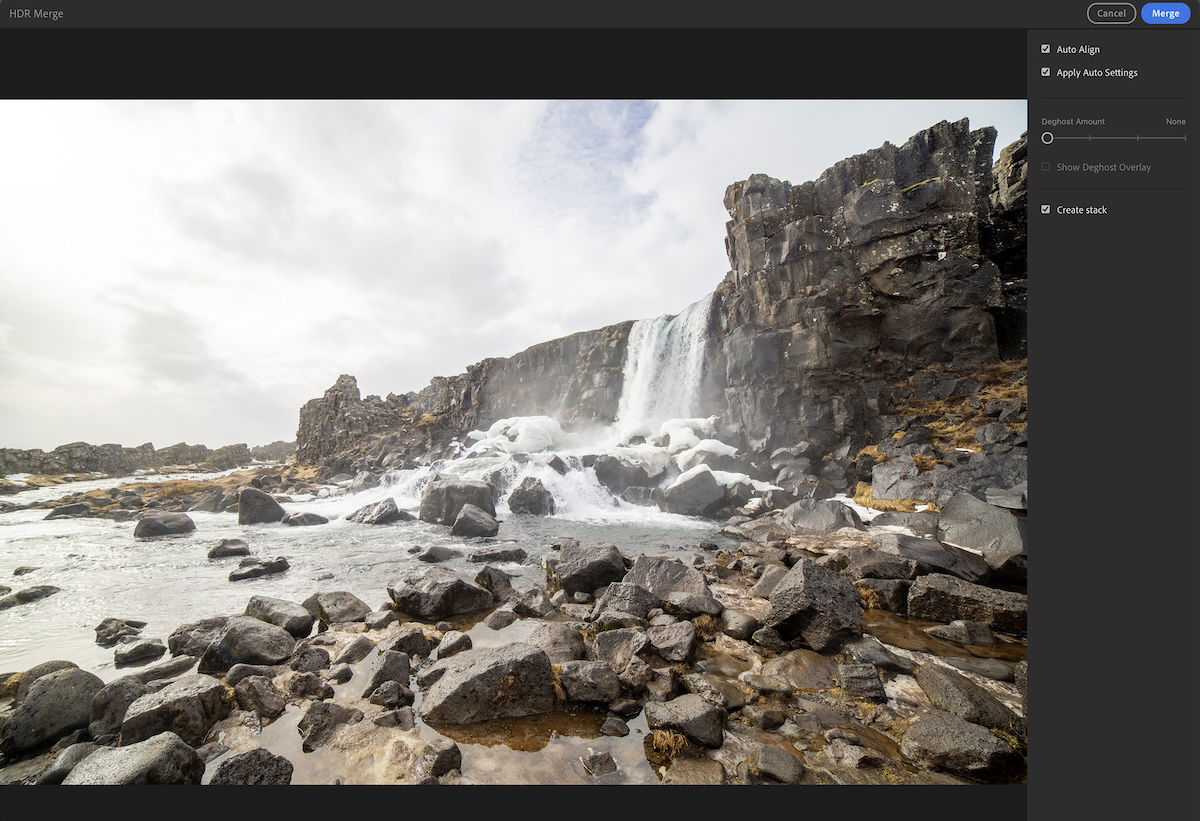
The Deghost Amount tool comes in four different options. In Lightroom Classic, they are presented as buttons. In Lightroom CC, they take the form of a slider with four-stop options.
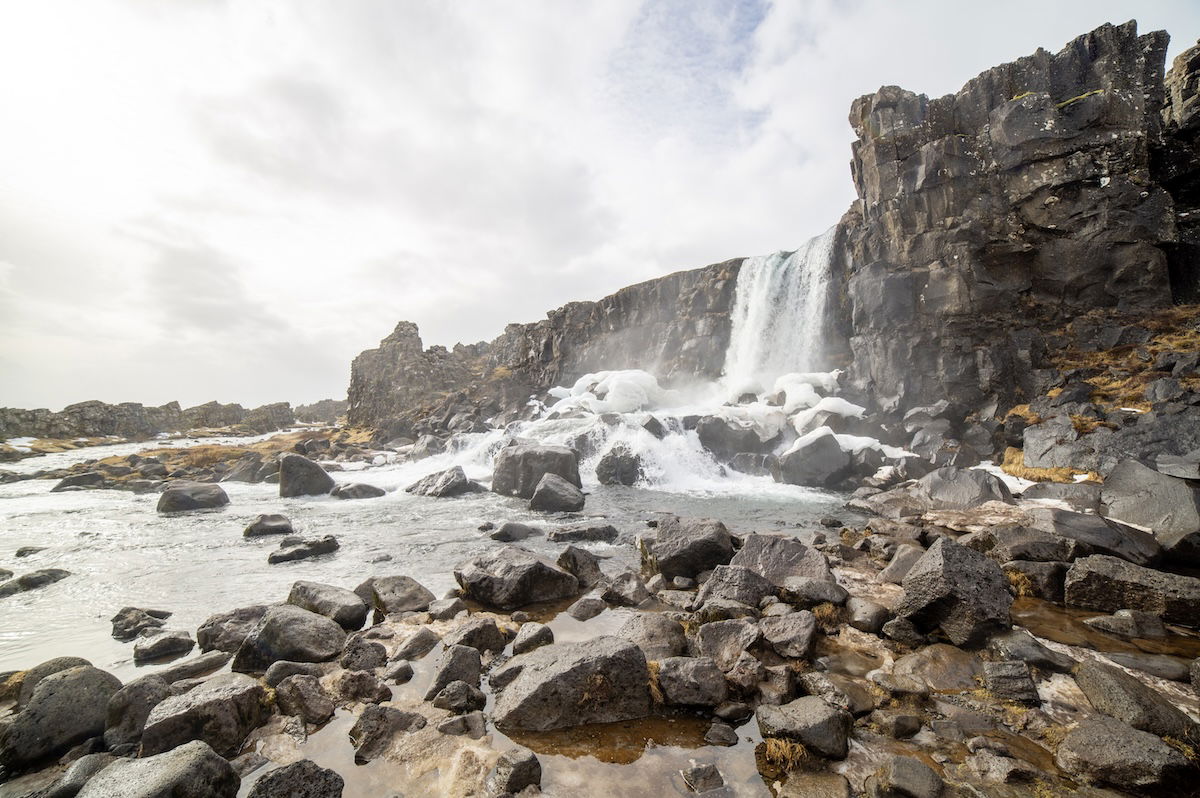
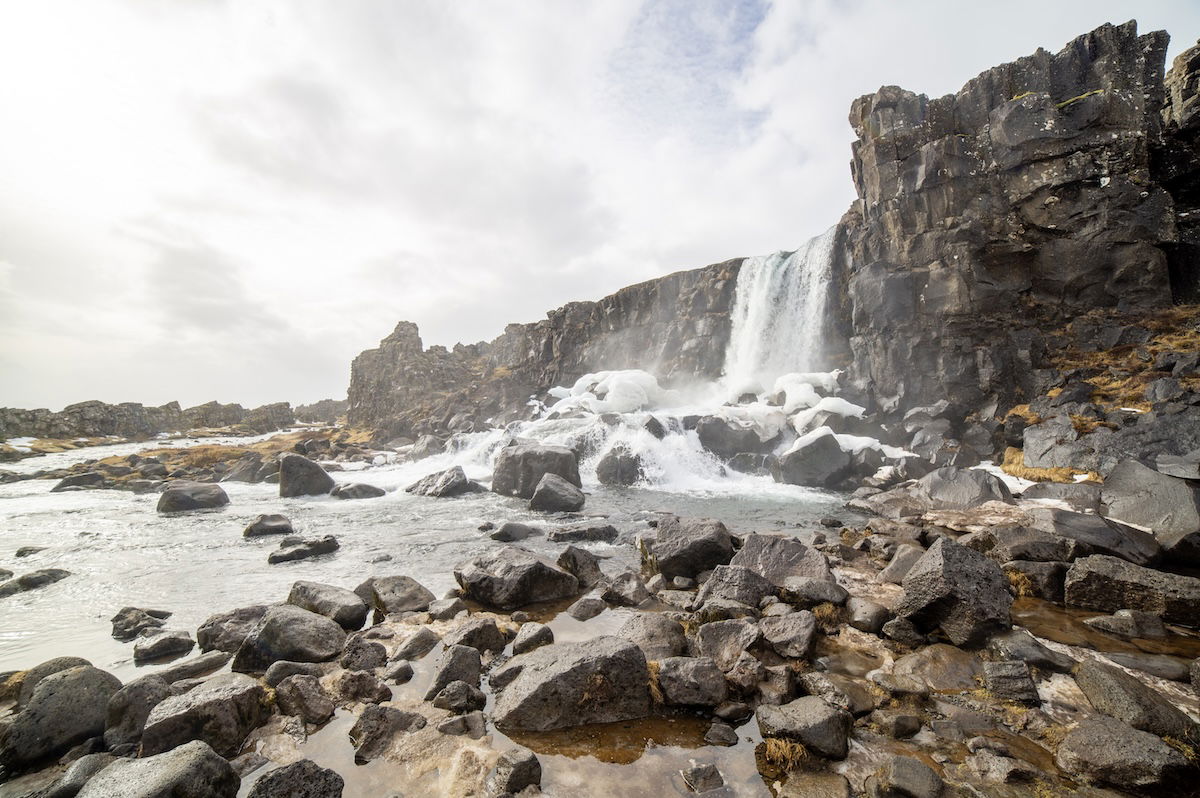
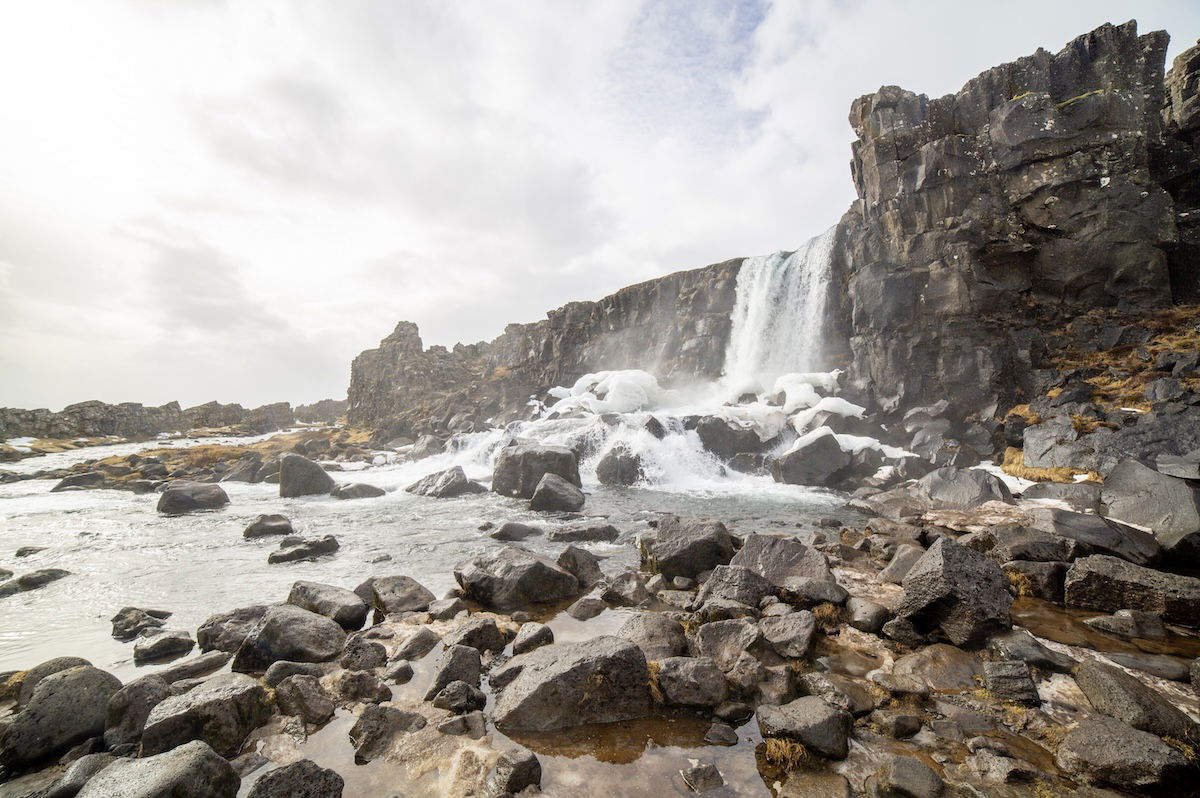
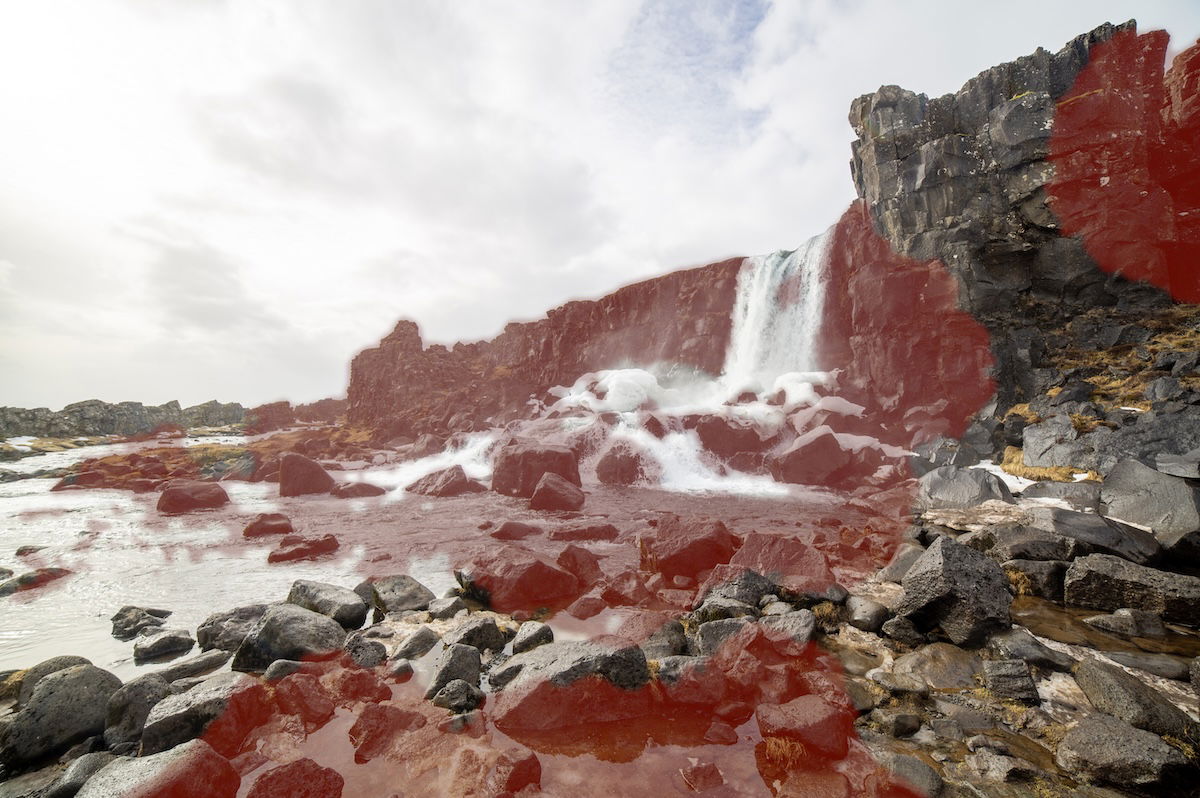
When creating HDR, the software may create semi-transparent areas that seem unnatural. This can occur when shooting in busy places with people moving or natural phenomena like mist from waterfalls.
The Deghost Amount option lets you choose how much the software impacts these unnatural occurrences. It is best to use None or Low deghost as you want as little intervention as possible to create a clean image. If the image still looks strange, try the Medium or High options.
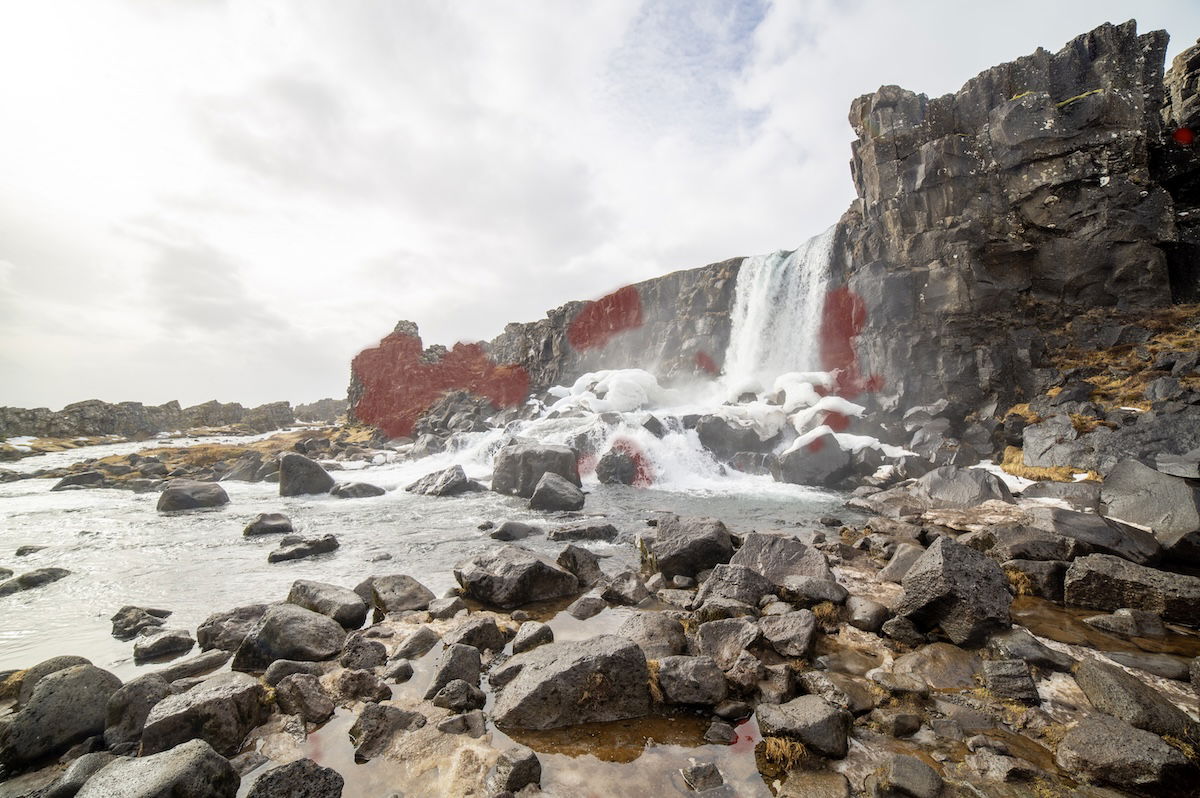
You can click the Show Deghost Overlay box to see the areas where the software makes changes. This highlights the areas that change through these different options in red. This is a good indicator of where the unnatural occurrences are.
The Create Stack button lets us clean up our library with a single click. Clicking this tick box puts all our selected images into a stack after Lightroom creates the HDR. It is useful for decluttering our Lightroom catalog.
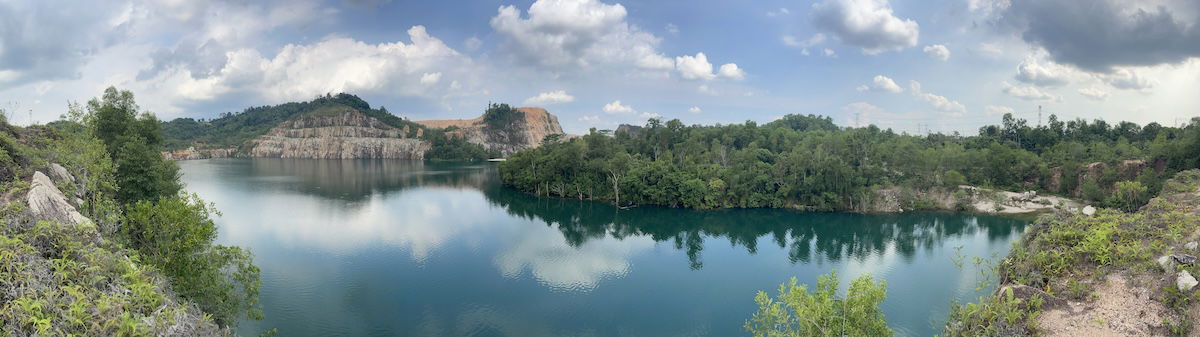
Panoramas are great for capturing a wide view of a landscape or cityscape when our camera or lens doesn’t have the field of view we want. A panorama is an image with a wide, unbroken view of multiple images.
Previously, you would have to stitch together the images with Photoshop’s painfully slow process. It is now common to find photo editing software that matches up your photos automatically.
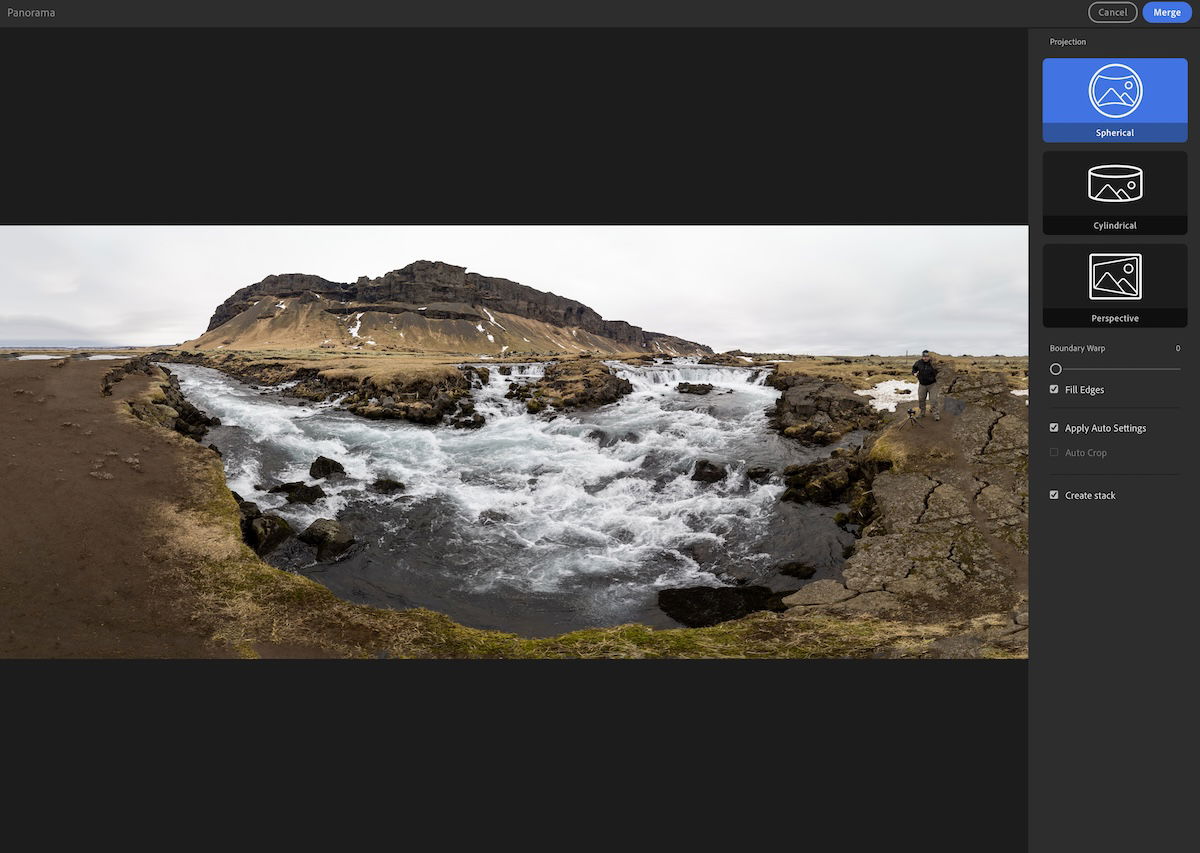
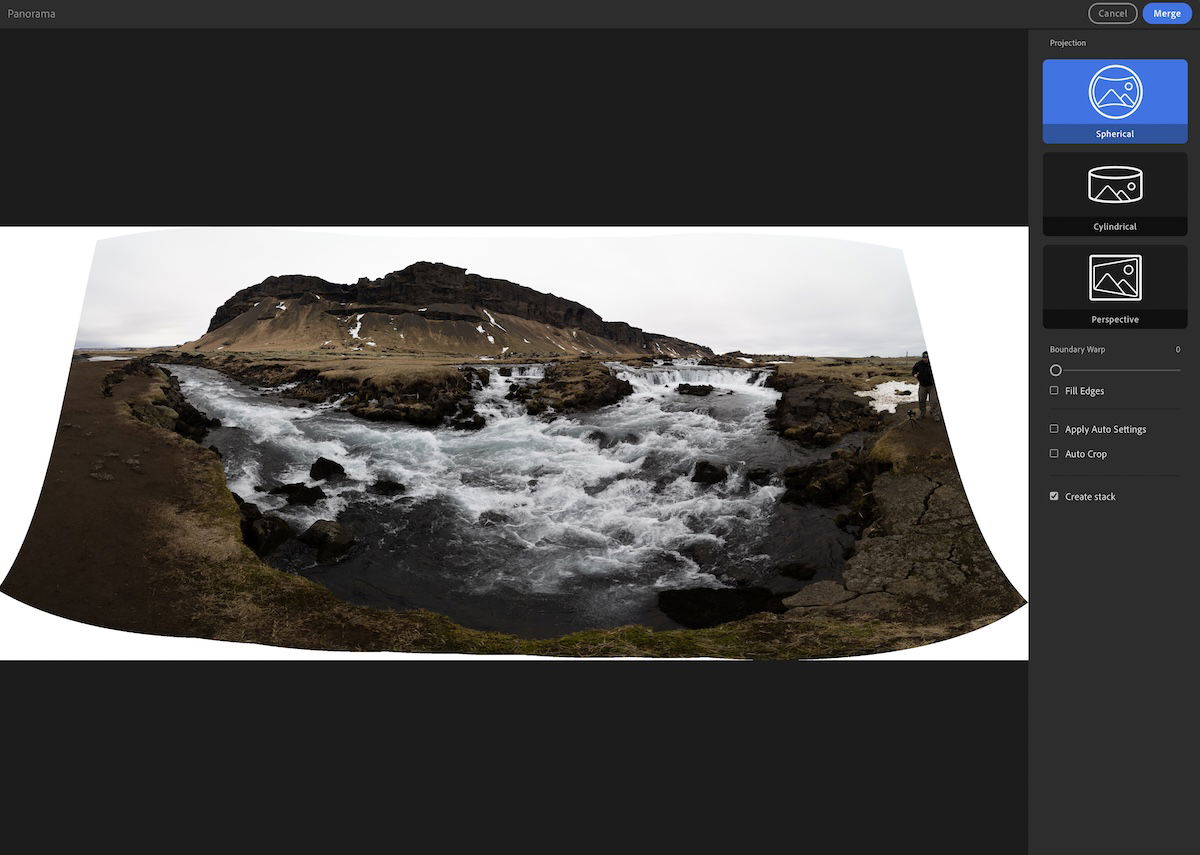
After your set of panorama images is open in Lightroom, right-click the selection and choose Panorama under Photo Merge. You will notice a few customization options, starting with the Projection style.
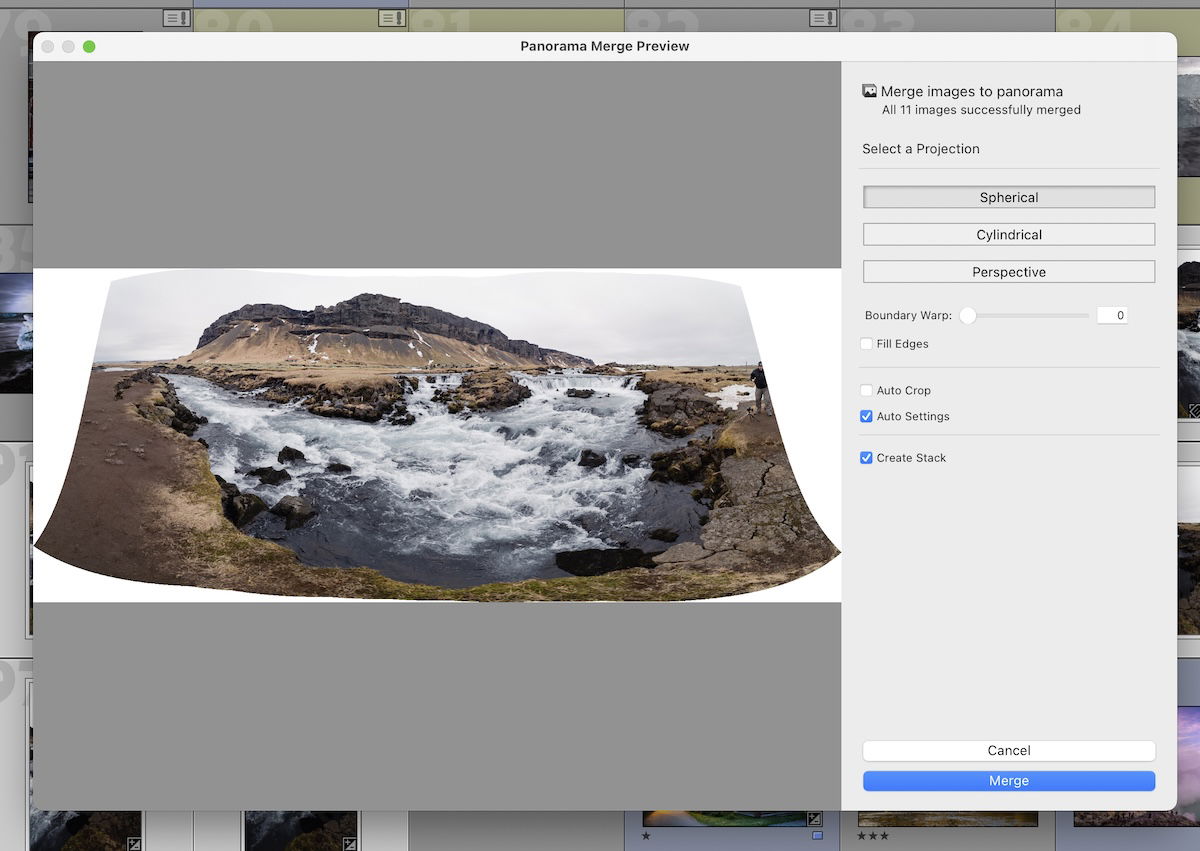
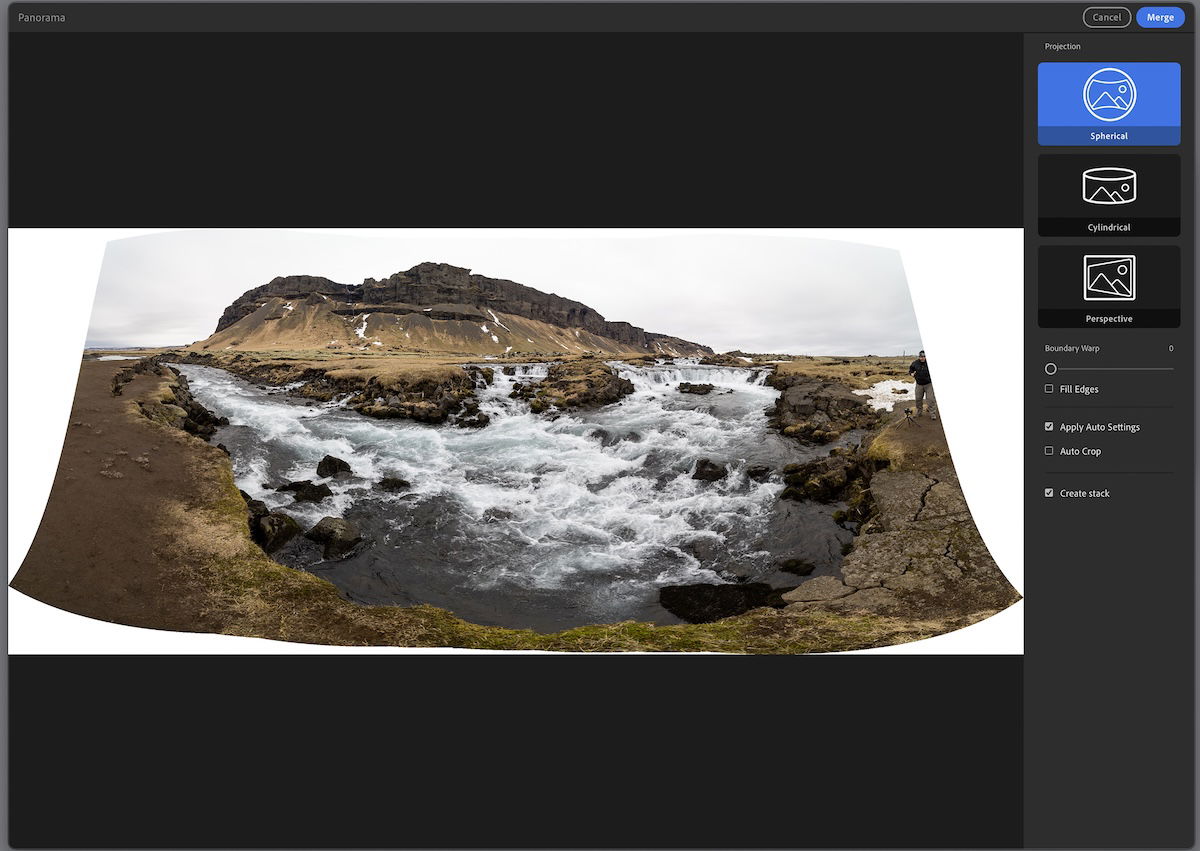
Your panorama can be shaped in three styles—Spherical, Cylinder, and Perspective. Each approach deals with your images differently. Let’s see how each of these options affects our photo.
When you open the Panorama page, try out each of these approaches. Each projection renders in only a few seconds, and you get different results from each one.
The spherical projection stitches the images together as if inside a sphere. This projection mode usually produces the most natural results for all panoramas. It has minimal stretching compared to other results.

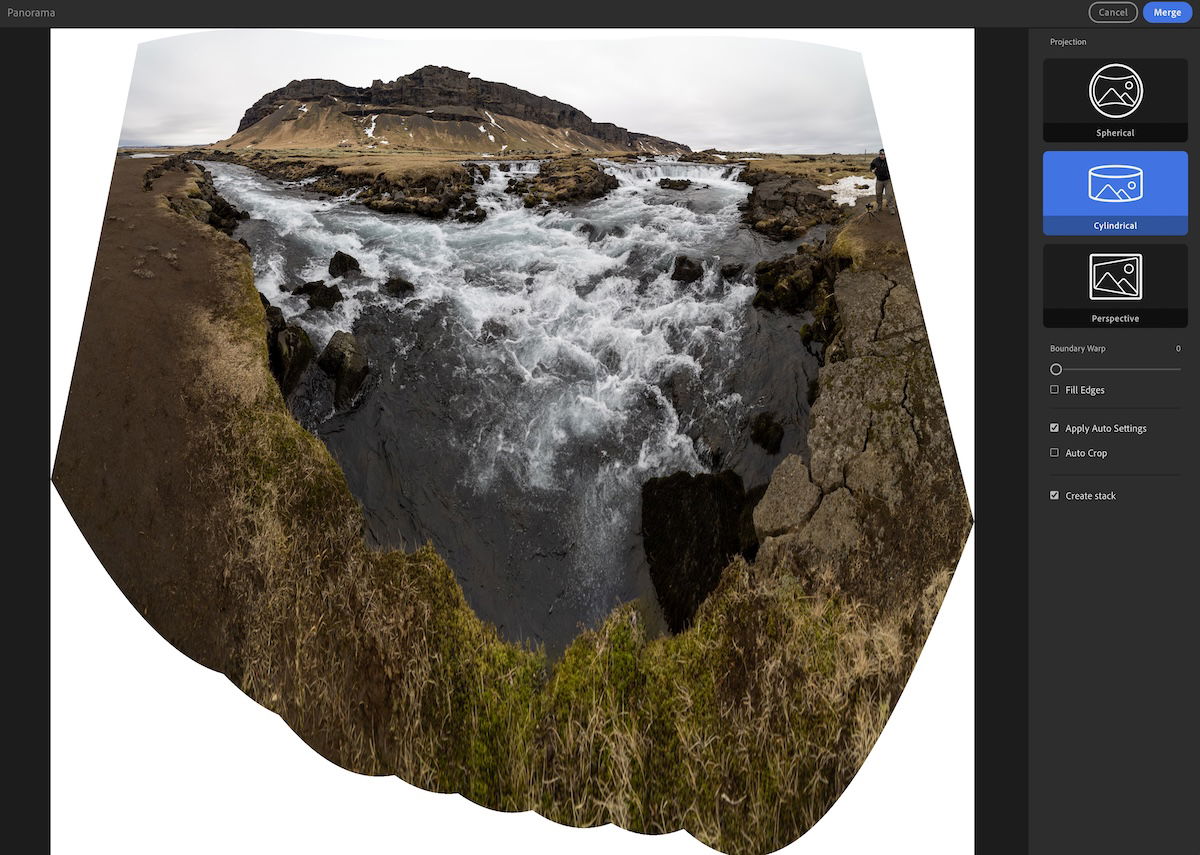
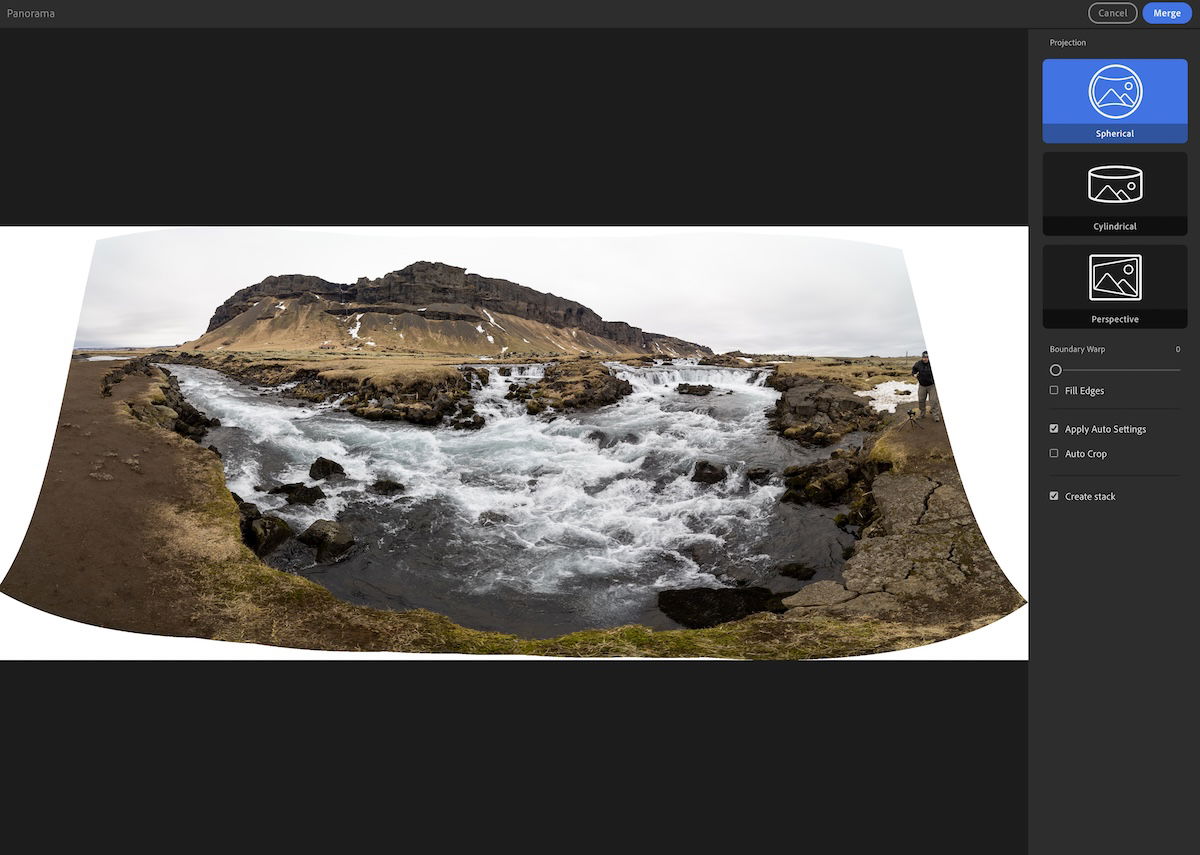
The cylindrical projection treats our images as if they were stitched inside a cone shape. This provides minimal distortion at the top of the image but much more toward the bottom.
The cylindrical projection is best for wide panoramas. But it can deform your images, trying to keep lines straight throughout the image.
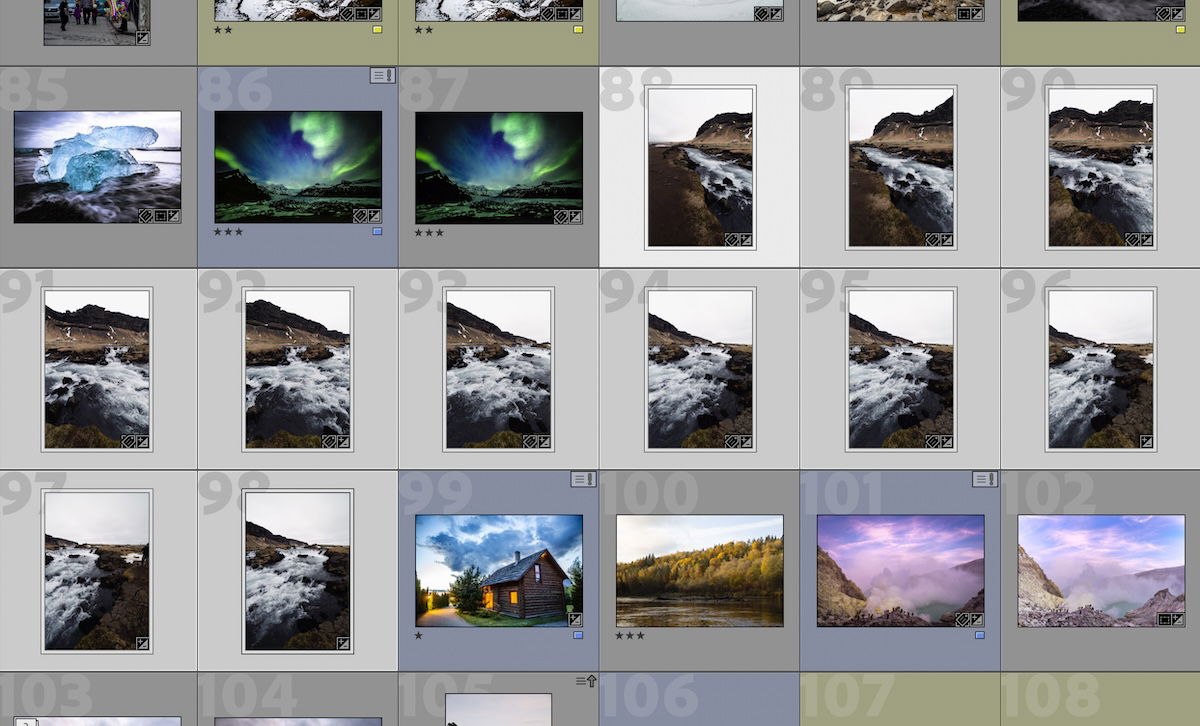
My example features a panorama made of portrait images. You can see that this mode isn’t great for this approach as it takes too much of the foreground into account.
The perspective projection maps our images onto a flat surface. This attempt to produce straight lines is ideal for architectural photography. But this approach can distort our images near the edge of the panorama in certain situations.
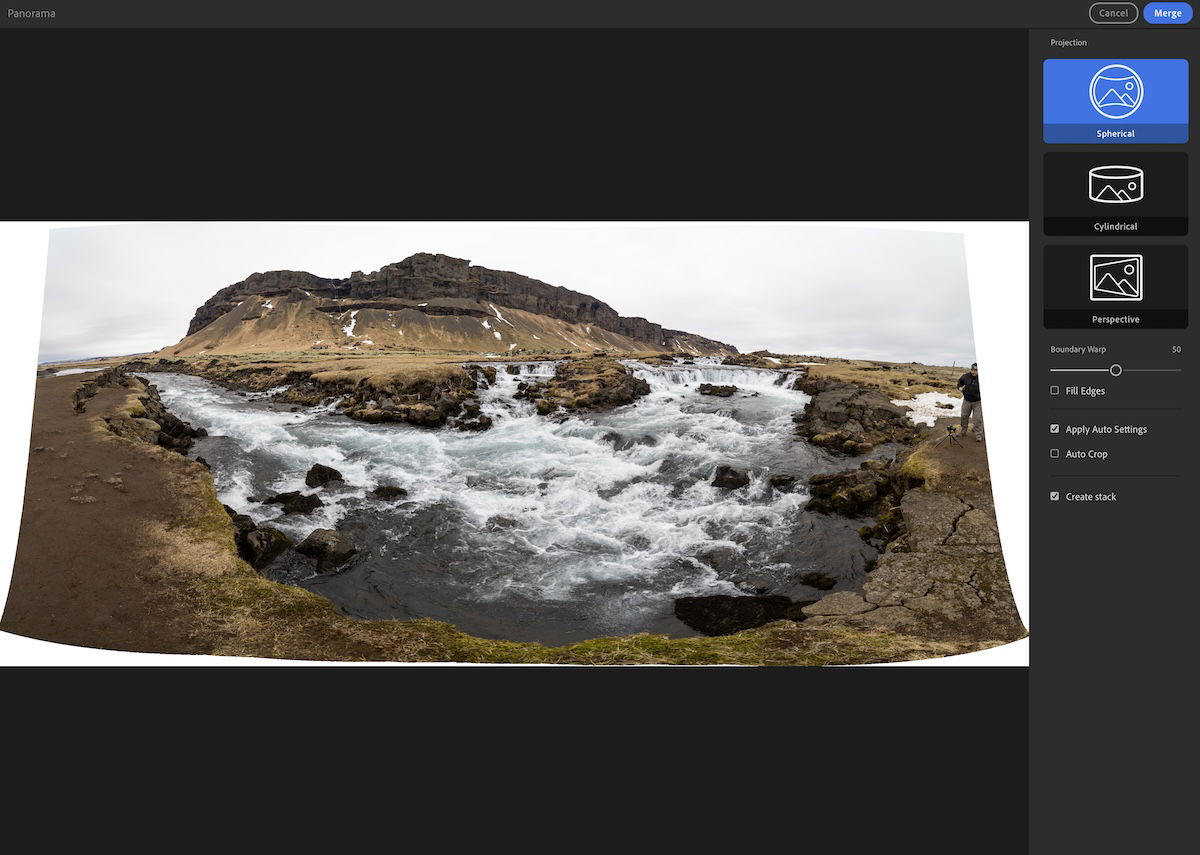
The Boundary Warp slider is a great tool for fine-tuning your panorama. This slider warps your image to fill the canvas. As the panoramas do not produce a rectangular image, this tool can warp your full panorama to use the full frame.
If you do not like the results of the Boundary Warp, you can always crop the panorama you have created. The downside is that you have to crop out part of the photograph. Boundary warp helps you preserve these details.

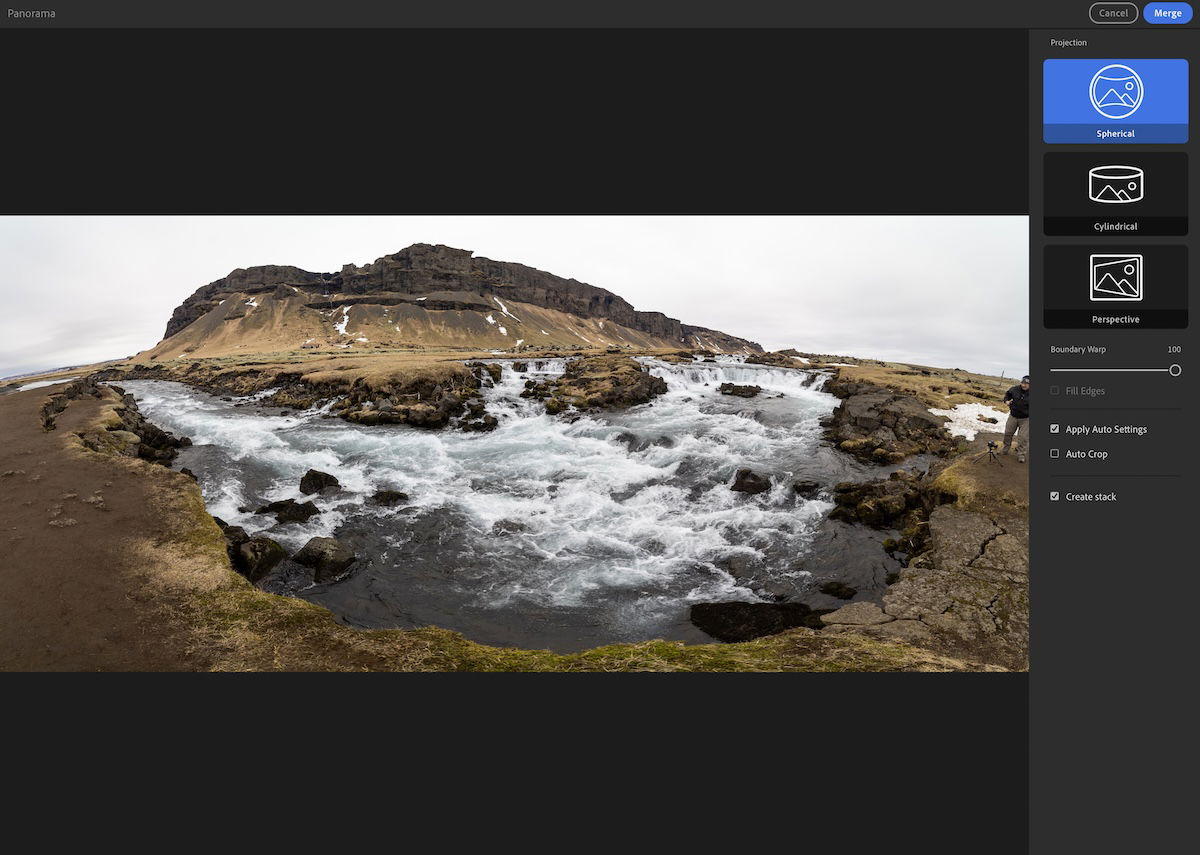
If you don’t want to crop the areas outside your panorama, consider ticking the Fill Edges box. This applies Lightroom’s “Fill” technology to the empty spaces inside your image.
The results are not brilliant for large open spaces. I would only recommend using Fill Edges if you have not pushed the Boundary warp to the edge of the frame.

The Auto Crop tick box performs a crop on images with extra space around the panorama. Lightroom chooses the widest crop possible without including empty spaces.
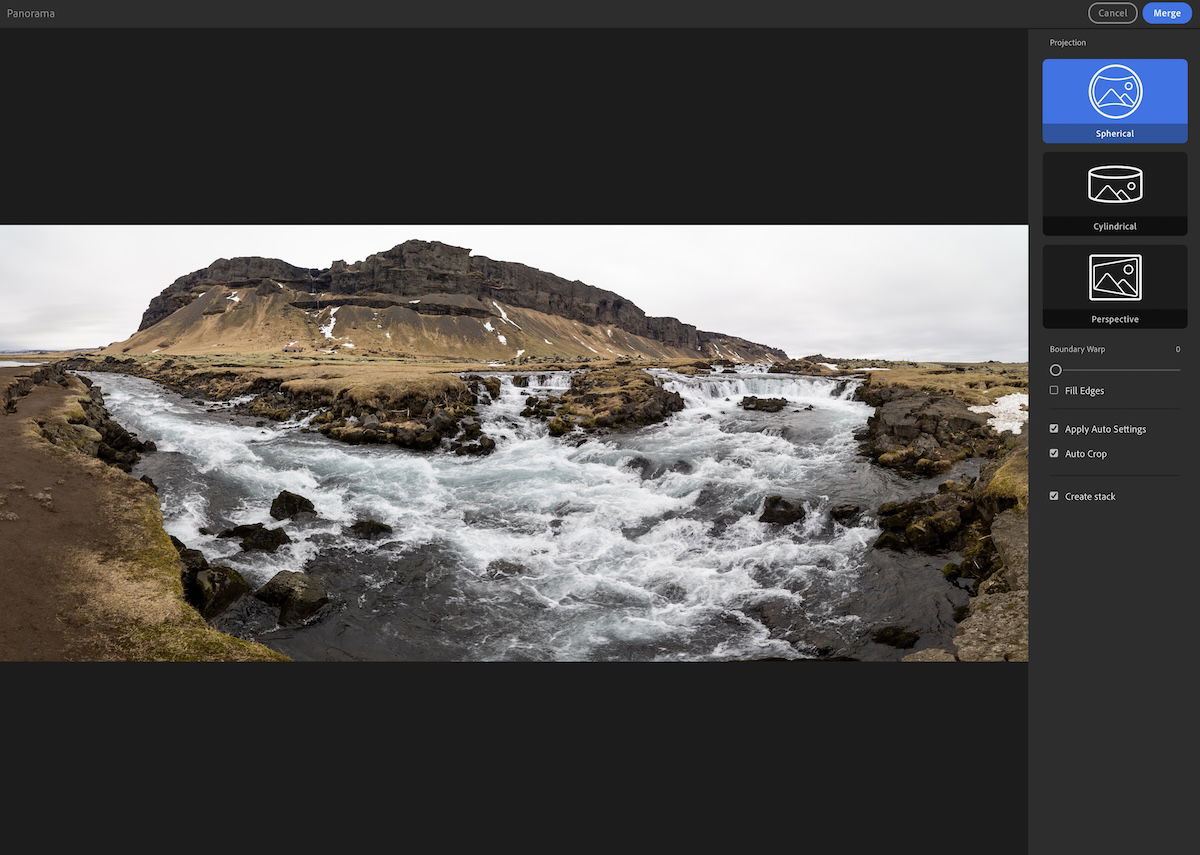
The Auto Settings tick box adds automatic tonal and color adjustments to your panorama. This is helpful as it produces a great starting point for further editing. It is also helpful if your images are not correctly exposed. A well-exposed image helps you spot inconsistencies more easily.

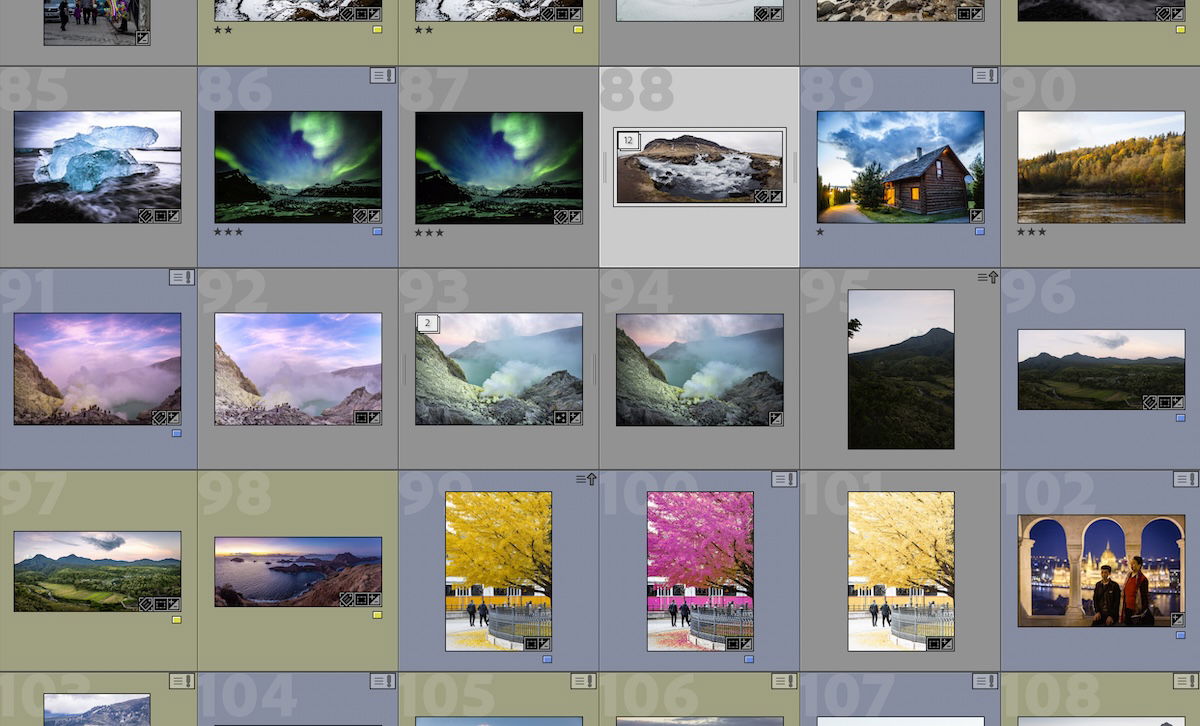
The Create Stack button operates like in the HDR Photo Merge section. Clicking this tick box puts all our selected images into a stack after Lightroom creates the panorama. This is useful as it helps declutter our Lightroom catalog.
The HDR Panorama Merge combines both Photo Merge options into one. This produces a complex stitch that would be lengthy without the aid of this type of software. Our options are the same as those in the Panorama section.
There are requirements for producing the HDR Panorama. You must ensure you have the same number of images for each bracketed exposure and that this bracket has the same exposure offset amount.
This should be obvious to those who have created HDR Panoramas before. If you want to learn more about bracketing and proper exposure settings, read our article about HDR bracketing.
After looking at how to merge photos in Lightroom, we see it is worth buying Adobe Lightroom if you shoot in these styles. The freedom and customization that Lightroom gives you are brilliant, and this is only a small fraction of what Adobe Lightroom has to offer.
HDRs and Panoramas are great tools for sharpening your Lightroom editing skills. Test these techniques and editing styles to see how they can improve your photography. These techniques are particularly useful for landscape and architectural photography.
Check out our Effortless Editing with Lightroom course to master post-processing!


![P08 [Lead Gen] Product Sidebar_v2_date_20230223](https://expertphotography.b-cdn.net/wp-content/uploads/2023/02/P08-Lead-Gen-Product-Sidebar_v2_date_20230223-300x295.jpg)
![P08 [Lead Gen] Sidebar Banner 2_date_20230223](https://expertphotography.b-cdn.net/wp-content/uploads/2023/02/P08-Lead-Gen-Sidebar-Banner-2_date_20230223-300x245.png)
![P08 [Lead Gen] Sidebar Banner 3_date_20230223](https://expertphotography.b-cdn.net/wp-content/uploads/2023/02/P08-Lead-Gen-Sidebar-Banner-3_date_20230223-300x245.png)