Today, we look at seven advanced Lightroom editing techniques the program lets you perform. These techniques range from enhancing images to providing outputs for your edited photographs.
Adobe Lightroom does more than simple editing adjustments. Our article covers how advanced editing techniques can change how we think about our photos. Thankfully, Lightroom is packed with numerous features. These tools let us experiment with different techniques. So, let’s dive in!
When you buy Adobe Lightroom, you can access two different versions. Because the programs have different approaches, one may lack features in the other. Let’s first outline which advanced Lightroom editing techniques you find in which version.
What is the biggest difference between these programs? Lightroom (CC) does not provide the array of output options that Lightroom Classic does. You won’t find the Book or Slideshow module in Lightroom CC. And you can’t make a collage because it lacks the Print module.
Lightroom CC also lacks the Photo Stacking technique. But this isn’t too much of an issue, as you can still batch-edit photos. Lightroom CC does include the Photo Merge technique, one of the most important techniques featured on our list.
You can read our full review of Adobe Lightroom to compare all their similarities and differences.
These advanced Lightroom editing techniques are niche, so you may never need to use them in your photographic journey. But for other photographers, some of these features may be crucial:
It is worth understanding and attempting these techniques to see if you enjoy them and what imagery you can create! Click on the links at the end of each section to learn about each feature more in-depth.
In modern digital photography, it is unsurprising that some of our favorite images are made up of multiple images. What is surprising is to learn that Lightroom lets us perform these edits in a super simplistic way.
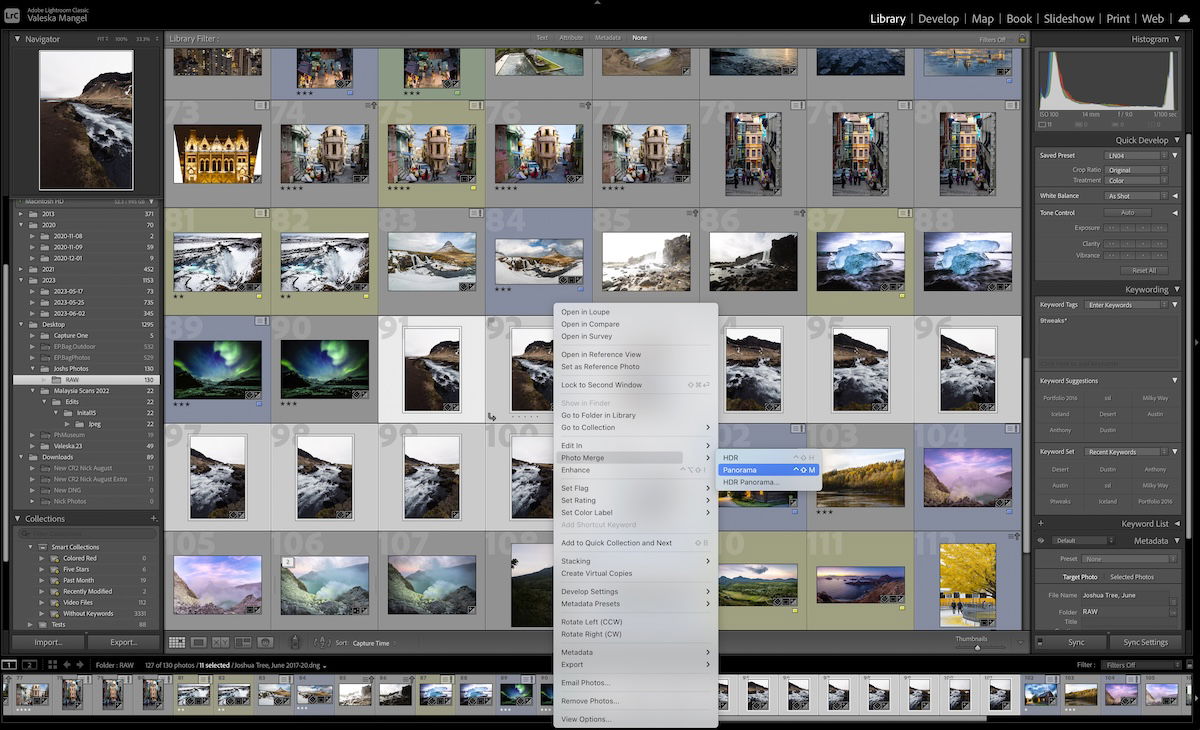
The Photo Merge tool can be found by selecting photos and right-clicking. It allows users to create HDRs, Panoramas, or even HDR Panoramas.
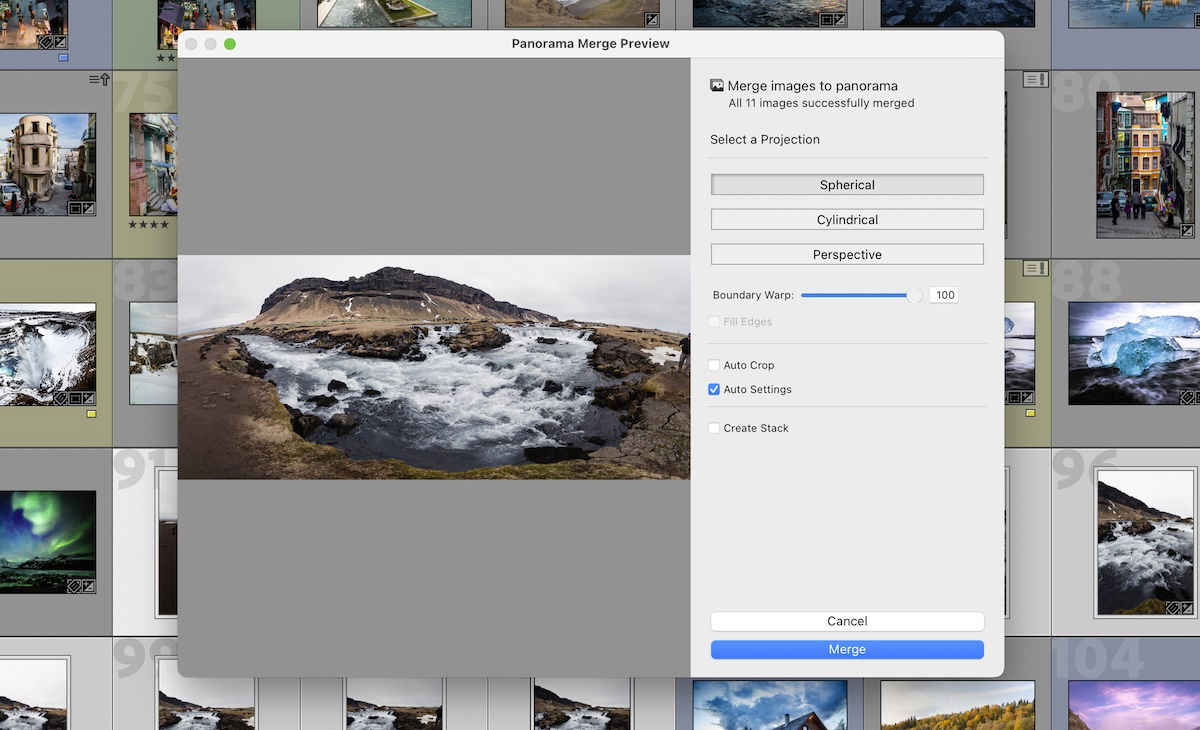
After we select our images and find Photo Merge, an interface lets us adjust the action in specific ways. The new image is then saved straight into Lightroom!
Lightroom has found a way to make these merge actions as simple as possible. Its great usability lets us test different techniques without proficiency in imaging software.
Read our complete article if you want a step-by-step walkthrough of merging images in Lightroom.

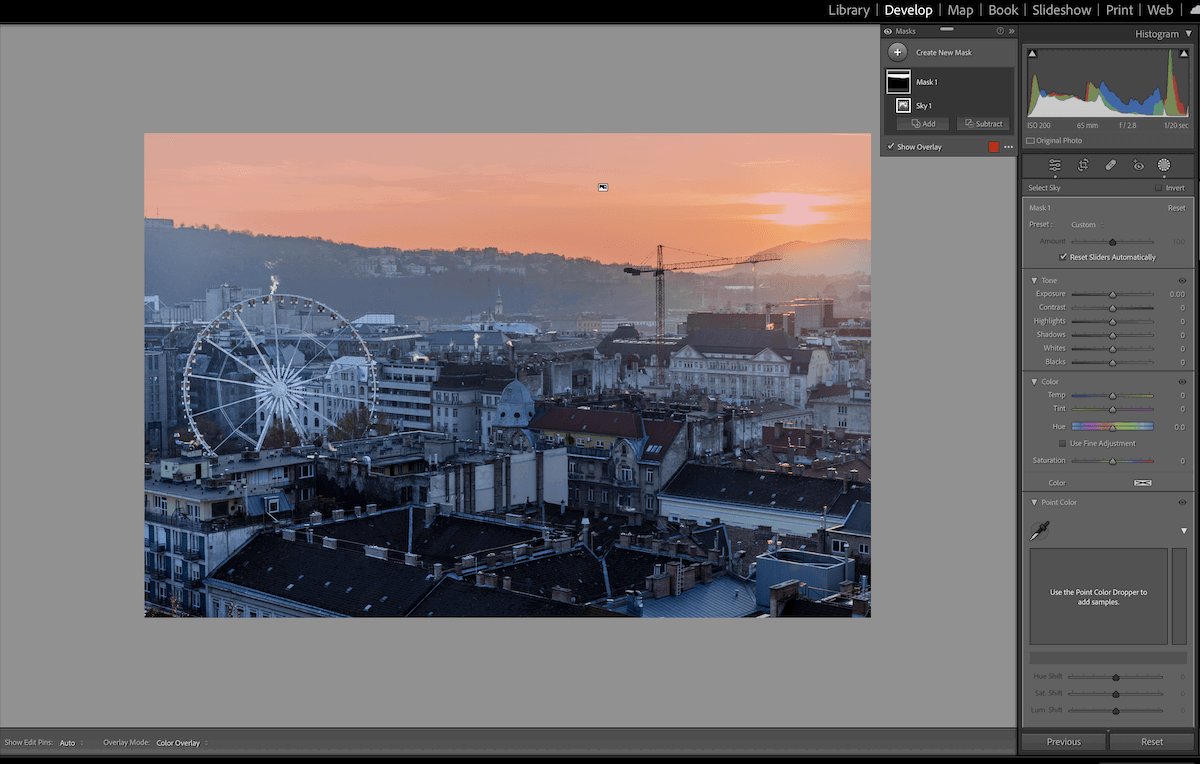
If you want to learn advanced Lightroom editing techniques, one of the first things you must do is create masks. Masks let you apply edits and adjustments to certain areas of your photographs. You can create a mask with a brush, linear gradient, radial gradient, or AI!
Masking brings photographers into the realm of professional digital photo editing. This ability is usually found only in programs like Photoshop, but it is now in various digital editing software.
Because Adobe has the capabilities, it has added masked editing to Lightroom with ease and excellent usability. This technology’s newest development allows AI to read our images and mask them for us!
Adobe execute executes this perfectly and saves us time, especially with portraits. Lightroom can now identify different sections of someone’s body to mask. Thus, we can apply specific edits to certain areas in no time.
Read our full article about creating makes if you want to go through the entire process.
Another advanced Lightroom editing technique that is helpful to learn is how to blur the background. This technique can help you draw more attention to the subject of your photograph. It is useful for portraits or advertisement photoshoots.
Applying a blur to the background also helps us counter mistakes we should have avoided while photographing. Using a wide aperture blurs the background. If you forgot to shoot with these settings, you can always simulate a bokeh with a blurred background.
To blur the background in Lightroom, you must create a mask. This allows you more control, as you can select every element you want to be in or out of focus. Learn more about how to blur the background.


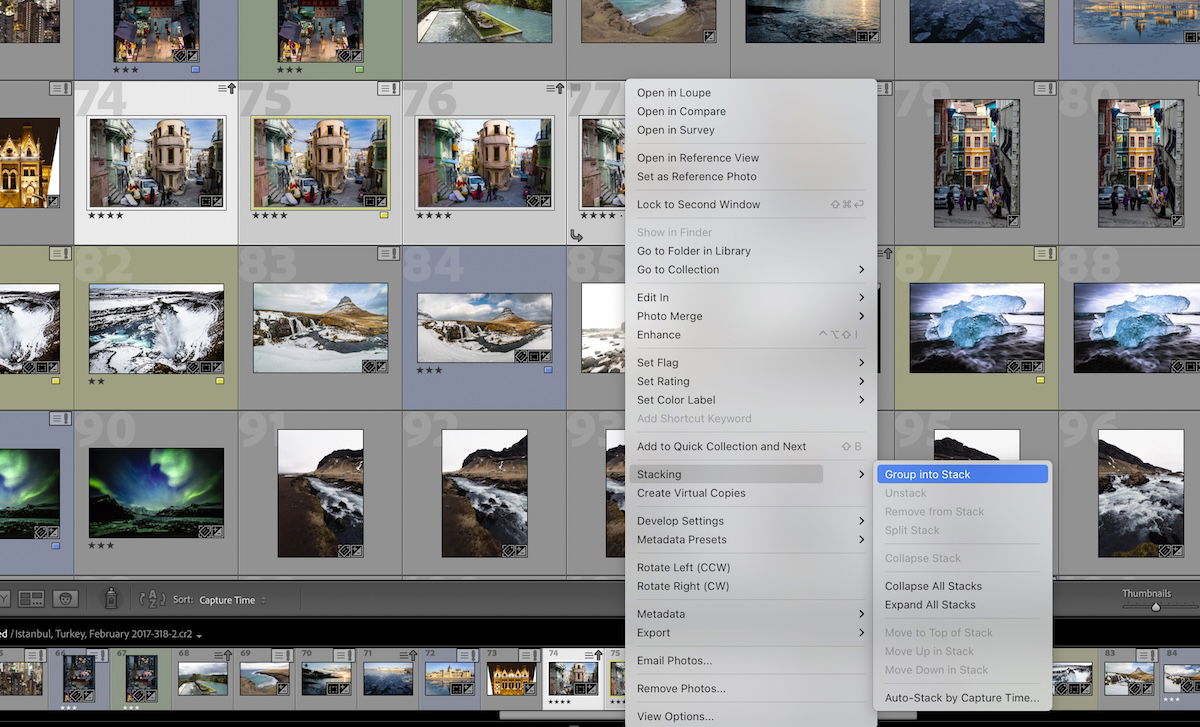
Stacking is an organizational feature in Lightroom that lets you control your images. It involves grouping images inside a Catalog or Folder, which can be useful if you like taking photos quickly.
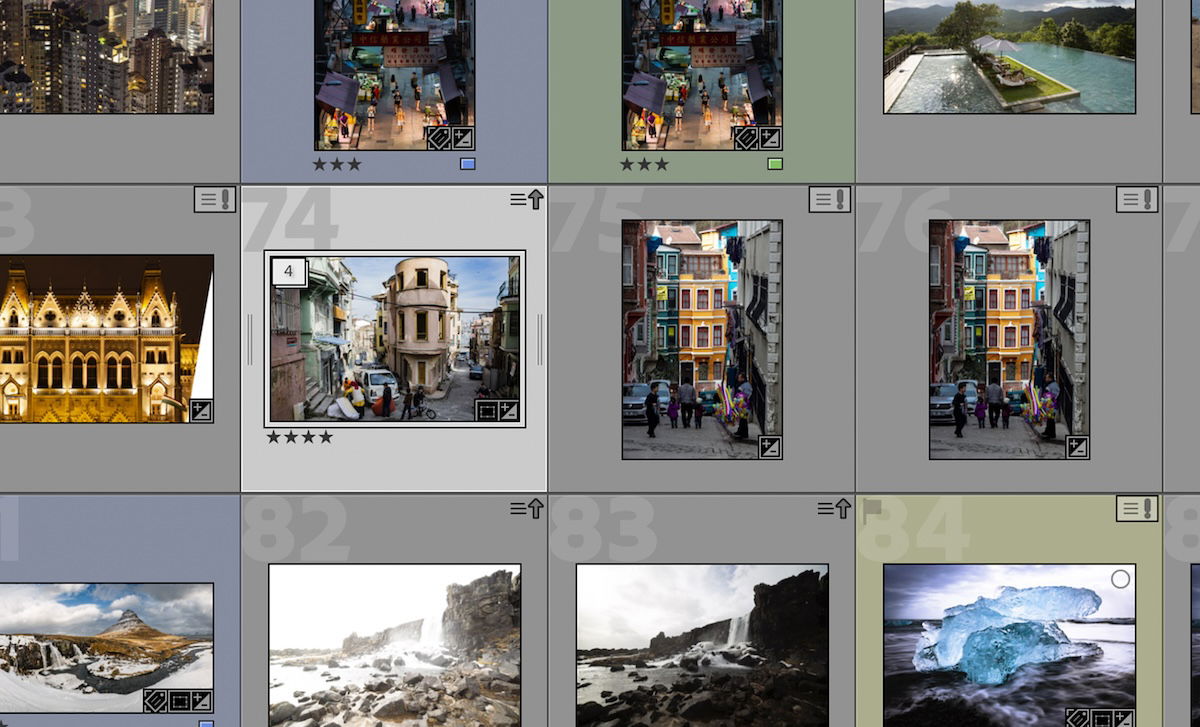
Once you have stacked some images, you can remove certain images or change the order. This is helpful if you want one image to represent the entire stack.
Lightroom provides hotkeys to collapse and collect your stacks. Photographers who value organizational abilities will love this feature. Lightroom also has an auto-stack feature so that we can do even less!
Auto stack lets the program group all images based on their capture time. When selecting this feature, you can edit the time between stacks. This is super helpful for a photoshoot where burst and continuous shooting lead to a huge number of photos.
Read about how to stack your images in Lightroom in more depth.
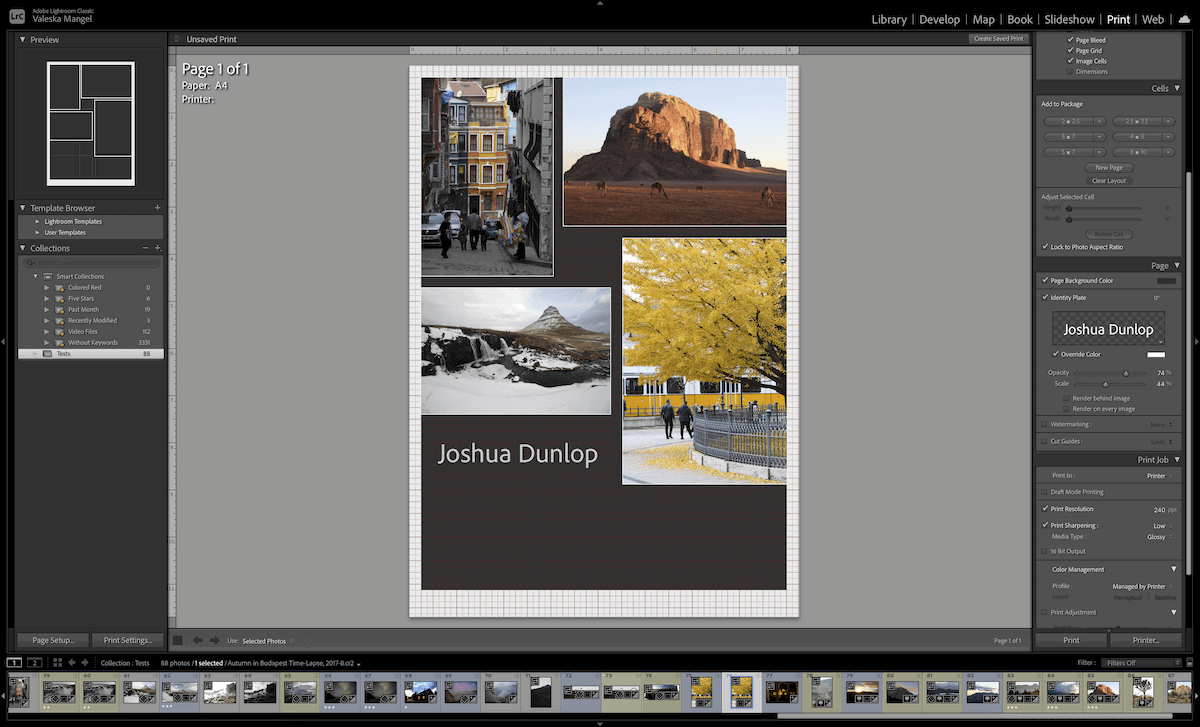
Lightroom also offers a way to create a simple collage without any other software. This could be helpful for photographers who want to advertise their business or create custom posters from their images.
The Print section at the top right of Lightroom Classic allows you to create a collage. You can use a simple contact sheet format or a more detailed arrangement of photographs there.
If you want to overlay and cut out images, Lightroom cannot help you. You will need to use Photoshop for these actions.
Adobe offers plenty of customization in this advanced Lightroom editing technique. You can save the template you build and then cycle different images through it to create different collages. You can even add your branding or watermark to your collage.
It’s excellent that Lightroom features this ability in its software. Without it, you would need to buy and learn Photoshop, which would cost more and take much longer.
In our full article, learn how to make a collage in Lightroom from start to finish.
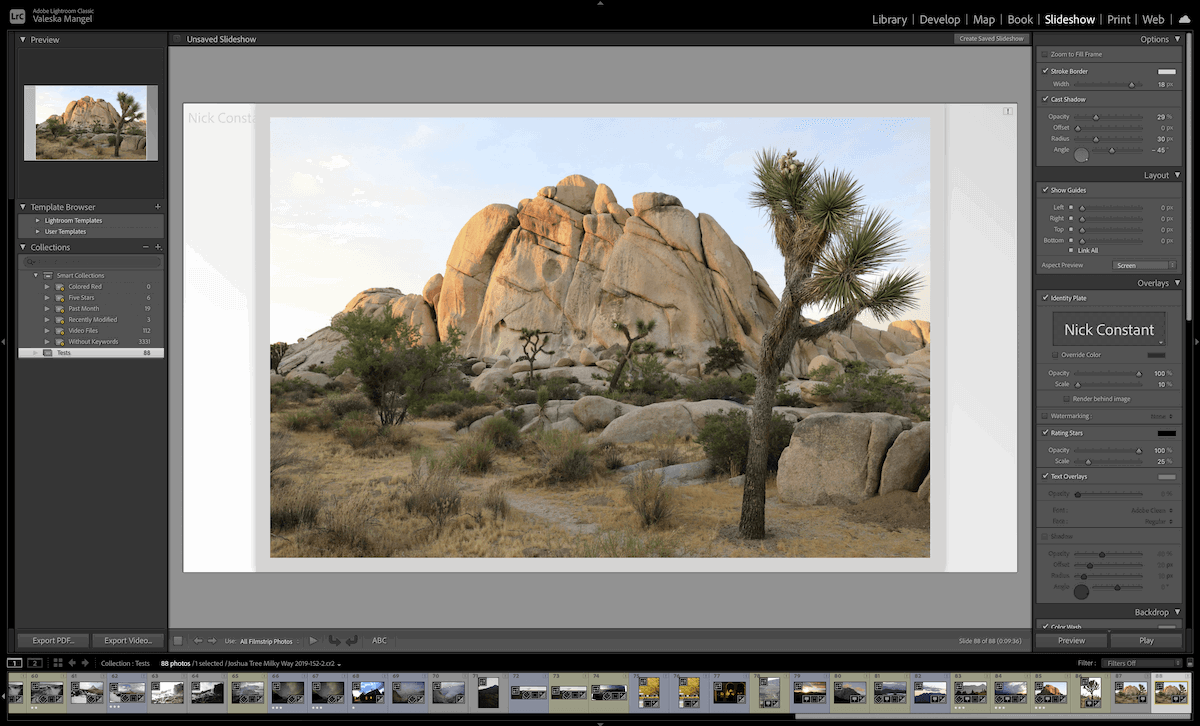
Do you need to present your photographs in a public setting? Set up a simple slideshow to cycle through your pictures while presenting. A slideshow may also be a great way to show your friends or family the photographs you have been working on.
Thankfully, Lightroom provides a module specifically dedicated to slideshows in Lightroom Classic. The Slideshow section is at the top right of Lightroom Classic. There, you can customize a professional slideshow of your selected photos.
You can dictate all the image sizes and the background. You can even add an image to the background!
Toward the end of the customization, you can organize the slideshow timing if you want it to cycle through images automatically. This involves high levels of control, including the time the photos are displayed and the crossfade time. Lightroom even lets you add music at this point!
Adobe lets you export your slideshow as a PDF or video. The video settings offer various options for the quality of the video. Lightroom also lets you play the slideshow inside the program if you don’t want to organize another option.
Read our full article about the slideshow feature in Lightroom if you want to learn more.
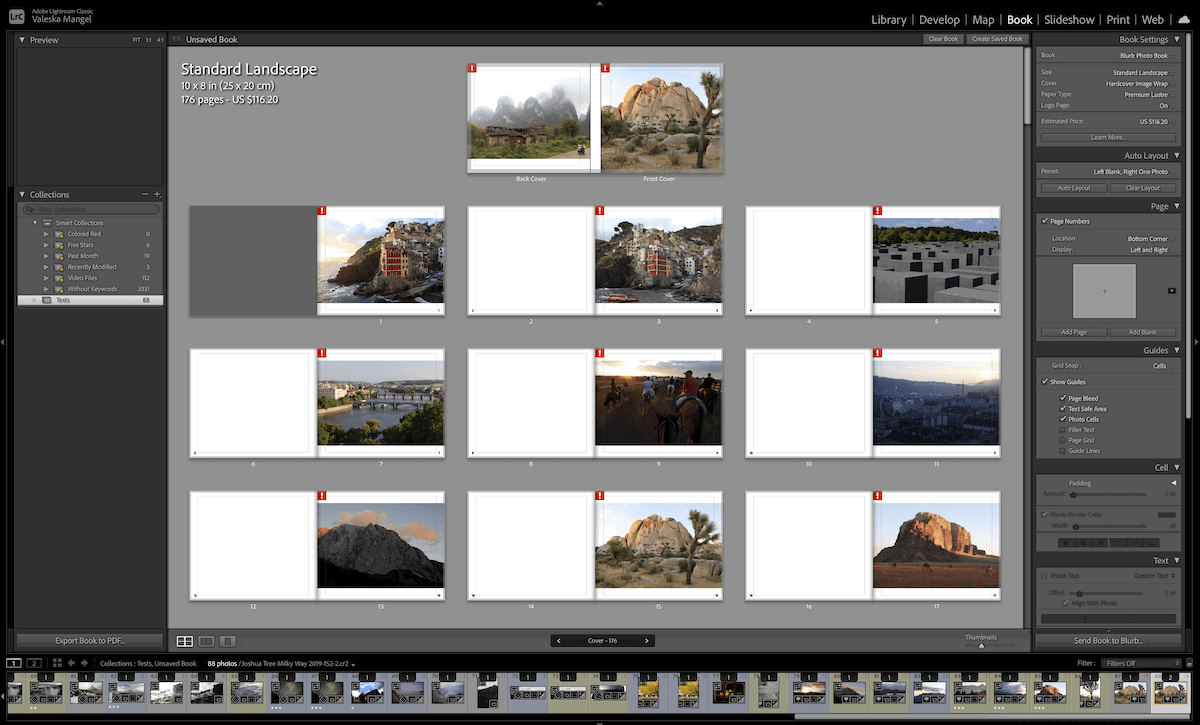
If you are happy with a range of your favorite photographs or have photographed a certain event, you may want to make your own photo book! Adobe provides an easy template-based photo book maker inside Lightroom Classic.
The Book section is along the top right of Lightroom Classic. Inside, you can layout and format the book to your desired outcome. Lightroom provides a wide range of customization options so you find a way to make the best layout for you.
The Book section lets you export your book directly to Blurb to get it printed through their service. This is super easy, letting you select the paper type and cover inside the app.
You even get the estimated price shown in Lightroom. If you don’t want to use this print service, you can always export the document to a PDF to take to another printer.
The amount of control Lightroom provides is outstanding. Adobe has specialist software for making publications, so it’s not surprising that it is well done. The Book section is worth experimenting with, especially if you already have a large selection of edited images in Lightroom.
Read our article about book-making in Lightroom to learn more about the process.
Our selection of advanced Lightroom editing techniques shows there is much more to this Adobe software than meets the eye. These extra abilities make Lightroom stand out from all its competitors. Of course, this makes sense becasue Adobe is behind all the top media software.
If you are new to photography, familiarize yourself with these actions. You never know when you may need to produce specific content. And if you want to know how to perform each technique, read about each in more detail through the links provided.
Check out our Effortless Editing With Lightroom course for comprehensive, easy-to-follow Lightroom tips!


![P08 [Lead Gen] Product Sidebar_v2_date_20230223](https://expertphotography.b-cdn.net/wp-content/uploads/2023/02/P08-Lead-Gen-Product-Sidebar_v2_date_20230223-300x295.jpg)
![P08 [Lead Gen] Sidebar Banner 2_date_20230223](https://expertphotography.b-cdn.net/wp-content/uploads/2023/02/P08-Lead-Gen-Sidebar-Banner-2_date_20230223-300x245.png)
![P08 [Lead Gen] Sidebar Banner 3_date_20230223](https://expertphotography.b-cdn.net/wp-content/uploads/2023/02/P08-Lead-Gen-Sidebar-Banner-3_date_20230223-300x245.png)