Today, we dive into Lightroom masking and the power of Lightroom’s newest AI. Lightroom masking has become one of the best features in the Lightroom arsenal thanks to the development of AI. We now have a way to make complex masks in a few seconds!
Our article guides you through everything you need to know about AI and manual Lightroom masking. By the end, you’ll be able to make complex edits. This gives you more control over your images. Thus, you can edit your images to a high standard with ease!
- Learn to use every tool for quick, professional edits.
- Discover seamless subject selection with a single click.
- Unlock hidden details in photos with our unique method.
What Is Lightroom Masking?
Masking is where you select a certain area of your photograph to edit. This was initially a feature found in detailed editing software like Photoshop.
Other photo editing software, like Lightroom, Capture One, and Luminar Neo, eventually added brushes. These brushes let us paint in the areas we want to edit, separate from the rest of the image.
Over recent years, these same photo editing programs have included AI masking. This means the programs read our files and decipher which areas are relevant. The first feature was sky identification and then came subject identification.
Lightroom is the best photo editing software that includes AI masking. This is thanks to its fantastic usability, accurate results, and many features.
Lightroom Masking in Lightroom (CC) vs Lightroom Classic
Lightroom uses the same approach to its AI masking in both Lightroom (Creative Cloud) and Lightroom Classic. You can perform the same task in either Lightroom version without compromising specific features.
The only notable difference is where you access the masking panel. In Lightroom Classic, the masking icon (circle with a dotted line around it) is found below the histogram. This is in the top right-hand corner of the Develop page.
You find the same icon along the right-hand toolbar in Lightroom CC. But you can only access masks in Detail or Compare viewing modes.
Adobe realized that masking is a crucial feature in achieving comprehensive edits. They also want us to use its incredible AI features to the fullest. The AI features are built around user experience and easy usability, so, unsurprisingly, they are in both versions.
How to Create a Mask in Lightroom
There are two main ways to create a mask in Lightroom:
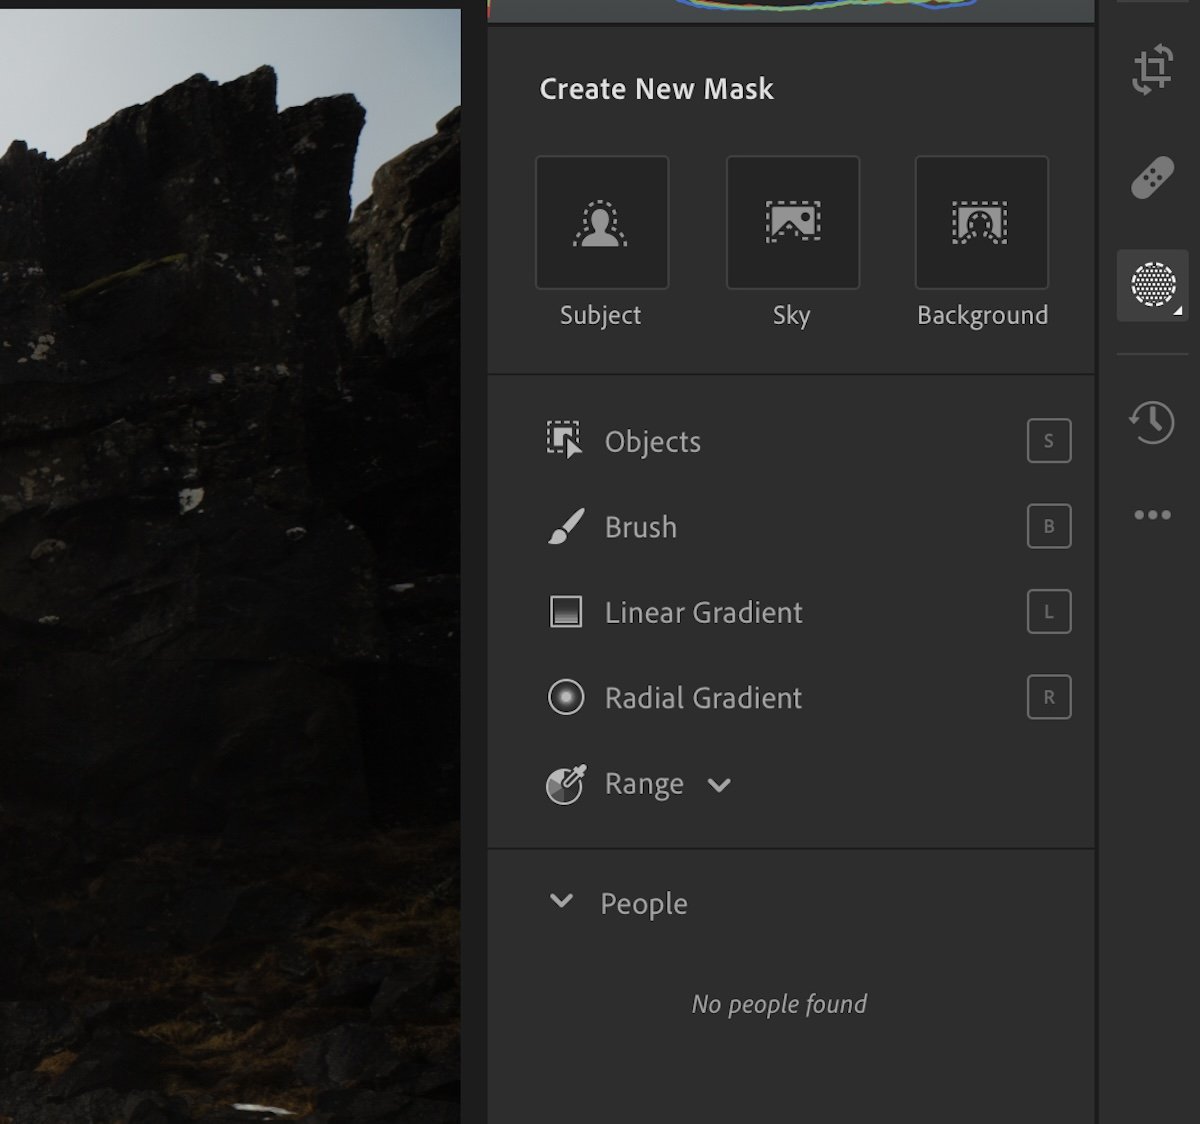
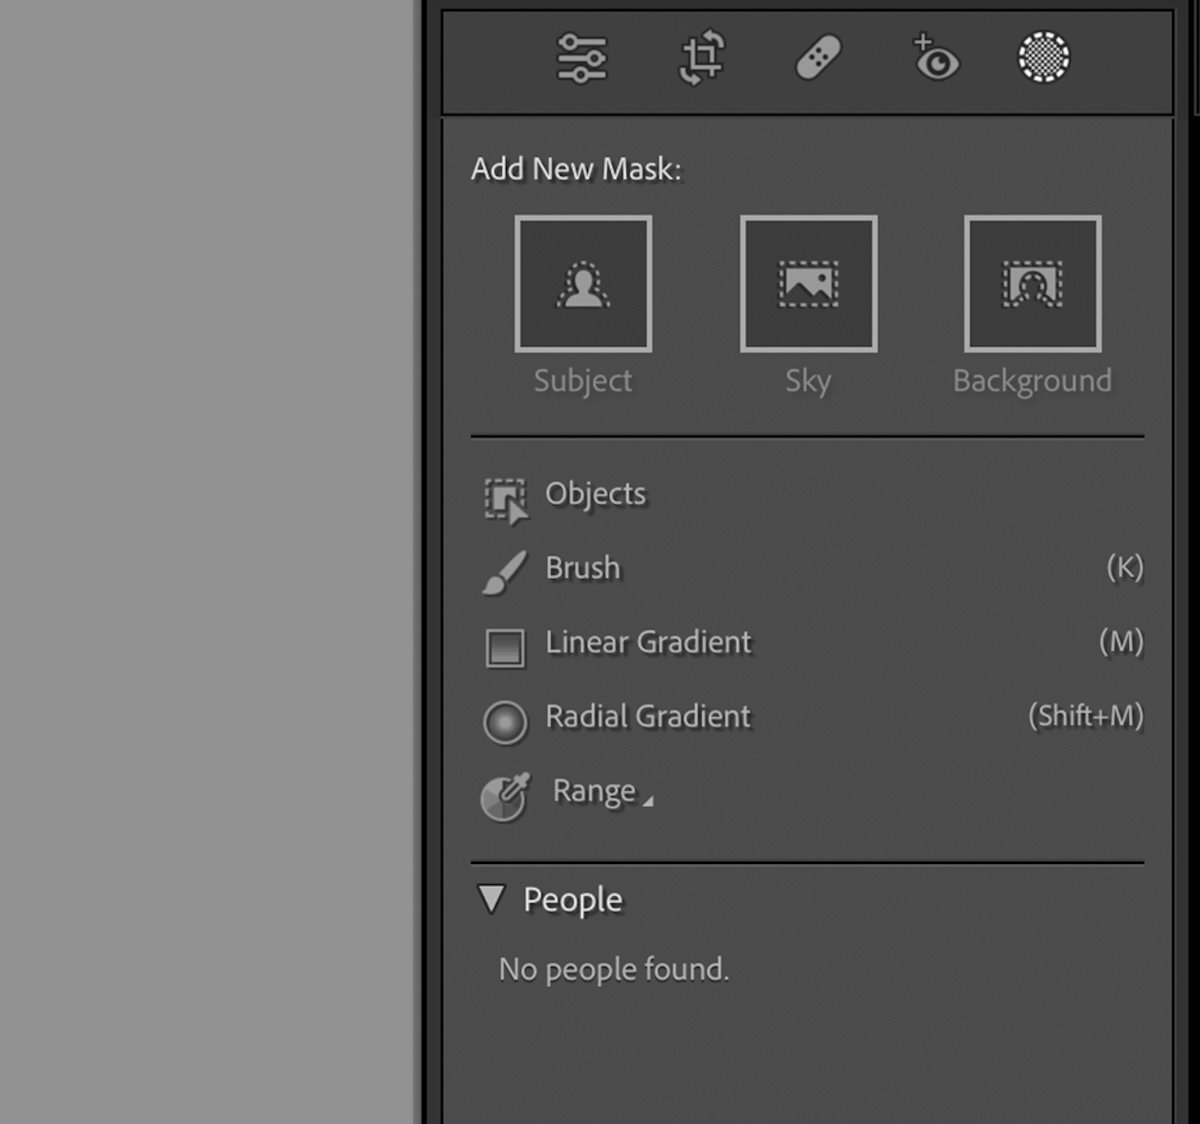
After you click the Masking icon, Lightroom presents various mask creation options. If your image doesn’t already have a mask, you will find the three AI options and larger icons in the top row. These options are Subject, Sky, and Background.
Below these three options, we have other methods that set a mask. The first option you will find is Objects. This new brush lets you select objects by quickly brushing over them. We go into more detail below.
Other manual masking options are in the same list as the Objects brush. These are Brush, Linear Gradient, and Radial Gradient. There are also ways to make a mask under Range, which masks a particular color, luminance, or depth range.
Underneath these sections is the People section. Lightroom scans the image for people and then provides a thumbnail image for the people it identifies. Clicking on a person brings up a range of AI masks that change the game for portrait editing. Again, we go into more detail below.
Adobe Lightroom Classic Masking menu
AI Lightroom Masking
We now run through all the AI masking options in Lightroom.
Subject Mask
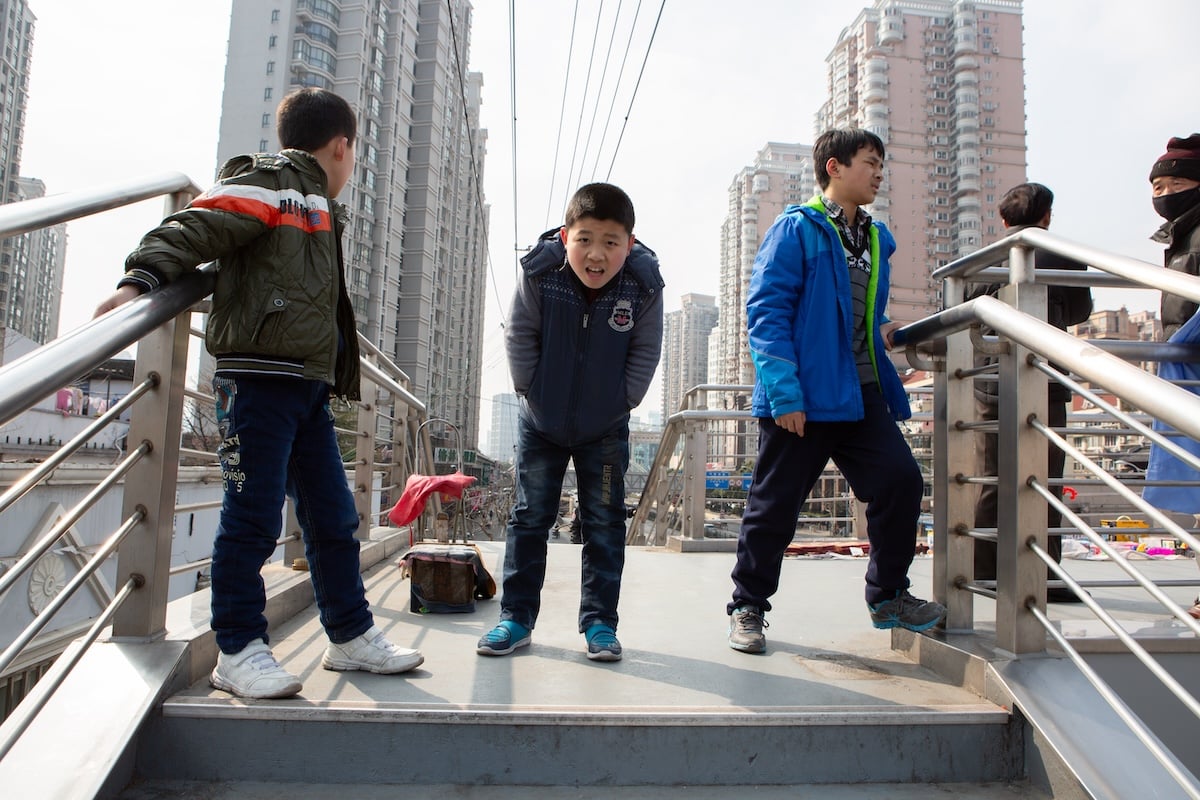
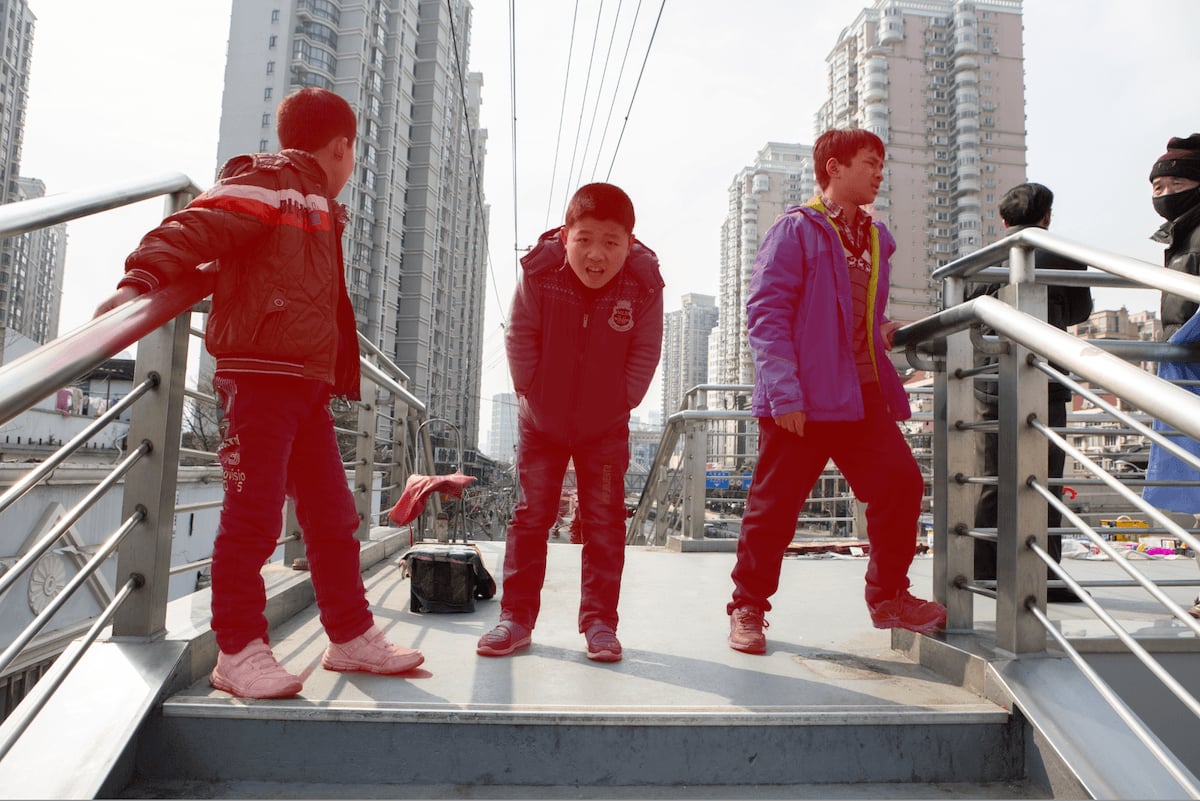
The first masking option we find is subject masking. Subject AI masking uses AI to scan our images and work out what the main subject for the photograph is. This tool is extremely impressive. It manages to identify and mask the main subject with no intervention.
There are cases where this AI mask won’t select the entire subject. This is most common in images where the main subject isn’t obvious in the photograph. But, there were images I thought the AI could never identify key subjects, and to my surprise, it created a great mask in two seconds!
To refine your AI Subject mask, click Add or the plus sign (+) under the subject icon in the new Masks overlay box. From there, your best option is to choose the Object or Brush mask.
Subject masks always try to find people first. If the AI cannot recognize people, it looks for vehicles or other elements that may contain people.
If there aren’t any of these, the AI then looks for buildings (cityscapes) or mountains (landscapes) that may be central in your photograph. Beyond this, the AI will look for other elements that may stand out in the image.
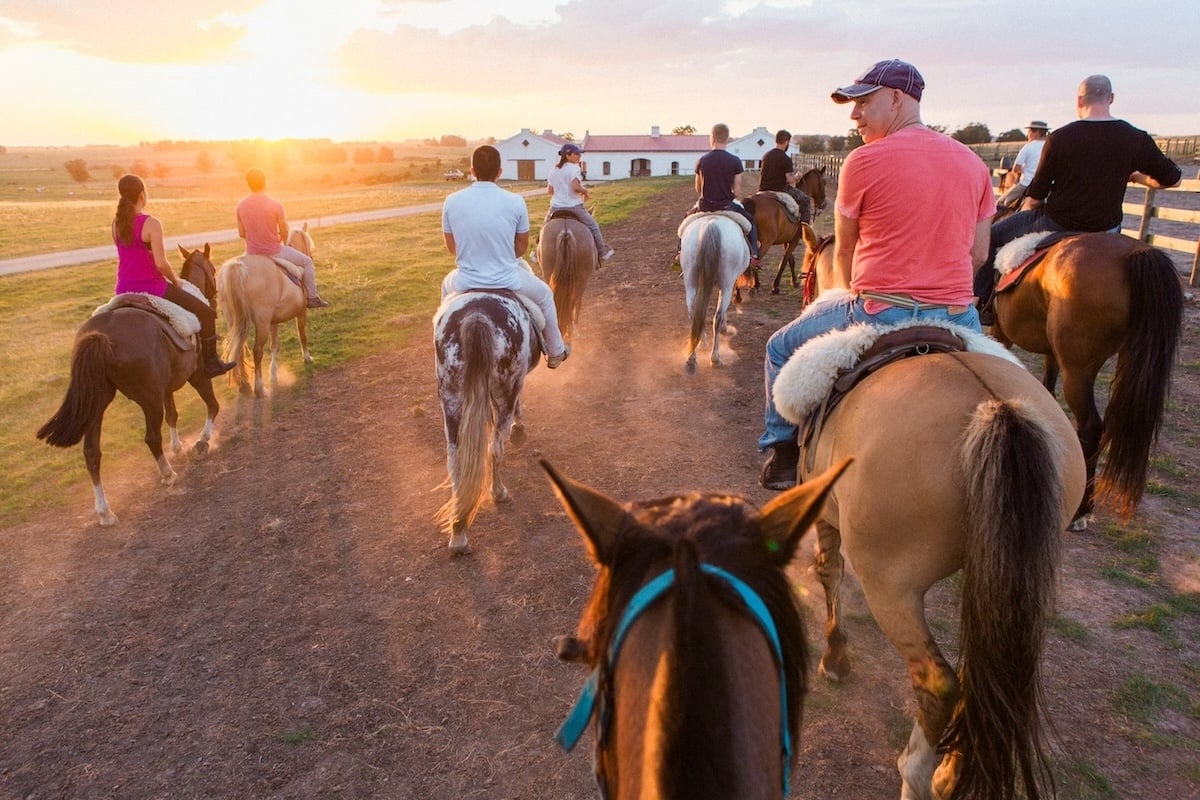
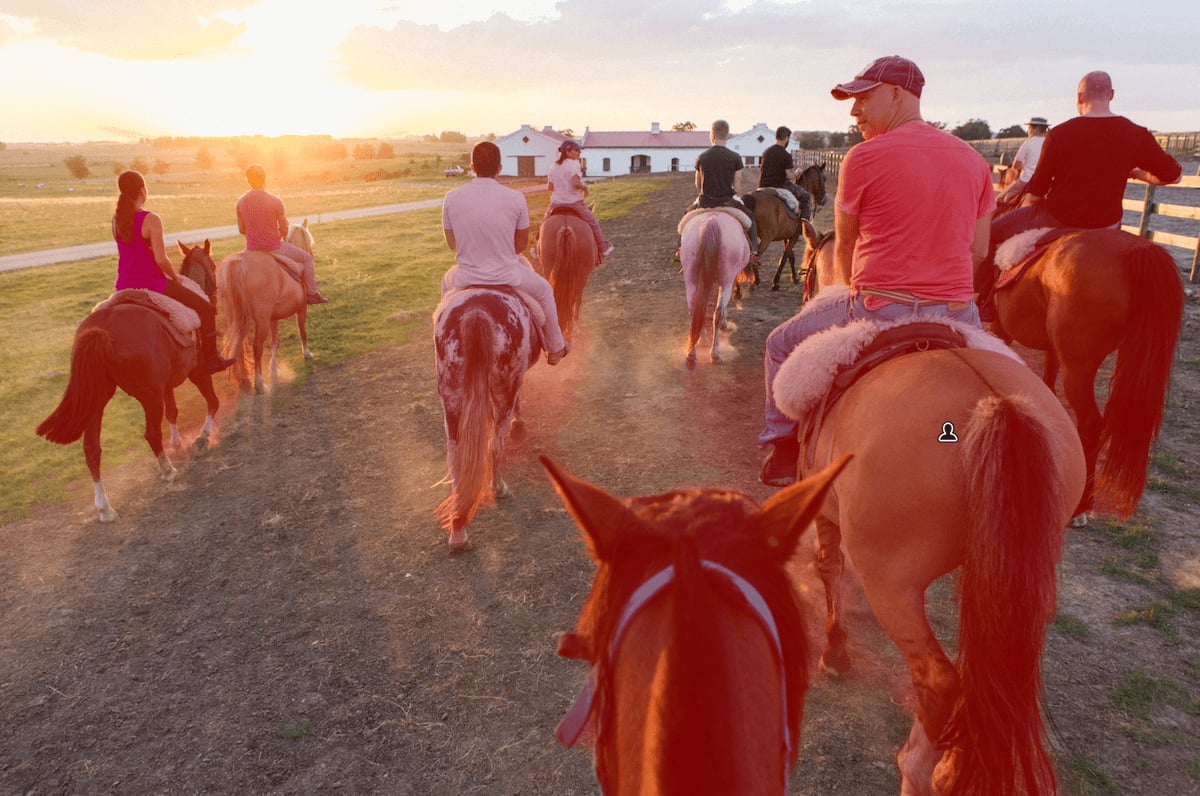
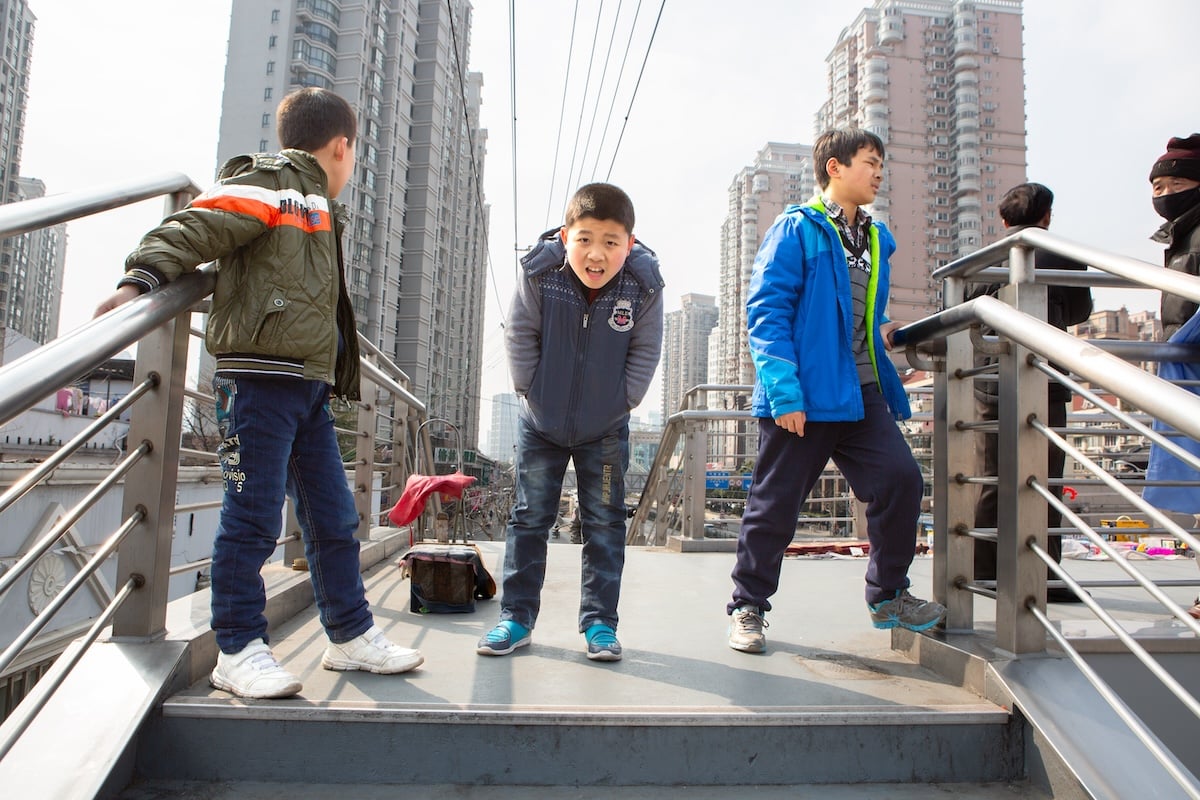
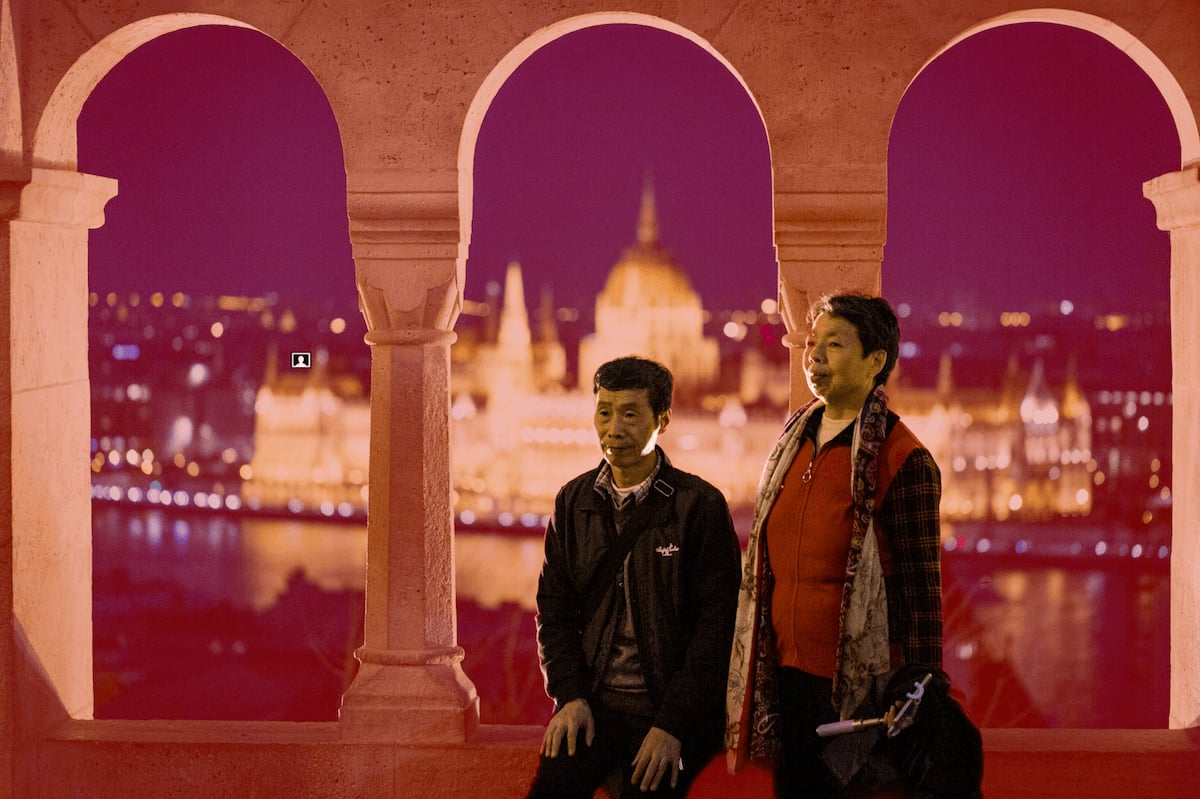
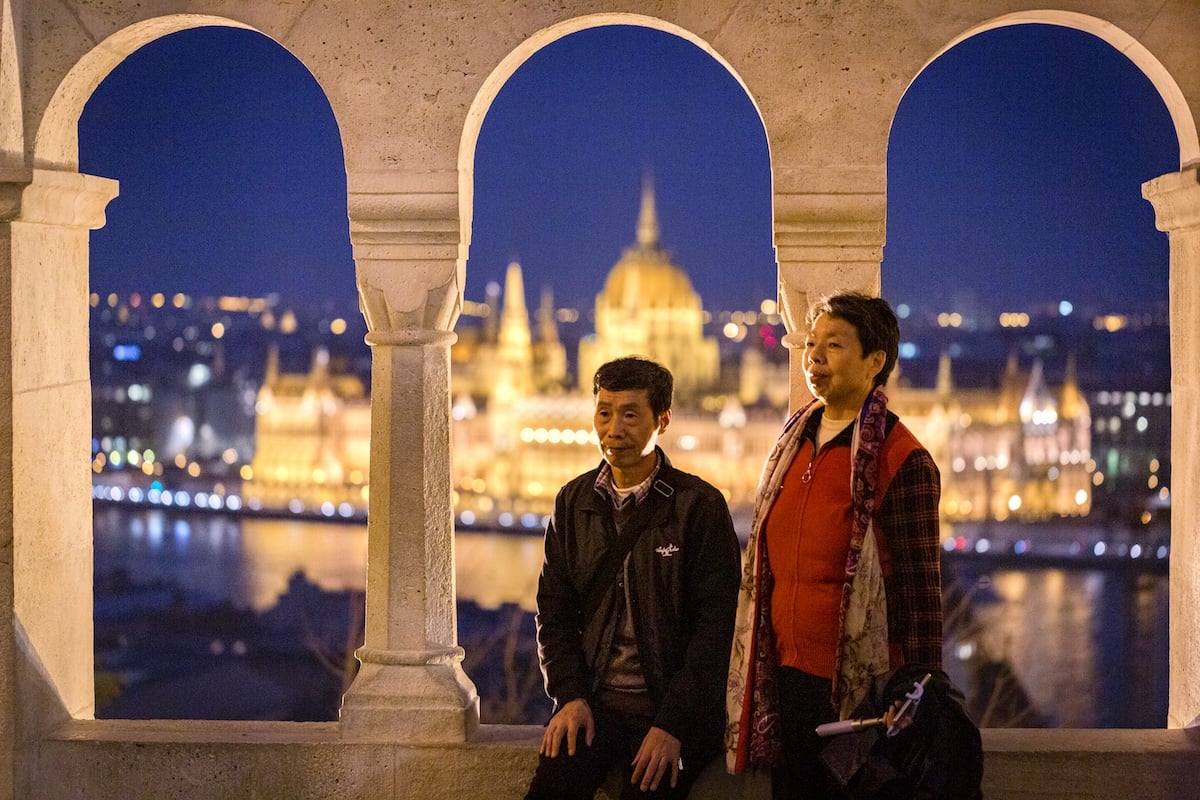
The subject mask is excellent. It saves a lot of time in images where the main subject is noticeable. It is particularly good for photographs with groups of people. The subject mask is also great as a starting point for images where the subject is less noticeable.
The results save you a lot of time. So refining won’t take too long!
Sky Mask
Sky masking AI is another incredible feature in Lightroom. It does exactly what it says. The AI can read the sky and provide a detailed mask for us to edit.
This is a helpful feature for all types of photography. It benefits genres like landscape and real estate photography the most. But it is also helpful for fashion photoshoots and other niches.
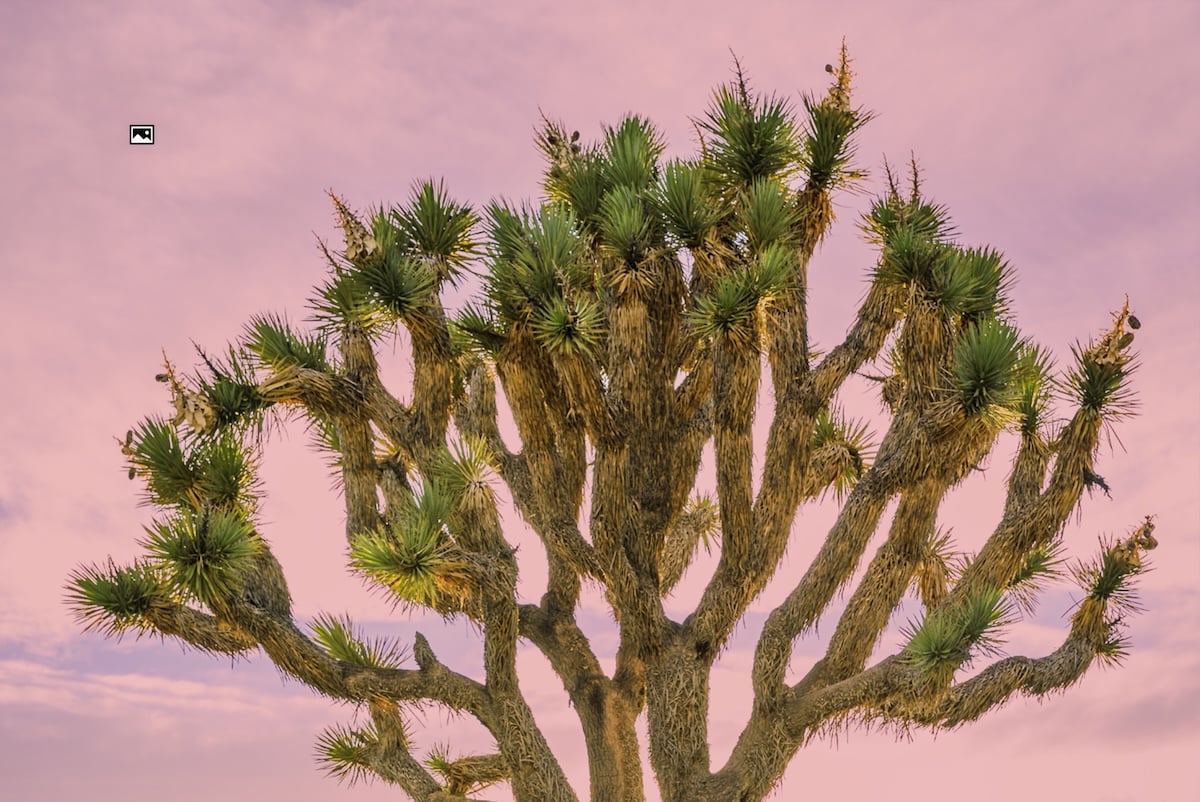
The AI sky mask can even identify the sky between finer details like wide gaps between leaves on a tree. It could do a better job with finer details, but the mask provides a decent solution to your approach.
The most common problem is the AI applying a slightly opaque mask over areas like branches or leaves. This means these areas are edited along with the sky but not to the same extent.
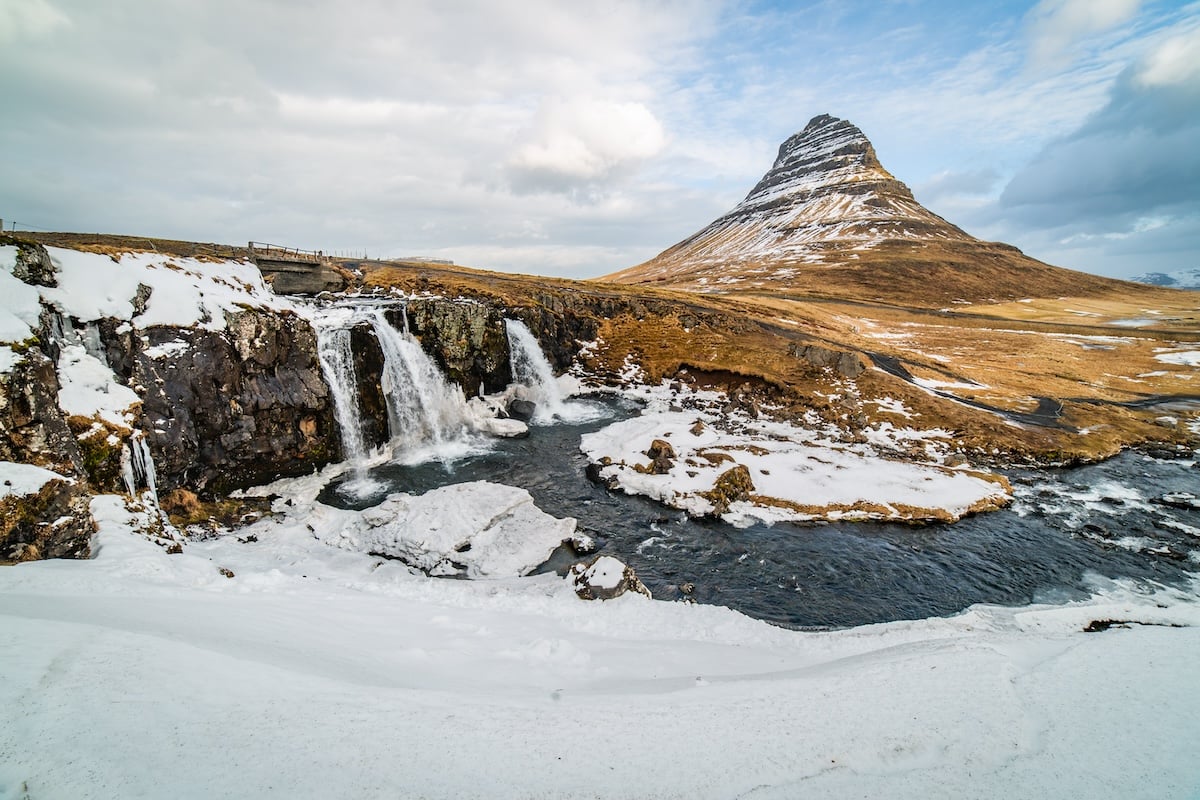
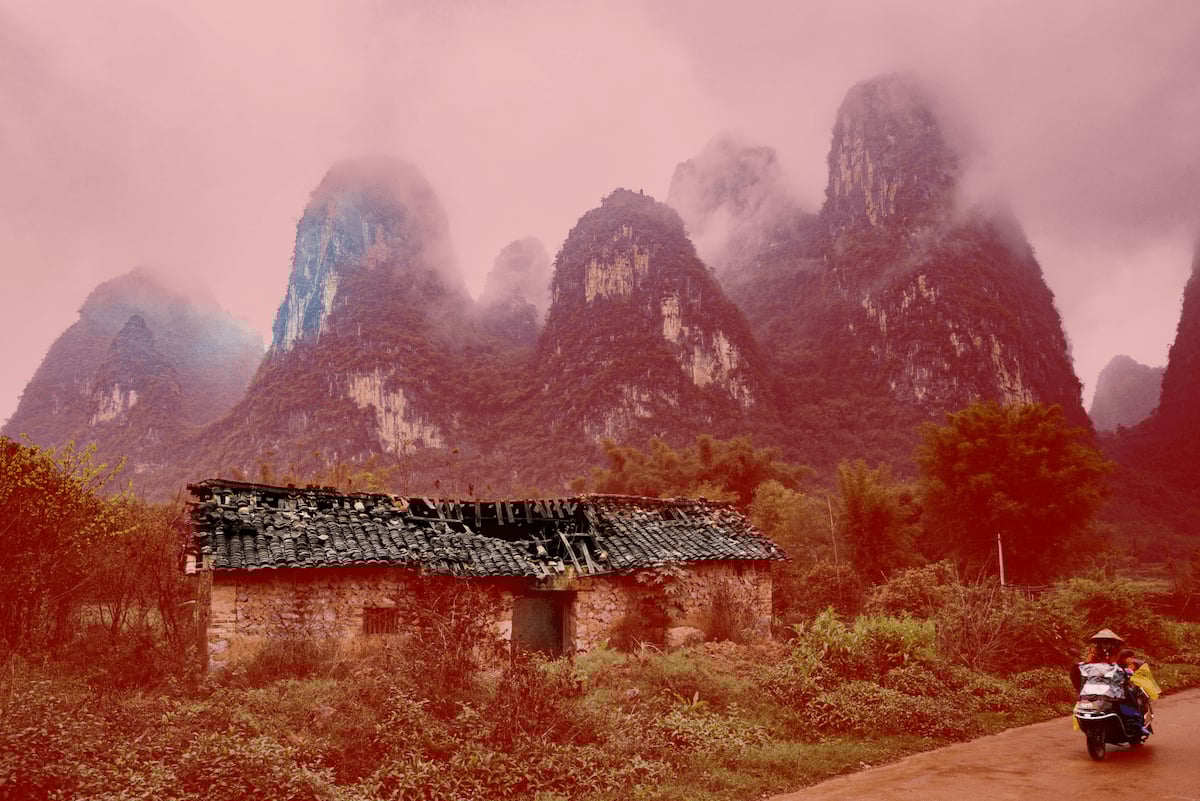
Another environment in which Sky AI doesn’t perform well is snow-covered mountains or mountains in the distance. Lightroom’s AI finds it hard to tell if it is a texture in the sky or the ground. This means you may also get an opaque mask in these areas.
But the Sky mask is excellent overall. These examples I have given are tough environments for people to mask, let alone machines who don’t know what they are looking at! The Sky AI mask is a game changer for any photographer who wants more control over their image.


Background Mask
Another AI mask in Lightroom is Background. The Background mask is the Subject AI mask in reverse. It identifies the photograph’s subject and then masks everything but the subject.
You can create a Subject mask and inverse it with a single click. But it is more user-friendly to have a simple icon for the background. This is a nice touch for masking in Lightroom, as simplicity is a key benefit, especially with advanced editing techniques.
Like the Subject mask, there are similar identification issues evident. This isn’t too much of an issue, as photographers would only mask a background if there were a noticeable subject.

People Mask
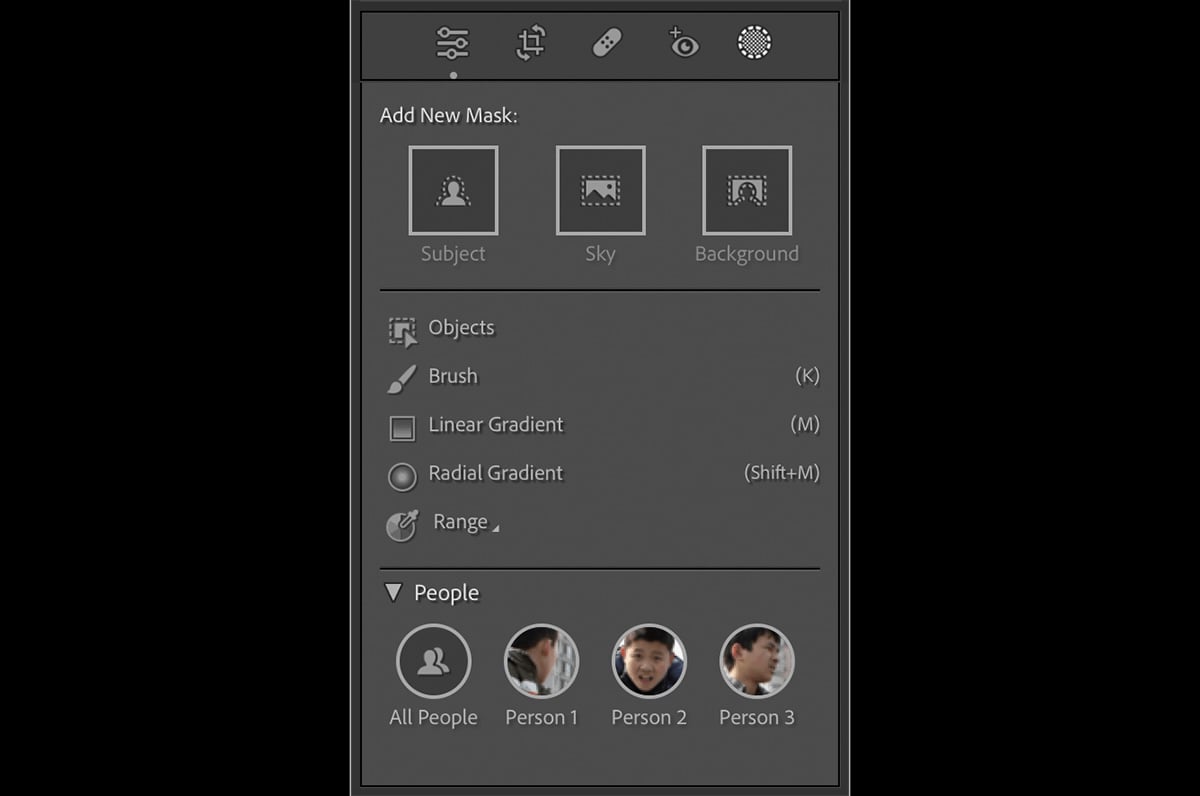
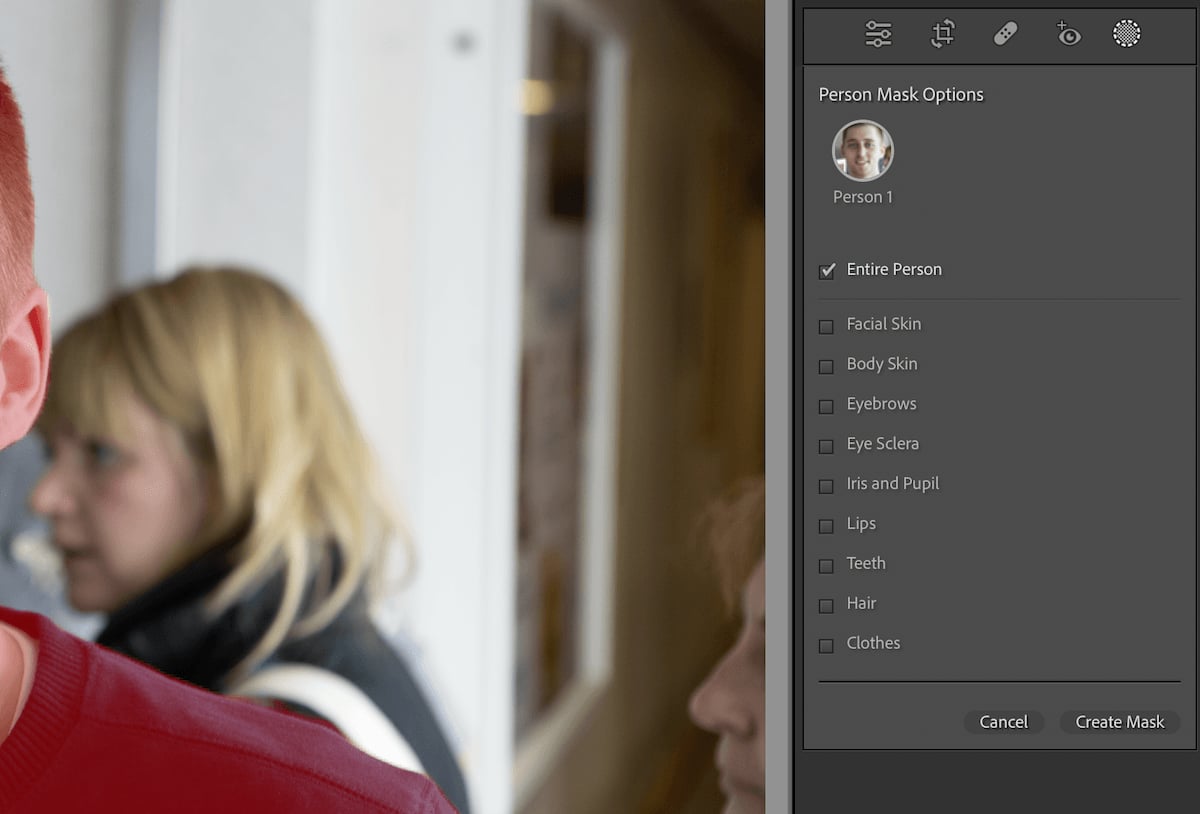
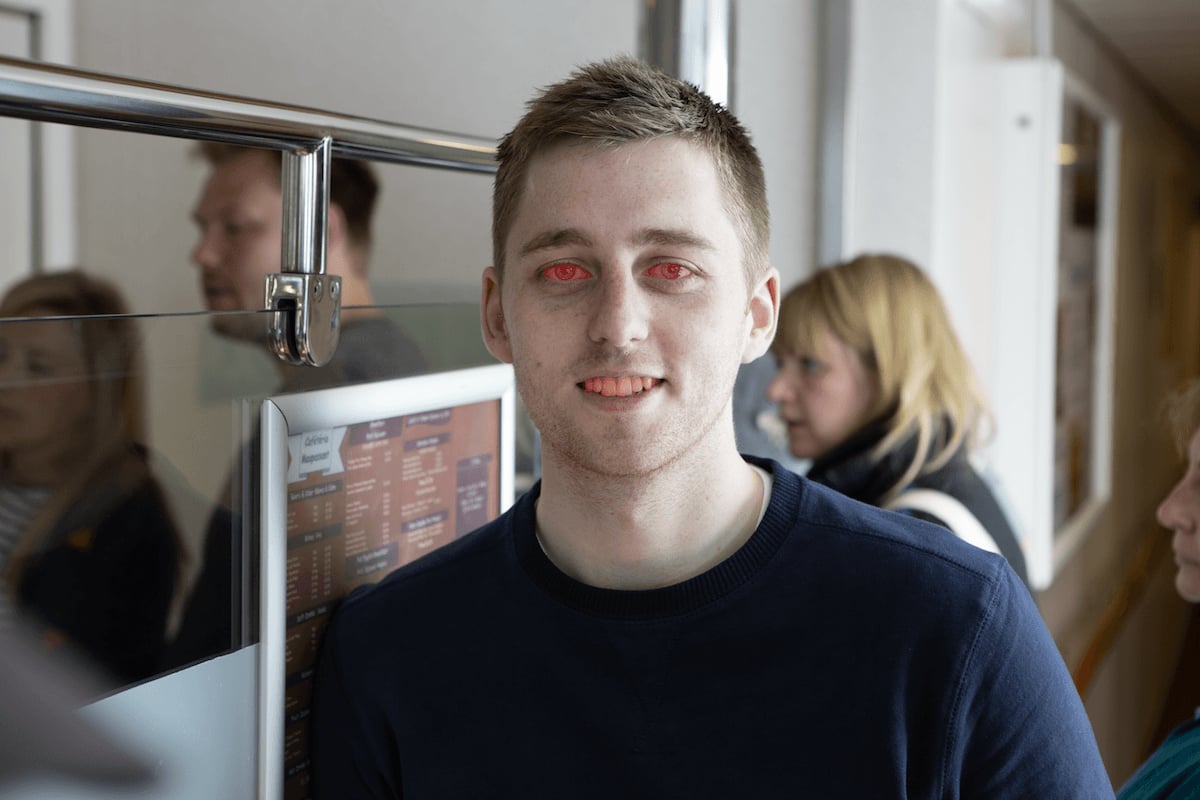
We now look at the most detailed and advanced AI masking in Lightroom, the People mask. The AI automatically scans your images for people. After identifying them, a thumbnail picture of your subject appears in the People section.
If you click on the thumbnail of your desired subject, you encounter a range of masking options, from the entire person to just their facial hair! This includes face and body skin, eyes, lips, teeth, and even clothes. You can also tick multiple boxes to combine these areas.
This technology from Lightroom is seriously impressive. It does an excellent job identifying each feature and provides an easy, user-friendly experience. Previously, you would have had to mask all these sections yourself. This saves you hours of mindless masking!
We do encounter some issues here. If facial features are not well defined, the mask may slip out of the perfect outline of the features. Correcting this is easy as you can select a brush and remove the excess mask.
People’s features may be grouped if they are in a photo together. This is understandable, but we must brush away potentially confusing areas.
Overall, the people masking in Lightroom is a godsend for portrait photographers. It completely changes portrait editing, making it much easier and more enjoyable while giving you expert control. You can learn more about editing portraits.


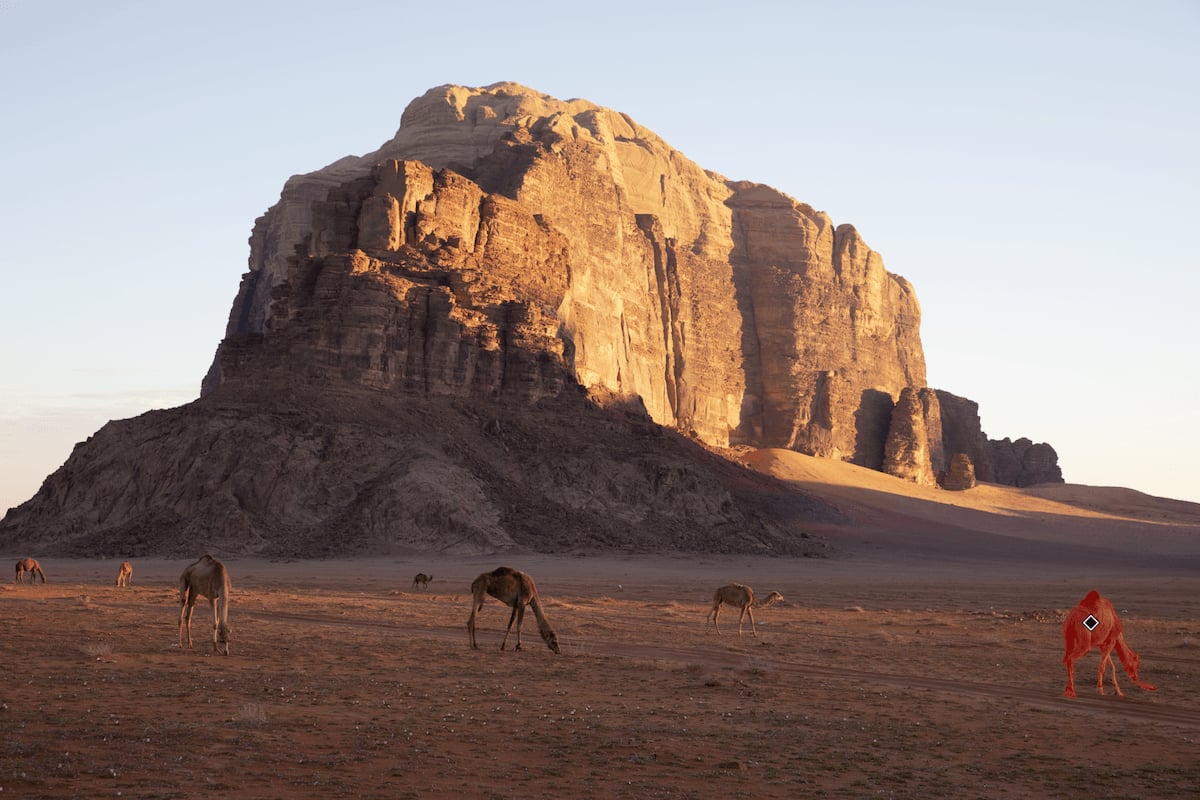
Objects Brush
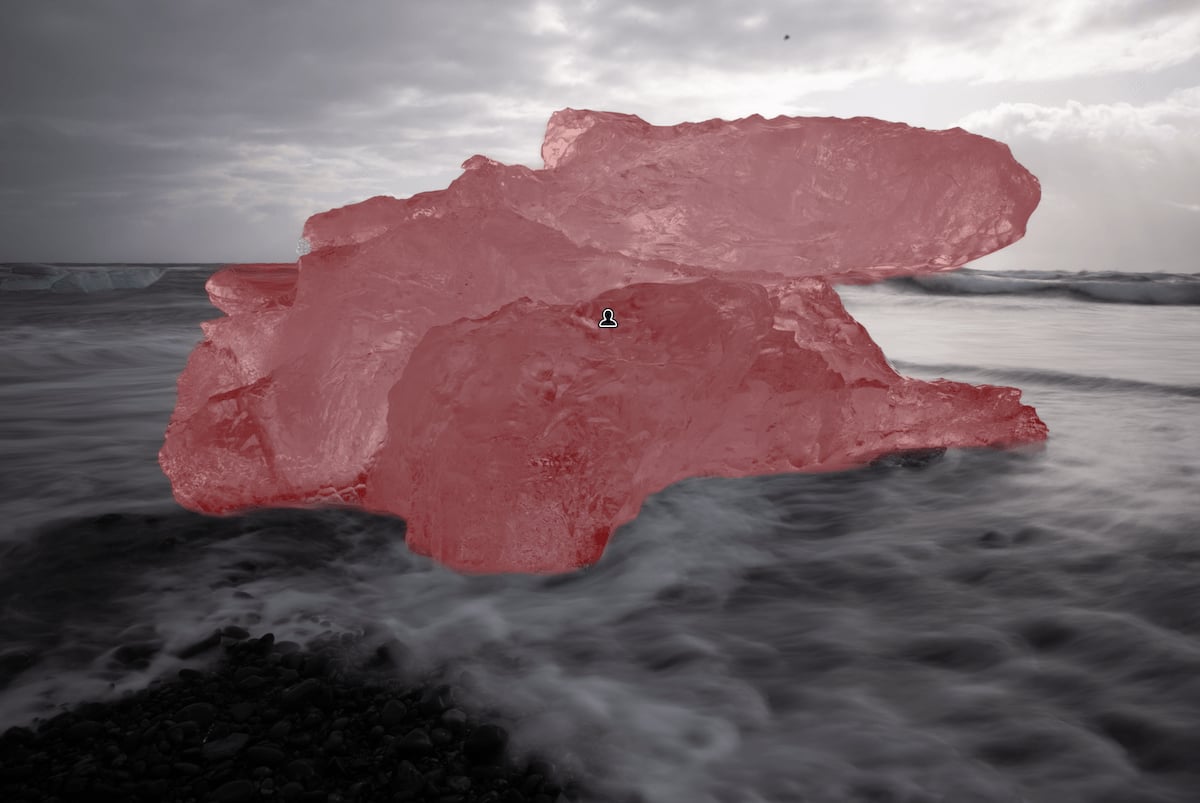
The Objects brush is a new AI masking tool that is brilliant if the Subject AI cannot identify the main subject.
Clicking the Objects mask lets you select your object with two options—Brush Select and Rectangle Select. If you cover your object with these selections, the AI works out the object inside your selected area.
The Brush selection is best for making a more detailed tracing of objects and ensuring the whole object is in the selection. After selecting your mask, you can continue with the same options for all masking features.
The Objects tool can still produce inaccurate masks due to the same issues as other AI masking methods. This is mostly due to a dramatic color or luminance change in the object or a texture similar to its surroundings.
The Object masking tool is brilliant. It is particularly useful for product or editorial photographers who must pick certain photo elements to mask. It can be useful for all types of photography, so familiarize yourself with this tool.


Manual Lightroom Masking
We now run through all the masking options in Lightroom that don’t use AI.
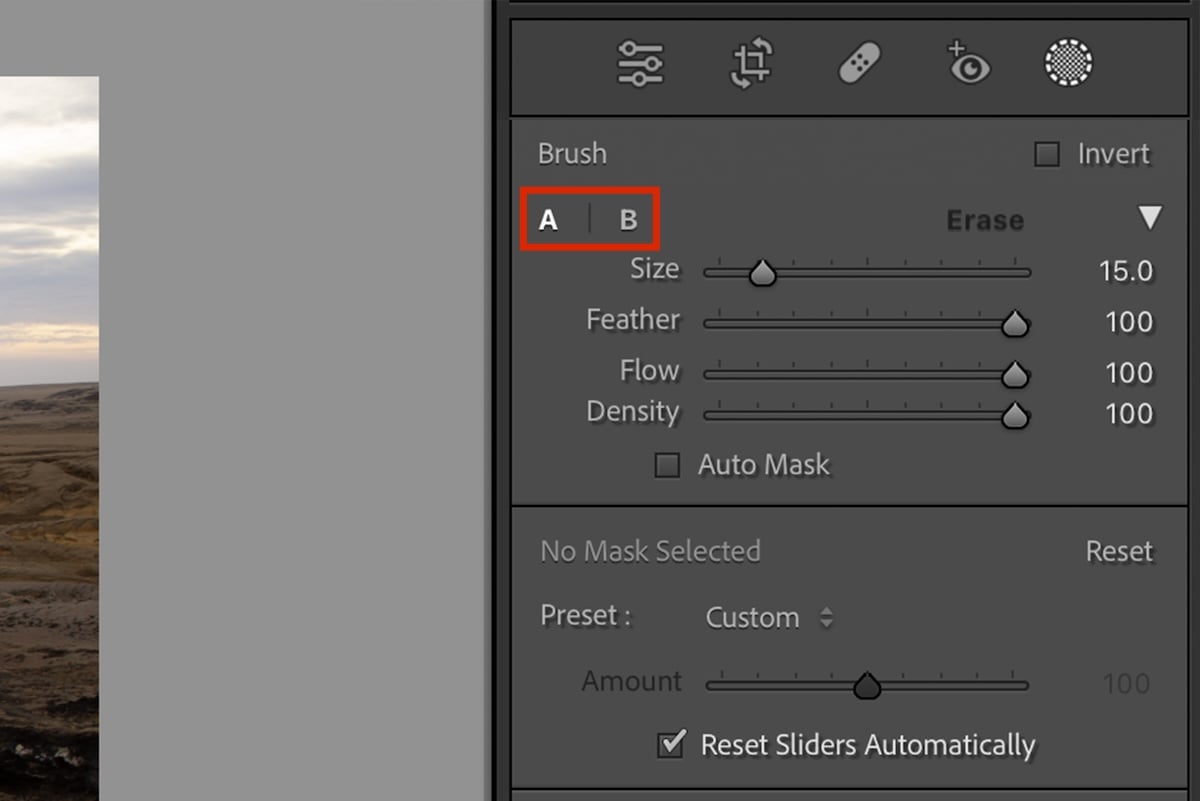
Brush Masking
The Brush masking tool is the only way to create your own manual mask in Lightroom. This is a process that could take a long time to get your selection perfect. But you can go into fine levels of detail to make an accurate mask.
The brush lets you change the selection’s size, feather, flow, and density. One great feature is that Lightroom lets you set two different brush options to flip between (A and B).
This is useful because a soft feather selection may benefit leaves and hair. A hard feather selection benefits clothes or harsher changes in texture and opacity.
There is also an Eraser to ensure a perfect selection. Another good feature is that Lightroom shows you the extent of the feathering while hovering over your photo. This is helpful because it gives you an accurate portrayal of what will be applied when brushing in.
After you have perfected your mask, you can continue with all masking adjustments available. You should become familiar with Lightroo’s Brush tool for several reasons. One is that you can then refine AI masks to a high degree. And another is that these brush skills transfer to Photoshop.
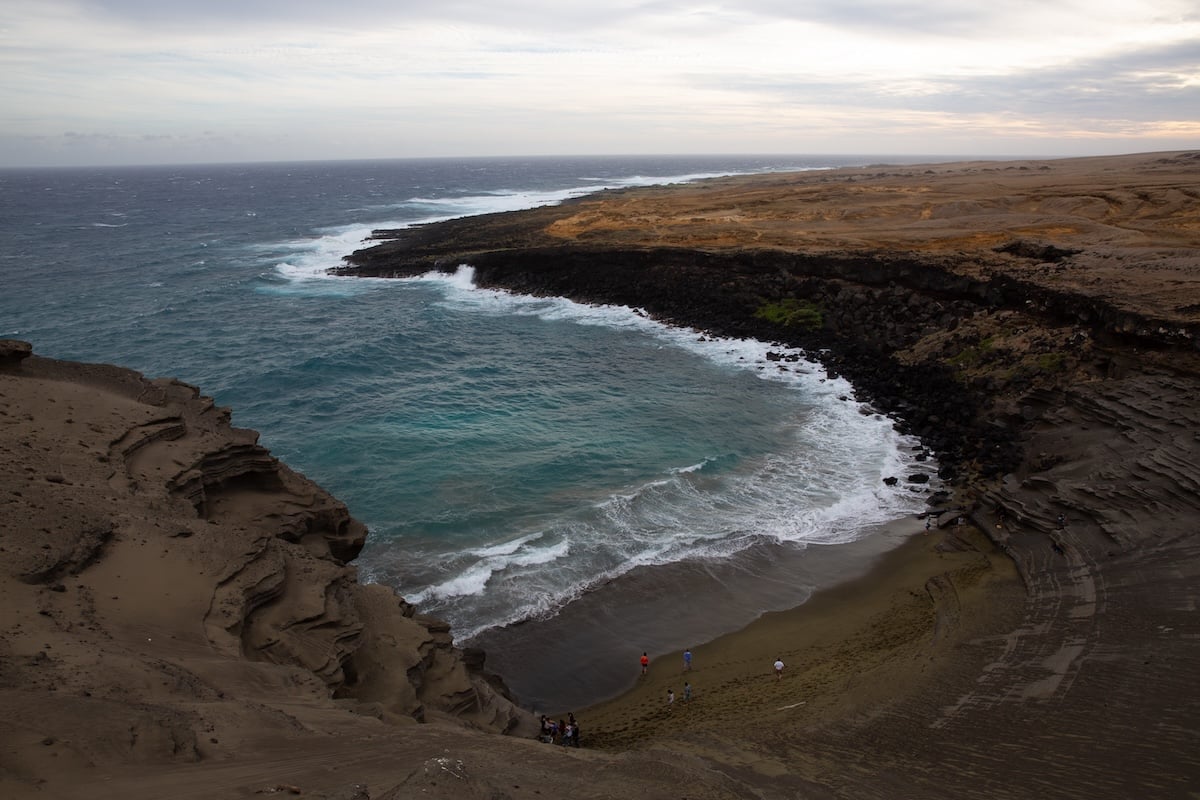
Linear Gradient
The Linear Gradient tool provides an easy way to add a gradient to your photographs. Lightroom provides a mask that fades sharply or gradually over a selected part of your photograph. You can then apply any adjustment you want to the masked section of your edit.
Adding a linear gradient is as easy as clicking on your photo and dragging the gradient down. The longer you drag, the more gradual the gradient will be. You can always change the gradient after it is set. It even lets you change the angle or inverse the selection.
A linear gradient mask in Lightroom is perfect for landscape photographers. It could also be useful for creatives experimenting with alternate editing techniques. Previously, this would have been the best way to edit the sky. But now Sky AI masking in Lightroom is much more accurate.


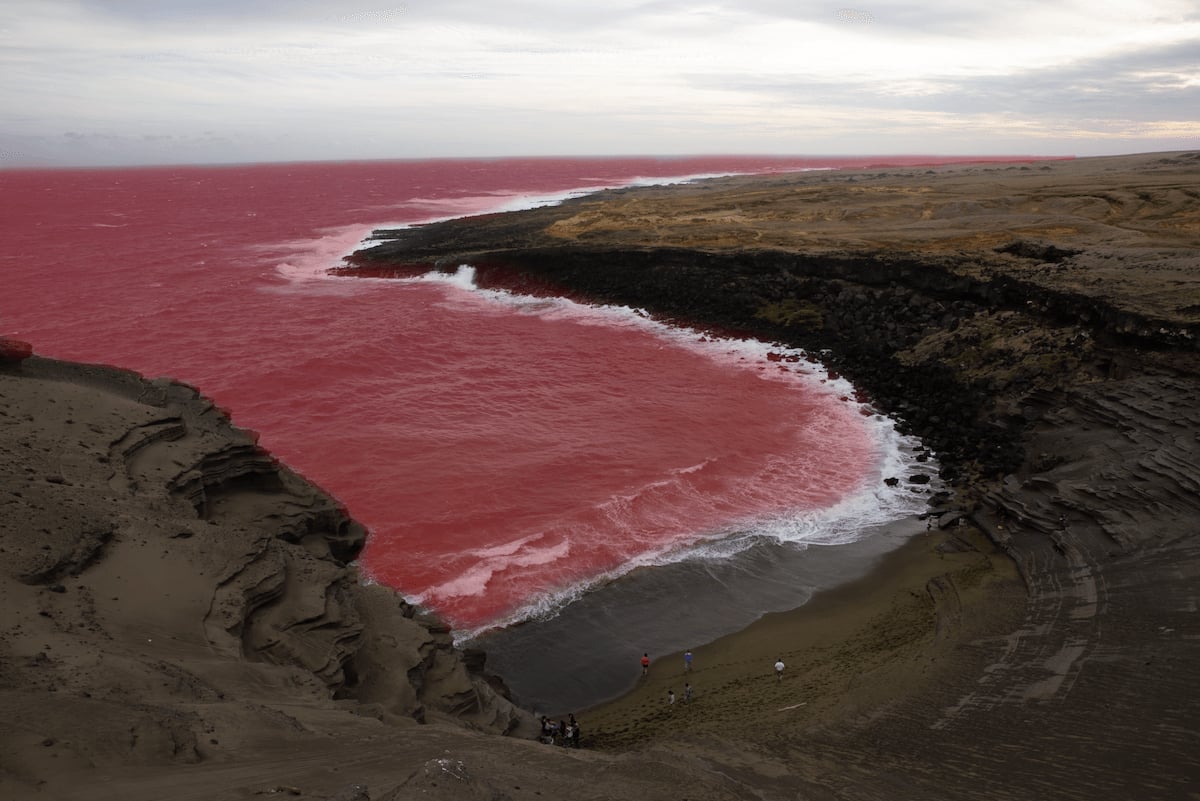
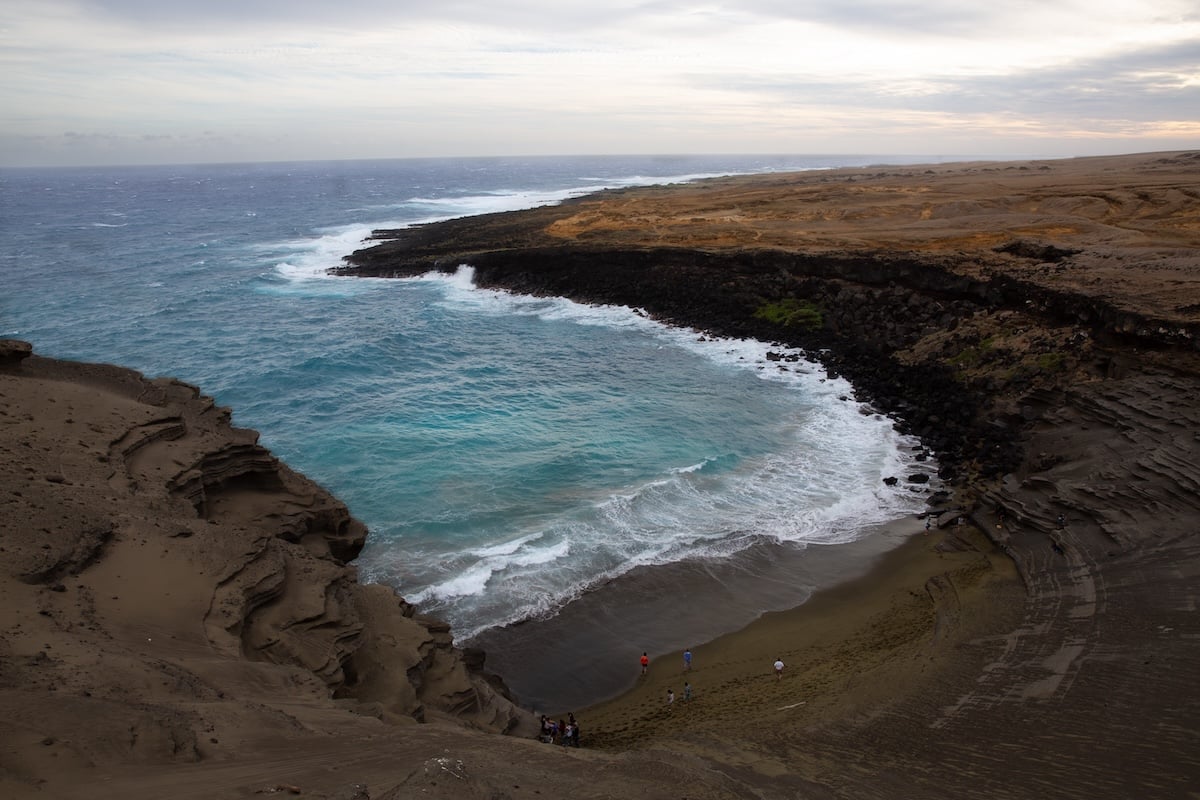
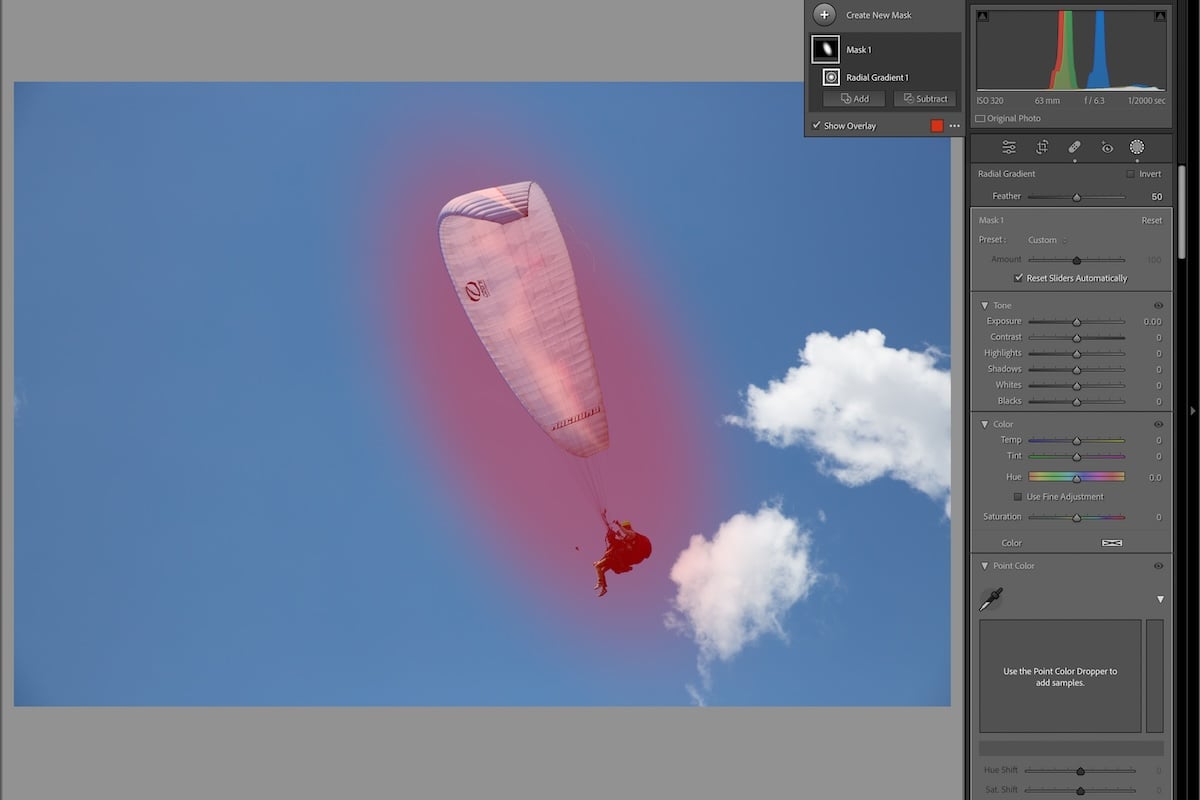
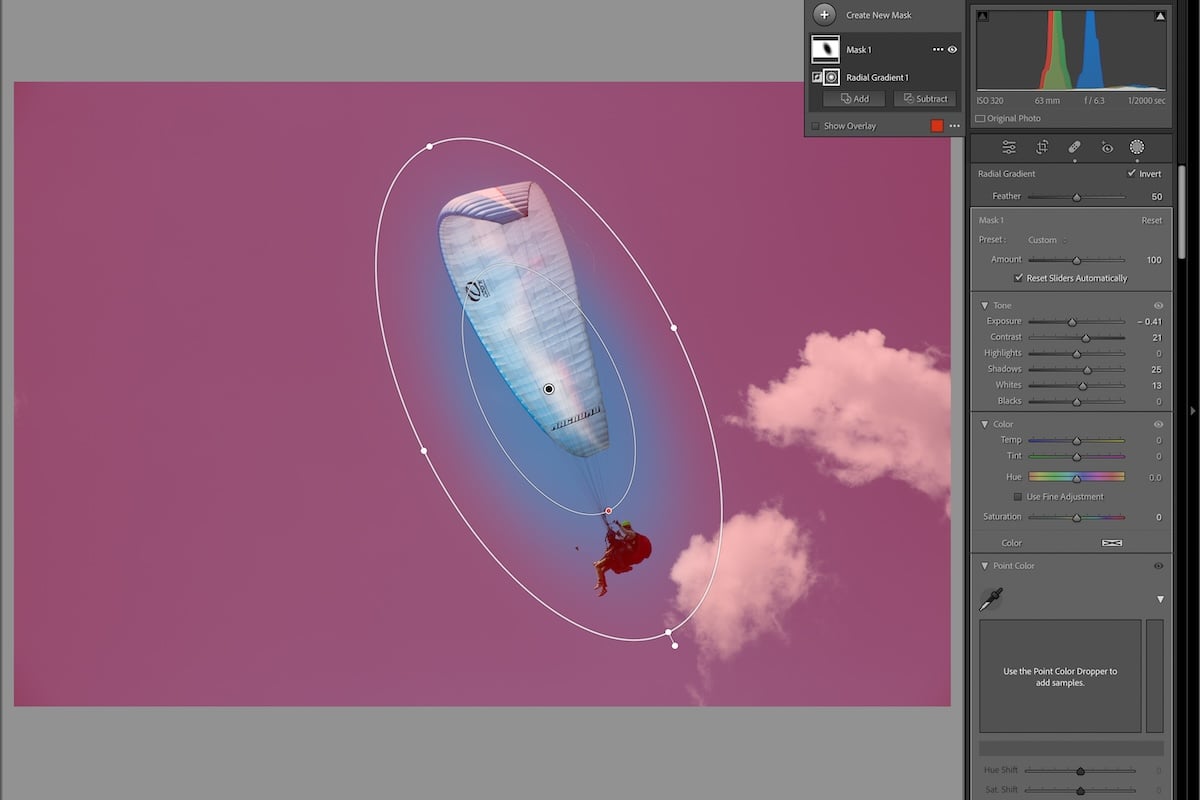
Radial Gradient
The Radial Gradient tool is an easy way to provide a circular gradient in Lightroom. This works similarly to the Linear Gradient tool, but you draw a circle instead of a straight line.
You can click and drag the Radial Gradient tool to suit your desired outcome. You can achieve a wide range of radial shapes to suit the sections you want to mask. The tool also benefits from its inverse selection, providing a vignette to your images.
This is a great tool for directing attention to particular areas of your photograph. The Vignette tool in Lightroom is incredible, so a Radial Gradient may not be the best way to add one. But this may be for you if you want to make the vignette off-center.

Lightroom Range Masking Options
We now run through all the masking options in Lightroom that examine different ranges in our photographs.
Color Range
Another great way to mask in Lightroom is to use the Color Range masking tool. This tool lets you select a color range to be masked across your image. A Refine slider lets you select how much difference from your selected color the mask selects.
When you select the Color Range tool, you automatically get a color dropper for your cursor. You can then review your photo and select the color you want to mask. When you have clicked the relevant color, all the similar colors around the image turn red.
You may notice it is hard to select the particular color you want. This is because the overall color temperature of the photograph may make colors blend. This is where the Refine slider comes in handy.
The Color Range masking in Lightroom is helpful for editorial photographers who may want to fine-tune colors. You can also make colors pop or stand out more. This method is also great for creatives or those looking to experiment. This tool lets you change colors completely!


Luminance Range
Lightroom’s Luminance Range masking is like the Color Range. Instead of masking similar colors, this tool masks all areas with a similar luminance range. So, all areas with a similar brightness are in the mask.
This tool comes with a luminance range slider. It lets you fine-tune the selection for the mask.
The slider lets you adjust both the higher and lower luminance values. This means you can make a concentrated and particular mask or a broad, open one. You also can use the points below the slider to add a gradient zone.
There is also a Show Luminance Map tick box. This visualizes your current selection clearly. This is very helpful for fine-tuning your mask. It turns your image monochrome, and your selected area is red.
The Luminance Range masking method in Lightroom is fantastic. It suits certain niches like landscape photography well. But it can also benefit all types of photography.
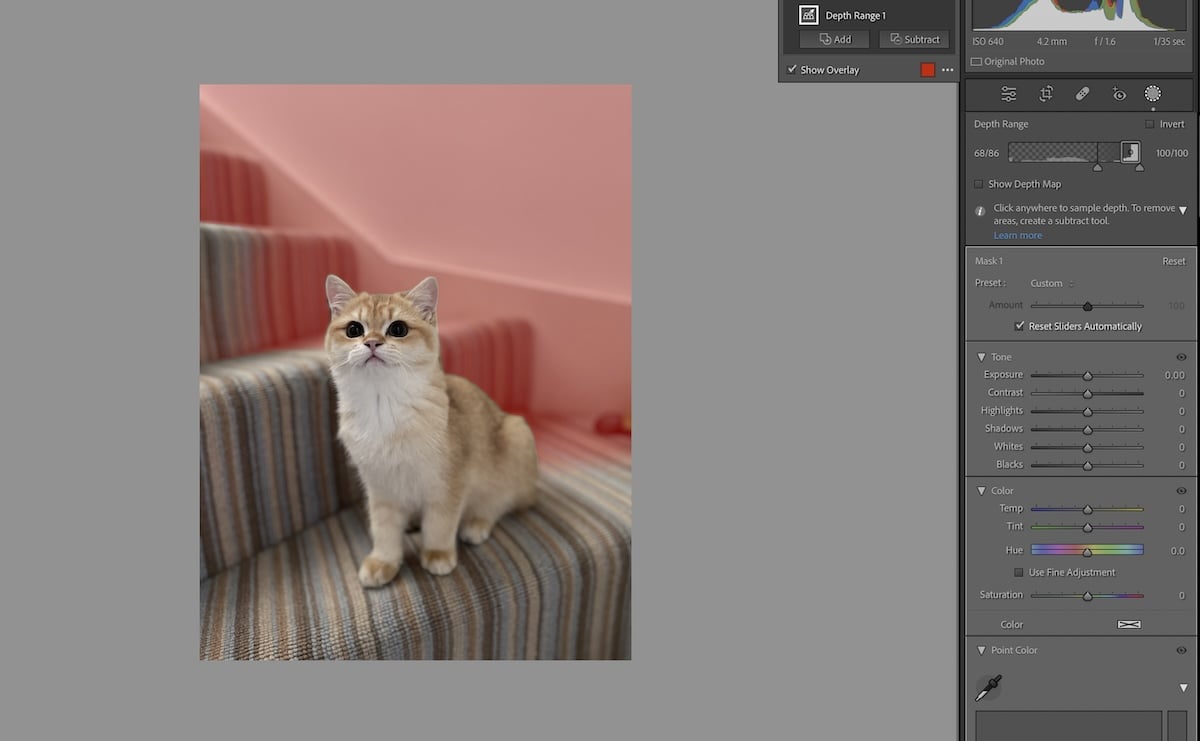
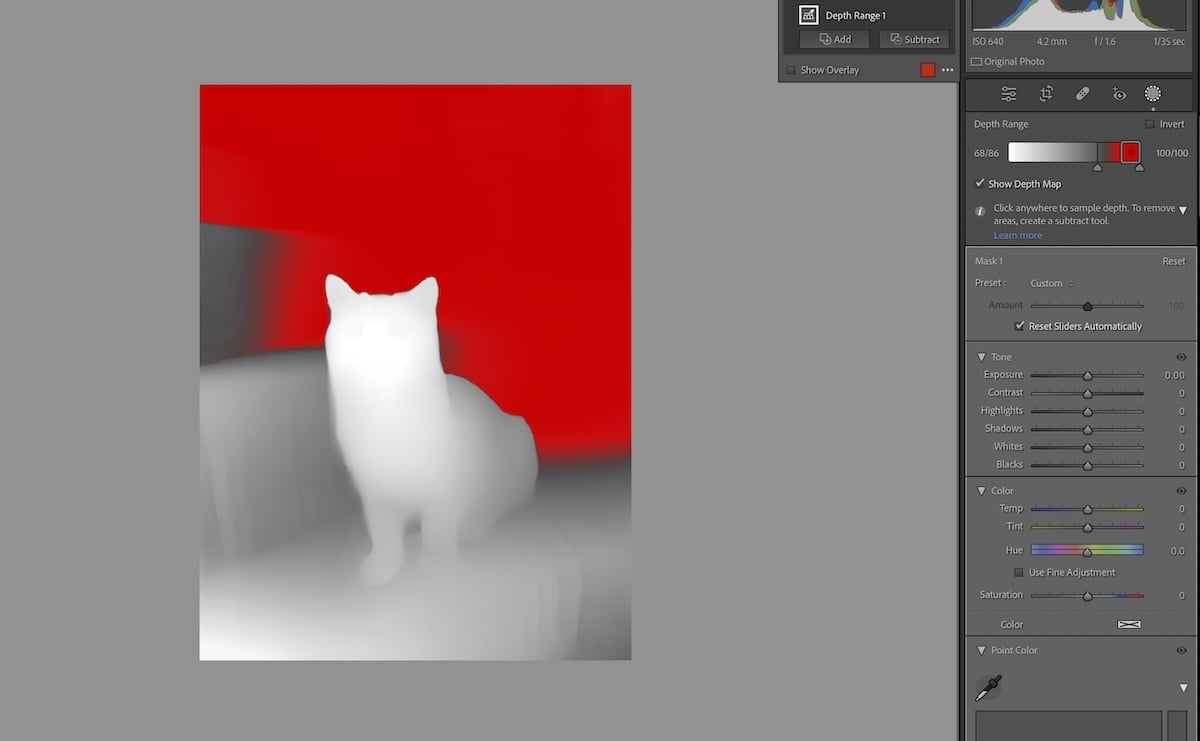
Depth Range
A unique feature that Lightroom offers in its masking tools is the Depth Range. You can only use this photo for images that contain depth information.
The most common camera with depth information may be your smartphone! The HEIC files in portrait mode contain depth information.
The mask functions similarly to the Luminance Range masking option. You get a similar adjustment slider, which contains much more detail than a regular slider. You can also click the Visualize Depth box, which makes the depth range visible over your photograph.
Like the other two range masking tools, you also get a dropper as your cursor. This lets you click the particular depth you want to edit in your image.
The Depth Range masking tool is great for added control if you have photographs with depth information. This can be helpful to make subjects pop in your photograph.

Conclusion: Lightroom Masking
After looking at all these different options for masking in Lightroom, we can see that Adobe went above and beyond with these tools. The way Adobe handles masking in Lightroom is among the best in any photo editing software, including Photoshop!
This is thanks to its excellent usability. Now, even beginners can perform advanced edits with Lightroom masking.
Some techniques to create masks in Lightroom benefit certain situations and photos more than others. So, make sure you give each method a go to familiarise yourself.
Check out our Effortless Editing With Lightroom course for comprehensive, easy-to-follow Lightroom tips!
- Learn to use every tool for quick, professional edits.
- Discover seamless subject selection with a single click.
- Unlock hidden details in photos with our unique method.


