Today, we will guide you through how to add a watermark in Lightroom. Watermarks are an important form of security in digital photography, especially if you share your images online.
Luckily, Lightroom provides a brilliant process for applying customized watermarks to our photos. This process is much easier than applying your watermark in Photoshop. In this article, we will guide you through the entire process and explore every option Lightroom allows.

What Is A Watermark?
A watermark is similar to a signature for our photographs. It is primarily used as a mark of ownership. If we share our images beyond the circle of those who know our photography, then people who like our images can search for more of our work.
Watermarks are also important for protecting our images. People will not want to use a photograph with writing across it. Adding a watermark can ensure a client only uses our pictures after we are paid.
You will see watermarks in all shapes and sizes. Small watermarks are for situations like the first example I mentioned, sharing images so people can trace us. You can make these as subtle as you like. As the watermark will still be fairly obvious, viewers can find your or your company’s name.
Larger watermarks are for the second example: to protect our images. It is common to see big and bold watermarks covering photographs. This is because it makes it impossible to crop or edit out the watermark.

Example of watermark in the top right
Watermarks in Lightroom vs Lightroom Classic
Adobe Lightroom now comes in two different versions: Lightroom and Lightroom Classic. Both versions have many of the same functions; what differs are the approaches to editing processes.
Lightroom favors a post-processing workflow that utilizes the cloud. This allows you to work from the same set of images on any device you want. This version also prioritizes simplicity and ease of use through a stripped-back interface. This may be easier for beginners to work through.
Lightroom Classic has an interface with which any photographer who has used the past versions of Lightroom would be familiar. It provides a wide range of features, some of which you may never need to use. You will find more in-depth controls and attention to detail in Lightroom Classic.
Both Lightroom versions have a watermark editing feature. These are both found in the exporting process. The only difference between the two Lightroom versions is the layout of the Watermark Editor box.

Add A Watermark in Lightroom
A watermark is one of the last edits you want to apply to your photograph. This is why you will find the Watermark Editor in the exporting process.
Let’s now go through how to add a watermark in Lightroom in detail.
Finding The Watermark Editor
First, choose your image or images, and go to File > Export.
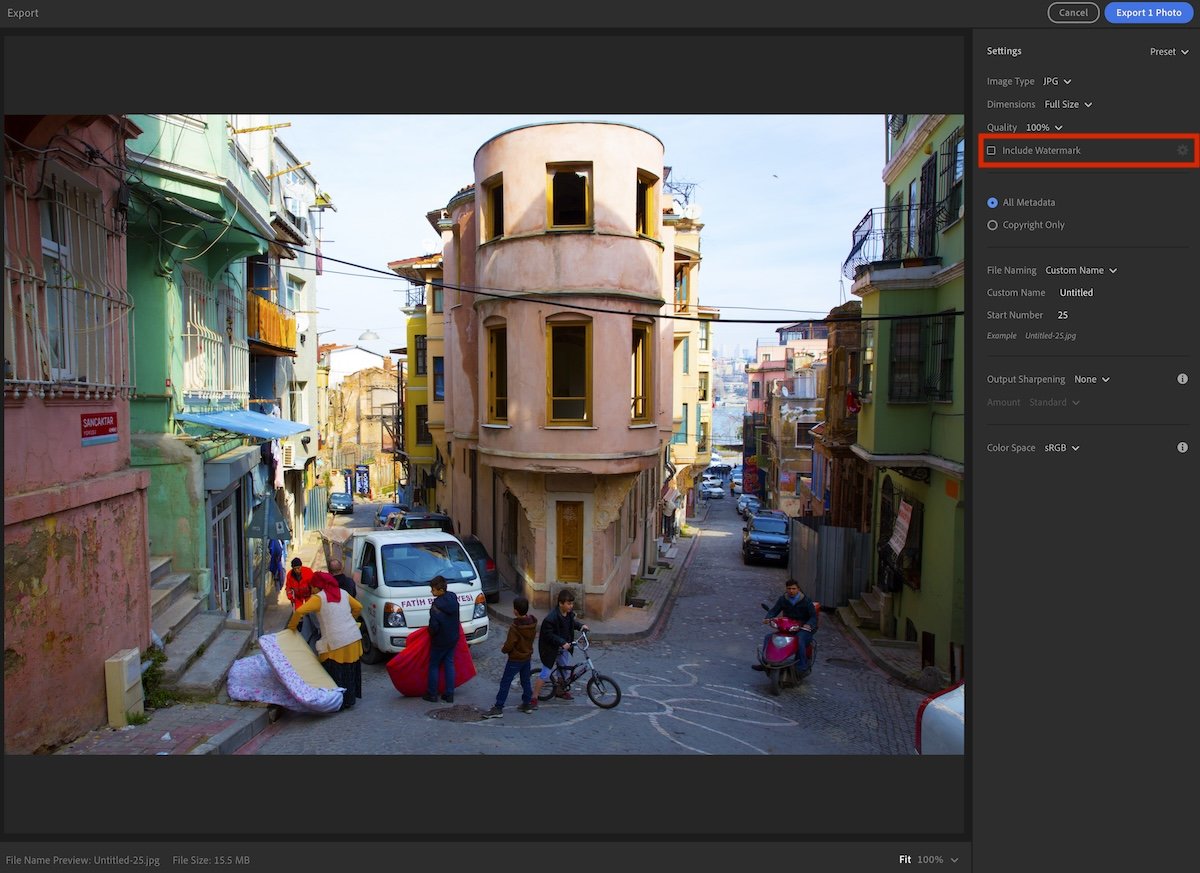
In Lightroom, look for the tick box labeled ‘Include Watermark.’ If you click this, Lightroom will apply a preliminary watermark based on the name attached to your Adobe account.
To access the editor, click the settings cog wheel to the right of this tick box.
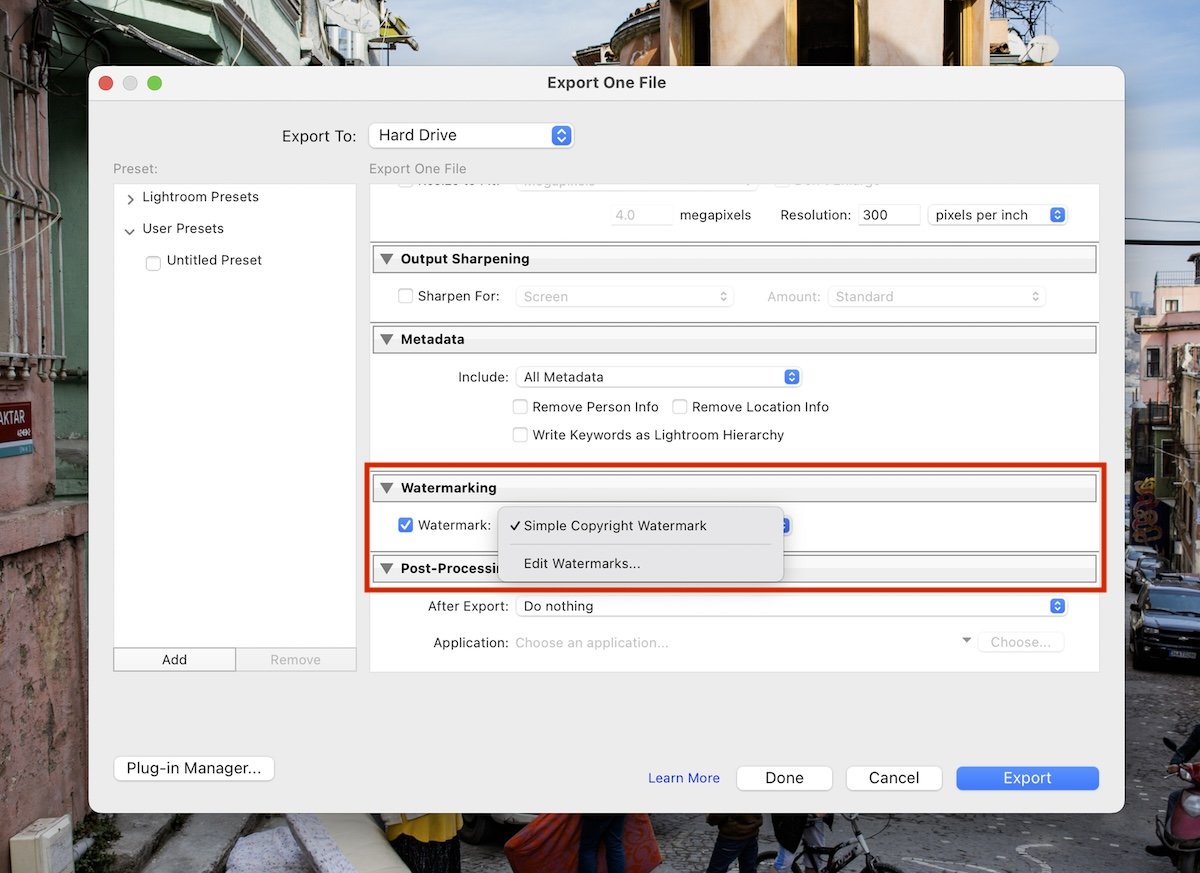
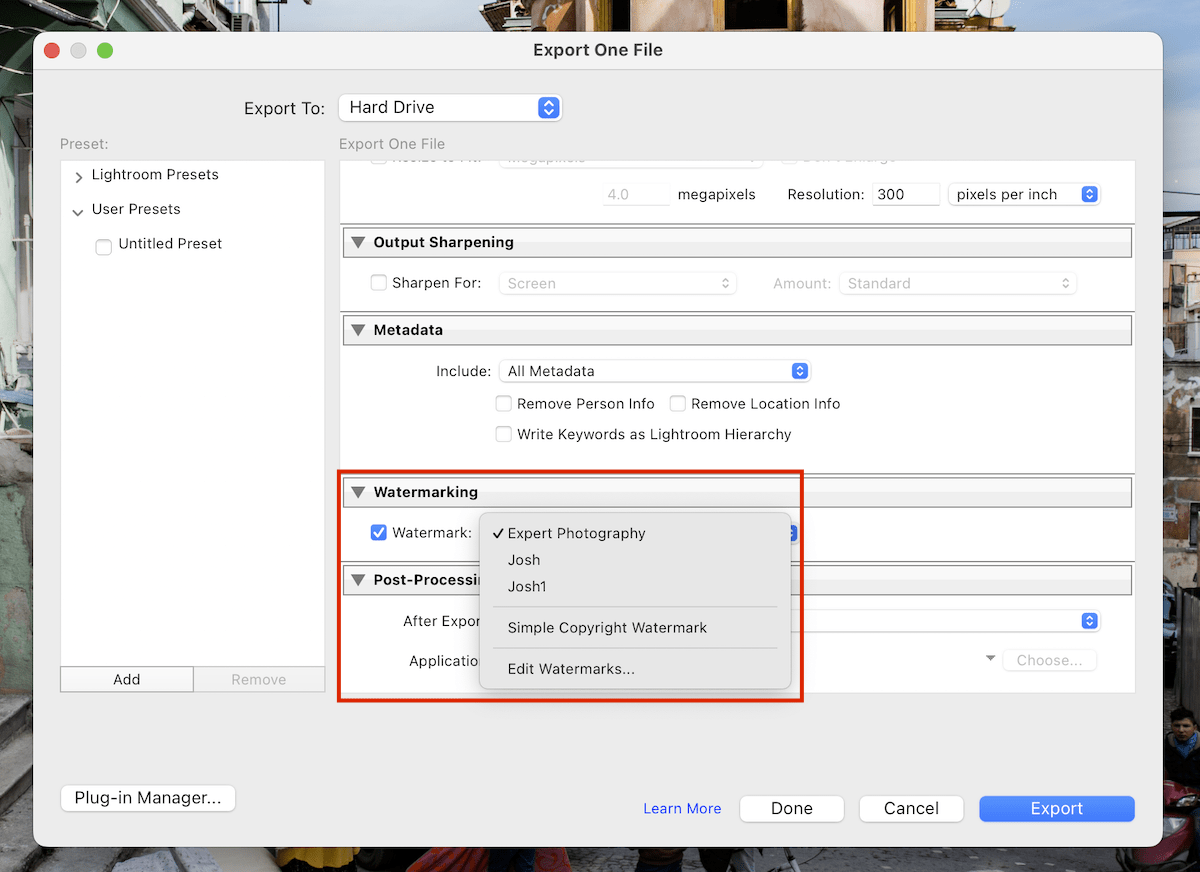
In Lightroom Classic’s export box, scroll down until you see Watermarking. Here, click the tick box and use the dropdown menu to select Edit Watermarks…
You can save a range of different watermarks in the Watermark Editor. Lightroom Classic allows you to select these different watermarks through the dropdown box quickly.
Creating A Text Watermark
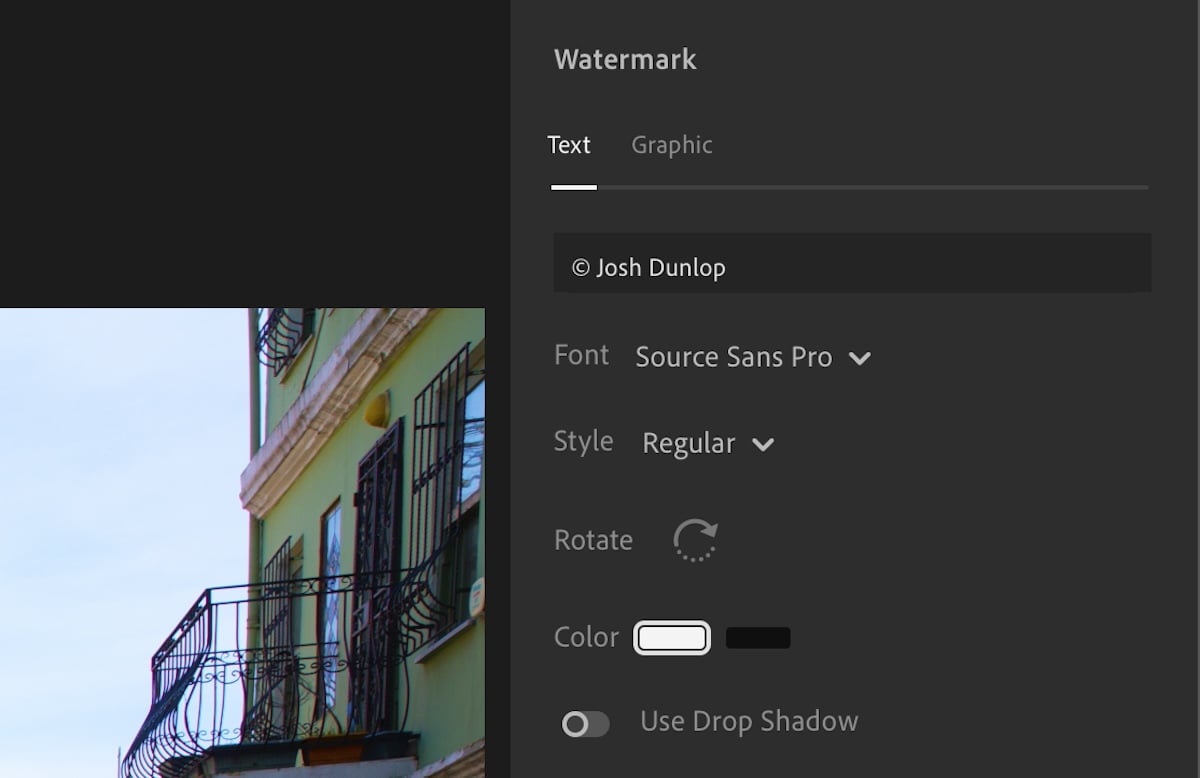
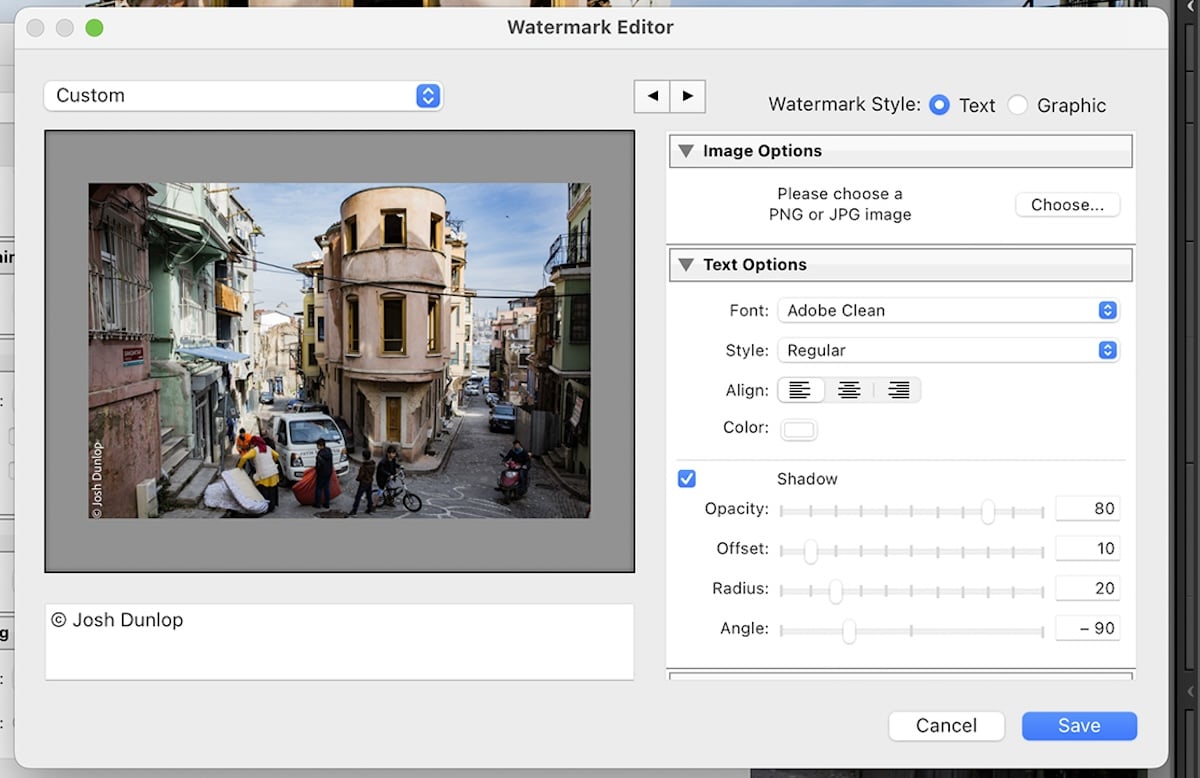
Lightroom offers a very simple top-to-bottom workflow for creating a text watermark. You will start by setting the text, the font, its style, its rotation, and its color. Lightroom even offers a drop shadow option to make it look like the watermark is above the image.
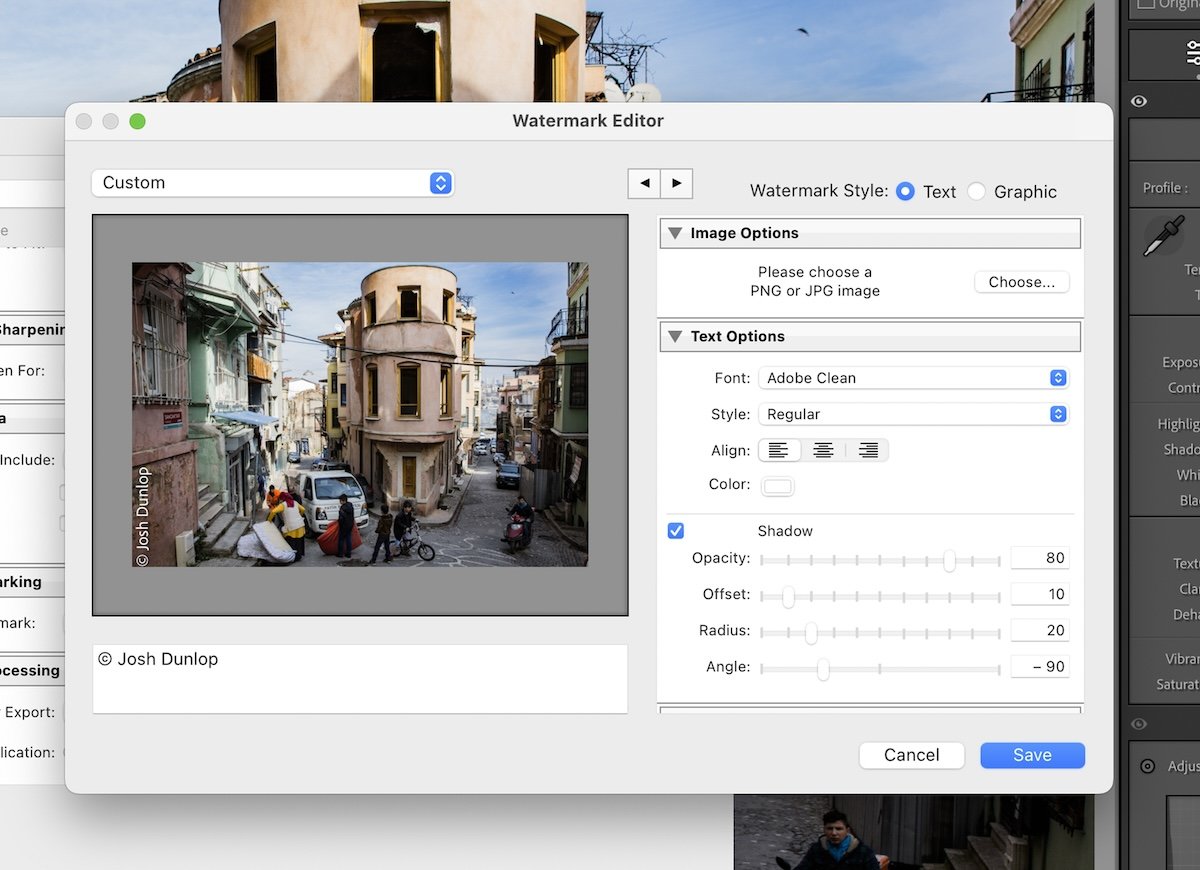
Lightroom Classic is slightly more complicated but offers more customisation options. To access your customization options, click the Text Options section. Here, you will see the same options as Lightroom but also an Align section for longer watermarks.
Lightroom Classic includes many different ways to customize your drop shadow. This is smart because a well-placed drop shadow will be difficult for someone to edit out. Here, you can adjust its opacity, offset, radius, and its angle.
Creating A Graphic Watermark
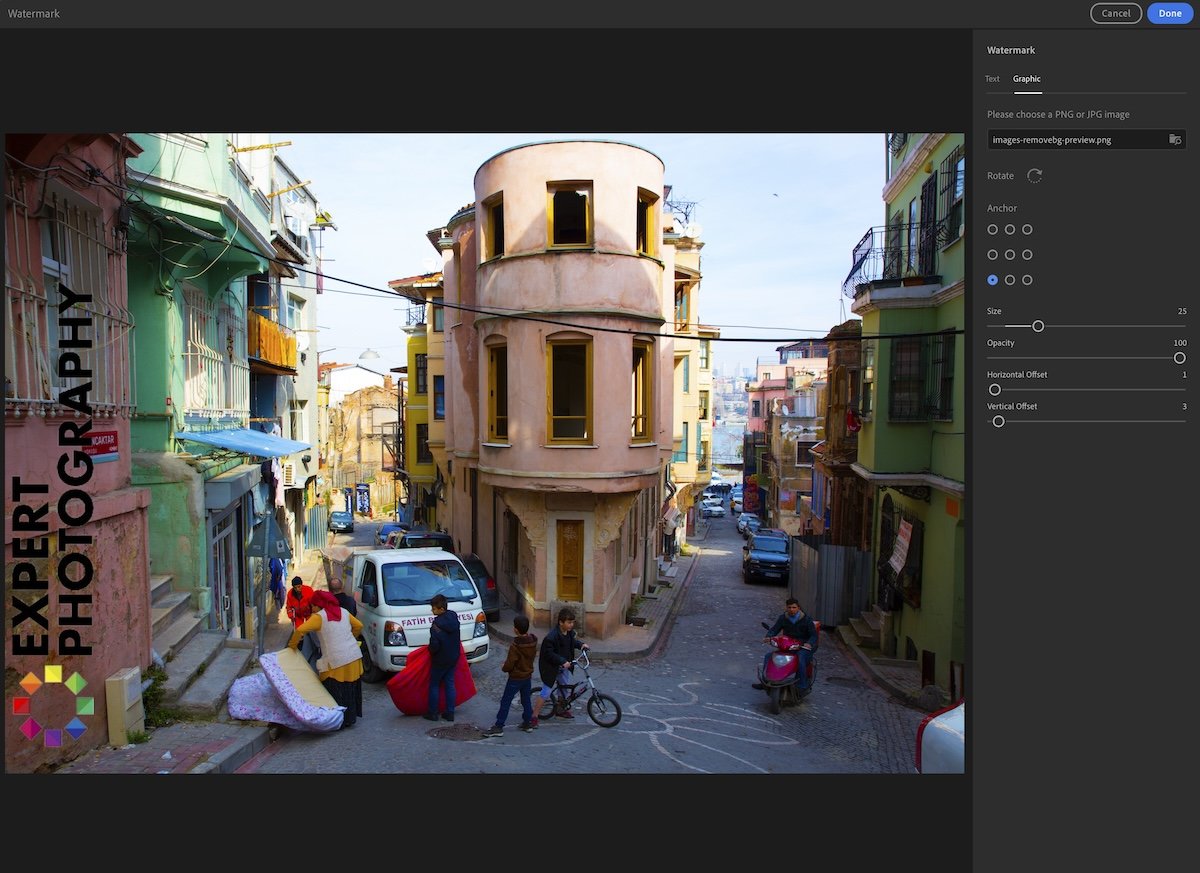
If you want to add a graphic watermark, you must upload an image to Lightroom. Both versions accept JPEG or PNG files. I suggest using a PNG file, as you can use a transparent background.
To make an image without a background you will have to use Photoshop. You can also use this online background remove website. But it may not produce accurate results, so make sure you double check the design.
If you have your own branding for your photography, use this.
In Lightroom, you can add your graphic by selecting Graphic along the top of the Watermark Editor. This section will replace the text options with a box titled ‘Add A Graphic.’ Clicking this box will bring up a file browser where you can find your desired watermark.
Lightroom Classic has a ‘Watermark Style’ selection option in the Watermark Editor. This is a check-box between Text or Graphic. Upon clicking Graphic, you will immediately open a file browsing box to select your graphic.
Editing The Watermark
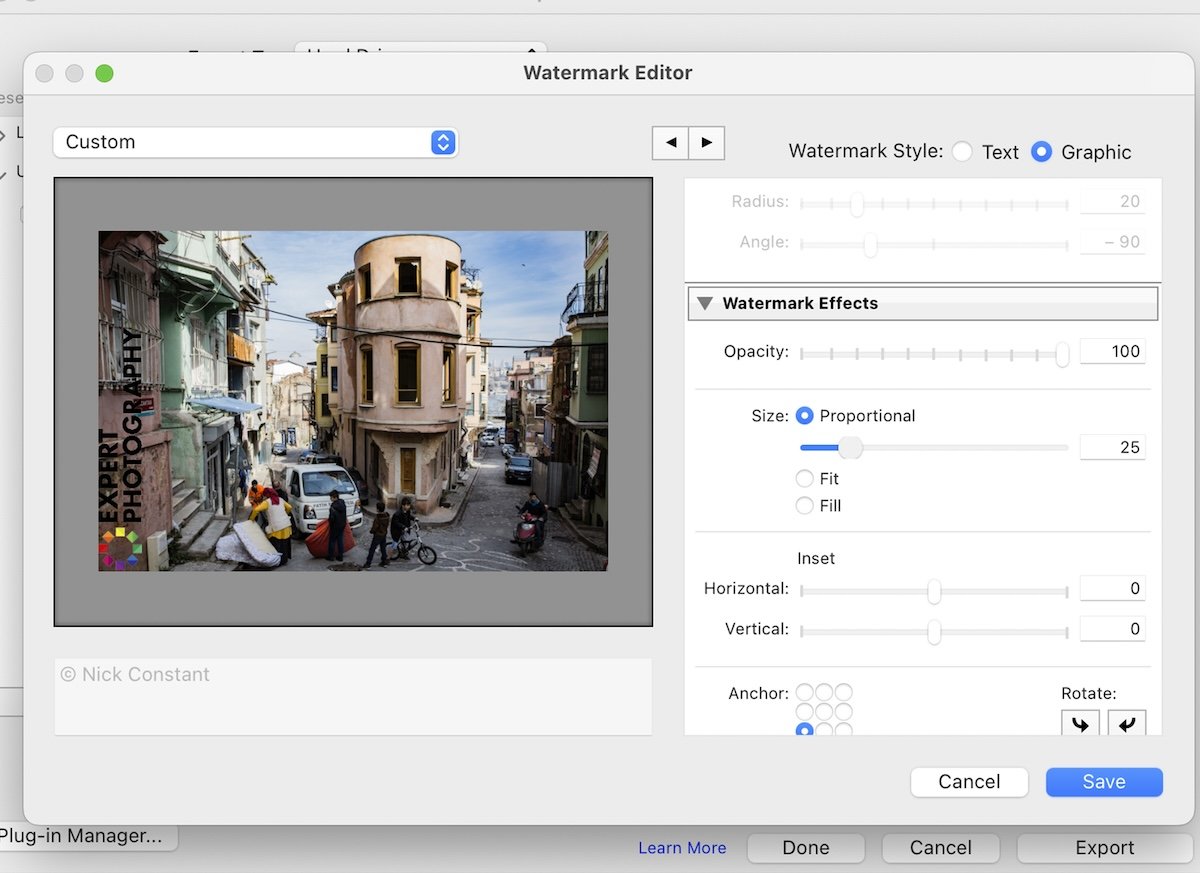
Let’s now review the options Lightroom provides to fine-tune our custom watermarks. You can adjust the Size, Opacity, Inset, and Anchor of your watermark. We will outline what each of these adjustments does below.
Size
The Size adjustment in Lightroom is a simple slider that goes from smaller to larger. The watermark will adjust as you move the slider so you can directly see the impact.
Lightroom Classic has a slider and two other tick-box choices: Fit or Fill. You may be familiar with these options from the cropping process.
Fit will ensure the entire watermark is displayed in full across your image. It will make the longest edge of your watermark match the longest edge of the photography.
Fill will fill the frame with the watermark. Here, the shortest edge of your watermark will match the shortest edge of your photograph. This will likely crop your watermark, so there may be better options.


Opacity
The Opacity slider sets how transparent your watermark is. This allows you to make the watermark as subtle or noticeable as you like.
Feel free to go down to 10-15 if you want to make it subtle. Viewers can still pick up on your watermark if they are interested in your work.
The Opacity adjustment is the same in both Lightroom versions.

Anchor
The Anchor option decides where your watermark will be positioned in your frame. This customization option consists of nine tick boxes in a 3×3 square. Each tick box corresponds to a different area of the frame.
This process is the same in Lightroom and Lightroom Classic.
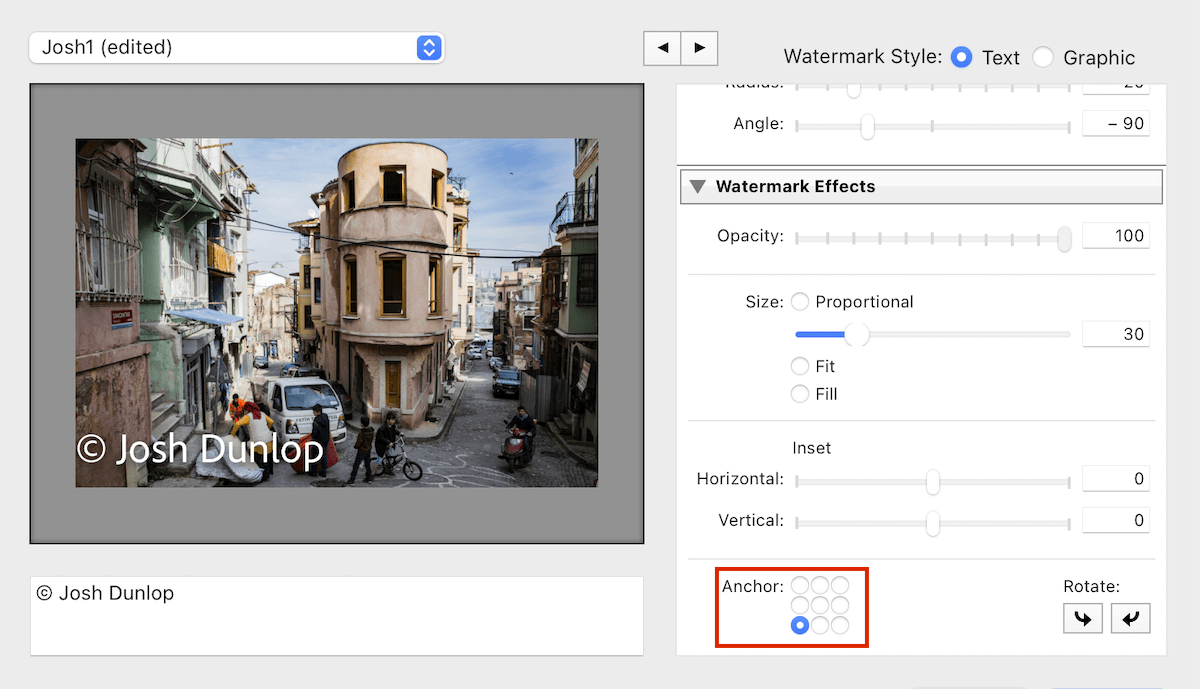
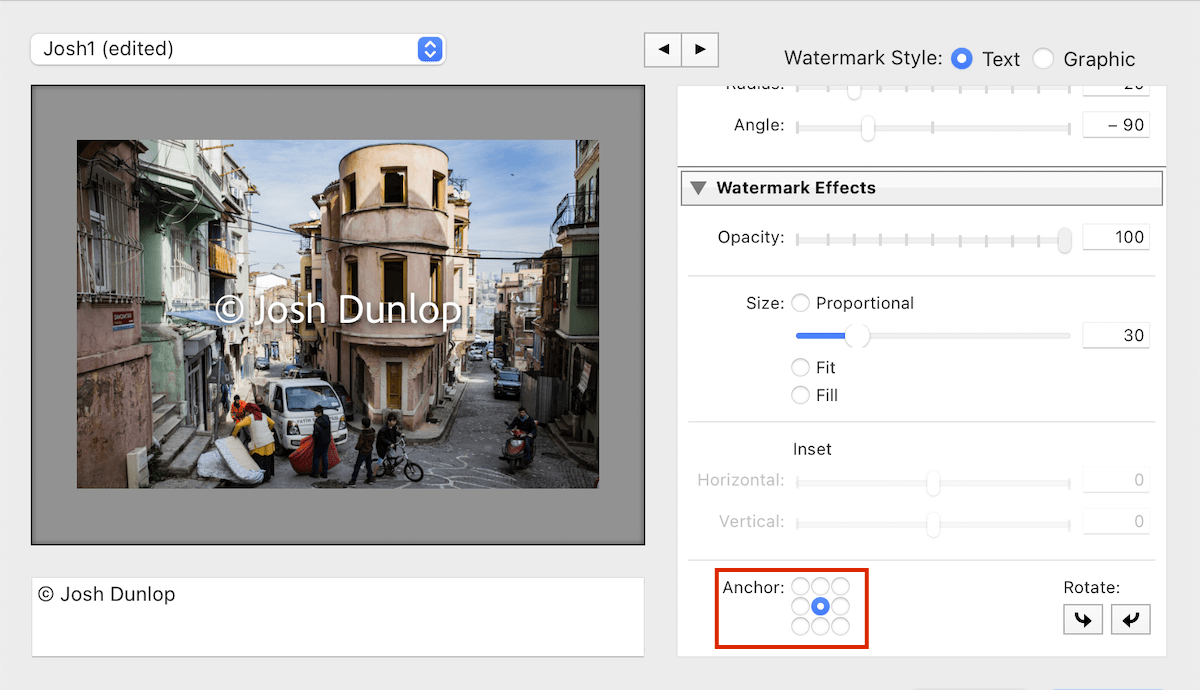

Inset/ Offset
The Vertical and Horizontal Inset/Offset lets you move your watermark horizontally or vertically. This is very helpful for fine-tuning the position of your watermark on your photo.
For some reason, it is titled Inset on Lightroom Classic and Offset in Lightroom. They both work the same, Lightroom Classic’s slider allows for more maneuverability backwards and forward. Lightroom’s slider allows for more maneuverability in one direction.


Exporting/ Saving Your Watermark
Lightroom will always remember the last watermark you have set. So, every time you check the Include Watermark box, you will have the same watermark as the last.
Lightroom Classic allows you to save different watermarks as presets. To save your watermark, find the dropdown box labeled Custom at the top left. Click this and select Save Current Settings as New Preset. You will then be able to name this preset.
The next time you export an image in Lightroom Classic, you can select a preset in the Watermark section. This will appear as a choice in the dropdown box where you previously selected the Watermark Editor.
Watermark presets in Lightroom Classic
Conclusion: Add Watermark in Lightroom
Now that you know how to add a watermark in Lightroom, you have made your work much more secure. A watermark is one of the best ways to stop stealing your photos. And if they take your photos, everyone will clearly see who the photo belongs to.
Thankfully Lightroom have set up a quick process to applying watermarks to our images. So make sure you try these out for yourself to protect your images.