If you feel like you need to switch up your photography, then you need to try long exposure portraits. With this technique, you get to create dream-like effects. We'll show you how to do it step-by-step.
What Are Long Exposure Portraits?
Before we delve into how to do long exposure portrait photography, let's find out what long exposures are all about.
In simple terms, long exposure means that the camera shutter stays open for a long time. In typical situations, the shutter only opens for a fraction of a second. But for long exposures, the shutter can remain open for several seconds to even minutes.
Since the shutter stays open for a long time, it tends to record movements as blurry streaks. It's the perfect technique to use if you want to create surrealistic effects for your portraits.
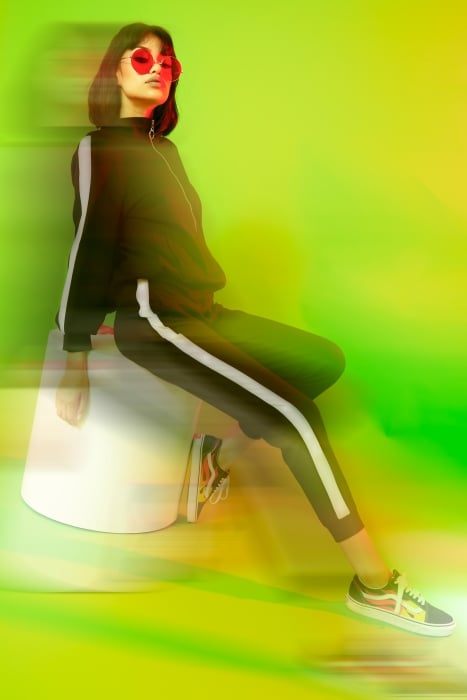
Photo by Dom Hill on Unsplash
Step 1: Use the Right Equipment
For any type of photography that requires long exposures, you'll need three key pieces of equipment to ensure the best results.
Tripod
Long exposure tends to record movement as blurs. That includes the subtle movements you introduce to the camera when you touch it. To keep it stable, you'll need a tripod to minimize the camera shake.
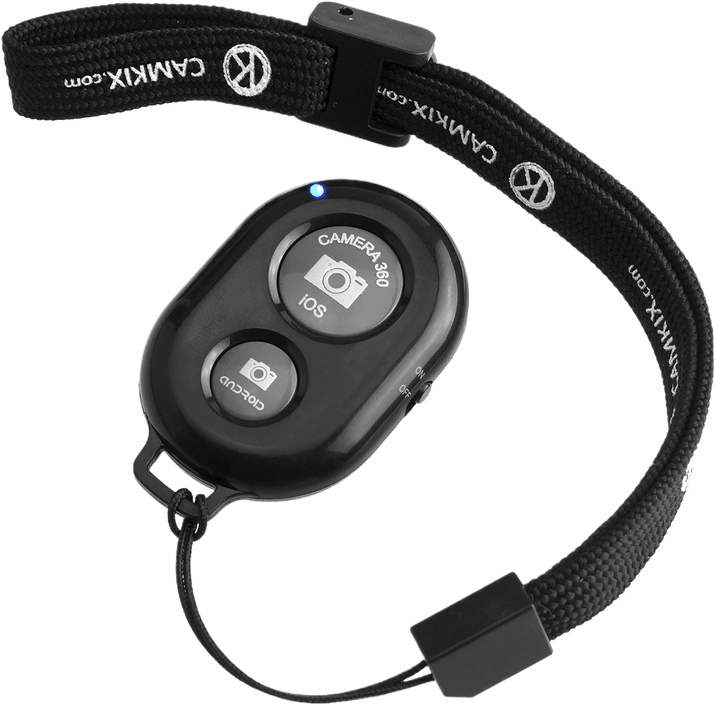
Remote
Even subtle movements like triggering the shutter with your fingers can cause the camera to shake. So if you don't want unintentional blurry images, it would be best to use a remote control. When paired with a tripod, your remote will ensure that you'll have almost zero camera shake.
Lighting
A good light source is crucial for shooting long exposure portraits. The main options you'll have are continuous lights which include LEDs, light bulbs, and strobes. Don't worry if you don't have any professional lighting gear. Even a phone screen or a table lamp will do.
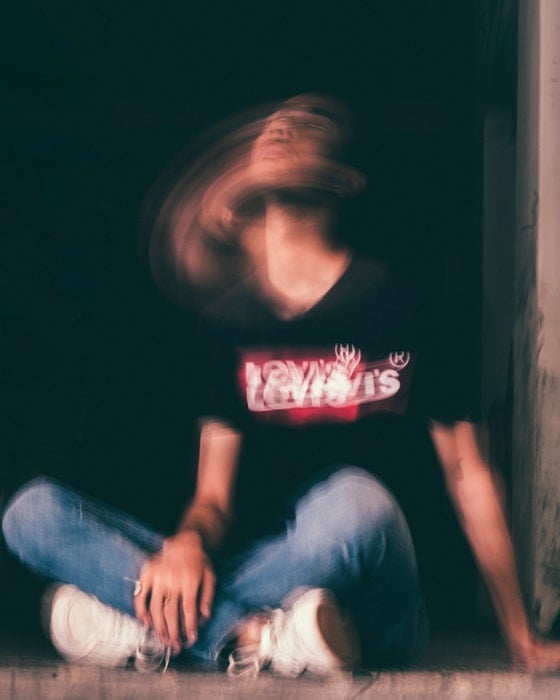
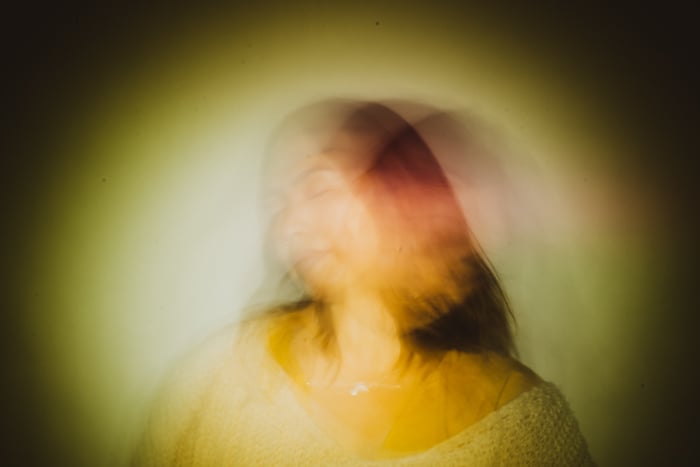
Photo by Manav Sharma from Pexels
Step 2: Choose a Dark Location
Now that you have the equipment you need, you'll need to find a good location for your photo shoot.
In long exposure photography, too much light can be bad. Since your aperture stays open for a long time, you may end up with overexposed images if you don't have control over the intensity of your light source. A great solution is to find a completely dark location. That way you don't have to worry about random light streaks that may appear in your pictures.
It is best to find a place without windows. If your room has windows, wait for the evening to come. Set up thick curtains to make sure street lights don't shine through into the image.
Step 3: Pick Your Light Source
There are tons of light sources you can use for long exposure portraits. We'll show you a few options.
Lamps
These are the perfect light source to use if you don't have any professional equipment. The good news is they work just as well as more expensive options when it comes to long exposure portraits. The downside is that you'll need to turn them on and off manually as you're shooting.
Strobes
These are the most consistent light sources to use for long exposure photography. Since the flash only lasts for a fraction of a second, you don't have to worry about turning it on and off. The only downside is that they're more expensive than lamps. But even one flashgun is enough to let you create beautiful images.
You'll also need a remote trigger to use the strobes. That way you can position it anywhere, and it will go off wirelessly when you press the shutter.
Flashlights
What makes flashlights perfect is that you can carry them around and turn them on and off quicker than lamps. You can use it to direct beams at specific spots and create light painting (more on this later). Feel free to combine flashlights or other portable light sources and regular lamps if you want to create cool effects.
Step 4: Set Up Your Lights
There are many ways to set up your lights, depending on what you want to achieve. Generally, you would need to have a key light which is your main light source.
The best position for a key light is about 45 degrees from your subject. Of course, you can change your setup any way you like, but that's the best angle to start since it provides pleasing light on the subject. One thing you need to avoid is lighting your subject head-on. Doing so will create a flat, shadowless image.
Once your key light is set up, you can now start adding other lights. Feel free to experiment and place them in different positions. For instance, you can light them from the back, the other side opposite the key light, or from above.
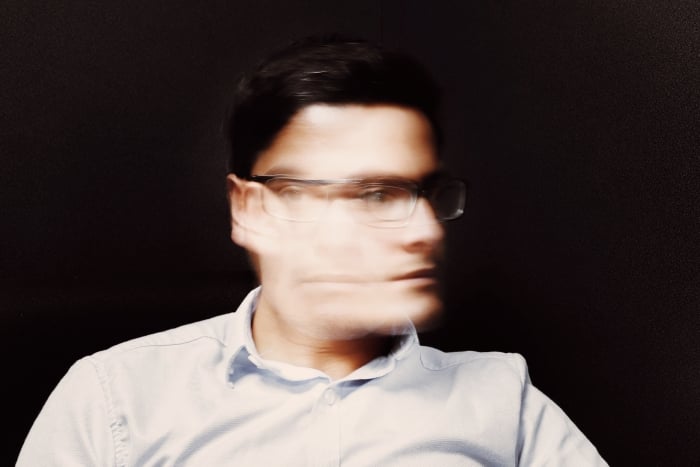
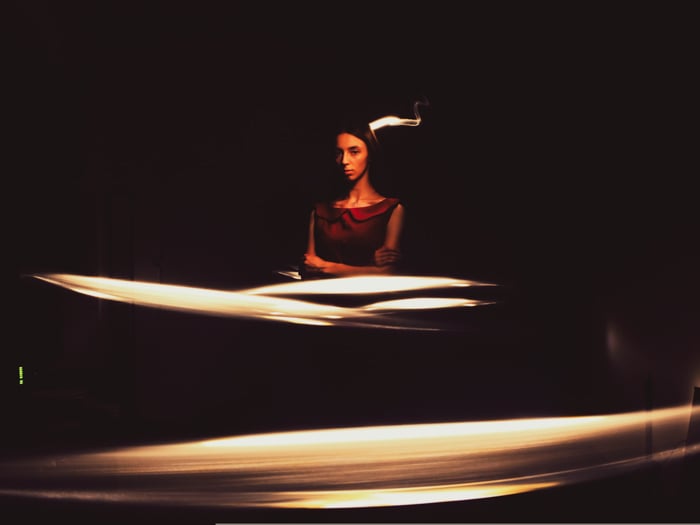
Photo by Javi Hoffens on Unsplash
Step 5: Dial Your Settings
Long exposure photography involves a lot of trial and error. That's why it's best to use Manual Mode to let you change the settings freely.
The first setting in Manual Mode you'll need to adjust is the aperture. Select the widest f/stop on your lens so that your camera can gather plenty of light even in a dark room.
Your lens will have a difficult time focusing automatically in the dark. To make sure your subject stays sharp, switch to manual focusing and adjust your lens's focusing ring yourself.
Before you take a photo, turn on the lights and have your subject stand in front of the camera. Now focus your lens manually then turn off the lights. Even though you can't see your model anymore, you can be sure that they'll be sharp because your lens is already set.
The next parameter to change is the shutter speeds. Since it's dark, you can start with 4 seconds and go either faster or slower depending on the amount of light your camera captures.
Remember that the settings may change when you finally introduce lights to your set. Even though you'll only turn them on for a quick moment, they may end up overexposing your shot. Feel free to readjust your shutter speed when this happens.
For the ISO, you can start with 800 and go higher in case your portraits take more than ten seconds to expose. Just try not to go higher than 3200 as your chances of getting image noise also increases.
Step 6: Turn the Lights on at the Right Moment
If you're using continuous light such as LEDs and lamps, keep them turned on for a few moments after you press the shutter. That way, you give the light enough time to expose your subject. After a few seconds turn them off to avoid overexposure.
Remember that the amount of time it takes to expose your subject properly varies. So take some test shots to see if you are under or overexposing your photo. Adjust your shutter speed accordingly until you get the lighting right.
For Flash
In normal situations, flash freezes motion even when you’re using slow shutter speed. But if you combine it with ambient light, you’ll get interesting results. You will have both blurry and sharp elements in your shot.
To use flash for long exposure portraits, you can use a lamp as your key light and place the flash on the other side of your subject. Once you’re ready to shoot, ask your subject to move and press the shutter
The areas lit by the lamp will register as motion blur in your image. Meanwhile, the areas where the flash hits your subject will be frozen and more or less sharper.
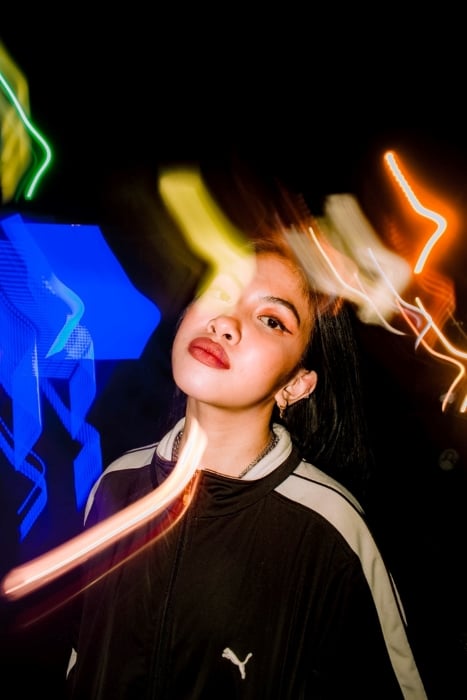
Photo by Renzy Atibagos from Pexels
Step 7: Creating Movement
Now that we have the light and camera setup out of the way, it's time to have fun experimenting. The secret to great long exposure portraits is movement, and there are plenty of ways to do it.
Paint with Light
A technique you can try is light painting or writing using a portable light source. All you have to do is turn on your light and move it around in the air. You can draw patterns, words, or random squiggles. All the movement you make will register as light streaks in your image.
Move the Camera
If you want more control, you can just move the camera. Since it's on a tripod, the streaks you'll get would be much cleaner than if your subject were moving. You can tilt it up, down, or sideways. And if you love to play around, you can even ask your model to move around while you reposition your camera.
Ask the Subject to Move
The simplest way to capture motion is to ask your subject to move around. It could be as simple as turning the head once the shutter opens. Or you could ask them to dance to see what effect you get.
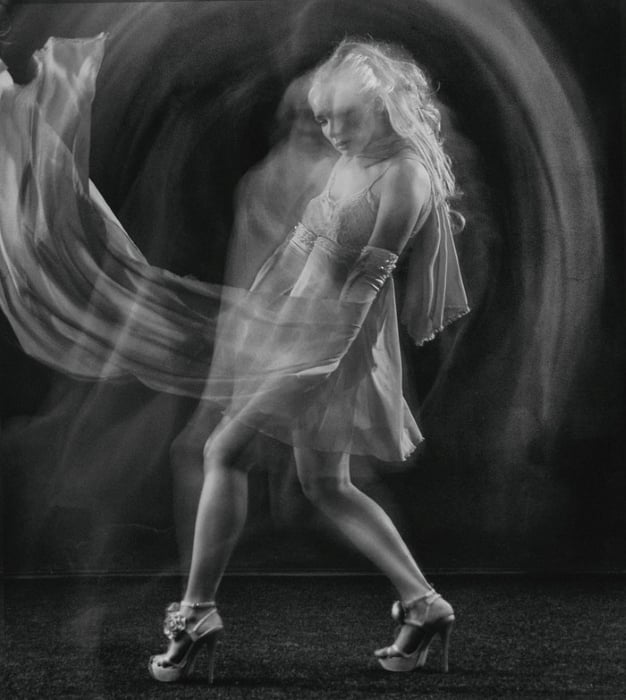
Photo by Alexander Krivitskiy from Pexels
Conclusion
Now that you know the techniques required for long exposure keep in mind that it's still challenging to do. Be patient because you're bound to make mistakes. Take tons of test shots and figure out what you need to tweak to achieve the best shot.
Don't be afraid to change the position of your lights and move around to see what works. Most of all, feel free to experiment and surprise yourself with magical results.


