Highlights are one of the most important elements of a photograph. When they're properly exposed, they can make your photo look amazing. But when they're not, they can ruin an entire image. In this tutorial, we'll show you how to expose for highlights in photography so that you can get the best results possible every time.
Understanding Highlights In Photography: Why Expose for the Highlights?
The reason to expose for the highlights is that you want to use post-processing to edit your photo later. Exposing for the highlights will likely mean a large part of your photo is underexposed.
The aim of post-processing is to recover this underexposed part of the photo. This way your entire frame is exposed correctly. In the past, older camera sensors would not process the dark area of your frame so well. Today’s cameras are better able to keep data in the dark parts of your frame.
Of course you’ll want to use RAW to make this style work.
This technique works in a similar way to HDR or digital blending. With those, you take photos of several dynamic ranges and then put them together into one photo. This photo is then correctly exposed across the frame.
The advantage of exposing for the highlights is that you get the same result with one photo and no need to bracket.
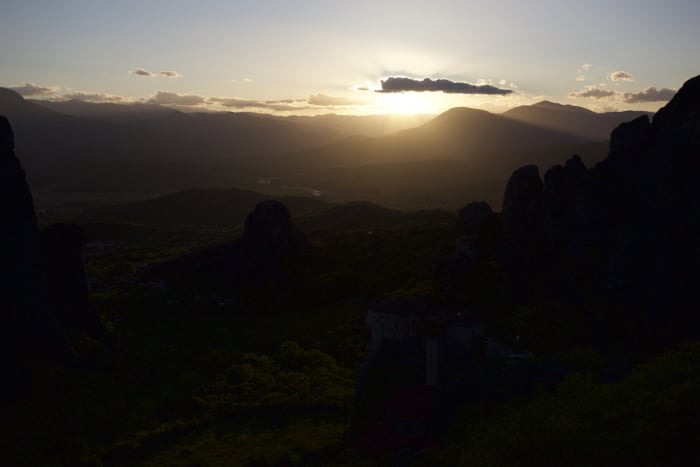
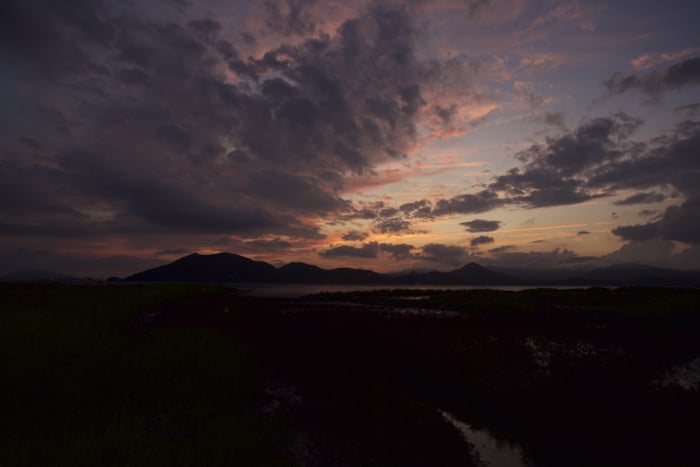
In this photo, you can see the result of exposing for the sky. The image is in one dynamic range, with the foreground underexposed.
What’s Dynamic Range?
Dynamic range describes the exposure value of the photo you’re taking. A camera is only able to take photos in one dynamic range.
This can be great when you want to produce silhouettes in your photos. But how come your eyes don’t see these silhouettes as well? The answer is because your eye is a lot more complex than even today’s most complex camera’s.
Your eye is able to process what you see in many different dynamic ranges. It gives you a clear representation of the world. And it’s balanced because it includes many different dynamic ranges.
If your camera only produces results in one dynamic range, how can you fix this?
- Filters – You can use Graduated ND filters to balance light across the photo.
- Bracketing – You can take a series of photos at different exposure values. You could use up to seven different bracketed photos for this. These will then be blended together using a process like HDR or digital blending.
- Post-processing – You can use post-processing to recover the parts of your photo that were not correctly exposed. A RAW file is needed for this process.
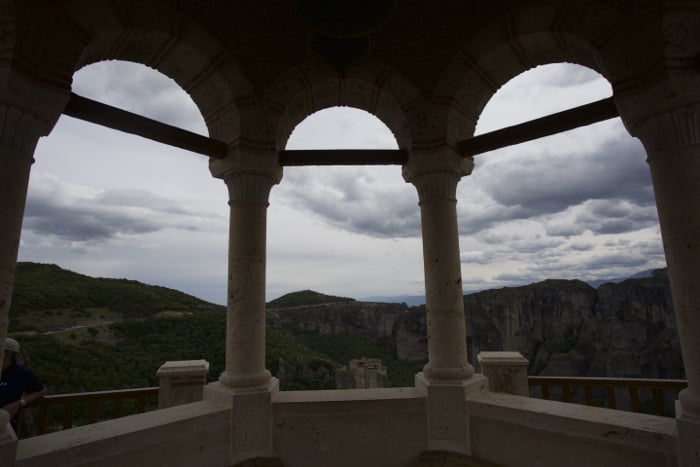
In this photo, the difference in light is less, but the pillars are still too dark where the sky is correctly exposed.
How Is Exposing for the Highlights Different From HDR?
Most photographers will think of HDR photography when it comes to a photo that has balanced light across the frame. This is a possible way of correcting the problem being faced, but there are other better ways of doing this now.
Exposing for the highlights is different from HDR though. You’re using a single frame in post-processing, as opposed to three or more that you use for HDR.
The post-processing, however, is similar. It’s a good idea to use graduated ND filters to reduce the work you need to do in post-processing.
Can You Expose for the Shadows?
Why expose for the highlights and not the shadows? Some will argue that to slightly overexpose your photo will give you an easier time than underexposing it.
That’s yesterday’s argument for yesterday’s cameras though.
If you expose for the shadows you’ll blow out the sky. It’s not possible to recover areas of a photo that are overexposed.
You can recover shadows, within reason. And you’ll get good results for your photo through post-processing in this way.
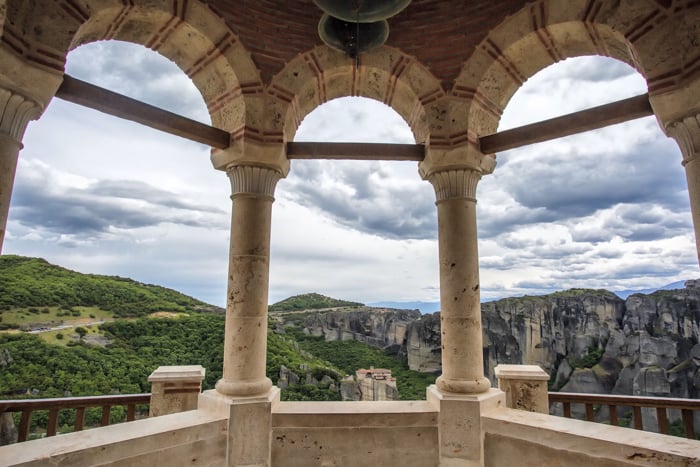
Here is the result of lightening up the shadows, much more detail and interest in the photo now.
How Should You Expose for the Highlights?
There are two approaches you can use for exposing for the highlights. With the first method you’ll lock the exposure in position.
With the second method, you’ll manually underexpose the photo.
Locking the Exposure
This is a relatively simple process. There are a few extra steps you can take to make this even easier on yourself.
- Put the spot metering for your photo in the center of the grid. This is what you use to choose where the camera focuses, but it also records exposure as well.
- Aim at the area of your frame where the highlights are, this is likely to be the sky.
- Press your shutter to halfway, and the exposure and focus will be locked. Now keep your finger at this halfway position.
- Move your camera back to the composed photo you wish to take, and press to take that photo. Your image will now be exposed for the highlights.
In this photo, there is a lot of interesting detail in the foreground, but the photo has been exposed for the dramatic sunset.
To refine the above process you can take a few more steps, and these are detailed below. These steps aren’t totally necessary. Following these steps will give you more control over your photo so they are recommended.
This method describes how the process works on a Canon camera.
- Keep your focal and exposure reading point centered as before.
- Usually focus is controlled by the shutter button. However, you can adjust this to be controlled by another button. You can set the back button for focus, this button is the one with a six pronged star above it.
- To do this go into the custom function and select the shutter button AF-On option. To turn on the back button select the metering start/meter + AF Start. This will now mean you can use the shutter to meter for the light, and the back button to focus your photo.
- Now aim your camera at an area of the frame that will be highlighted. Press the shutter button down to halfway, and you’ll lock the exposure for the photo you now intend to take.
- Next, recompose your photo, and use the back button to focus the camera.
- You’re now ready to take the photo, with the camera set to expose for the highlights. You’ll notice the sky is correctly exposed and the other areas of the frame will be dark.
Manually Underexposing
Generally speaking exposing for the highlight essentially means underexposing the photo. You can achieve this by lowering the exposure value in either aperture or shutter priority mode.
Depending on your camera model, you’ll have one dial that adjusts your primary setting, and another to adjust the exposure value.
Some models need you to hold down a separate button while adjusting the dial to change the exposure value.
You can also achieve this in manual mode by lowering the aperture or increasing the shutter speed. You’ll see the photo will be underexposed using the camera’s internal light meter.
Processing Your Image
Now that you have your image it’s time to process it, and bring back those shadows. If you go too far with your underexposure and your shadows are just black, you won’t be able to use post-processing to fix this problem.
If the difference in light between the highlight and the shadows is that great, consider using digital blending and bracketing your image.
Your photo should also have been taken at the lowest possible ISO for the conditions, and of course taken in RAW.
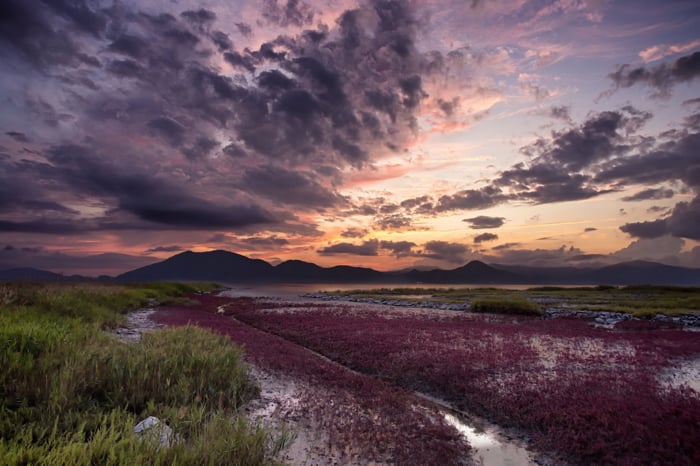
Through processing this image you can now see the purple salt marsh plants that compliment this amazing sunset.
Simple Processing
Use your editing software’s editing functions to lighten the photo. This will usually mean using sliders to adjust the shadows in the photo, so making them lighter.
You could decide to increase the exposure of the overall image. This would make the highlights brighter. Then you could use the sliders to decrease the exposure of the highlighted area of your image.
Another possibility is to use the curves function in programs like Photoshop to do much the same thing. You can then increase the brightness of the shadows in your photo.
Luminosity Masking From a Single File
A more controlled approach involves using luminosity masks. You’ll also be blending an image from a single photo.
With this approach you have more control over which areas are brightened more or less.
- Use luminosity masks to select the shadows in your image.
- Now make a new layer from this selection. Use a white layer mask with this selection.
- Use the curves function to brighten the shadows. To do this lift the diagonal line into an upward-facing curve.
- You can now use the black brush tool to hide the areas of the photo you don’t wish the effect to be applied to. You can adjust the strength of the brush by percentage, so it only gradually hides the effect. This allows you to make local adjustments to specific areas of your image.
- To finish up you could adjust the entire image using sliders to brighten the shadows. Or you might already be pleased with your results.
Conclusion
This method is just one way you can produce high-quality photos. It works when your scene has different levels of light across it.
How would you go about taking this type of photo? Would you expose for the highlights, or do something different? Do you expose for the highlights, but use a different method to achieve this?
As always we love hearing from you. Please write your comments below, and if you have images to share please put them there as well!