The iPhone HDR feature is one of the most underused features on the iPhone. People often don’t know how to use it or what apps to use with it to get the best results. In this article, we’ll show you how to use the HDR feature on your iPhone and we’ll also recommend some apps that you can use with it for awesome photos.
What Is HDR?
Before we get to the technical aspects, let’s find out what high dynamic range is. Don’t let the fancy term confuse you. It’s a technique for capturing the lightest and the darkest tones of your subject
Every camera has a different level of dynamic range. This is its ability to capture shadows and highlights. Some devices are better at catching highlights and shadows than others.
But no matter how high-tech your equipment may be, it's bound to struggle when the lighting is tricky.
That's where HDR photography comes in. It lets you shoot with different exposures. You can capture a broad spectrum of lighting to get rich highlights and dark shadows.
You can create HDR by shooting photos of any particular scene three or more times. Then you can load the images into editing software and stacked together into one frame.
These days, a lot of cameras and even smartphones have a built-in HDR camera. Since they process the HDR images automatically, you don't have to worry about merging them in editing anymore.
HDR vs. Non-HDR
It can be difficult to tell apart HDR photos from non-HDR ones if you don't know what to look for. But generally, HDR images have more vivid colors.
To help you visualize the difference between HDR and non-HDR, it would be best to compare them side by side.
The image below is a non-HDR image. As you notice, the highlights are too bright, and the shadows are too dark. Even when you try to edit this, you won't bring out the details in the image.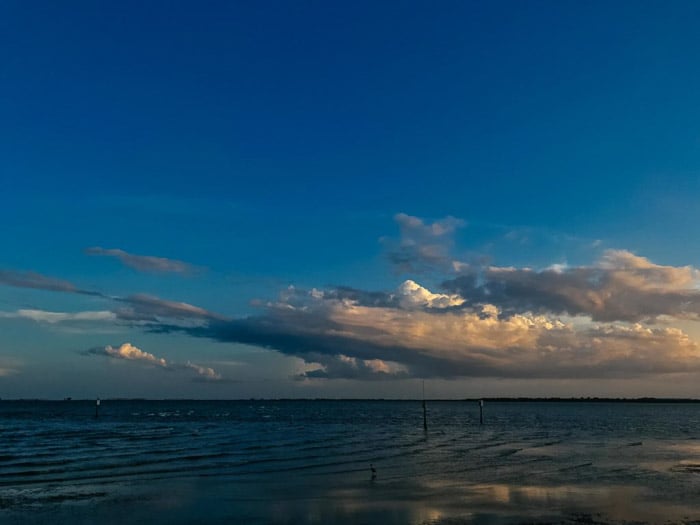
Now let's look at the image taken with HDR. It's the same picture. Except this time you see more detail in the highlights as well as the shadows.
The difference between HDR vs. non-HDR is subtle in most situations.
But HDR helps you achieve the best exposure. And you keep the details even when the lighting is challenging.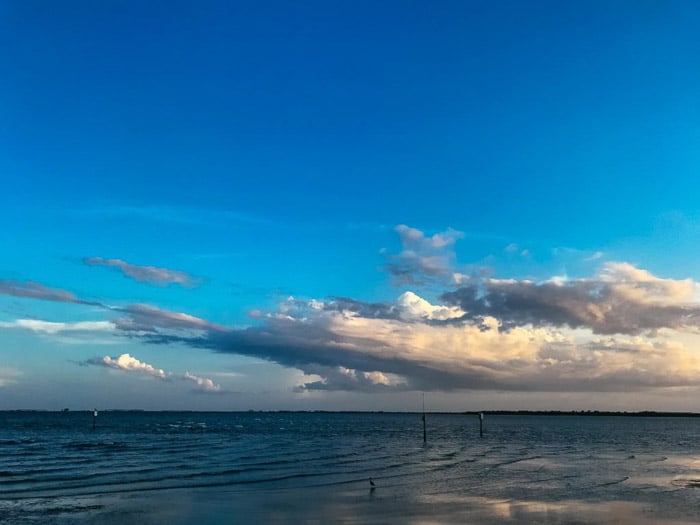
But what about if you want to have both HDR and non-HDR photos? Then turn on Keep Normal Photo in Settings under Camera.
The function is useful to have, especially if your HDR version doesn't look appealing.
How to Take HDR iPhone Images
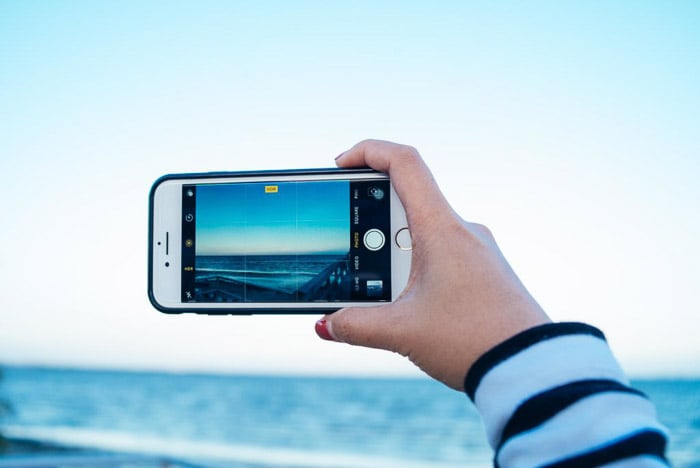
Now that you know the definition of HDR, it's time to learn how to use it. Open your camera app, and you'll find HDR at the top of the screen.
When you tap HDR, you'll see three selections: Auto, On, and Off. The feature is available in Photo and Square but doesn't work in other modes such as Portrait or Pano.
Although using Auto HDR might be tempting, you should never activate it. Doing so allows your iPhone to judge whether it has to active HDR or not.
That may sound good on paper, but you can't trust your Apple iPhone to make decisions for you. Smart HDR is automatic for iPhone XS and iPhone XS Max unless you disable it. This also means your iPhone will not take a single photo but multiple ones which will consume a lot of space in your photo library. So only turn on your HDR on iPhone when you need it, and turn it off when you don't.
When you're in HDR, choose your focus point by tapping on the screen. A white box then appears to show what you selected. Once it turns yellow, that means your subject is in focus. You can then take the photo like normal.
HDR Techniques for iPhone Photography
For the most part, shooting HDR images is the same as taking regular pictures. The only difference is that it takes a bit longer to capture anything when you’re in this mode.
You have to keep your camera stable while it's taking photos. If you want the best results, place your phone on a tripod. That way, your images align well once your device merges them together to create an HDR photo.
When you're doing landscapes, you should consider using a timer when shooting. Once you activate it, you have a few seconds to take your hand off the camera before the shutter opens. This ensures that you don't move the phone while shooting.
Now that your phone is stable let's turn our attention to the exposure settings of your camera. Remember the white box that appears on your screen?
It's not only a focusing tool, but it's also an exposure meter. By reading the light from the area you selected, it tells the camera how bright or dim the final photo should be.
When you're in HDR mode, always select the darkest area on your screen. That way, you help your phone better decide the final exposure of the image.
If you choose the brightest area, you might end up with an overexposed image, instead.
How to Edit HDR iPhone Photos

HDR doesn't always give us the results that we want. So if you're not satisfied with the photo, you can do minor retouching to make it look better.
You can use your native iPhone editing app to make some changes to your photos. The main elements that make HDR images distinct are exposure and contrast. So those are the two settings that you'd want to adjust.
All you have to do is tap the sliders until you achieve the look that you're after.
If you want more control over your photos, you can use third-party editing apps, instead. Adobe Lightroom and VSCO are two of the best photos app you have for your phone.
They offer a whole lot more than letting you change the exposure and contrast.
Using Lightroom or VSCO is almost the same as using your iPhone editor. Like your native app, they let you use sliders to adjust settings. But they also have a lot of extra features that the iPhone editor doesn’t have.
They allow you to change different elements such as Highlight, Shadow and Fade for more vivid results. Apart from that, they also have filters which alter the colors in your image to add mood.
Remember not to go overboard with the editing. If you alter your image too much, you might end up with a noisy, pixelated picture. You don't want that to happen, especially since you're using JPEG format which isn't meant for heavy retouching.
When to Use HDR
Although it might be tempting to use HDR all the time, you should only use it in certain situations.
One of the best uses of HDR is in landscape photography. Since you're shooting a vast amount of space, you’ll have some areas that will have more light than others. So to balance out all the differences in the exposure, HDR would be necessary.
You can also use HDR when the sun is high up to lessen the effects of harsh shadows and bright highlights. And it can help you keep details in objects that are backlit. This is because it balances the light from the background and your subject.
We don't recommend using HDR if you want to take photos of shadows and high-contrast scenes intentionally. If you do, your picture might end up looking flat and unnatural.
Furthermore, you shouldn't try HDR when you're photographing fast-moving objects. Remember that your camera takes several photos to create an HDR image. So if anything moves in those shots, you'll end up with a ghosting effect.
Best Third-Party iPhone HDR Apps
The iPhone’s HDR feature works well in most situations including direct sunlight, low-light, and shaded subject. But if you want more features, using third-party HDR apps would be best. There are a few options out there, and Pro HDR and TrueHDR are two of the best.
TrueHDR allows you to use Auto and Semi-Auto capture, but it can also take HDR photos manually. That means you have full control of the exposure for each image. This is something that the iPhone camera app lacks.
This app also has filters included so you can change the tones of your pictures by tapping on the screen.
The only downside is that TrueHDR takes longer to take photos than the iPhone. So it would be best to set your phone on a tripod if you're using this app.
Then there's Pro HDR. Just like TrueHDR, it also has Auto Mode, but it works better Manual Mode. When you open the app, you'll see three blue boxes on your screen. Feel free to move them around to get specific exposures of different areas.
Doing so will give you a more balanced HDR iPhone picture. If you're not satisfied, you can even tweak the intensity of the HDR after taking a photo.
Conclusion
Now that you know HDR's meaning and its capabilities, don't be afraid to use it when you encounter tricky lighting. The subtle changes it creates in photos may not be easy to notice at first glance.
But when you look at the fine details of your HDR iPhone photos, you'll see how much you really need it.


