Depending on what you shoot, ND filters can be a photographer’s best friend. There will be times when you need to capture scenes that are too bright for the camera. In these situations, Neutral Density (ND) filters come into play.
What Does an ND Filter Do?
Neutral density (ND) filters may sound too technical for a beginner photographer. But to make it easier, you can think of them as sunglasses. They reduce the amount of light hitting your sensor or film.
ND filters are perfect for bright scenes that even low ISO levels can’t manage. They’re also useful for doing long exposure shots in daylight.
You can attach the filters to the front of your lens like any other filter. If they’re round, you can screw them onto the threads of your lens. And if they’re square, you can slide them into a filter holder.
For the most part, knowing how to use ND filters is easy. But knowing when to use them is slightly trickier.
Why Should You Use ND Filters?
Let’s say you are photographing a lighthouse with the sea in the background. Your camera settings could be something like this: ISO 100, 1/1000 s shutter speed, and an f/8 aperture.
The foreground scene may be well-exposed, but the waves in the background are a little distracting. And we can use the motion of the waves to our advantage by smoothing them out. And to do that, we’ll need to do a long exposure.
A long exposure records the scene over many seconds, stopping our camera from freezing the movement of the water. Instead, all of the water’s fluid motion is captured in a single frame.
We need a shutter speed of 15 seconds, but that adds 14 stops of light. So if we take the photo with those settings, we’re just going to get a blown-out shot. For correct exposure, we need to remove 14 stops of light using the other settings.
The ISO is at its lowest, so that won’t help. The shutter speed or f-stop can go from f/8 to f/11, f/11 to f/16, and f/16 to f/22. That’s only three stops until we reach our maximum aperture. Not to mention that if you go above f/16, you might see diffraction.
So what about the other 11 stops?
For this purpose, we need a 10-stop ND filter. We can’t get precisely 11 stops, so we’ll need to deal with the extra stop using editing software. But with the combination of the right settings and an ND filter, we can create a proper exposure.
When Should You Use a Neutral Density Filter?
There are plenty of situations where it’s beneficial to use a neutral density filter.
In portraiture, using an ND filter would allow you to shoot with a wide aperture, even in bright midday light. Using a neutral density filter means you won’t end up with overblown highlights in your image.
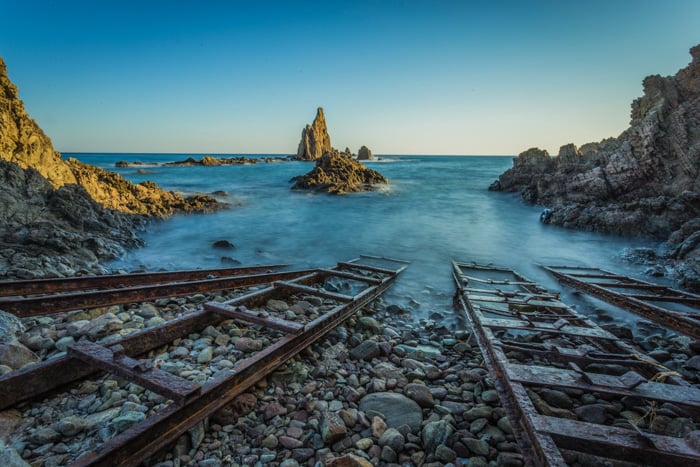
For landscape photography, you can use it to smooth bodies of water through long exposures. It’s also perfect for creating wispy clouds or even dreamlike forests.
And for architecture photography, you can use it to “erase” people in the scene. Since most people will be walking through your frame, they won’t show up in your photos if you do long exposures. Here’s our article on how to remove people from photos.
To properly use an ND filter, you have to figure out how much light you have to cut out first. If there isn’t too much extra light, then perhaps putting an ND2 filter (2 stops) should be enough. But if your image still looks overexposed, then perhaps you can try an ND4 filter (4 stops). Experiment with other filter strengths until the lighting looks correct.
If you’re using a variable ND filter, all you have to do is twist it until you get the correct exposure.
What Are ND Filter Ratings?
ND filters come in all different ratings for all different sorts of situations. When we talk about exposure, we think in terms of stops. A 2-stop ND filter stops twice as much light as a 1-stop filter.
We use stops to make the transition between camera settings and filters easier.
A stop in photography either doubles or halves the amount of light that hits your sensor or film. So that means a 1-stop ND filter cuts the light by 50%.
A 10-stop filter stops the light by ten factors. It is essential to do this sequentially.
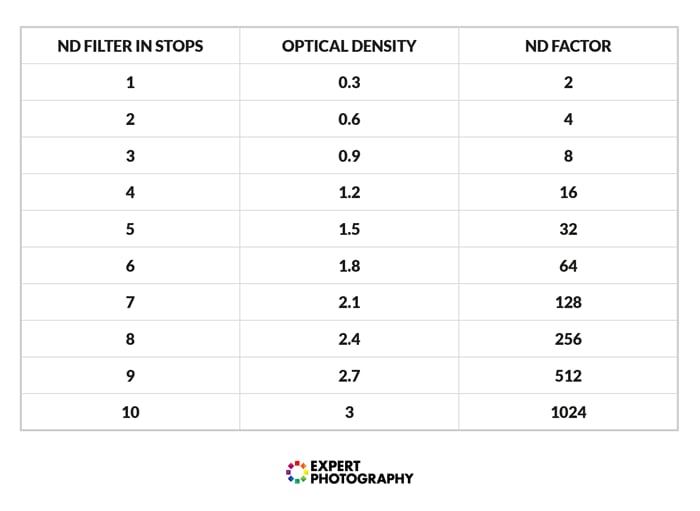
Companies advertise filters in different ways. For example, instead of saying stops, they might use phrases like “optical density of 1.5” or “an ND factor of 32.”
When you capture long exposures, it’s only the shutter speed you will change. If you have a 12-second exposure without a filter and you add a 1-stop ND filter, you have effectively halved the amount of light.
To counterbalance this, you have to increase the amount of time you let light into the camera. In this case, by doubling it. One second becomes 2 seconds.
See the table below for all 10 examples. The new exposure times double sequentially. So a 4-stop ND filter will mean you have to double the initial exposure four times.

What Are the Different Types of ND Filters?
Mount Types
Before we talk about the different types of neutral density filters, let’s discuss the mount types first.
Just like any other filter, there are various ways to attach them to the lens. Below is a list of a few of the most popular options.
- Slide-In. The slide-in version of the neutral density filter requires an adapter or filter holder. This screws onto the front of your lens. Once attached, you can slide the glass into it.
- Screw-On. The screw-on version allows you to screw it onto the front of the camera lens.
- Drop-In. There are types of ND filters that sit in your camera body, just in front of your mirror. These are preferable, as they do not refract light as the others might.
All these mount types have their pros and cons. Slide-ins allow you to use the same size of filters on almost any kind of lens. But they’re bulky and aren’t always the best choice if you move around a lot.
Screw-ons are the most secure option, especially if you move around a lot when shooting. But you’ll need the proper size filter to fit lenses with different diameters.
Drop-in filters are secure and let you use one filter size for any lens. But they can be quite expensive.
The neutral density filters we discuss below have all types of the mounts we just mentioned. So it’s up to you to weigh the advantages of each option and decide which is best for you.
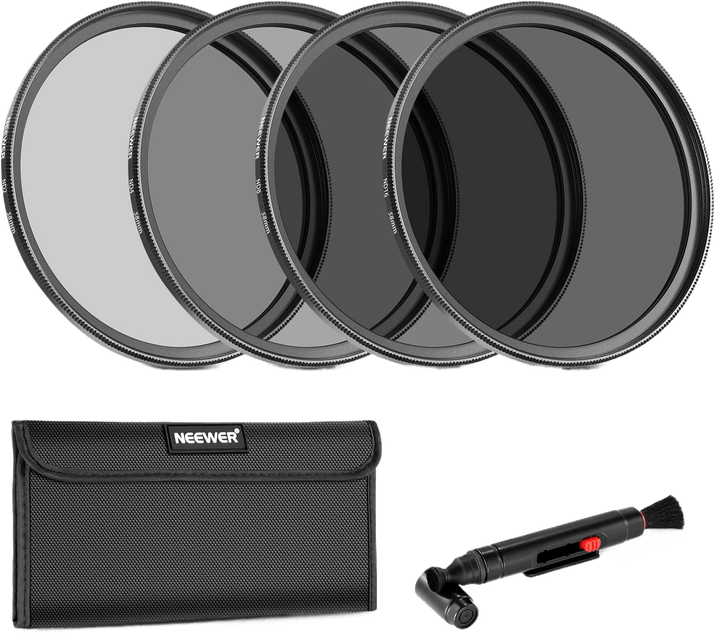
Neutral Density Filter Kits
Most neutral density filters come in kits.
On average, a kit has three to five filters with varying ND numbers. Each neutral density filter has a different rating. It starts from ND2 and can go up to ND64 or more.
What makes the neutral density filter kit useful is that you can combine filters to achieve the ND number you desire.
So let’s say you need an ND10 filter, but your highest option only goes up to ND8. What do you do? You can easily combine screw on an ND2 on the ND8 already on the lens. Then you have an ND10 neutral density filter!
Variable ND Filters
A variable ND filter is made of two separate polarized pieces of glass. The first layer is linear, and the other is circular.
These two polarizers allow you to control different intensities of light coming through the lens. In other words, using a variable neutral density filter means you don’t need ten separate filters anymore.
All you have to do is twist the filter ND to offset the polarization. When polarized at a 90-degree angle, the filter doesn’t let in any light. At 0 degrees, it lets in 100% light.
A variable filter works incredibly well. But it can also be quite expensive. You should also be aware that it can introduce artifacts into the out-of-focus areas.
In most cases, you’re better off buying a kit with several neutral density filters. They not only lessen the chances of projecting artifacts, but they’re also cheaper.
Graduated ND Filters
A graduated ND filter is slightly different from a regular ND filter. Only a part of it has an ND coating, while the other half doesn’t have any at all.
You won’t see any difference in the original exposure in the lower half of the filter. But the f-stop reduction gradually gets higher as you go up. The highest ND number of a variable neutral density filter is usually around two-thirds of the way up.
A graduated ND filter is for darkening a specific part of the image, not the whole scene. Photographers use them mostly for skies, especially since they can be more than three stops brighter than the foreground.
The purpose of the gradations in the filter is to make the transition from ground to sky a lot smoother. Otherwise, the separation line between the light and darkness would be too pronounced.
You can rotate these graduated filters if the lightest element is in the bottom half of the frame.
Likewise, if only the top-third of the image is too bright, you can move the filters up or down to compensate.
DIY Neutral Density Filters
Many articles on the internet offer cheaper solutions for the best ND filters. But the best option for DIY photographers is to use a welder’s glass to reduce light. It’s much cheaper than a dedicated ND filter.
Welder’s glass gives you a 10-stop reduction in light. However, using it will require you to do a lot of color management in post-production. If you are interested, read this article on how to process the final image.
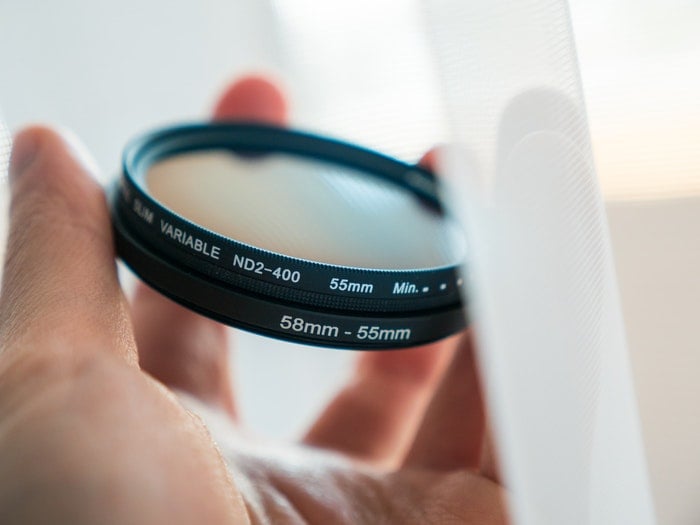
Photo by Roman Koval (Pexels.com)
What Is the Best Neutral Density Filter?
I had previously bought an ND filter pack from Amazon that I was looking forward to using. This was before I did any professional research.
The pack I bought was the Rangers 8pcs ND Filter Kit. I finally got it and went out to try it. It’s what I decided to use in our how to remove people from long exposure shots article.
From my experience, these filters may not be strong enough on their own. And stacking them isn’t a great idea. They are plastic and will give your images a vignette, a colored tint, and a higher possibility of refracted light.
That’s why I went with Lee’s Big Stopper later. It has a 10-stop reduction in light, which is quite impressive. It won’t be enough for a solar eclipse, but it will help your landscape or street photography.
These filters aren’t cheap, but you get what you pay for. So if you’re going to use them a lot, they’re a worthy investment.
What Other Equipment Will You Need?
The first accessory you will need when using these filters is a tripod. You’ll need it to stabilize your shots, especially if you’re doing long exposures.
A cable release or remote trigger is also essential because it doesn’t require you to touch the camera. Pressing the trigger remotely reduces camera shake and blurriness in your image.
And finally, you’ll need a lens cleaning cloth. You’ll be touching and changing filters somewhat often. So it’s essential that you have something to wipe off the smudges on the lens.
Common Problems When Using ND Filters
I found several issues using ND filters. After my experience, I would recommend getting mid-range glass ND filters. The Rangers 8 pc ND filter kit is a plastic version and gave me a purple color cast and a blurry final image.
Do not try stacking the filters if you have a cheap set. I know it is tempting to put a 4-stop ND filter and a 6-stop ND filter in replacement of a 10-stop ND filter. But if your kit is made of plastic, the result might not be as good as you hoped. It will cause light refraction, where the light entering will bounce between the two pieces of glass, showing you dust and light spots.
It’s also likely that vignetting will occur as the light now hits your sensor from different angles. And if they give you a color cast, putting two together makes it twice as bad and more challenging to remove.
Conclusion
No matter how good technology gets, digital cameras can still sometimes overexpose images in bright lighting conditions. No matter what type of photography you’re into, an ND filter is a good investment. Always bring them in your camera bag. You’ll end up needing them more than you think.


