Capturing the beauty of a cascading waterfall or the bustling movement of a busy city street—these are moments when long exposure daytime photography truly shines. Unlike traditional long exposure shots that are usually taken in low light conditions, long exposure daytime photography presents its own set of challenges and rewards. From using the right gear to mastering the ideal settings, this blog post will guide you through the nuances of creating visually striking long exposure photos during daylight hours.
What Is Long Exposure Daytime Photography?
Long exposure photography is opening the shutter on your camera for an extended period of time. This lets your camera capture more light.
There’s no fixed definition of "long". I define a long exposure as a shutter speed of 0.5 seconds or longer. But long exposure settings can extend into minutes.
I started learning long exposure photography at night when there isn’t a lot of natural light. I had to leave my shutter open for a long time to gather more light. At night, I use a long exposure because it is necessary to make an image.
But during the day, there is plenty of natural light. Using a long exposure during the day isn’t a necessity. It’s about creating an effect.
There are a few steps you need to know, so you don't overexpose and ruin your image.
Step 1 – Gather the Necessary Equipment
Capturing long exposure photography in daylight needs some special equipment.
- Camera with manual mode
- Tripod
- Neutral Density Filter
- Remote shutter release (optional)
Camera
To create daytime long exposure photography, you need to be able to control your camera’s settings. You can do this either in Manual Mode or Shutter Priority Mode.
Most mid to high-end digital cameras have a Manual Mode.
Tripod
A tripod is absolutely necessary for capturing long-exposures.
Even the steadiest photographer struggles to make a clear image at 0.5 seconds or longer. We naturally shake a little, and this movement shows up as blur in the image.
In long exposures, we want anything moving in the scene to blur. But we want subjects not moving to be in focus.
A sturdy tripod keeps your camera still throughout the exposure.
Neutral Density Filters
Add a Neutral Density (ND) filter to your lens.
ND filters are sheets of glass that reduce the amount of light coming into your camera. They work a bit like sunglasses for your camera.
There are different types of ND filters. The most common are 3-, 6-, and 10-stop filters. The more stops, the less light gets into your camera, and the longer your shutter can be open.
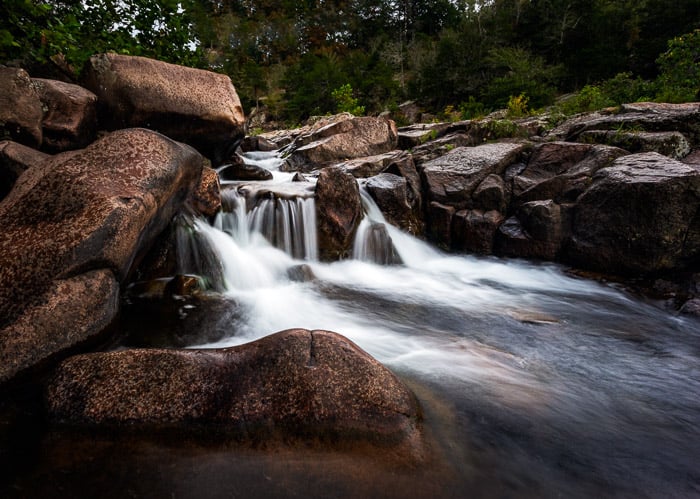
Sometimes you won’t need an ND filter to create long exposures. I didn't need an ND filter for this image. The day was rainy and the waterfall was fast. 0.8 of a second was slow enough to blur the water.
There are two types of ND filters. One kind are square with a mounting system that attaches to the front of your lens. The other type of filter screws onto the front of your lens.
When buying screw-on filters, look at the thread size of your lenses. Buy ND filters that fit the largest of your lenses. Then buy a set of step-down rings that allow you to attach the large filter to your smaller lenses. Stepping UP, screwing a smaller filter onto a larger lens, will create a vignette on your images.
I use Breakthrough Filters, but there are other less expensive options. When buying ND filters, check published reviews for clarity. Cheaper filters may create a color cast on the image and have a vignette – a darkening of the edges.
Step 2 – Find a Composition that Works
There are a couple of different types of scenes that work well as daytime long exposures.
Blur Motion
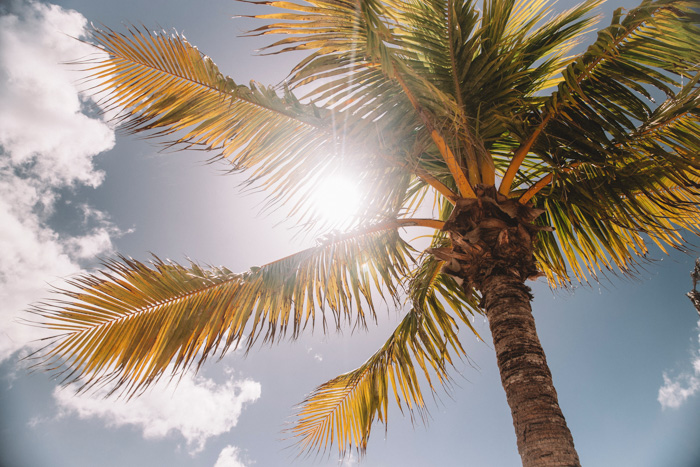
Long exposure daytime photographs work best when the composition includes some blurred motion. Common scenes include moving water (like waterfalls, streams, or waves) and clouds.
When composing your image, you'll have to imagine how clouds will streak or the shape of the moving water.
A note about blurring clouds. To create the effect, there needs to be open sky between clouds. On an overcast day, the clouds don't have enough space to stream into.
With a long exposure, anything moving in the scene will blur. This includes leaves on trees or boats on the water.
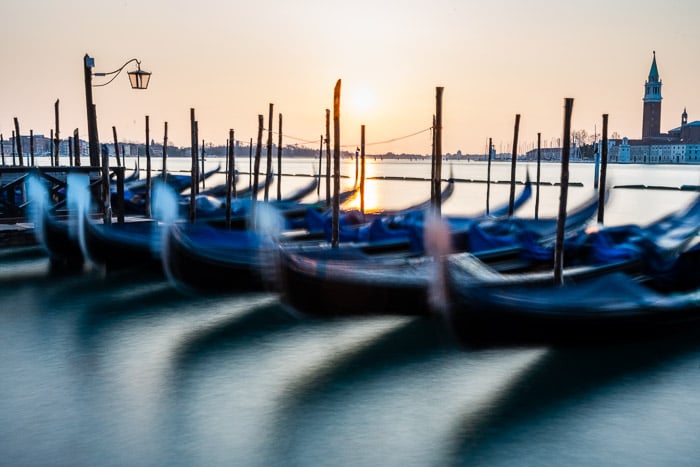
At a shutter speed of 25 seconds, the water blurs but so do the gondolas.
Remove People
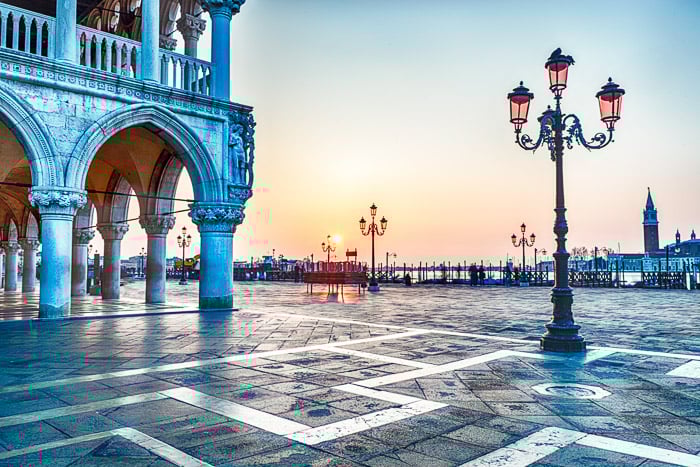
Another reason to use long exposure during the day is to remove people from a crowded scene. When your shutter is open for an extended period, moving details disappear. This includes crowds of moving people.
Even first thing in the morning, San Marco square in Venice is teeming with people. These people moving through the scene disappear in a long exposure. Unfortunately, if someone stands still too long, they'll be captured in your image.
When a person or object moves slowly through an image, you may see a ghost. These appear as shadows in your image. If you get ghosting, try lengthening your shutter speed.
Intentional ghosting is a form of Intentional Motion Blur (IBM). This can create a spooky, otherworldly effect.
Now it's time to set up your camera.
Step 3 – Select Your Camera Settings
You can use Manual Mode or Shutter Priority Mode to capture daytime long exposure photography.
Use Shutter Priority Mode if you are happy with your camera selecting the aperture. If you want to control aperture, use Manual Mode. Landscape photographers often use a narrow aperture like f16 to keep the entire scene in focus foreground to background.
ISO & Aperture
Start with camera settings that limit the amount of light hitting your sensor. Generally, this means selecting an ISO of 100 and an aperture of f16. My camera allows for smaller apertures, but these can create distortions in my images. So, I rarely use an aperture smaller than f16.
Shutter Speed
There's no fixed shutter speed for creating long exposure photography. Shutter speed depends on three things:
- How bright the day is
- Which ND filter you use, and
- The speed of the motion in your composition.
As a guideline, I use a 3-stop ND filter on overcast days or when it's shady. I use a 6-stop ND filter just after sunrise or before sunset when the sun is starting to fade. On a sunny day, I'm more likely to use a 10-stop ND filter. I can stack my ND filters if I want a really long exposure.
Shutter speed also depends on the speed of the motion in your composition. For instance, fast-moving waterfalls can blur at 1/5 of a second. Slow-moving water needs a longer shutter speed to blur the motion.
You'll want to experiment with how much motion you capture.
Long shutter speeds may remove all texture from water, making it silky smooth. But I sometimes like a bit of texture in the water. I experiment with different shutter speeds in the field. Later, I decide how much motion blur and texture I want.
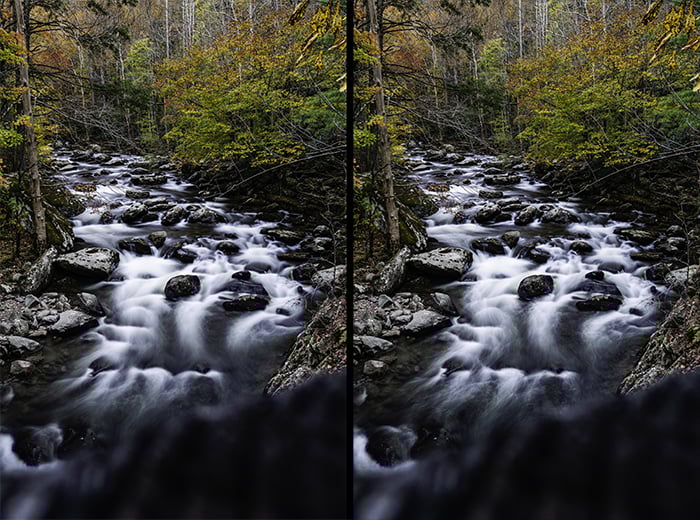
For the image on the left, I used a 5.0-second exposure. For the image on the right, I used a 2.5-second exposure. There is a difference in the texture of the water.
When photographing clouds, your shutter speed depends on how fast the clouds are moving. If they are moving quickly, then they will begin to streak at shorter shutter speeds. If they are moving slowly, you may need to have your shutter open for minutes.
I know this sounds complicated. There are two methods I use to help me select my starting shutter speed.
Aperture Priority Mode
With my ND filter attached, I put my camera in Aperture Priority Mode. I note the shutter speed suggested by my camera. I then move to Manual Mode and use this shutter speed as a place to start.
Sometimes I go faster, and sometimes I go slower. But at least I have a place to start.
ND Calculator App
Without my ND filter attached, I put my camera into Aperture Priority Mode. I note the shutter speed suggested by my camera.
Then I open an ND Calculator App like NiSi Filters. I enter the shutter speed into the app and select which Nd filter I plan to attach to my lens. The app tells me what shutter speed I need with the ND filter for equal exposure.
This will tell me if I’ve chosen the right ND filter to use.
Shutter Release Settings
When photographing something moving slowly, I put my camera in bulb mode. Then I attach a remote shutter release. I use my phone to time how long I leave the shutter open.
When my long exposures are less than 30 seconds, I don’t bother to attach the remote shutter release. Instead, I set my camera's internal timer to 2-seconds. When I push the shutter button, the camera waits 2-seconds before taking the photo. This means my hands aren’t touching the camera when the shutter opens.
Auto-Focusing
Finally, a note about auto-focusing. Your camera may struggle to find focus when using a 6- or 10-stop ND filter.
It's a good idea to find focus before attaching the ND filter on the lens. Then switch to manual focus.
Final Thoughts
There are three main steps to creating a daytime long exposure.
First, gather necessary equipment (tripod, ND filters, and a remote shutter release). Then, choose a composition with motion. For instance, a waterfall or clouds moving across a blue sky. Finally, in Manual or Shutter Priority Mode, select camera settings. Your shutter should be open long enough to blur the motion.
Now that you know how to take long exposure shots in daytime, get outside and start practising!
Daytime long exposure is one of the topics we cover in our creative photography course, Wow Factor Photography. If you'd like to learn more, check out the course here.