Color banding in photos is distracting discolorations—colors that should gradually move from one shade to the next instead jump to the next color. You see distinct bands or rows of color instead of a gradual transition. The bands may be roughly straight or curve around objects.
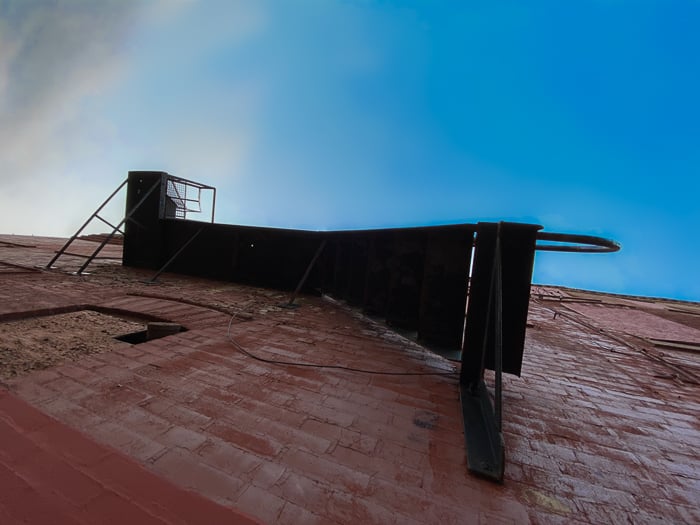
You are more likely to see banding in areas of your image where one hue dominates, like in a cloudless blue sky. Instead of moving seamlessly from one shade of blue to the next, you see distinct lighter and darker blues sections. Or you may see sections of color in areas with a high dynamic range, like when shooting into the sun. The exposure and colors jump, and you may see a yellow, orange, or red halo.
You might not notice color banding at first. You may only see it after editing or exporting the file as a JPEG. So let's explore what causes colors to separate. Once you understand the cause, we will show you how to avoid banding and fix it in post-processing.
What is Color Banding?
We see banding as a problem with color. But it is really a problem with tones moving from light to dark. We only see it when the same color transitions from light to dark. When you purposefully encourage color banding in your photo, it is called posterization. It is a style popular when creating posters, thus the name.

Photo posterized in Photoshop using a Posterize adjustment layer and the Style Transfer neural filter.
What Causes Banding in a Clear Blue Sky?
Often banding appears in a clear blue sky. But it may be hard to pin down. You might see it immediately after taking the photo or not until you have uploaded the picture to social media. One image may have banding, but the next one may not.
There is one underlying cause of color banding. There is not enough tonal range in the photo to create a gradual transition. Some of the reasons for banding can get a bit technical. But let's try to keep the explanations as simple as possible.
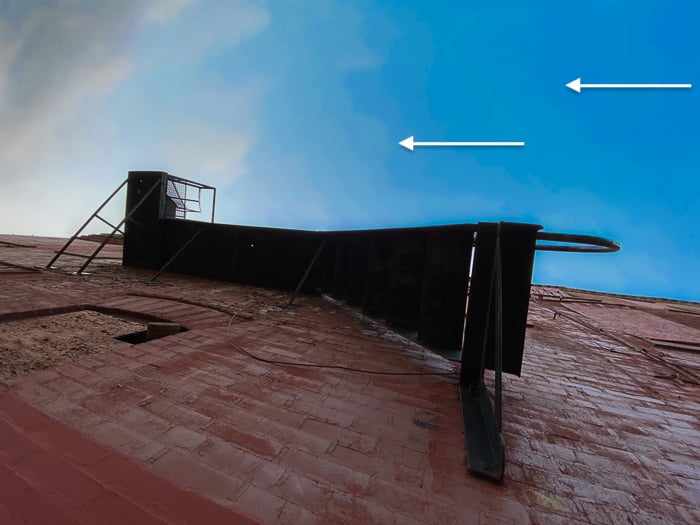
Color banding often occurs in a cloudless blue sky. © Jenn Mishra
Color Banding in a Compressed File
You are more likely to see banding in a compressed file. The most common type of compressed file is a JPEG. You usually compress your files to JPEGs before posting them to social media. But many cameras let you choose different compression levels when taking a photo. These settings range from compressed JPEG to uncompressed RAW files.
When compressing a file, digital information is removed. It is usually information the camera or photo editing program thinks you do not need. Color separation occurs when too much tonal information is removed. Blank blue skies seem like they are all one color. But there are often slight color variations. The technology may get over-aggressive and remove some of the blue information, thinking it is unnecessary.
Compare these two images compressed as JPEG files. The one on the right was compressed with 100% quality, the other only 10%.

Color Banding During Photo Editing
Sometimes you create banding problems during photo editing when you push color settings to an extreme. For instance, you may want to bring out the color of the sky or correct for exposure. Banding can happen if you add too much saturation, vibrance, or dehaze. It can also occur if you adjust single colors in the HSL/Color panel.
When banding occurs during photo editing, you have pushed the tonal range too far. There is not enough information in the file. There are a few photo-editing tricks to help with this. But in general, you may not be able to push the photo edits as far as you want to.
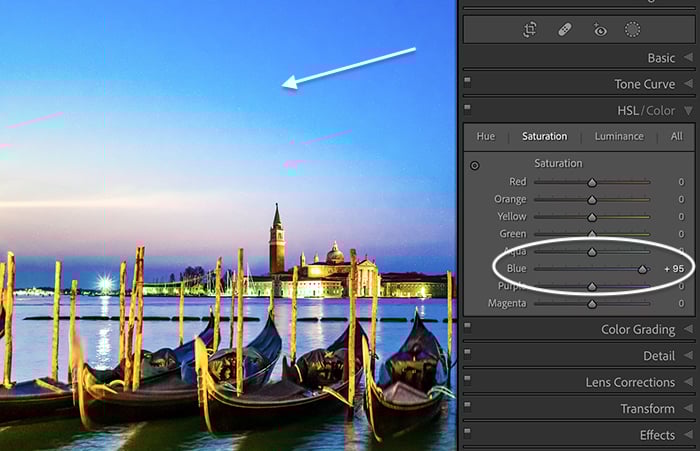
Banding starts to show when the blue saturation is pushed too far. © Jenn Mishra
How to Avoid Color Banding
Ideally, you want to avoid tones separating in the first place. There are a couple of things you can do when taking photos to eliminate or reduce the occurrence of banding.
Shoot and Edit Uncompressed Files
There is a reason why most professional photographers shoot photos in an uncompressed RAW format. Uncompressed RAW files are larger than JPEG or compressed RAW files. That is because RAW files keep all the digital information your camera is capable of capturing. You lose data when the camera compresses the RAW file or converts it to JPEG.
If you are having problems with banding, check your camera settings. Most mid-to-high-end cameras let you choose the file format. If you are shooting JPEG or compressed RAW, switch to uncompressed RAW. That may be all it takes to fix the problem. Even iPhones have a RAW file option.
Then import the highest quality files possible into a photo editing program. And do most of your edits on a RAW file. If you have to export your photo for further editing, use an uncompressed format like TIFF or DNG in 16-bit mode. Lightroom recommends using ProPhoto RGB color space. You can see these settings in the Lightroom Classic > Preference menu under the External Editing tab.
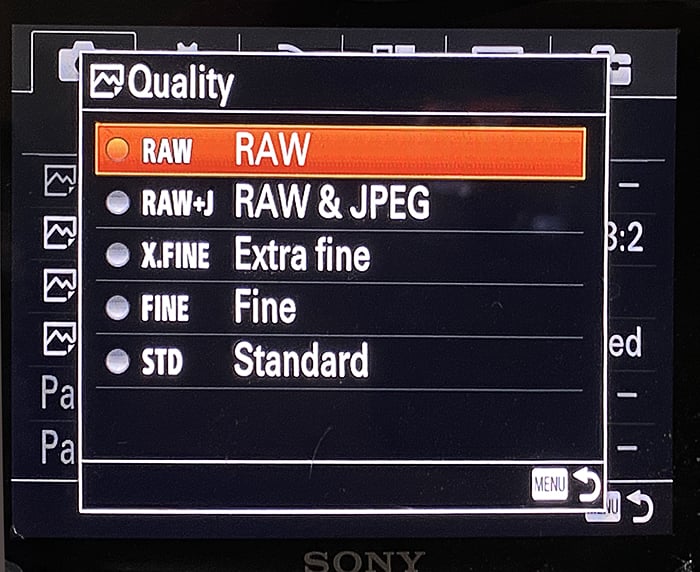
The file quality and compression menu in a Sony camera.
Create Well-Exposed Images
Color banding often appears when you push photo edits too far. As much as possible, create a well-exposed image. If your camera has “blinkies” or zebra stripes, turn them on. These provide exposure warnings.
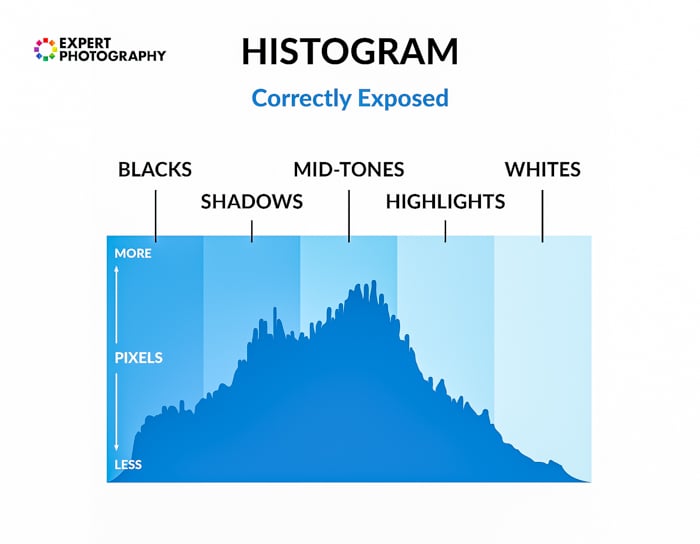
Use your histogram to make sure your picture is not over or underexposed. If you are new to histograms, it is a graph that maps the light in your photo. You want most of the peaks to fall in the middle or slightly to the right.
Adjust your exposure if the peaks are pushed to the far right or left or go off the top of the chart. You may have to take a series of images at different exposures and combine them later. This is bracketing, and it increases tonal values in your photo.
 How to Fix Color Banding
It is best to avoid banding in the first place. But if you are working with a photo where tones abruptly change when they should be gradual, here are a few things you can try to limit the distraction.
Check Your Monitor
Before changing your photo, ensure that the banding is in the image and not just on your display. Zoom in to the affected area and look closely. Also, try opening the photo in another program like Photoshop. If the banding changes shape or disappears, it is not in your image. If you suspect a problem with your monitor, use a color banding test like this one from Eizo.

Increase File Information
You cannot directly add information to a file if you did not capture it in the first place. But there are a couple of things you can try in Photoshop that maximizes the information available when you edit.
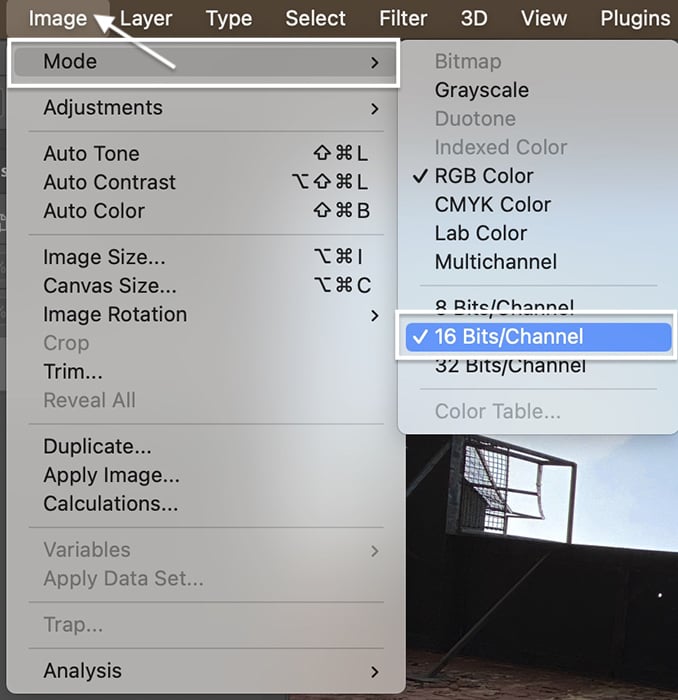
First, check the bit mode of your file. In Photoshop, go to the Image drop-down menu and select Image > Mode. If your file is in the 8 Bits/Channel, change it to a 16-bit file.
Files in 8-bit use fewer colors and are smaller. The maximum number of colors available is 256 per color channel. It is usually fine for viewing on computer screens with a limited range of colors.
A 16-bit file has over 65,000 color combinations available. The colors in your photo will not change. But 16-bits gives you more information to work with. You may be able to push your post-processing settings a little further without the colors separating.
While you are in the Mode menu, check that you are in the RGB color space. The most common setting for digital photography is sRGB because it covers colors used on most monitors. But if you are having problems with banding, you can try AdobeRGB. It does not necessarily add colors. But it covers a slightly different range of colors.
To switch color space, go to the Edit drop-down menu. Select Edit > Color Settings (Shift+Ctrl or Command+K). Under working space, change sRGB to Adobe RGB.
Make Subtle Edits
Banding often occurs when you push photo edits to an extreme. Try making more subtle edits rather than moving sliders to one extreme or the other. There are often different ways to edit a photo. For instance, if you want a more saturated color, you can use saturation and vibrance. But you can also add a little contrast, clarity, and dehaze. Also, use the HSL/Color panel in Lightroom to target a specific color.
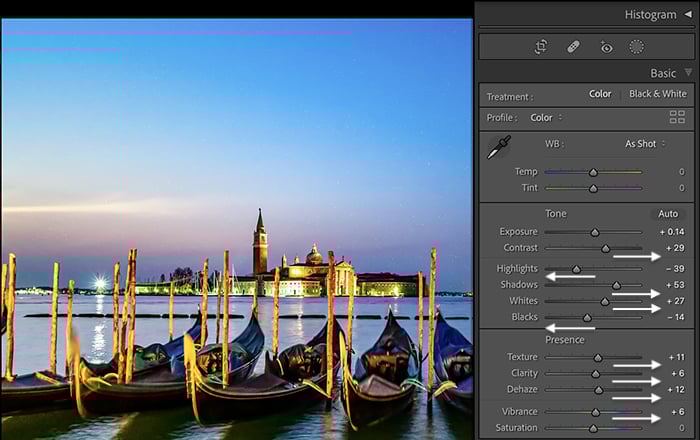
Make subtle edits in Lightroom’s Basic panel.
Disguise Color Banding
If you have banding in an area of your photo, try to disguise it with blur or noise. First, select the banding area. For instance, you can choose a sky in Lightroom using the Select Sky masking tool.
In Photoshop, you can use the Quick Selection tool or the Color Range tool under the Select drop-down menu. Then copy the selection to a new layer by clicking the “Create a new layer” button at the bottom of the Layer panel. And make this a Smart Object layer (right-click and select “Convert to Smart Object”).
Option #1: Add Blur For a Smooth Transition
In Lightroom, add blur by reducing the Texture and Clarity sliders.
In Photoshop, add blur to the selected layer. Go to the Filter drop-down menu. Select Filter > Blur > Gaussian Blur. Or you can also use Surface blur. Then start moving the blur slider and watch the preview. Stop when the banding begins to disappear. If you need to, add a mask and blur only to the affected area.

Option #2: Add Noise and a Layer Mask
Usually, we are trying to remove unwanted noise from our images. But in this case, a little random noise can help disguise banding. In Lightroom, reduce the Noise slider.
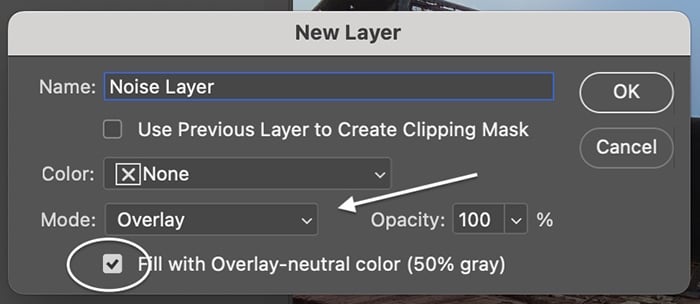
In Photoshop, go to Layer > New > Layer. In the dialog box, change the blending mode to “Overlay.” Check the box "Fill with Overlay-neutral color (50% gray).” Change the name to “Noise Layer.”
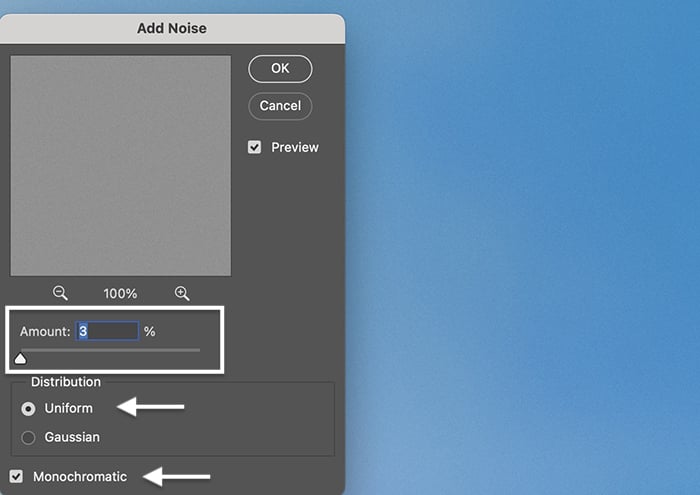
Go to the Filter drop-down menu. Select Filter > Noise > Add Noise. Choose the Uniform button and Monochromatic check box.
You do not need to move the Amount slider very much. You want just enough noise to disguise the problem but not so much that the noise becomes noticeable. Less than 5% is probably good. Then add a layer mask and apply the noise only to the area with banding.
Conclusion
Color banding is an abrupt change of color in an area of your photo where the color change should be gradual. Banding happens when you do not have enough information in your file. Or you push the edits to an extreme.
Avoid banding by making a well-exposed photograph and saving it as an uncompressed RAW file. To fix color banding, make subtle edits and limit how much you compress the photo when exporting as a JPEG. If banding is harsh and distracting, try disguising it by adding a blur and some noise to the area.
After you’ve mastered color banding, try our Shooting Skies e-book to capture frame-worthy photos!