The clarity tool in Lightroom can add an extra punch of textures and details to your photos.
In this tutorial, we’ll show you how to use it and what types of images are best suited for this tool.
Using a Clarity Tool: What Does Clarity Mean?
Clarity is a type of contrast tool that does not affect the entire image. It mainly affects the mid-tones. In fact, clarity doesn't even affect the overall contrast of the mid-tones, but just the edges.
An edge is an area where there are differences between tones: one tone that is dark against one that is lighter. By increasing the clarity you emphasize the edges of these mid-tones, bringing out texture and detail.
By decreasing clarity, you make the edges look less defined, adding a blurry or dreamy effect.
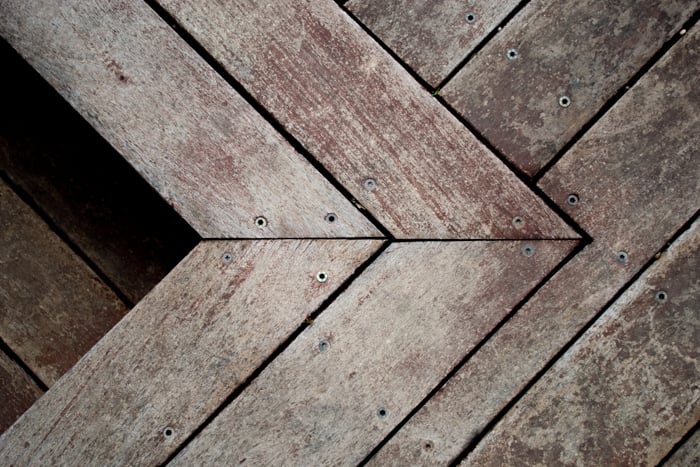
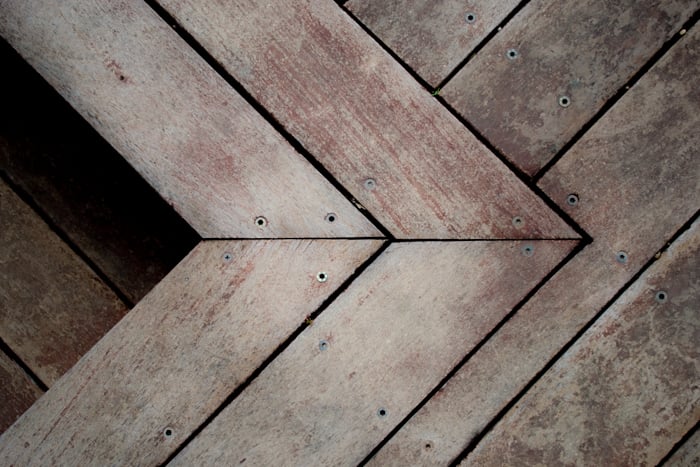
Original photo
I increased the clarity to emphasize the wood texture.
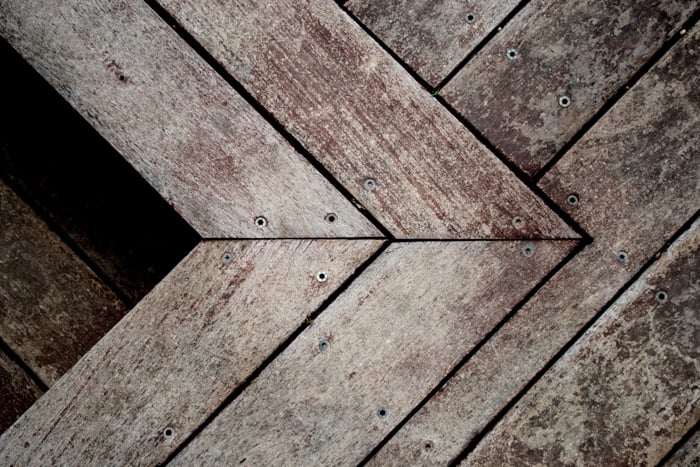
If you decrease the clarity, you suffer a loss of detail and the image gets a glow that makes it look a bit blurry.
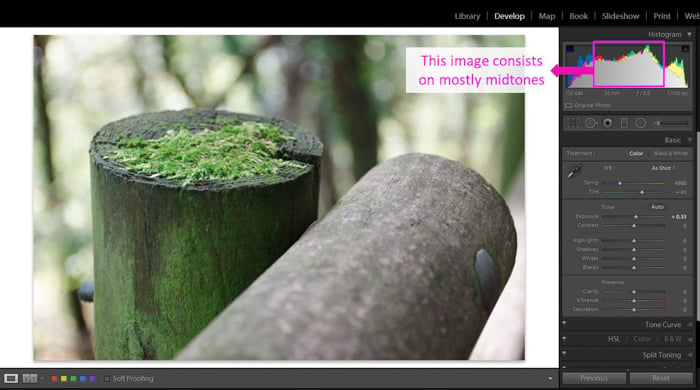
Keep in mind that changes in clarity affect some images a lot while others very little. If your original image is flat and dull, meaning that it has mostly mid-tones, you can improve it by increasing its clarity.
On the other hand, if your image is composed of highlights and dark tones, the effect of the clarity won't be so noticeable.
Using the Slider to Adjust Clarity
Clarity is one of the Basic adjustment sliders in the Develop module.
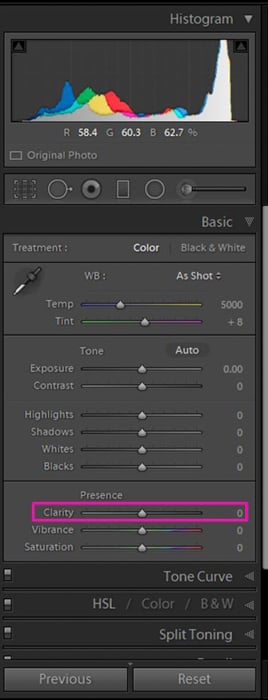
It is a global adjustment. By moving the slider you will affect the mid-tones in the whole image. It has a range from -100 (right side) to +100 (left side).
In this tutorial, I will sometimes use the -100 and +100 values to exaggerate the clarity effect. When editing images, I never use these extreme values. They can make the photo look unnatural and fake.
Modify the Clarity of a Selection of Your Image Using the Brush Tool
Sometimes you might want to adjust the texture of just a part of the image. This can make it stand out.
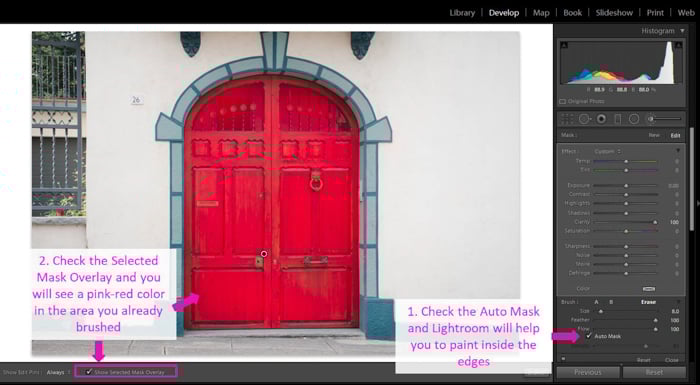
In these cases, it is useful to use the Brush Tool. To do so, first select the Brush tool in the Develop module, right under the histogram.

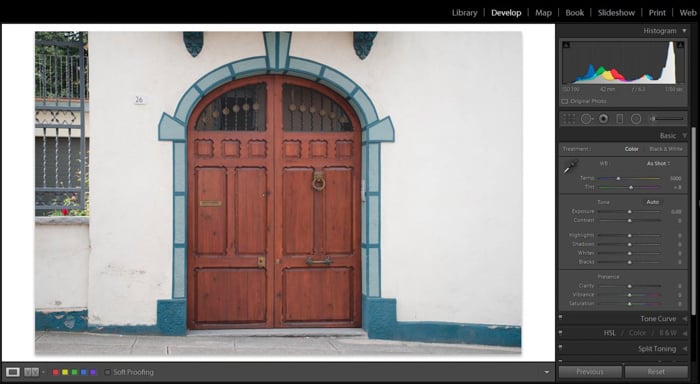
I want to emphasize the texture of this door, so I will use the brush tool.
You can remove previous adjustments of the brush by double-clicking on the word “Effect”. Then, move the clarity slider to the value you want and brush the part of the image you want to emphasize.
To make your work easier, check the Auto-mask tool. Lightroom will help you to “paint” inside the edges.
If you make a mistake, you can correct it at any moment by using the Erase option of the brush.
If you want to check which area you actually painted, check the box “Show Selected Mask Overlay”. A pink mask will show you the area you already brushed.
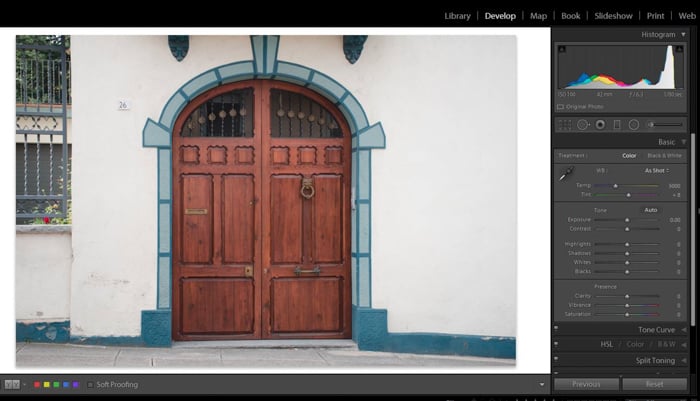
This is the final result!
Modify the Clarity Using a Radial Filter
Another way to do local adjustments is to use a Lightroom radial filter. This option is faster than using the brush tool, but you are limited to areas that fit the shape of the filter.
To use this method, first, you need to select the radial filter in the toolstrip of the Develop module. Next, click and drag the filter in your image to place it in the area of interest. After that check the “Invert Mask” box. Now the filter settings will affect the area inside its limits.
To make the effect look more natural you should feather the edges of the filter by increasing the Feather value. Lastly, increase or decrease the Clarity value using the slider until you get the effect you like.

You can always make changes in your radial filter. Press on its dot to activate it. Then you can move it by click-dragging its center button.
To change its size use the pins on the edges and modify the settings using the editing sliders.
What Is the Difference Between Clarity and Contrast?
When editing photos in Lightroom you might wonder if there is much difference between the Contrast and Clarity sliders.
I will show you the effects each of the two have on the image using the histogram.
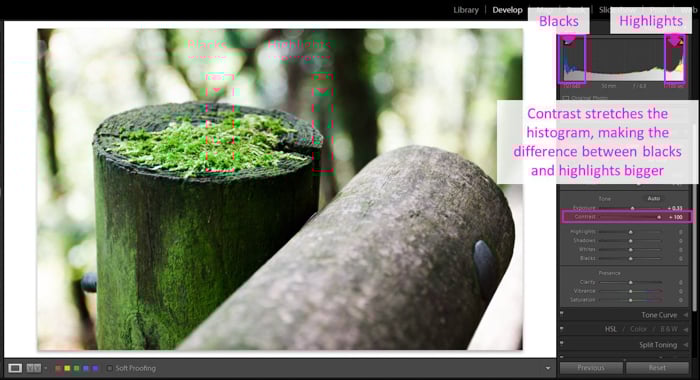
When you increase the contrast of an image, moving its slider to the right, you make the shadows darker and the highlights brighter.
Basically, with contrast, you stretch the histogram because the difference between dark and bright is bigger.
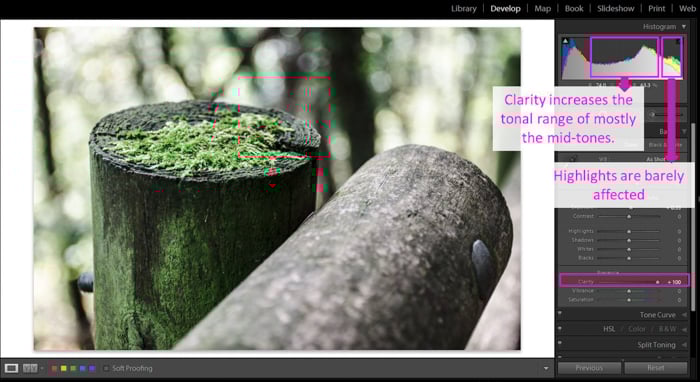
Clarity doesn't have such a strong effect in the histogram. It increases the tonal range mostly in the mid-tones and it also makes the image slightly darker while protecting the highlights.
The histogram remains the same on the left side (highlights). It changes in the middle (mid-tones) and the right side (shadows and blacks).
Compare Lightroom Clarity vs Sharpening
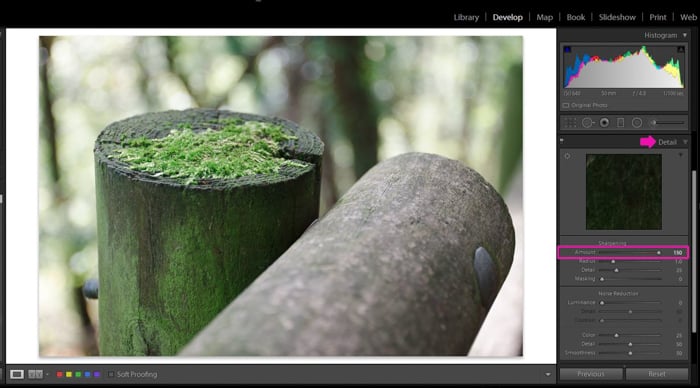
Similar to clarity, sharpening in Lightroom also affects the edges between tones. It has no effect on the histogram of your photo. In fact, in the Lightroom preview, you won’t notice much change. It is only when you zoom in or you see the original photo size that you can appreciate the effect of sharpening.
Clarity, on the other hand, affects the edges of only the mid-tones and as I showed you in the previous section, it does have an effect on the histogram.
Besides emphasizing textures, it also modifies some of the tones of your image. Usually, it makes them look a bit darker.
Different Ways to Apply Changes to Clarity in Your Photos
Now it is your turn to try the clarity slider and the local adjustments. Here’s how I use clarity to enhance my photos.
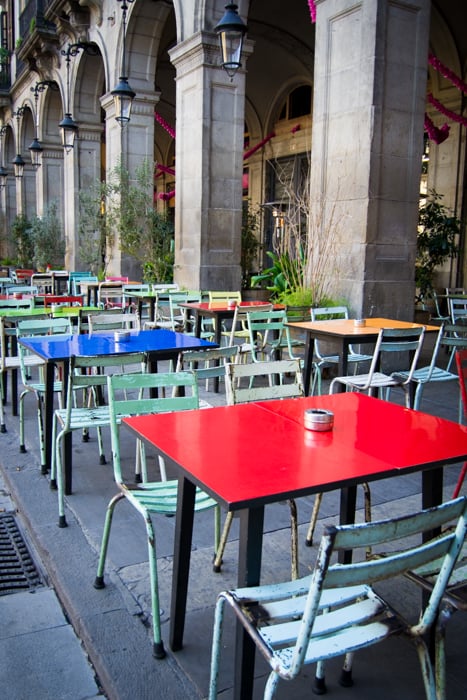
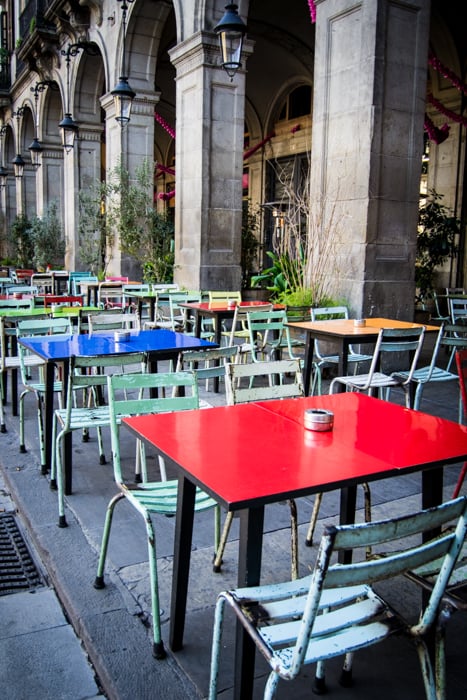
Use Clarity to Increase Texture in Buildings and Street Photography
Increasing the clarity of buildings in architectural or street photography works well. It adds texture and details. Clarity makes this type of images stand out.
Just make sure that you don’t overuse clarity so that the image still looks natural.
Clarity value: 0
Clarity value: +40
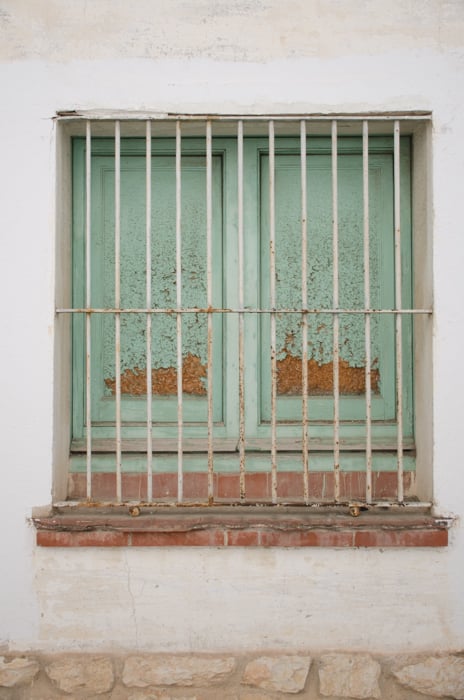
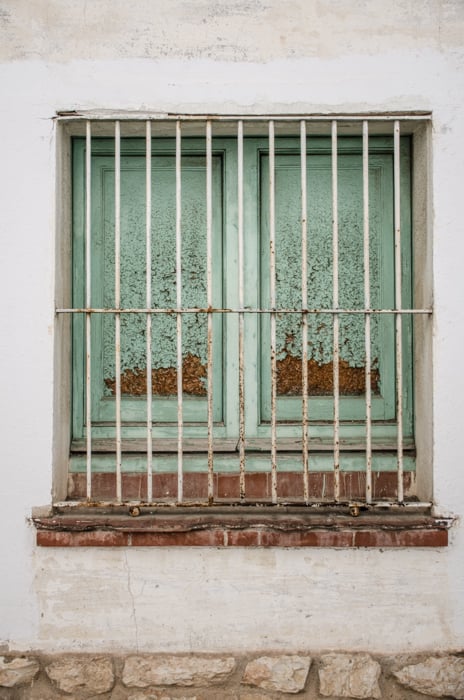
This trick works well with objects that look old or abandoned. As they usually have a lot of textures, a bit of clarity adds a touch of drama.
Clarity value: 0
Clarity value: +75
Increase Details in Eyes and Lips and Decrease Skin Clarity
Clarity is useful when editing portraits. First of all, you can emphasize parts of the body such as eyes and lips by increasing their clarity. As these are local adjustments, it is better to use the brush tool.
By increasing the clarity you will also darken the area you brush. You might need to increase the exposure a bit too, especially if you want to add clarity to the eyes.

This is the photo with my basic edits. I want the eyes to stand out more.
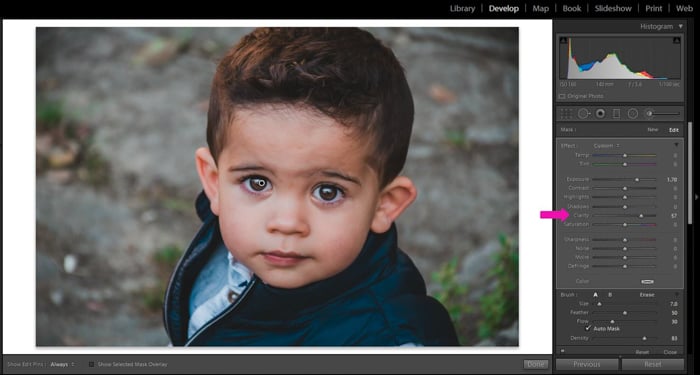
I brush the iris using a Brush with Clarity +57 and Exposure +1.70

This is the final image.
For the majority of portraits, I avoid increasing the clarity of the skin. It emphasizes any wrinkle or imperfection that the skin has, and models are not usually happy about it.
In fact, you can brush the skin and use a negative clarity value. This will make the skin look smoother because you decrease detail.
It is important to keep it natural. Avoid extreme negative values that will make the skin appear plastic-like.

Original image
I brushed just the face skin with a brush with Clarity -100. I avoided brushing eyes, eyebrows and the mouth.
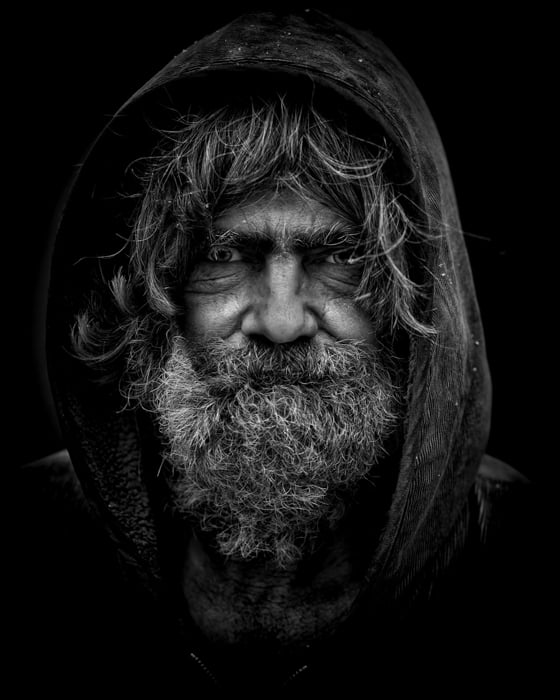
Increase Clarity in Portraits to Add Dramatic Effect and Emphasize Emotion
There is one case where it is a good idea to increase the clarity in portraits, including skin. This is when you want to give to the character a dramatic appearance or convey certain emotions.
You might want wrinkles to look more obvious to emphasize the age of your model. Or you might want to achieve a look that shows them as strong characters. This is even more evident if the portrait is in black&white.
Keep in mind that not all models want to see themselves with such strong features. Use it always with respect and with people that you know will like the clarity effect.
Increase Clarity in Cloudy Skies to Make Them Pop
If you are a landscape photographer you can also improve your images adjusting their clarity. It works well on the clouds if you want to emphasize their texture.
If you don’t want to affect the clarity of the whole image, you can use a brush tool to paint the clouds and then increase the clarity locally.
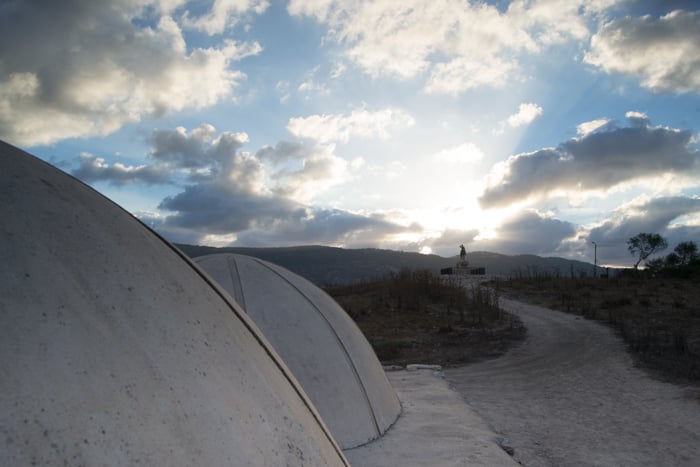
Original photo
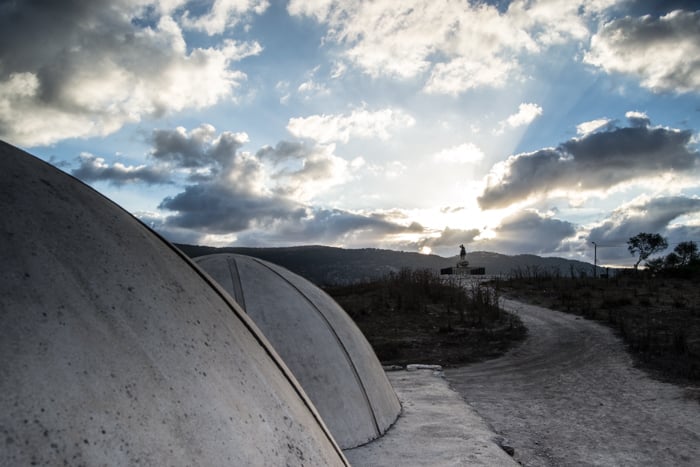
Clarity value: +90
Use Clarity in Nature Photography to Create More Lifelike Photos
Some animals have beautiful patterns that can be emphasized by increasing their clarity. Use the brush tool to paint just on the areas of hair, feathers or scales.
Remember to keep the clarity at a moderate level for a more realistic image.
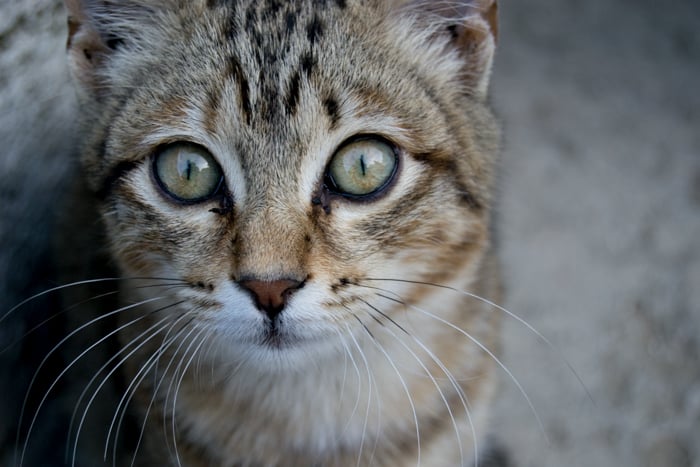
Original photo
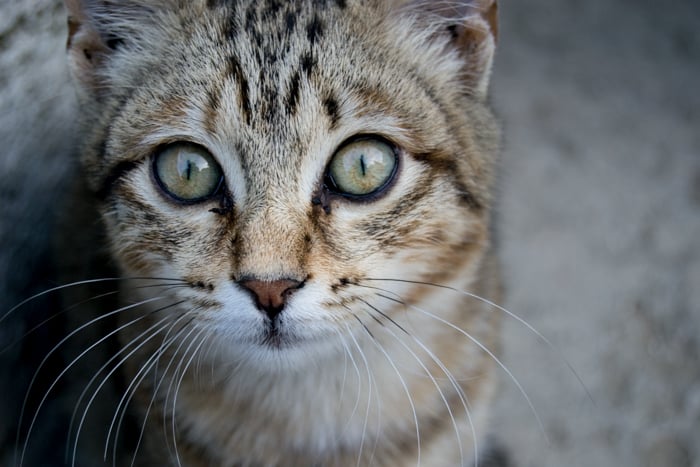
I emphasized the cat’s patterns with a clarity positive brush. I brushed his forehead, cheeks and also his eyes.
Animals are not the only ones that can benefit from this tool. You can increase the texture and detail of flowers, leaves or any other natural element by brushing them with an increased clarity value.
On the other hand, you can also decrease the clarity to get a dreamy effect. This will work well in certain nature elements, such as flowers.

Clarity value: 0
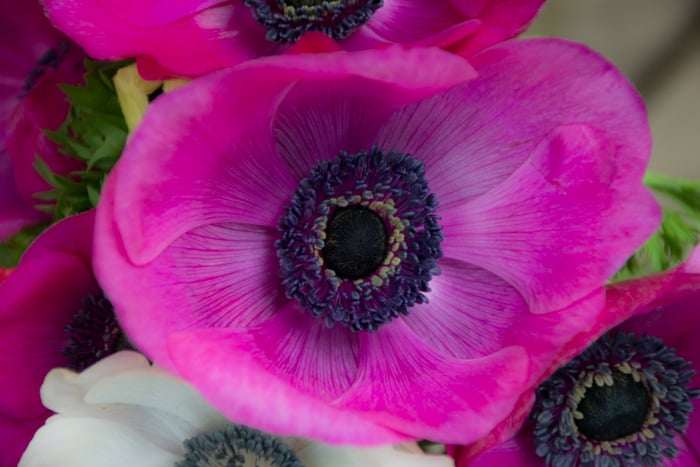
Clarity value: -50
Conclusion
Clarity is a great tool to emphasize textures and details and to give images extra contrast. Remember that it works mostly in the mid-tones. An original image with just shadows and highlights won´t get much improvement from it.
As any other editing tool, clarity should be used wisely to improve your images because if you push it too far, your photos will look unnatural.
A tip to avoid clarity over-editing is to take a break from the computer. Go and do something different, rest your eyes for a while, even if it is just a couple of minutes.
When you come back to look at your edited images it will be easier to see if you’ve overdone it with the clarity tool.