The dehaze adjustment in Lightroom is a brilliant photographic tool. Clarity is a key issue when editing photos. The dehaze tool allows us to recover as much detail from the photograph as possible.
Today, we will examine how the dehaze adjustment functions and how we can use it to our advantage. By the end of this article, you will know when to use it and its advantages.
The dehaze tool removes as much unwanted haze from your image as possible.
This is a sought-after tool as mist, haze, and other visually dampening environments are common in photography. Atmospheric haze is also unavoidable in landscape photography.
Different types of haze dramatically reduce the quality of the scene we see. They subtract definition and also reduce the color and contrast in the photograph.
The dehaze adjustment in Lightroom aims to combat all these points. It can reduce the mist in the photograph while simultaneously adding contrast and color to the needed areas. This incredible tool magically cuts through the haze in the photograph.
The dehaze tool in Lightroom can also add haze to our photographs. This is not as useful as its dehaze qualities, but you may want to use it to add atmosphere to your photographs. It helps create moody, misty photographs that are less about the scene and more about the atmosphere.
Adobe Lightroom now comes in two different versions: Lightroom and Lightroom Classic. Both versions have many of the same functions; what differs are the approaches to editing processes.
Lightroom favors a post-processing workflow that utilizes the cloud. This allows you to work from the same set of images on any device you want. This version also prioritizes simplicity and ease of use through a stripped-back interface. This may be easier for beginners to work through.
Lightroom Classic has an interface with which any photographer who has used the past versions of Lightroom would be familiar. It provides a wide range of features, some of which you may never need to use. You will find more in-depth controls and attention to detail in Lightroom Classic.
Both Lightroom versions produce the same results as the algorithms for adjustments are the same. They both allow you to perform photo merging. So, it will come down to personal preference or whether you need to use a very specific process.
The dehaze tool functions exactly the same in both Lightroom versions.

We will now show you how effective the dehaze tool can be. We will go through different environments you may come across in photography and show you how the dehaze tool works.
The dehaze tool can be used for clarity and creativity. Let’s examine its effectiveness.
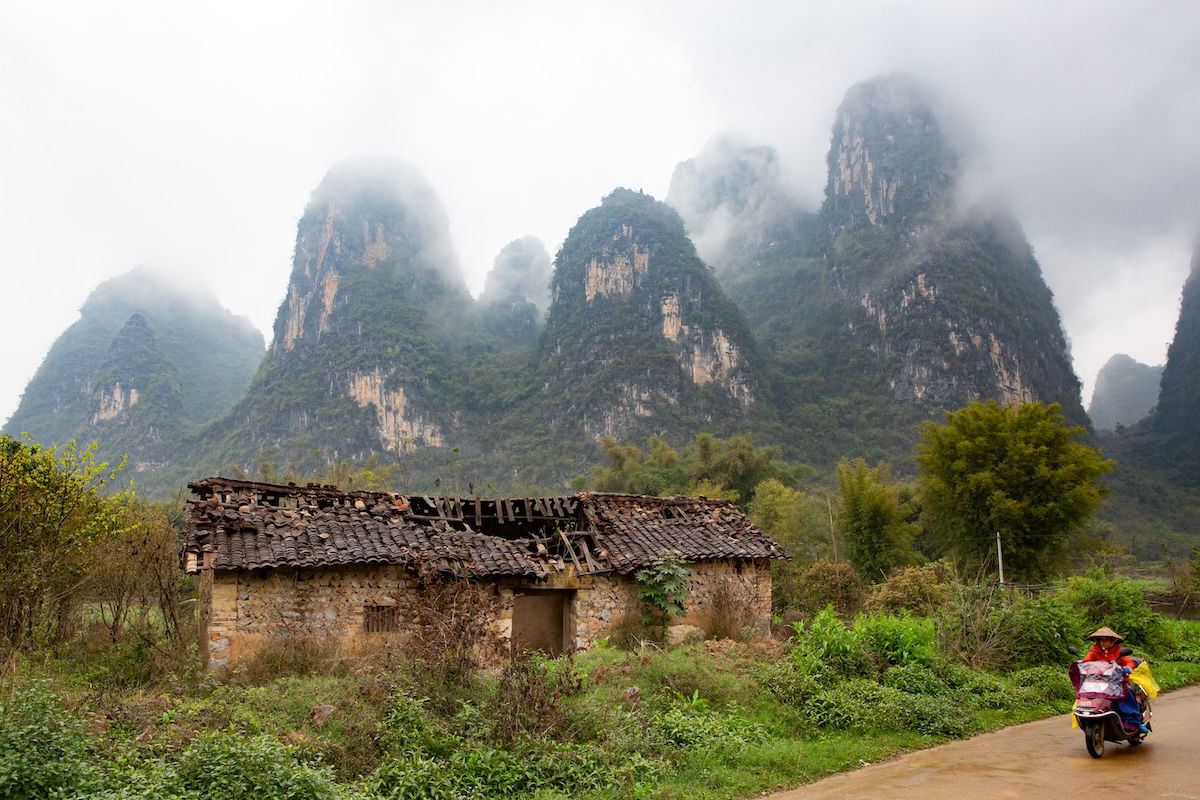
We will start by using the dehaze tool to remove haze. For this first example, I will pick a misty picture.
I will use this cloudy landscape scene to demonstrate the power of the dehaze tool. The first adjustment I make is to add +50 dehaze to the scene. We can see the fog lift from the photo, and the mountains become much clearer.
The dehaze tool manages to lift this thick fog from the background. But it also makes the foreground slightly more defined. Some of the mountain tops were previously hidden in the mist, but now they are much clearer.
This dehaze process makes it extremely apparent why we should shoot in RAW. The quality recovery in a RAW file can reveal elements previously hidden in the photo.
If we push the dehaze to the extreme, +100, we can see much more detail in the mountains and clouds. The picture now has too much contrast, but it is interesting to see how this tool works.
The program has added some subtle saturation to the colors. The most noticeable element is that the image is much darker. In some of these dark spots (darker clouds), we can see noise where the program has struggled to portray the area accurately.
After looking at these results, you can see you will have to balance dehaze with other tonal adjustments. For my final edit, I used +65 dehaze and raised the exposure up a bit to counter the extra shadows. You must balance the tonal adjustment as it slightly contradicts the dehaze tool.


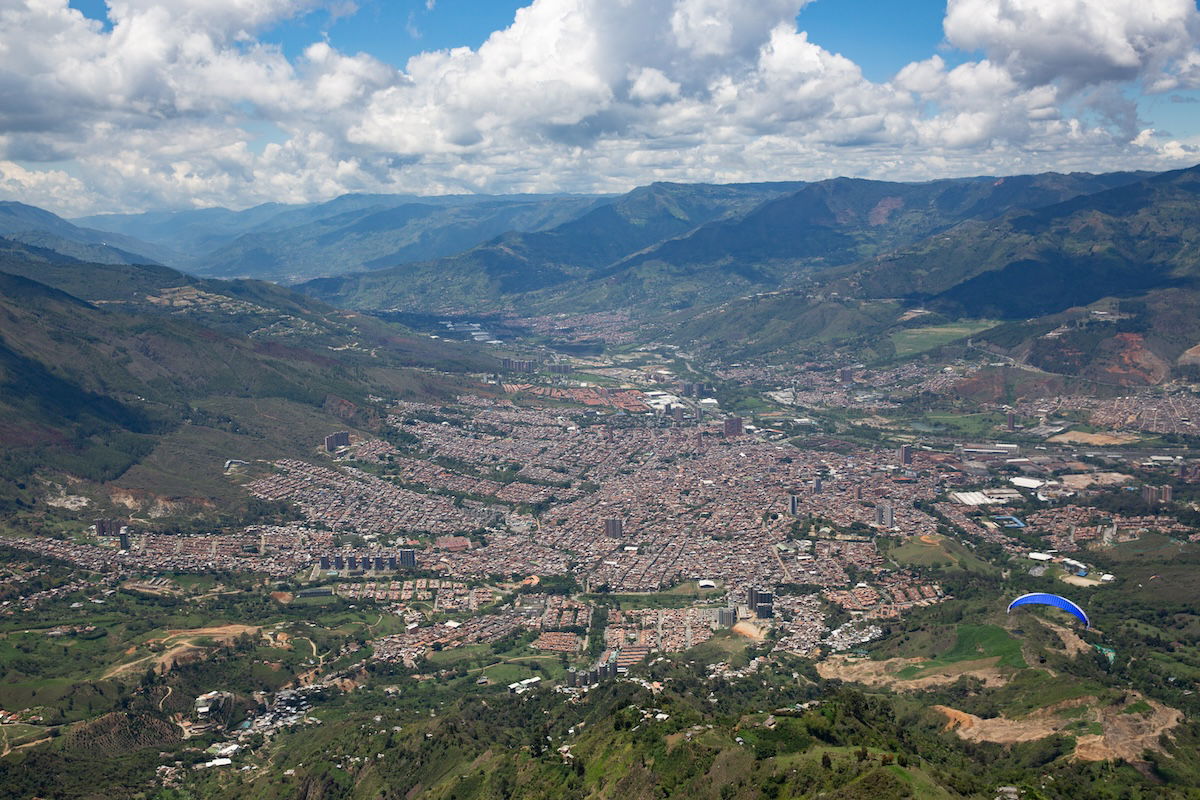
Let’s now examine another photographic situation that benefits the dehaze tool in Lightroom. The image we will edit shows a vast landscape taken from the air.
We will work with this image as it doesn’t seem to have much mist or haze. But the vast distance between the furthest point and the camera means there’s a great amount of atmospheric haze.
The dehaze adjustment tool is perfect for reducing atmospheric haze. As this haze is less noticeable, you should move the slider in smaller increments. As you can see, increasing the dehaze makes the city below and the distant mountains much clearer and more vibrant.

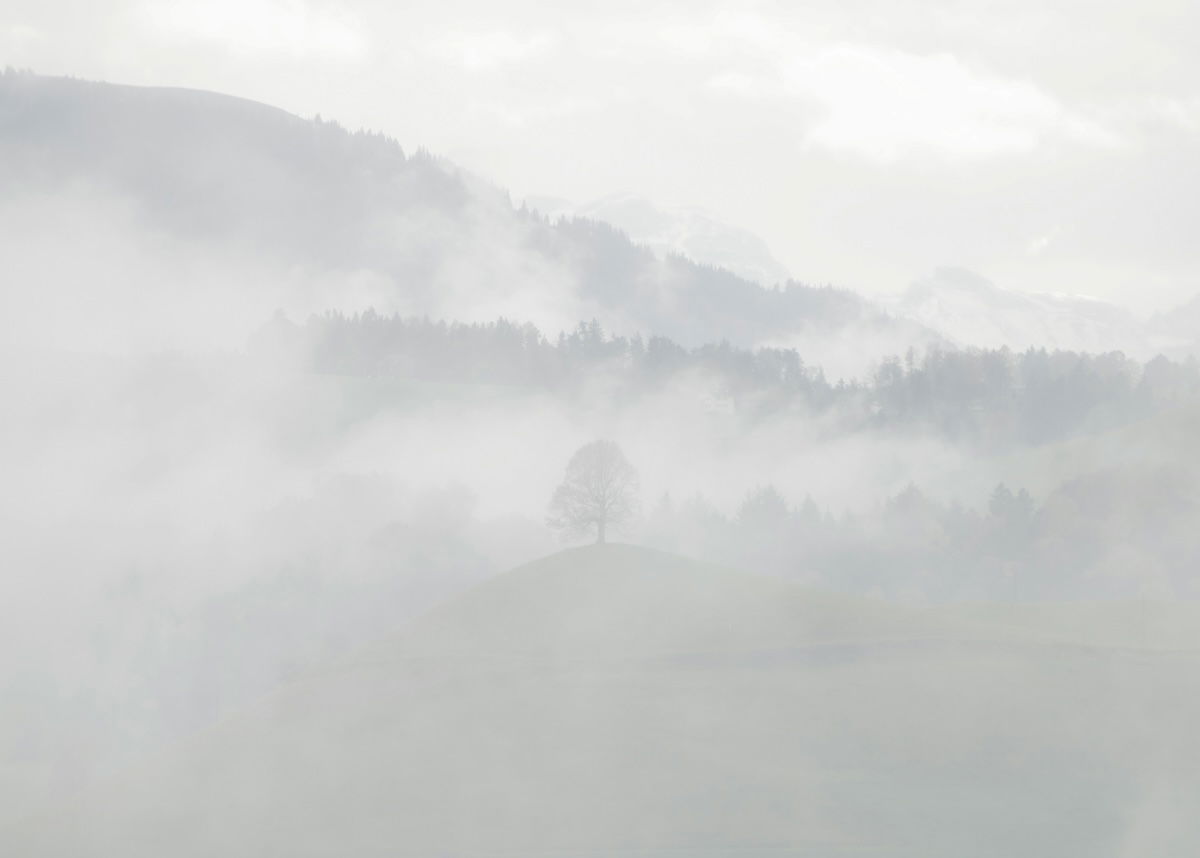
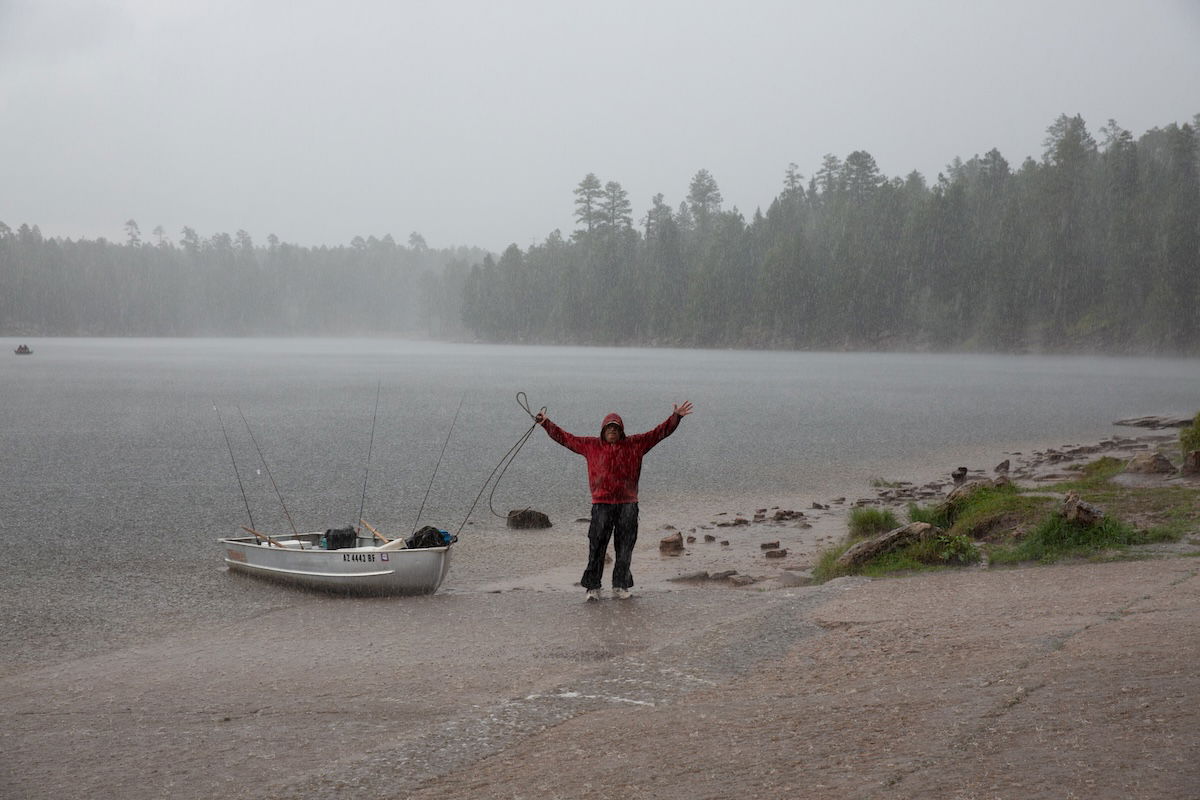
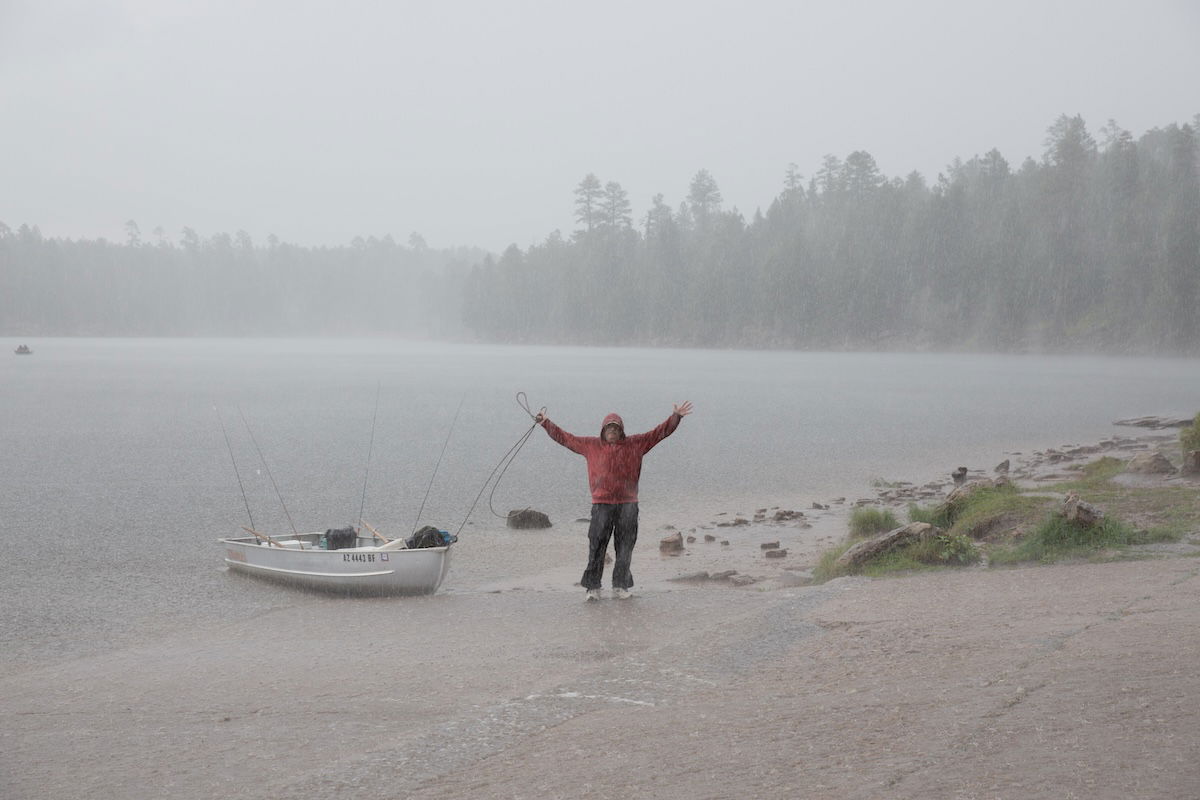
The dehaze tool can also be used to add haze or mist to our photos. This doesn’t work for any photograph, as most pictures will look overexposed with reduced dehaze. For this to work, you will need images that already have a slight bit of mist or an atmospheric feel.
For this effect, I will edit a picture taken during a storm. By reducing the dehaze amount, I am adding more haze to the image. This increased haze amplifies the intensity of the storm in the image. It washes out detail, giving the effect of more rain between the subject and the camera.
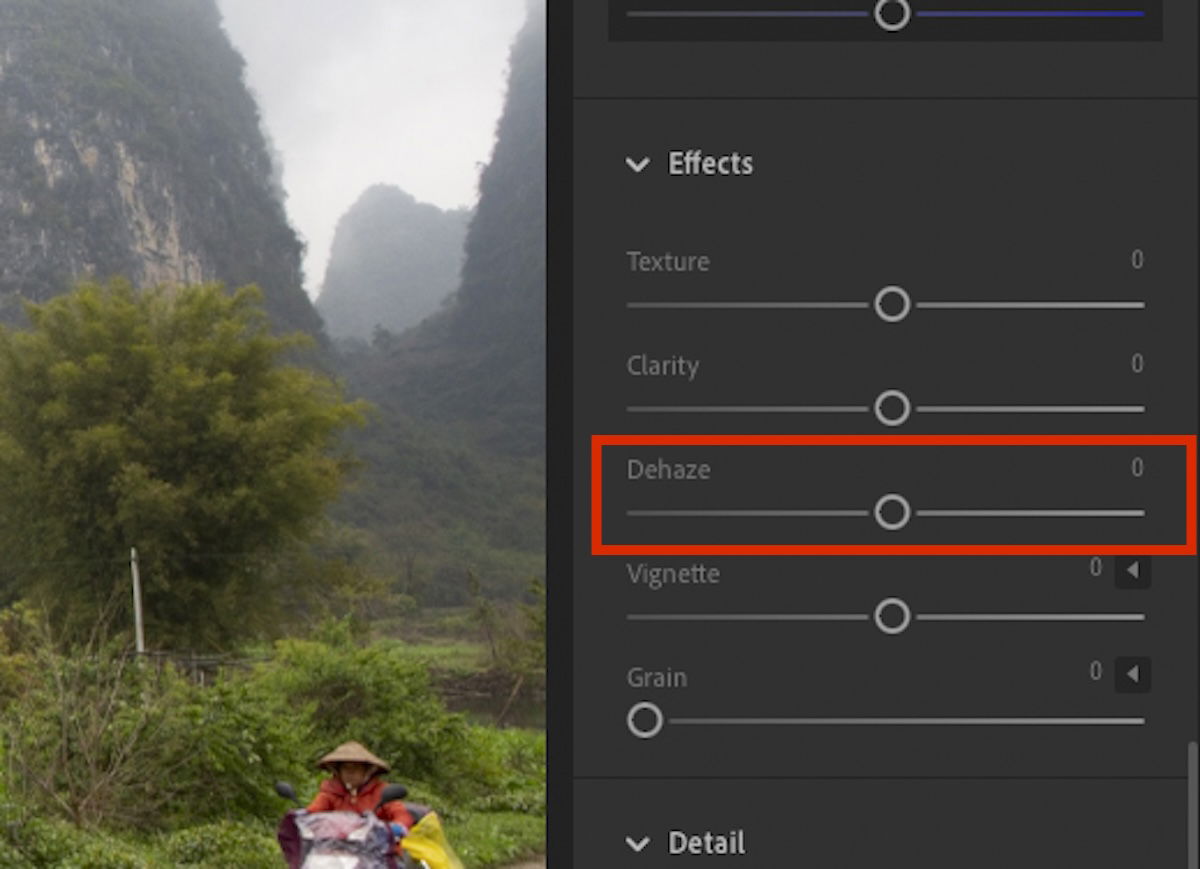
The dehaze slider in Lightroom is a crucial adjustment that can fix our images in seconds. Adobe Lightroom produces a brilliant slider that balances several important factors, resulting in an effective dehaze tool. Now, we just have to move a single slider to reduce the amount of haze in our photographs.
The dehaze tool is in the same grouping as clarity and texture. Read more about these Lightroom effects to get the most out of your images.


![P08 [Lead Gen] Product Sidebar_v2_date_20230223](https://expertphotography.b-cdn.net/wp-content/uploads/2023/02/P08-Lead-Gen-Product-Sidebar_v2_date_20230223-300x295.jpg)
![P08 [Lead Gen] Sidebar Banner 2_date_20230223](https://expertphotography.b-cdn.net/wp-content/uploads/2023/02/P08-Lead-Gen-Sidebar-Banner-2_date_20230223-300x245.png)
![P08 [Lead Gen] Sidebar Banner 3_date_20230223](https://expertphotography.b-cdn.net/wp-content/uploads/2023/02/P08-Lead-Gen-Sidebar-Banner-3_date_20230223-300x245.png)