Unlock the power of Photoshop masking with this beginner’s guide. Learn the essential techniques to seamlessly blend and manipulate images for professional-level results. In this article, we’ll discuss how to do Photoshop masking basics.
Photoshop Masking Basics
Photoshop masking determines what parts of a layer are visible and what parts are not.
You can use masks with photo layers. For example, when working with a composite, or with adjustment layers, such as lightening only a portion of the image.
With a Photoshop Layer Mask, you use a paintbrush to determine what parts of that layer to include in the final image. Another option is to create a layer mask from selection tools or Photoshop's Select and Mask.
Layer masks are displayed in the layers panel. (If the Layers panel isn't already open, go to Windows > Layers.)
A new layer with a mask will have a second image next to the image of that layer. This designates what parts of the layer are left out and not the entire layer.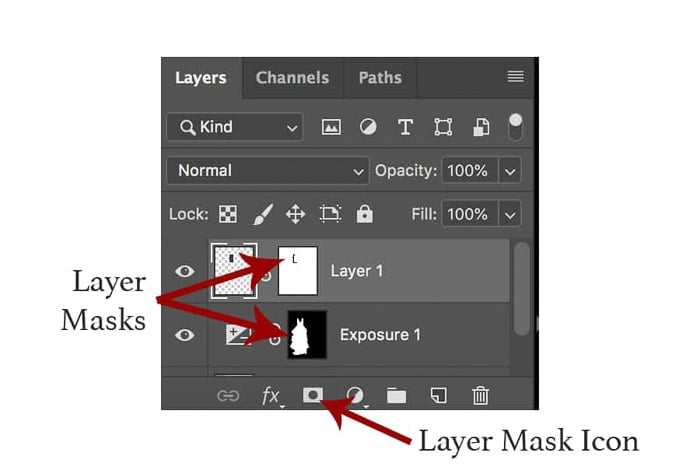
Using Photoshop masks is a mom-destructive editing technique. You can go back and adjust them at any time without undoing every adjustment that you've made since.
That's one of the reasons why layer masks are used across so many different Photoshop techniques. To adjust a mask, you need to click on the mask inside the Layers panel.
So how do you go about creating Photoshop masking in the first place?
How to Create Photoshop Masking From an Existing Layer
You might be creating a Photoshop composite or removing an object from the image. Then you’ll work with another image pasted in the file as another layer.
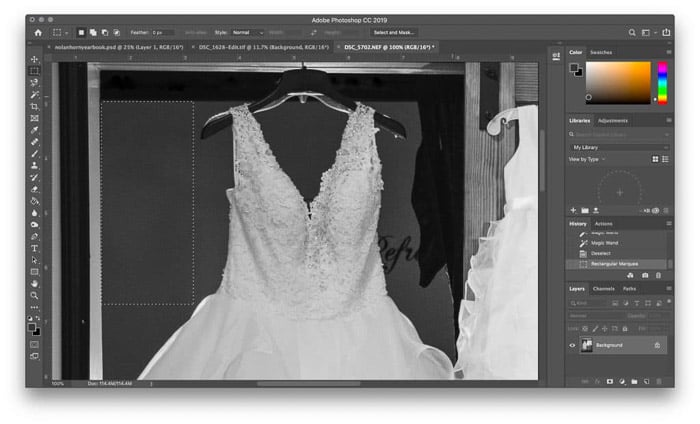
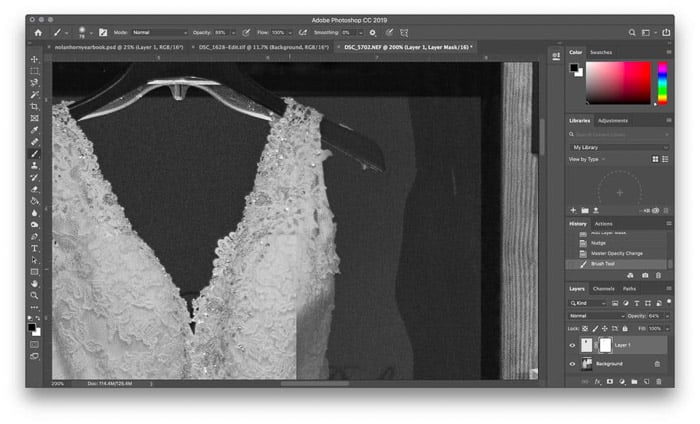
In the same image, I wanted to remove the writing on the wall in the room behind the dress. To do that, I copied a clean part of the wall. Then I pasted it back in as a second layer before using masking to create a clean blend.
There are two easy ways to add layer mask from an existing layer in Photoshop. One is faster, but the other has a few more options.
First, the shortcut. Select the layer you want to add a mask to inside the Layers panel. Then, click the mask icon at the bottom of the layers panel. It looks like a white rectangle with a gray circle in the middle.
Voila! You now have a layer mask that, by default, makes everything in that layer visible (a white layer mask).
If you want more layer mask choices, you can head to Layer > Layer Mask.
Choose "Reveal All" if you want a layer mask that starts with everything included.
Choose "Hide All" if you want to start with a layer mask that has nothing included yet.

Inside the same layer menu, you can also create a mask from a selection. Do this if you've already selected the area that you would like to mask out.
With the selection active, go to Layer > Layer Mask. Choose Reveal Selection to show what's inside the selection. Choose Hide Selection if you want to remove what's in that section.
Now you have a layer mask that's ready to be fine-tuned in the next few steps.
How to Create a Photoshop Mask Using an Adjustment Layer
You might want to apply an adjustment instead of adding or removing actual pixels. Then you'll work with a layer mask on an adjustment layer instead.
This technique is excellent for adjusting the exposure or color for only an area of the image. It won’t affect the image as a whole.
To create an adjustment layer, go to Layer > Adjustment Layer. Then, select the adjustment layer that describes the type of adjustment that you want to make.
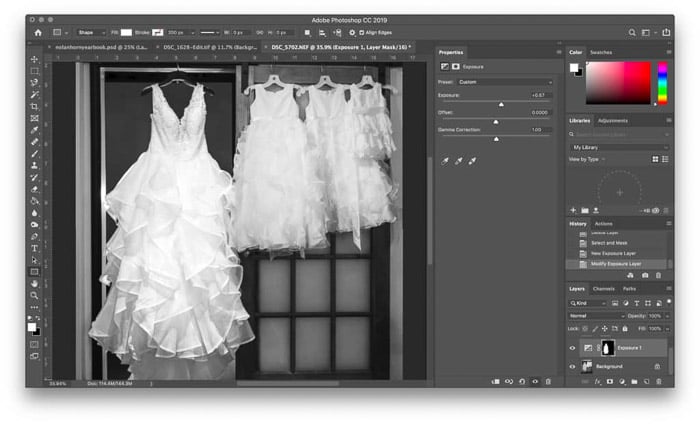
For the sample image, I wanted to brighten the bridal gown, so I used an exposure adjustment layer.
In the properties menu of that adjustment layer, make the desired changes. In the sample image, I used the exposure slider to brighten the bridal gown. I did this until it matched the exposure on the flower girl dresses.
Photoshop automatically gives you a mask inside an adjustment layer. There's no need to walk through the steps above to create a mask.
How to Use Select and Mask For Easy Photoshop Masking
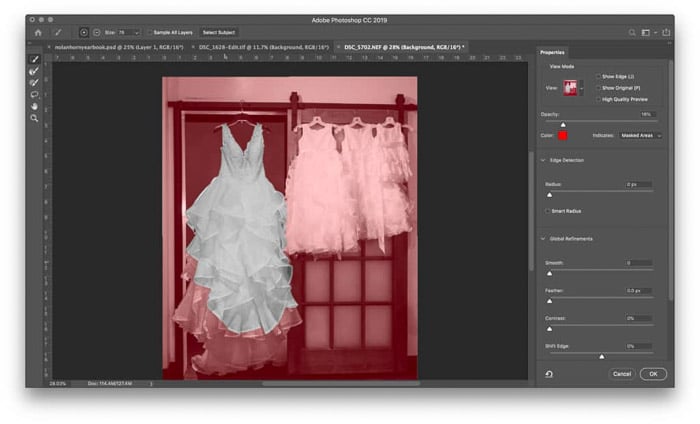
Photoshop's Select and Mask tool is one of the easiest ways to make complex selections. For objects that are tough to mask, like the lace and ruffles of the wedding gown in the sample image, use the Select and Mask tool.
Go to Select > Select and Mask. Inside the new Select and Mask Window, use the paint brush tool on the top left to paint in the areas of the image that you want to select. The red portion of the image is what's not selected.
Photoshop will automatically detect the edges. Increase the brush size for speed, decrease the brush size if Photoshop isn't accurately grabbing those edges.
Adjusting the Edge Detection radios on the right will also help select the object easily. You also have other tools like feathering the edge.
Once you've selected the object out, click OK. That object is now selected. If you head to Layer > New Adjustment Layer, the selection will already mask out for you.
Or you can go to Layer > New > Layer Via Copy to duplicate that object.
Starting with this option, your mask is already created for you. But you can still make further adjustments using the options below if needed.
How to Mask in Photoshop: Adjusting the Mask
You can start to see the mask in the areas that were brushed over. I used a temporary opacity so I could see where to mask.
Now, you have a Photoshop mask. But you haven't actually made any adjustments to the mask yet (unless, of course, you decided to start with Select and Mask).
In a Photoshop mask, white shows what's included in the mask and black shows what's excluded. To adjust the mask, you paint in white and black on that mask.
Grab the paintbrush tool and grab black if you want to remove parts of the mask (or white to add to the mask).
You might be working with one layer over the top instead of an adjustment layer. Lower the layer capacity so you can see where you are painting.
You can also use the fill tool to go from an all white mask to an all black mask.
Use the paintbrush tool to mask out the object that you want to remove or the adjustment layer you want to apply.
Remember to adjust the size of the brush edges for a clean selection. If you make a mistake, just go back and paint it in with the opposite color.
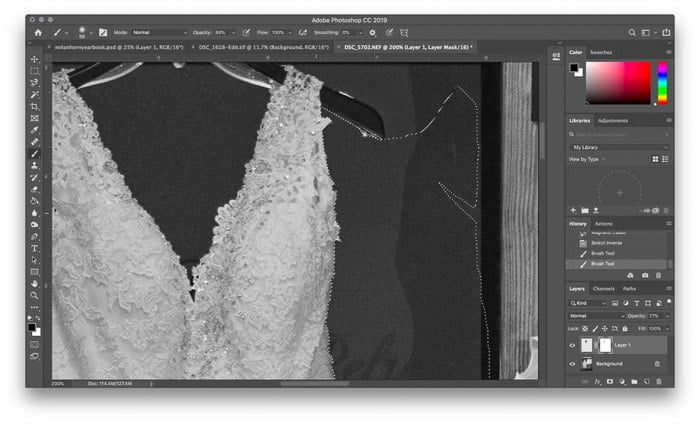
The brush tool isn't the only one that will come in handy here. I wanted to remove the curtain and wall art in the sample image. To do this, I used the magnetic lasso tool to select the edges of the dress so I could quickly paint over only the dress.
Adjusting the mask is a similar process for both working with a layer that has actual content and working with adjustment layers.
Layer opacity and blend modes also work when using layer masks. These significantly increase the possible edits using Photoshop masks.
Conclusion
Photoshop masking allows photographers to apply non-destructive edits to just a portion of the image. And that's a tool you can use in any number of scenarios, from wedding to street photos.
Now that you know the Photoshop masking basics, you can create selective edits with confidence. From adjustment layers to composing.
Looking for more photoshop tricks? Check out our new post about creating a cool abstract portrait in photoshop next!


