Lightroom smart previews are a fabulous tool to speed up your workflow and make it more flexible.
Working with smart previews in Lightroom means you do not need to keep your RAW files hard drive connected to your computer. This makes life easier if you prefer to edit photos in Lightroom on your laptop.
What Are Lightroom Smart Previews?
A smart preview is essentially a small working file Lightroom can create. This means it's not dealing with bulky RAW files. When you have smart previews enabled, Lightroom makes a virtual copy of your RAW files. It saves them as a compressed DNG file. A huge amount of hard drive space is saved because of this.
Don't worry, all your RAW files are kept. Lightroom sets up a new folder for the DNG files. A DNG is an Adobe Digital Negative RAW image file. Lightroom smart preview images are downsized as they are saved.
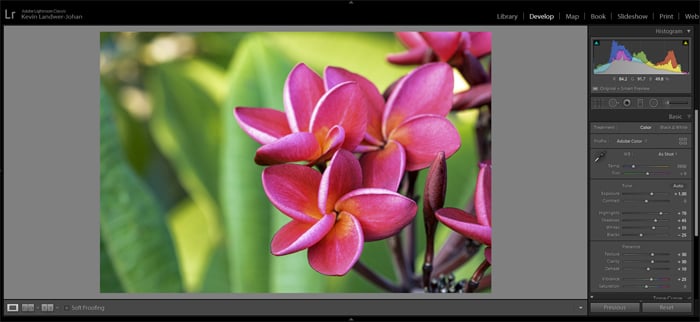
This has implications for when you are working on your photos in the Develop Module too. It means you are making alterations to the compressed file, not the original RAW file.
Common Questions About Lightroom Smart Previews
How Big Are Previews?
The longest edge of a Lightroom smart preview image will measure 2550 pixels. Conversion and compression to the DNG file are very efficient. The resulting file size is only about two percent of the original size.
You will be hard-pressed to notice any quality difference when viewing smart previews.
Should I Use Smart Previews in Lightroom?
Using Lightroom smart previews has two main advantages. Your workflow will speed up and you can save space on your hard drive.
Two issues often plague photographers when it comes to post-processing. These are speed and space. Finding some relief for these problems is always welcome.
Lightroom smart previews are smaller files. When you work with them in the Develop Module you'll notice one thing. Everything moves faster than when you are making alterations to RAW files.
Working with the compressed and resized DNG files makes Lightroom function more smoothly.
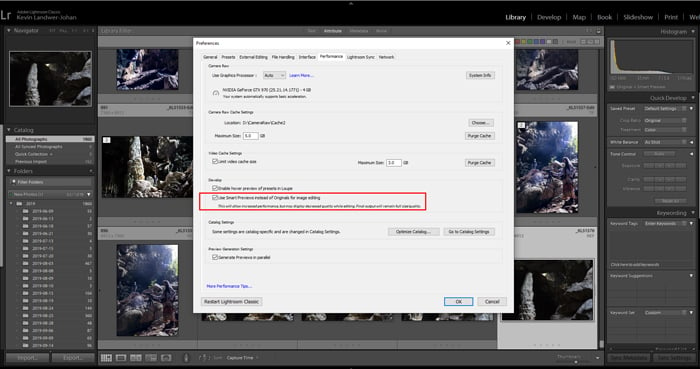
Smart previews take up a fraction of the space on a hard drive than RAW files do. Working conventionally in Lightroom the drive containing the RAW files must be connected. This is not necessary when you've created smart previews in Lightroom.
You might choose to store only the smart previews on your laptop and leave all the RAW files on your main computer. This frees you up to be able to edit from remote locations.
You will not need to take extra hard drives with all your original images. You can work directly on the smart previews.
Where Does Lightroom Store Smart Previews?
It places the folder in the same location as the Lightroom catalog folder. All you need to do is keep the smart preview folder on the computer you use Lightroom on. Then you'll have access to work with any images in the catalog.
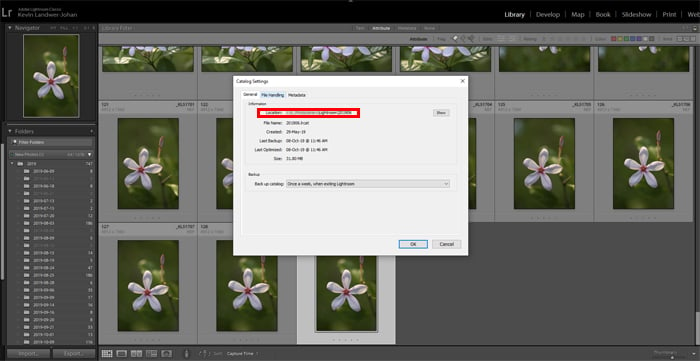
To locate or change where Lightroom saves the catalog files go to Edit>Catalog Settings. Here you will find the Location in the Information window. Click on the Show button to take you to the catalog location.
You can copy the folder created by Lightroom when it made the smart previews to another computer. The folder will be named [your catalog name] Smart Previews.lrdata.
What Are Standard Previews In Lightroom?
Standard previews in Lightroom are the default preview the software creates when you import photos. You can set the size of these previews in Catalog Settings.
Choosing the Auto option, Lightroom will build standard previews to match the resolution of your monitor.
Standard Previews in Lightroom are a bit limited as you cannot zoom in on them. When you do zoom in on one Lightroom must first build a 1:1 preview.
This slows down your workflow. Using smart previews avoids this lag time.
How Do I Export A Lightroom Catalog With Smart Previews?
You can copy the Catalog file from one hard drive to another. Either paste it to the second drive in a new folder or replace the original one you copied it from.
Make sure you or no one else has altered the catalog since you copied it. If you're working on a catalog shared with others, this is not a good option.
Another way to export a catalog with smart previews is to select all the images you have altered. Then go to File>Export as Catalog. This will bring up a dialogue box where you can name your new catalog and choose where to save it.
At the bottom of the box there are some checkboxes with options. Make sure you check the box Build/Include Smart Previews. Uncheck the box below it called Include Available Previews.
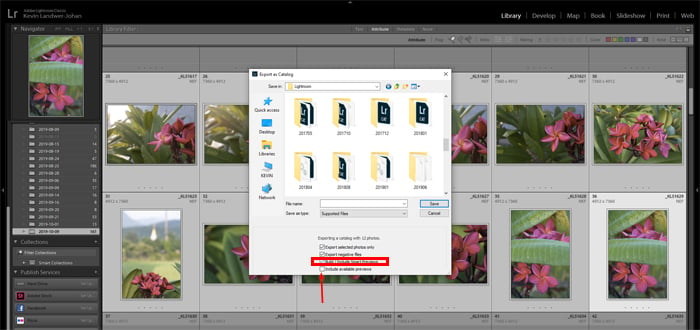
Lightroom can now open this new catalog when you connect the drive you saved it on to another computer.
HDR and Panoramas Made Using Smart Previews
Another thing you can do with smart previews in Lightroom is create HDR images and panoramas. When you have a number of files you want to merge you are now able to do this with smart previews.
Before, if you didn't have the original files, both Panoramas and HDR were grayed out in the menu. With smart previews there's enough resolution to make merged files.
Lightroom Compare Original and Virtual Copy
Working with smart previews still allows you to use the Lightroom compare original function. You can do this in the Develop Module by tapping the key.
This will toggle the original image so you can see what it looked like before you started editing.
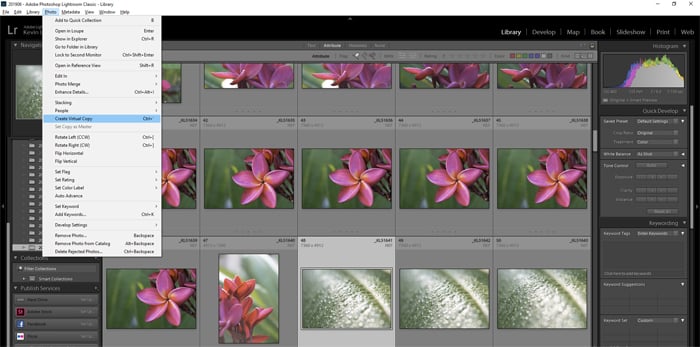
Making Lightroom virtual copies is also possible with smart previews. To do this go to File>Create Virtual Copy in the top menu.
When you make a virtual copy, a smart preview is also generated. You can work with this to make a set of alternative edits to the photograph.
How To See When An Image Has a Smart Preview
You will get a notification when a smart preview is generated. This happens in both the Library and Develop Module. It appears under the histogram in the right-hand panel.
If there is no smart preview information about the state of the image and preview will show here.
![]()
In the Lightroom Library Module when you have more than one image selected you will see a series of icons under the histogram with numbers.
These indicate the various states of information regarding the images and previews.
![]()
Conclusion
Working with Lightroom smart previews can make your editing life easier. You will appreciate how much faster Lightroom functions.
The flexibility you'll gain to work remotely without the need to transport huge file sizes is another thing you'll love about Lightroom smart previews.
For more great information, check out our posts on using Lightroom mobile, lightroom presets or best external hard drive for photographers!


