GIFs have become a popular way to express emotions, reactions, and ideas online. They’re fun, engaging, and easy to share on social media platforms. But did you know you can create custom GIFs using Adobe Photoshop?
In our step-by-step guide, we walk you through making a GIF in Photoshop, from importing your images to optimizing your final animation for web use. So, let’s get started and bring your creative ideas to life as a GIF!


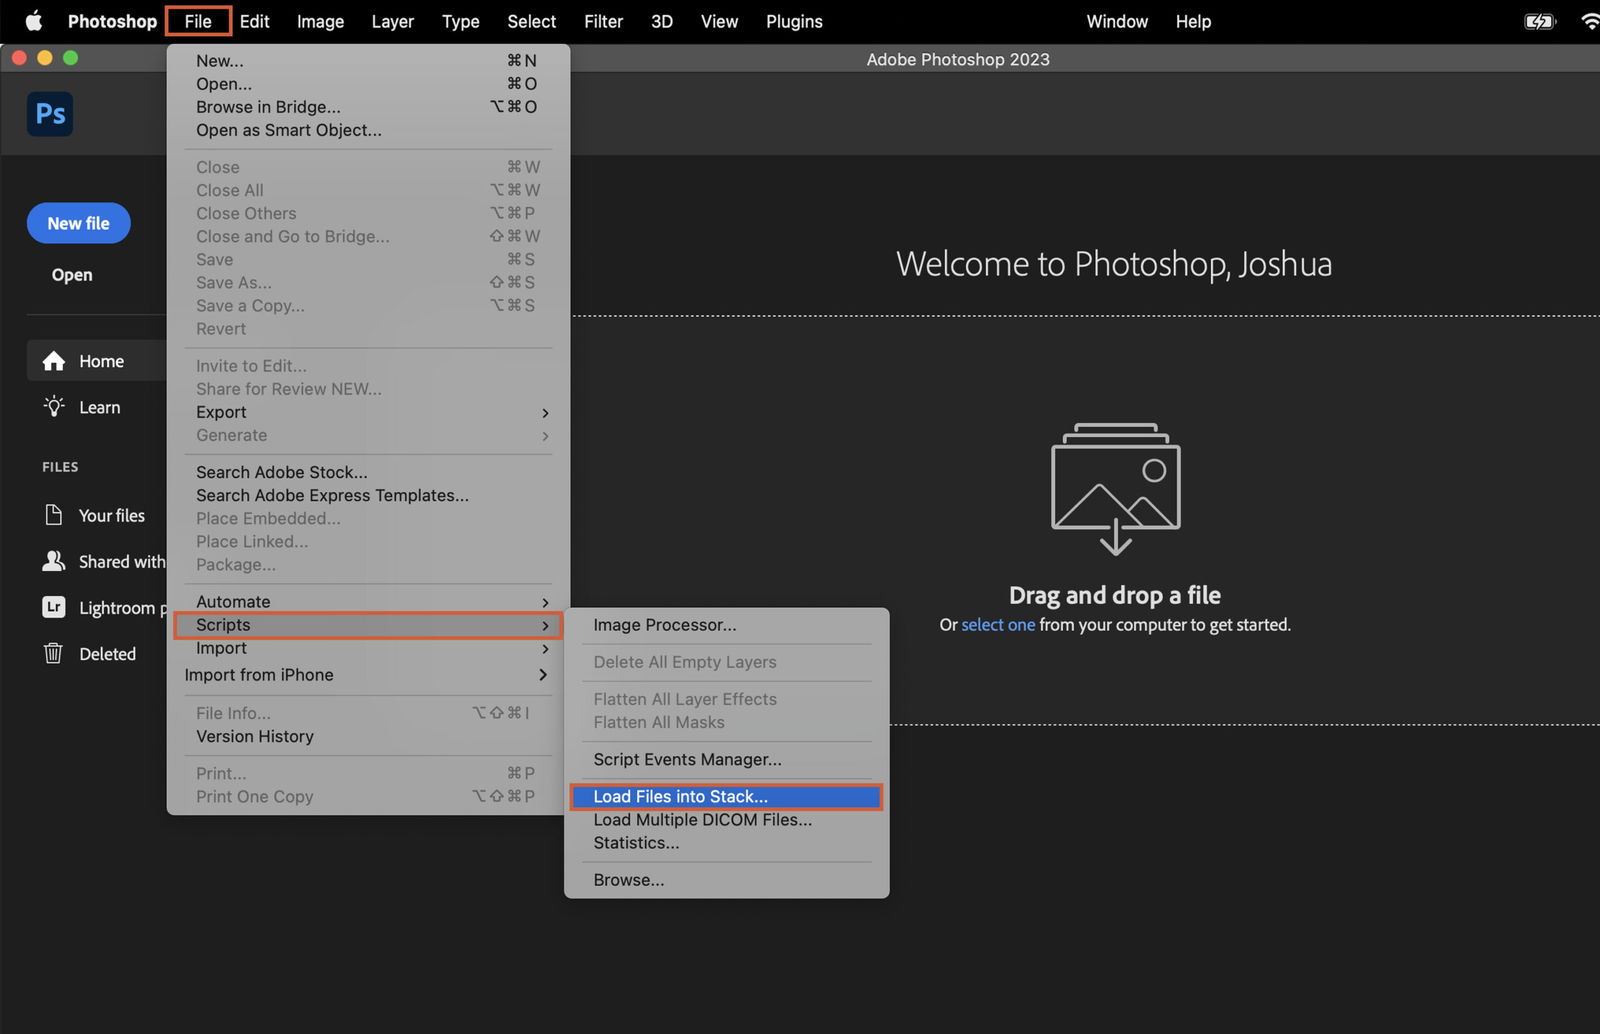
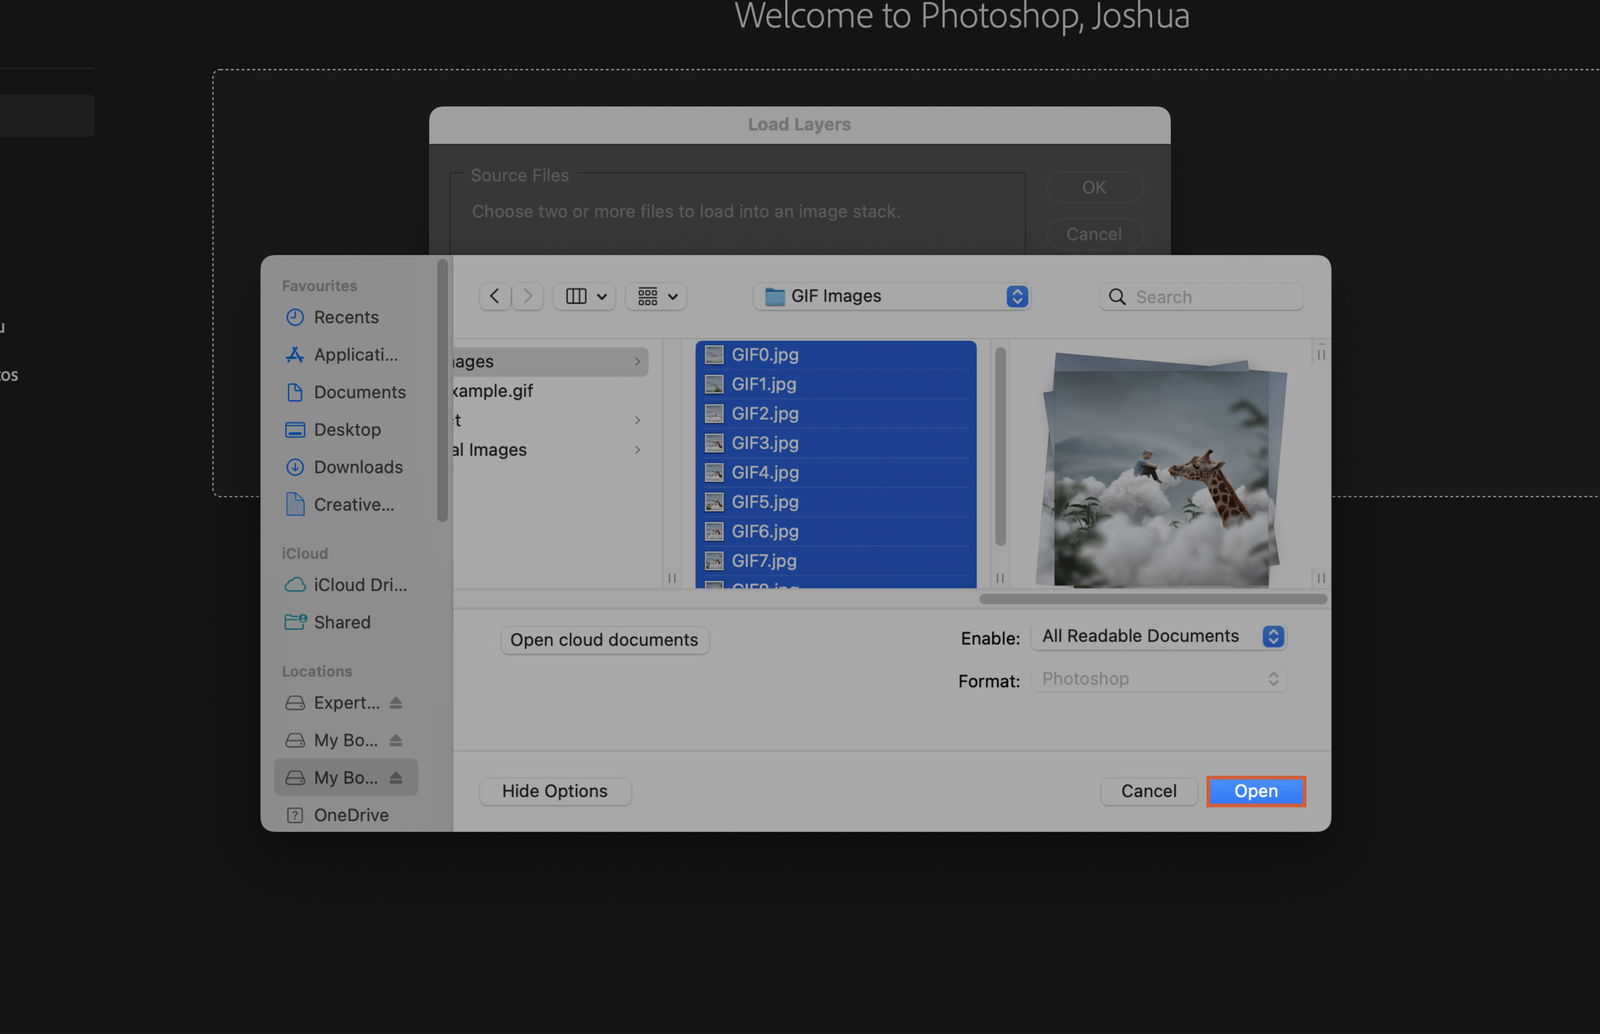
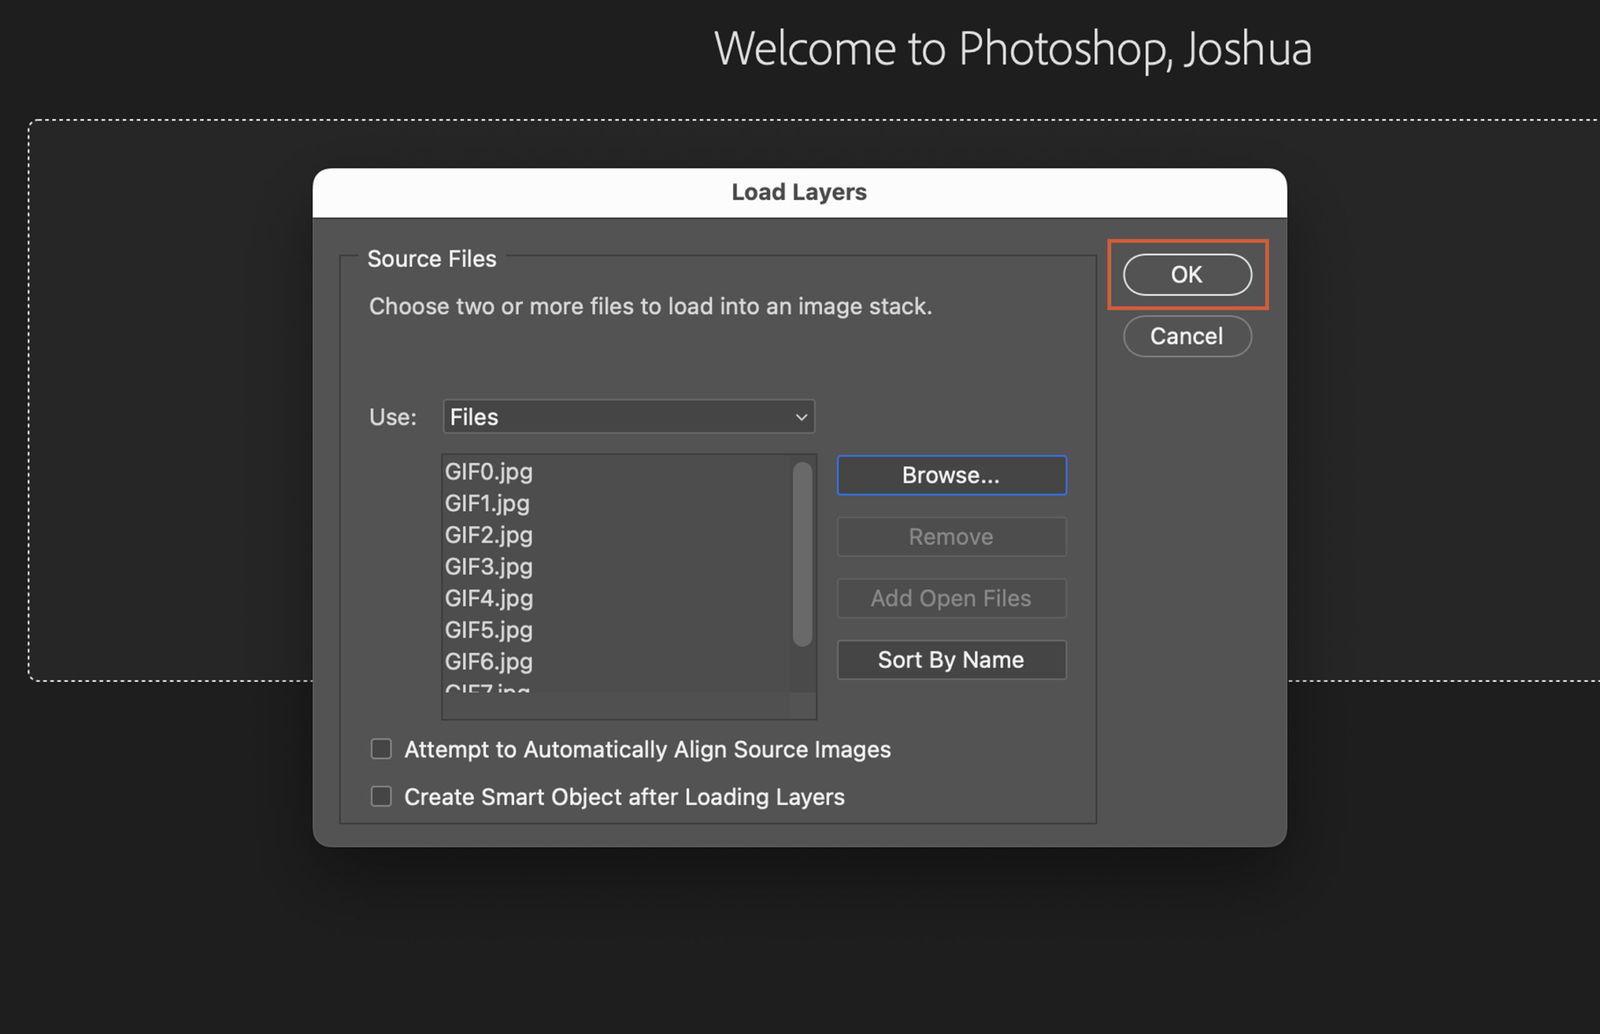
To start creating your GIF, import the images you want to use. Open Photoshop and go to File > Scripts > Load Files into Stack. A new window will appear.
Click “Browse” to select the images from your computer. Once you’ve chosen your images, click “OK” to import them into Photoshop and create a project.

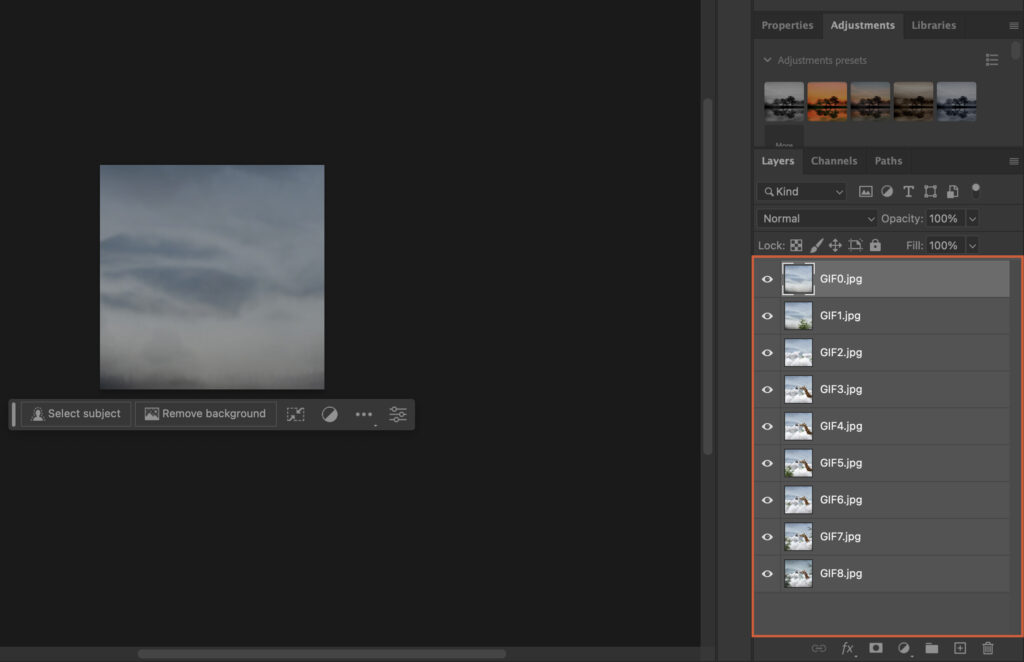
Now, it’s time to arrange your imported images into layers. Make sure each image is on a separate layer, and arrange them in the order you want them to appear in your GIF.
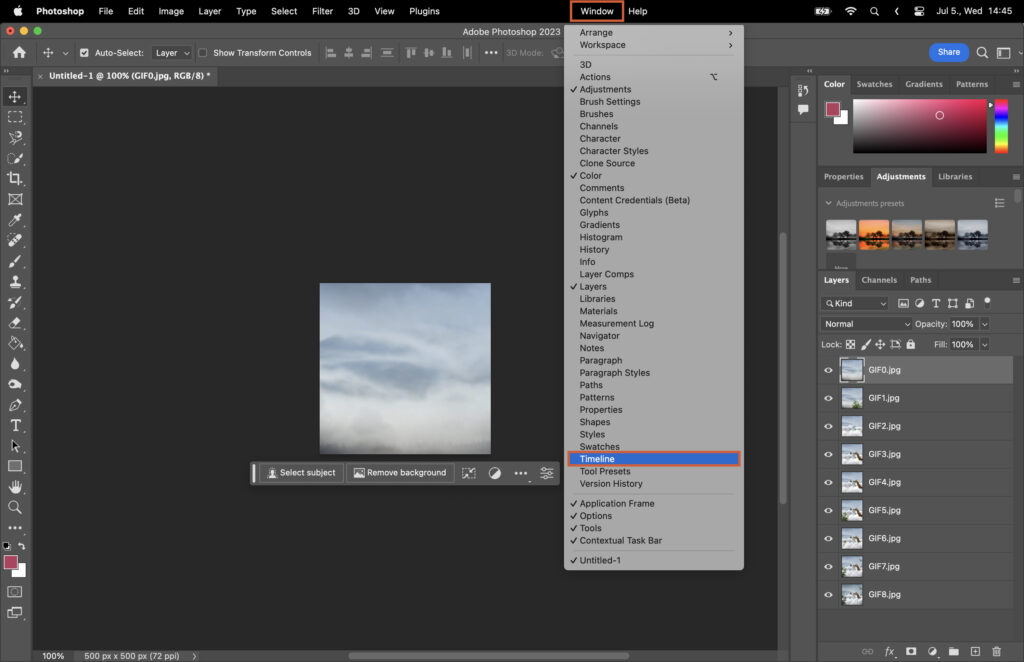
To create the animation, you need to set up a timeline. To do so, go to Window > Timeline to open the Timeline panel.
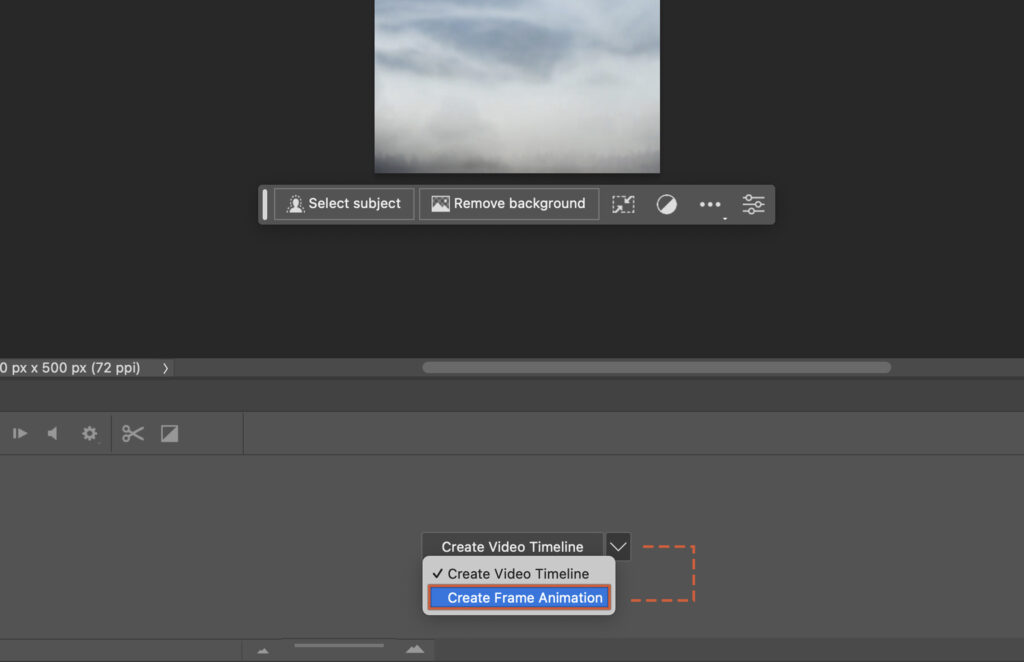
Click “Create Frame Animation” and then click the menu icon in the top right corner of the Timeline panel.
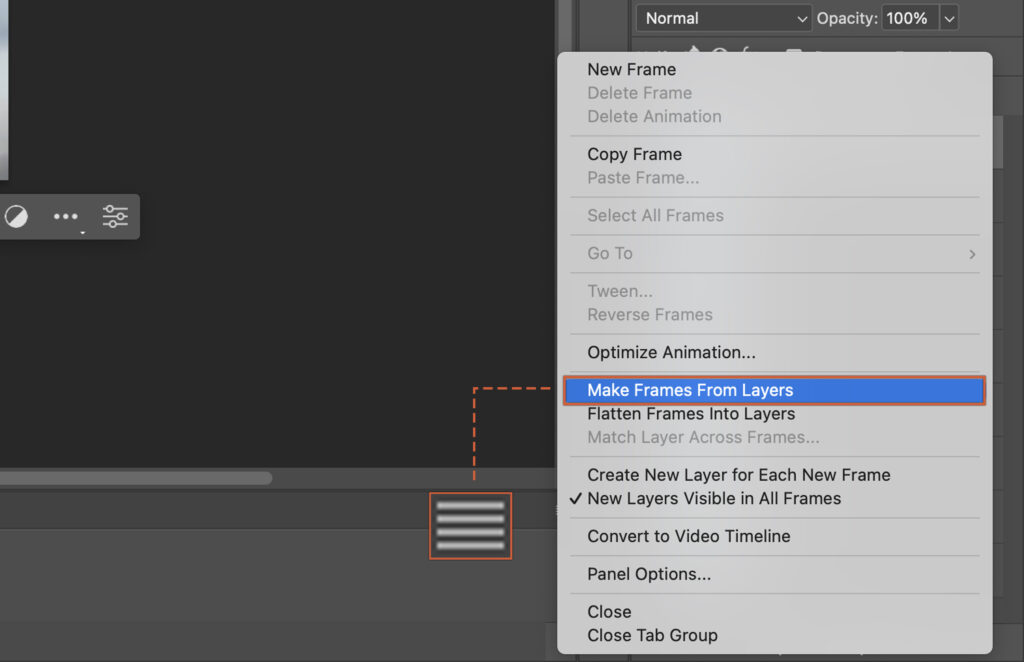
Choose “Make Frames From Layers” to convert your layers into animation frames.
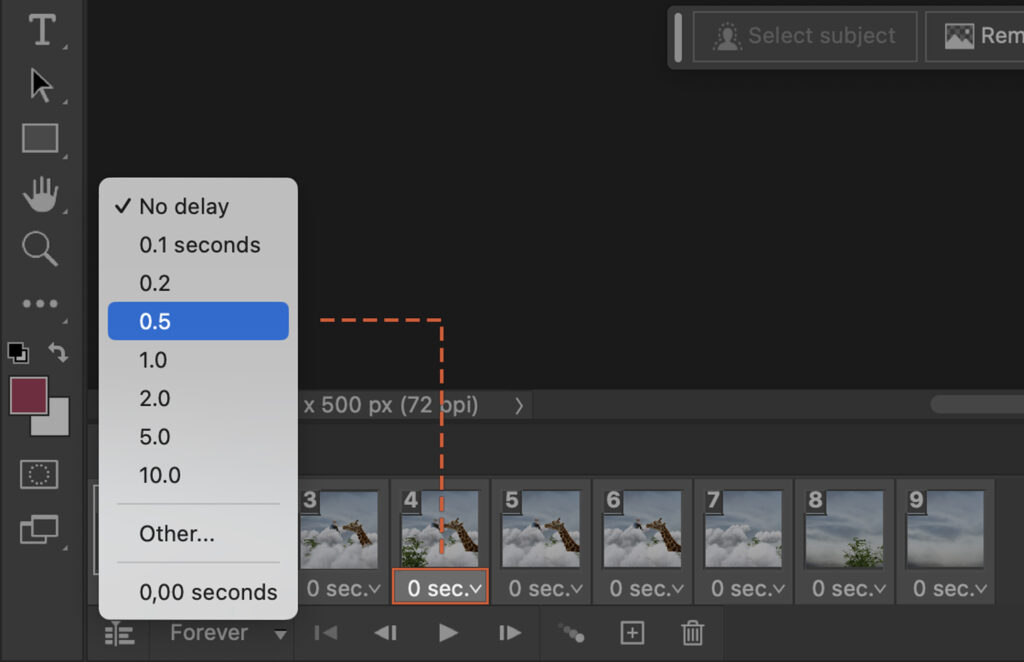
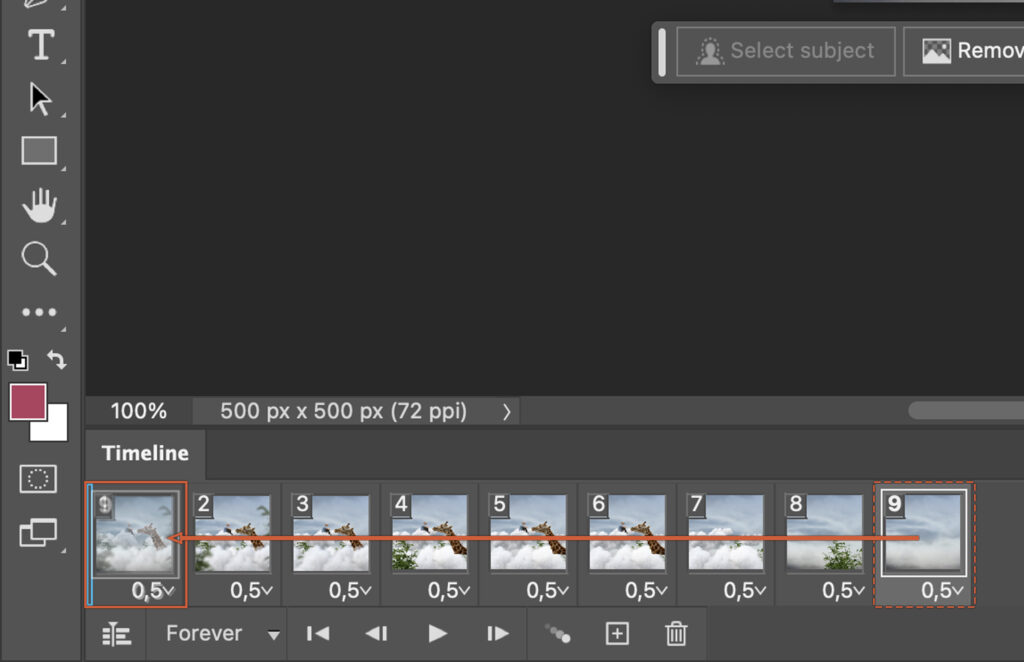
You want to control the length of each frame in your GIF. To do this, click on each frame in the Timeline panel. Then, set the duration using the drop-down menu below the frame. A shorter duration creates a faster animation, while a longer duration slows it down.
Before exporting your GIF, preview it to ensure it looks how you want it. In the Timeline panel, click the “Play” button to see your animation in action.
Make any necessary adjustments to the frame duration or layer order. It’s important to note that it typically organizes layers in reverse order within the timeline.
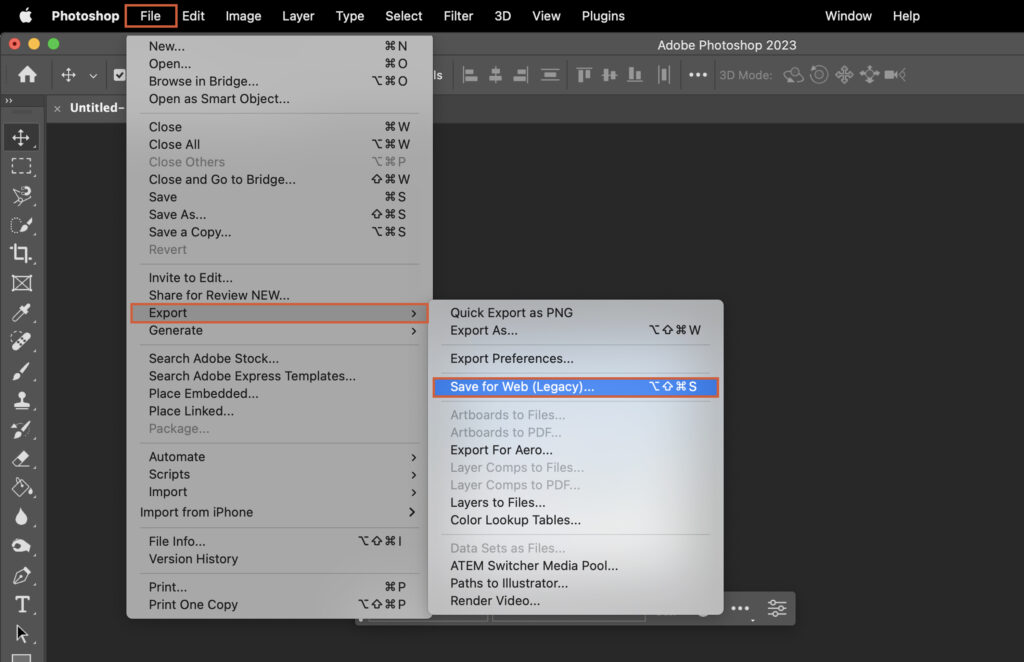
Go to File > Export > Save for Web (Legacy) to ensure you optimize your GIF for web use.
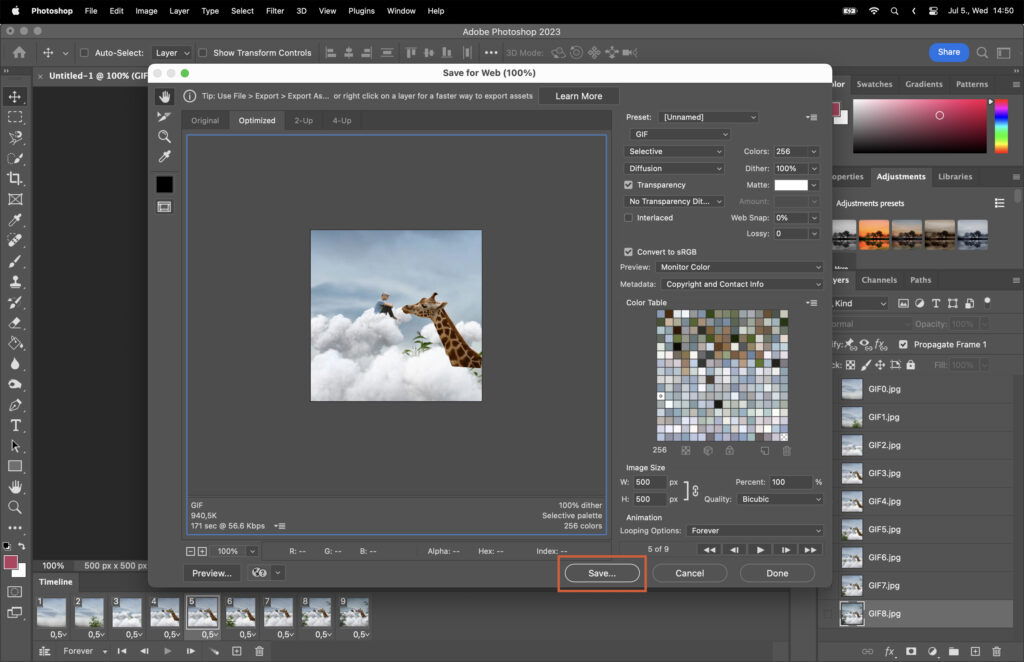
In the Save for Web window, choose the GIF file format and adjust the settings as needed. Then, reduce the file size by lowering the number of colors, adjusting the dither amount, or changing the lossy value.
Once you’re happy with your GIF and its optimization settings, click “Save” in the Save for Web window. Choose a location on your computer to save the file, and click “Save” again. Your GIF is now ready to share with the world!
![P32 [Lead gen] sidebar banner Related ebook](https://expertphotography.b-cdn.net/wp-content/uploads/2021/10/P32-Lead-gen-sidebar-banner-Related-ebook-300x295.jpg)
![P32 [Lead gen] Sidebar Banner](https://expertphotography.b-cdn.net/wp-content/uploads/2021/10/P32-Lead-gen-Sidebar-Banner-300x245.png)
![P32 [Lead gen] Sidebar Banner 2](https://expertphotography.b-cdn.net/wp-content/uploads/2021/10/P32-Lead-gen-Sidebar-Banner-2-300x245.png)