Learning how to use water in landscape photography is vital if you want more impactful images. Lakes, coastlines, and beaches make excellent landscape locations, but they all have different quality when photographed.
This article is an introduction into how you can use water in landscape photography. We look at the best camera settings for capturing water, and we explore different watery locations for epic landscape photography.
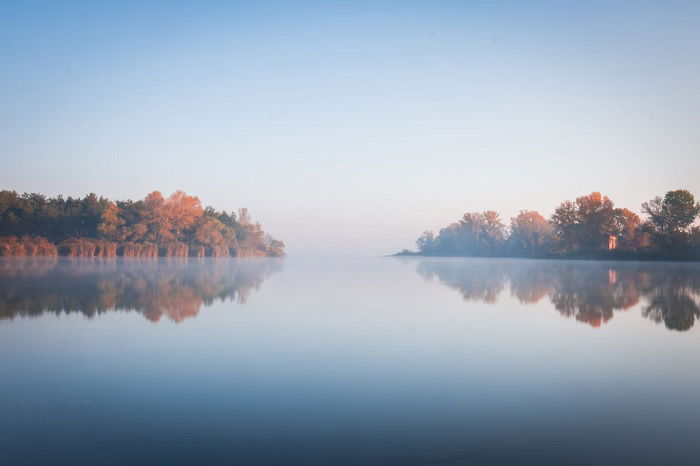

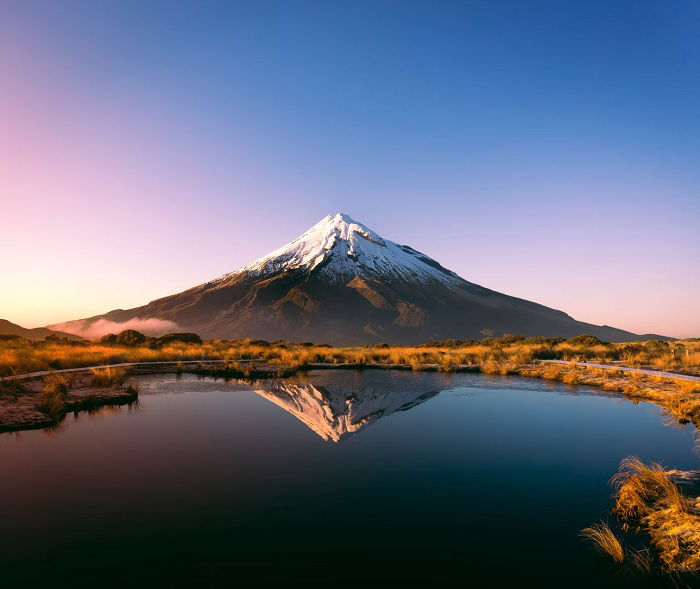
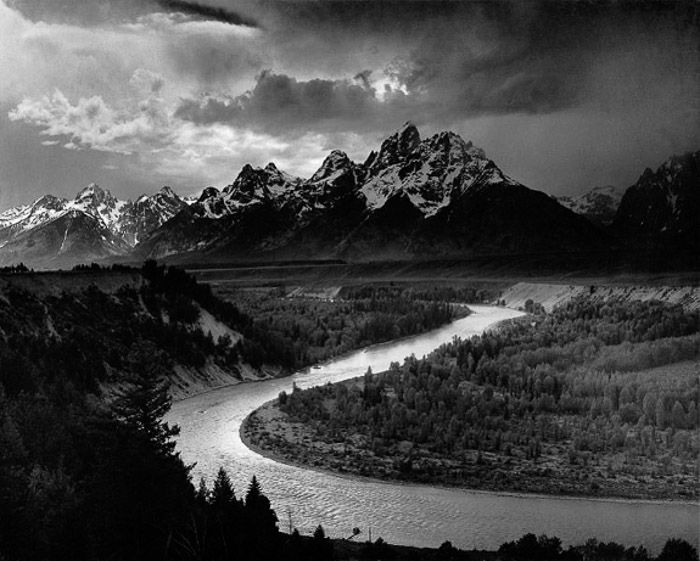
Adding bodies of water to your landscapes adds a new dimension to your photography. Still water adds stillness and tranquility as well as reflections for added visual impact. Moving water, on the other hand, adds energy and dynamism.
However, shooting still water requires different settings than shooting moving water. Every type of aquatic space is unique and requires specialist knowledge and skill.
Thankfully, we’re going to pass this knowledge on to you in this article. But this is only an introduction, so click the links to learn more about each type of water in landscape photography. You can also see our complete guide to landscape photography in this link.
Shutter speed is key to capturing the movement of water in landscape photos. Use long exposures of 5 seconds or more to smooth out rough seas or create a mirror-like effect on calm lakes and rivers. To freeze motion in waves or waterfalls, use a fast shutter speed of at least 1/100 sec.
Experiment with different shutter speeds between 1/2 and 1/8 sec to show the water’s fluidity. Use ND filters to get slower shutter speeds in bright light.
For waterfalls, avoid ultra-long exposures that lose texture. Instead, try 1/4 to 1/8 sec to keep the power of the falls.
When shooting waves, use a telephoto lens from a safe distance. Larger waves need faster speeds like 1/500 sec or more.
To learn more about water photography settings, check out our in-depth guide.
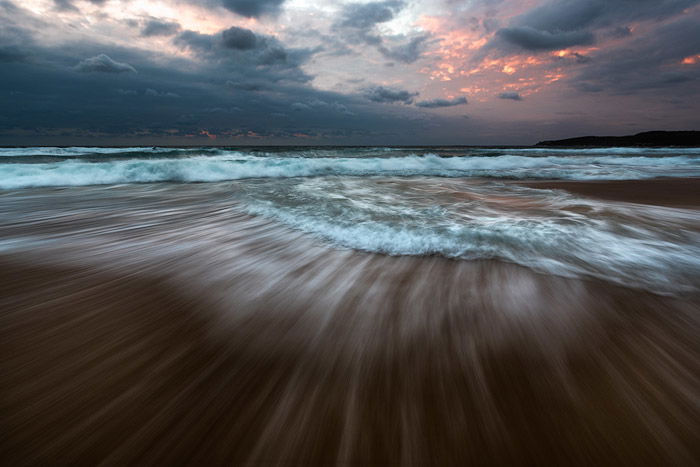
The beach is an excellent location for landscape photography. The wide open expanse gives you a sense of space, and you also have the excitement of the sea meeting the shore.
Golden hour is the perfect time to capture the beach’s beauty. The warm, golden light adds a magical touch to the sand and sea. Use a tripod to keep your camera stable during long exposures and capture silky smooth waves.
Include people in your shots to add interest and scale. Capture candid moments of beachgoers enjoying the sun and surf. You also have more intricate details like footprints, shells, and sandcastles that add life to your seaside images.
Play with shutter speed to freeze crashing waves or create a soft, blurred effect. You can also experiment with silhouettes by placing your subject between the camera and sun. This works really well in the evening before sunset.
Beach photography offers endless creative possibilities. With these tips, you’ll be capturing stunning seaside images in no time.
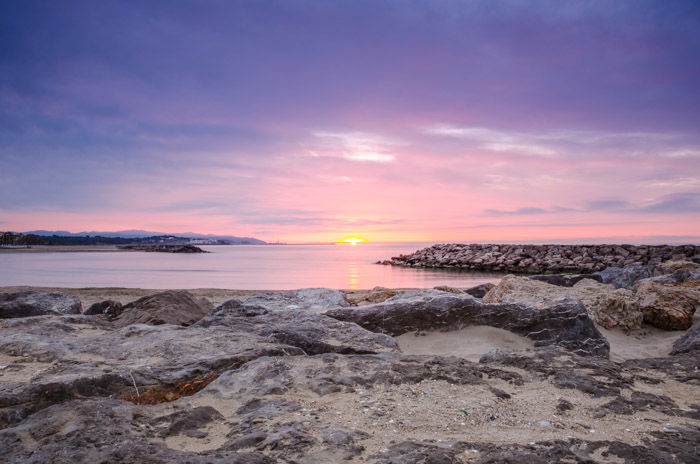
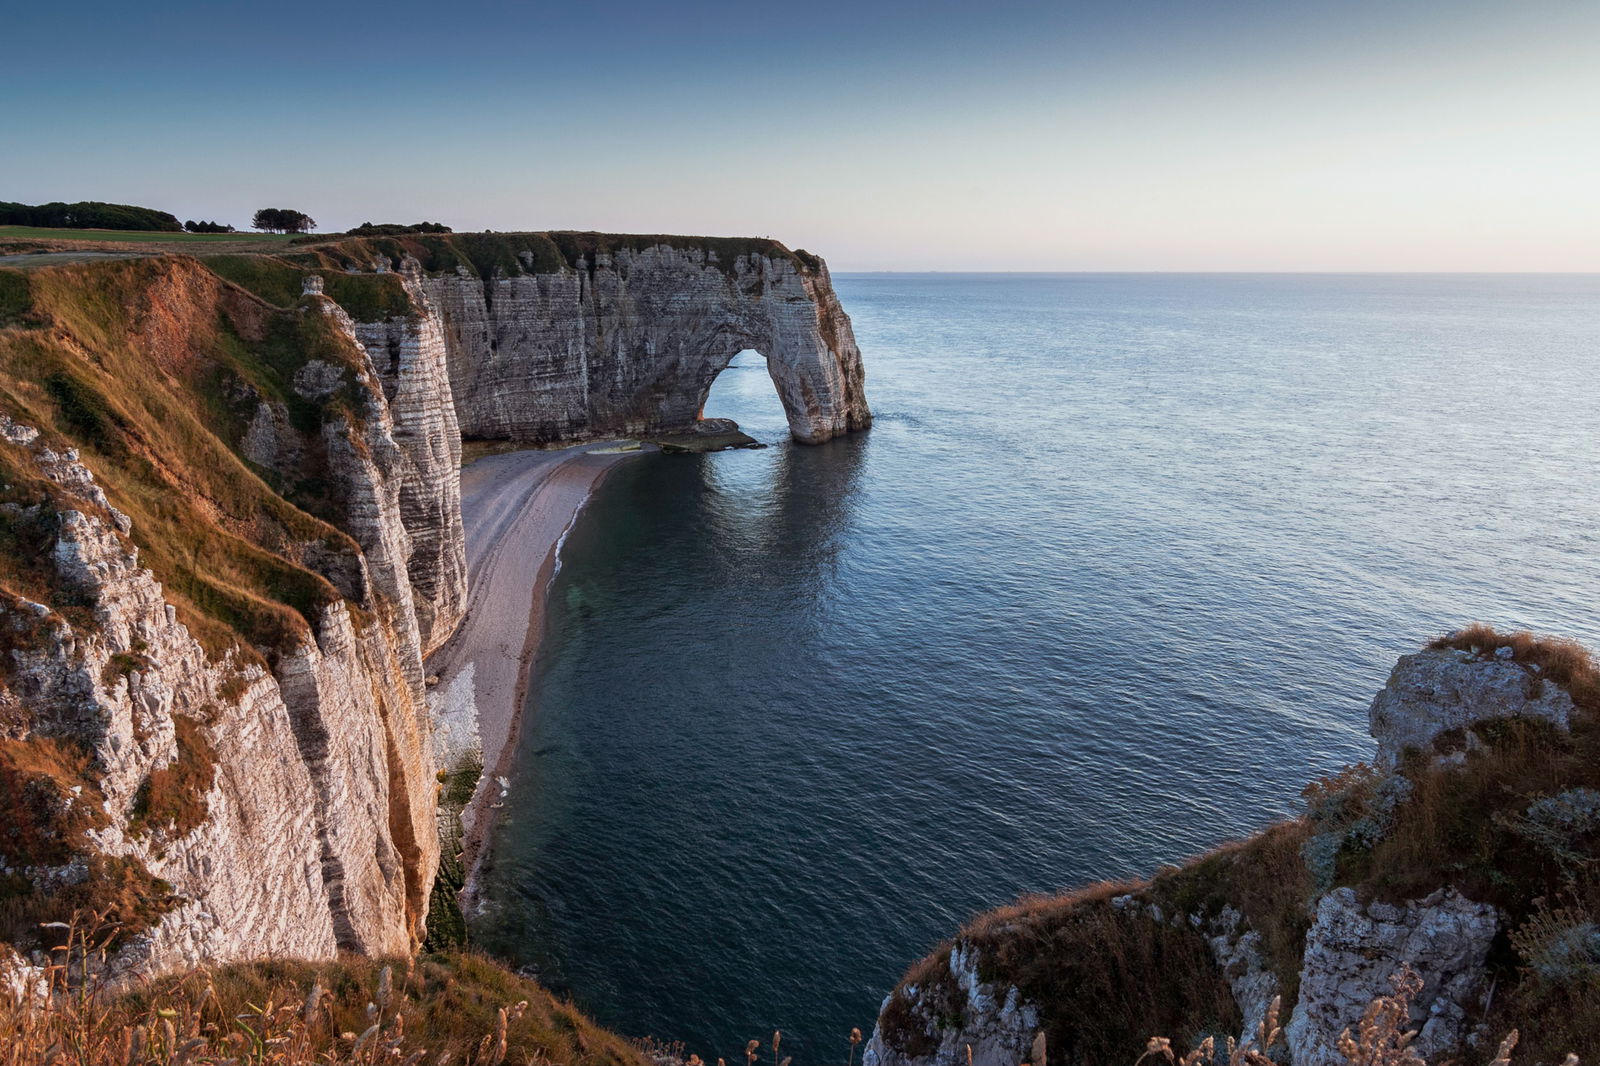
Coastal photography captures the beauty and power of cliffs and coastlines. To get the best shots, arrive early in the morning or late in the afternoon when the light is soft and warm.
Look for interesting foreground elements like rocks or tide pools to add depth to your composition.
Long exposures can create a silky water effect, but be careful of big waves that could drench you and your equipment. If you’re shooting during a sunset with quickly changing light, take multiple exposures to capture the entire dynamic range of the scene.
Don’t forget to look for details in the sand, waves, and rocks. Coastal photography opens up a whole new world of landscape photography possibilities.
If you’d like to learn more about coastal photography, we have an in-depth guide that covers everything you need to know.
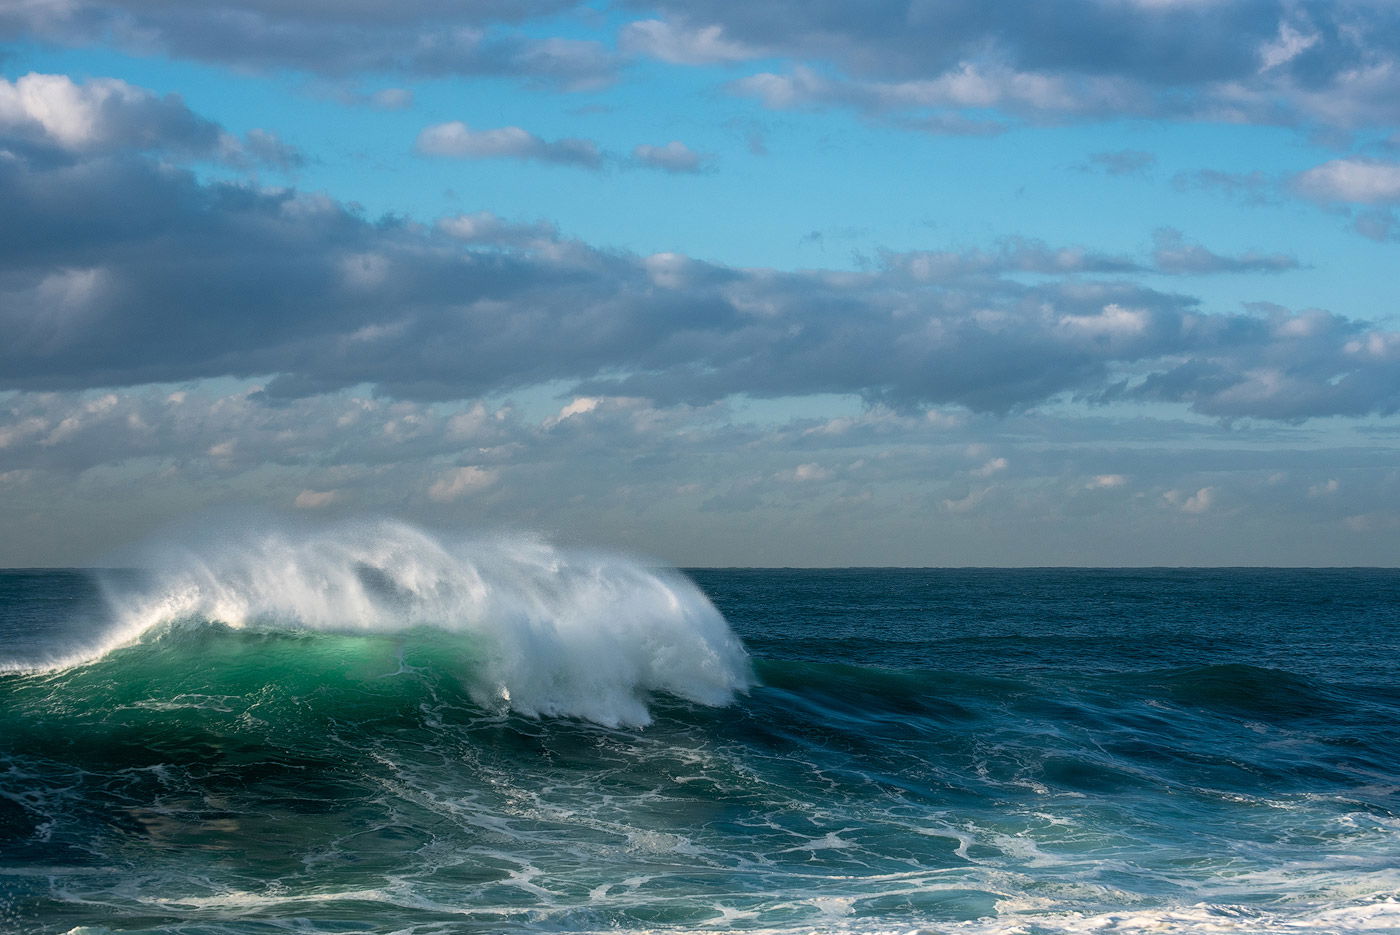
Ocean photography captures the beauty and power of the sea. To get stunning shots, use a tripod to keep your camera steady and bring a microfiber cloth and lens pen to clean salty spray off your lens. ND and polarizing filters are also helpful.
Safety is important when shooting near the ocean. Always bring a headlamp, watch for rising tides and strong waves, and be careful on slippery rocks. Avoid touching any animals, as some can be poisonous.
Long exposure is a great technique for ocean photography. Shutter speeds of 10 seconds or less create smooth, dynamic water textures.
You can also capture interesting patterns by shooting ocean photography with receding or incoming waves at 1/4 to 2 second shutter speeds.
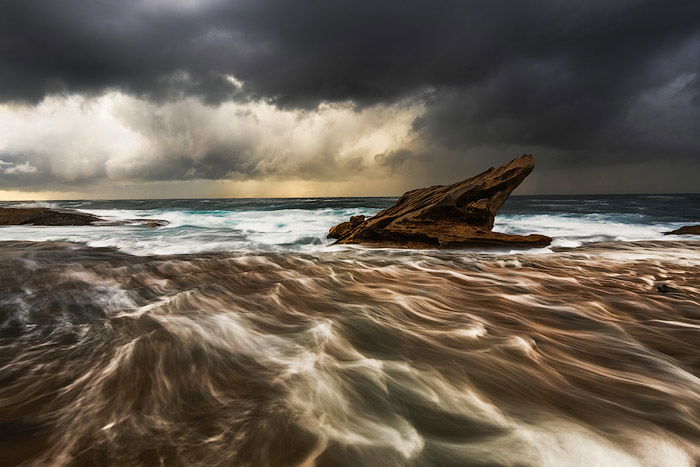
Seascape photography is all about capturing the beauty and power of the ocean. To get the best shots, you need to be close to the action. This means getting wet, so bring spare clothes and wear appropriate footwear like Crocs or fishing boots.
Use a sturdy tripod to stabilize your camera against the waves. Maximize depth of field by using an aperture of at least f/8.
Shutter speed depends on the effect you want – use long exposures to smooth the water or fast speeds to freeze crashing waves.
Incorporate waves into your composition as leading lines or interesting foregrounds. Shoot from different angles like sea level or atop cliffs.
Experiment with various times of day beyond just sunrise and sunset for unique lighting and colors. A wide range of lenses can also help you capture diverse perspectives.
If you’d like to dive deeper into seascape photography, there are many great resources available to help you master this stunning genre.
Snow photography can be challenging, but with the right techniques, you can capture stunning winter scenes. Shoot in RAW format to preserve detail in the bright snow.
Use your camera’s histogram to ensure a correct exposure and avoid overexposed or underexposed images.
Setting the right white balance is key to capturing the true colors of the snow. Use a lens hood and polarizing filter to reduce unwanted reflections and glare from the snow.
Dress in warm layers, wear gloves that allow you to operate your camera, and use a rain cover to protect your gear from moisture.
Waking up early to catch magical sunrises or staying out late for colorful sunsets can create beautiful contrast with the white snow. Try macro photography to showcase the intricate beauty of individual snowflakes.
For more snow photography tips and techniques, check out our in-depth guide.

Using water in landscape photography is a great way to add more interest to your shots. Whether by a lake or at the coast, water gives you more to work with and more ways to be creative.
But lakes and tidal seas behave in different ways, so you need to know how to work with each type of water. Still and moving water also gives you different qualities in the final image. They evoke different feelings in the viewer.
Mastering how to use water in landscape photography gives you more creative control when shooting landscapes. You’ll be able to capture stunning images no matter what your environment.